How To Integrate Google Sheets and Jira
If you’re trying to stay on top of multiple Jira projects in a spreadsheet, you’ve likely found yourself copy-pasting the same information into row after row or doubling up your work between Jira and Excel or Google Sheets. If you’ve come to this article hoping for an easier way to dispatch work in Jira from a spreadsheet, you’re in the right place. By the end of this guide, you’ll see how easy it is to set up a 2-way integration between Jira and Google Sheets without writing a line of code and you’ll be able to replicate this process in minutes flat to keep as many projects in sync as you need.
Here’s a demo of this integration with Excel instead of Google Sheets. The same steps and principles apply to Unito’s Google Sheets integration.

In this guide:
- Tools: Jira and Google Sheets
- Use cases: Software development, product management, task management, project reporting, data migration
- Great for: Developers, engineers, project managers, product managers, data analysts, stakeholders and executives
This Unito integration for Jira and Google Sheets has two goals:
- Automatically create new Jira issues based on specific rows in Google Sheets and/or vice versa.
- Keep our rows and issues in a two-way, real-time sync that updates as teams work on tickets, tasks, issues or any other Jira items. This ensures everyone has oversight on the latest development work in real-time without needing to switch between projects or a spreadsheet.
Step 1. Set up your spreadsheet
Before setting up a flow, you need to visit the Google Workspace Marketplace to add Unito Spreadsheet Sync, a Google Sheets add-on, to your sheet.
Here’s a tutorial video showing you how to set up the extension (click to expand):
Once you’ve installed the add-on, the next step is to activate it. Click Extensions > Unito Spreadsheet Sync > Open Unito. Then, you’ll see this screen:
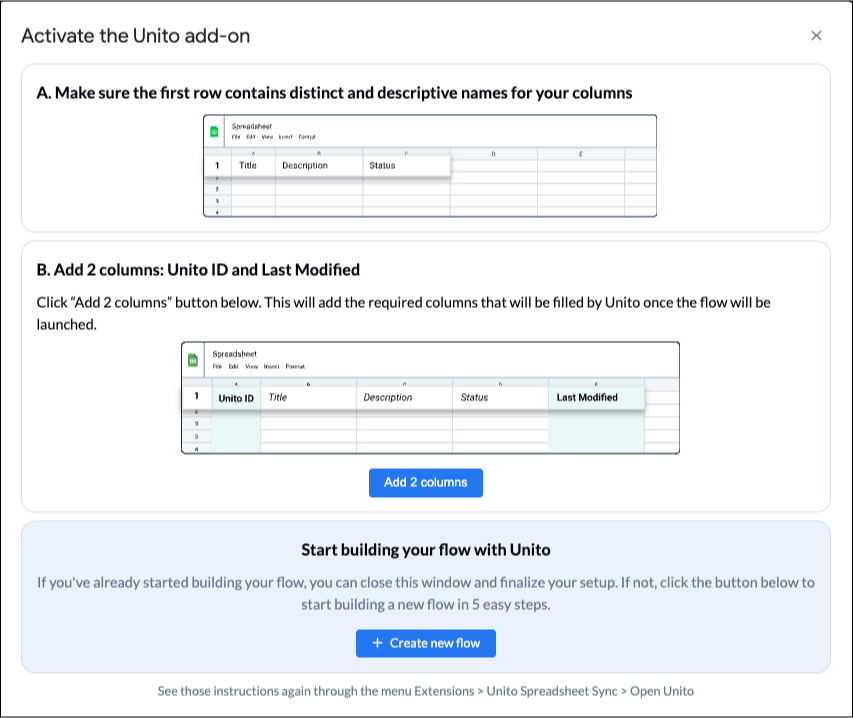

Click Add 2 columns. This inserts columns labelled Unito ID and Last Modified to your sheet. These tell Unito to sync data between these two columns.
You’ll also need a header row with the names of your Jira fields, but Unito can auto-populate those for you later on.
Step 2. Connect your Jira project and a sheet to Unito
- Navigate to the Unito App and click +Create Flow.
- Select Start Here to connect Google Sheets and Jira.
- Then +Choose account to specify the Jira project and sheet you plan on syncing.
- Click Confirm.

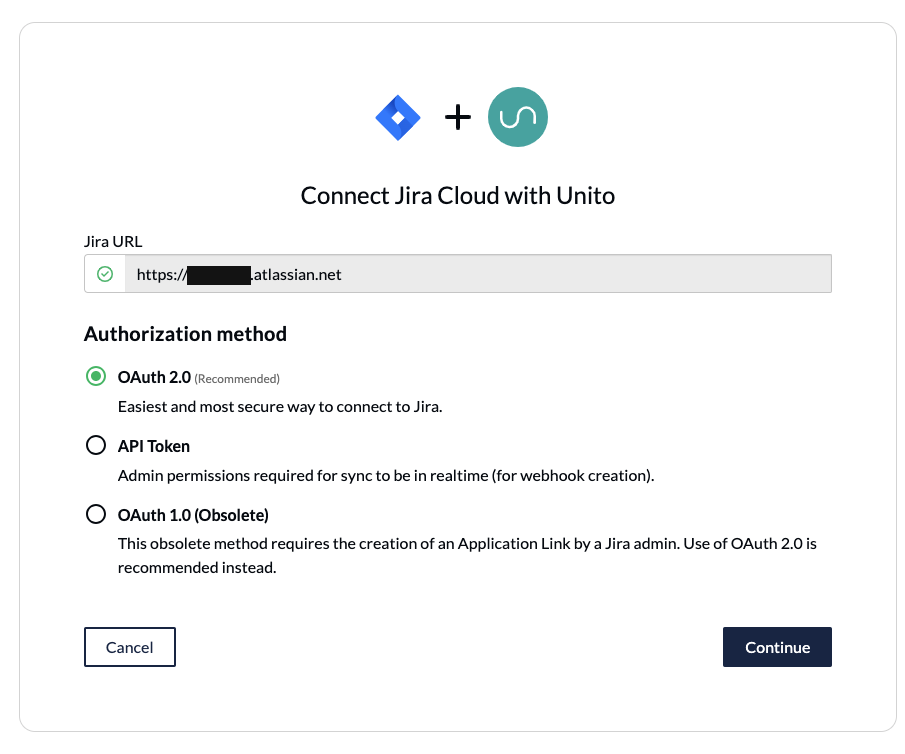
Configure Jira for Unito access
If you’re connecting Jira to Unito via OAuth2, then you simply have to copy-paste your Jira instance URL, and follow the on-screen instructions.
Here’s a separate guide on how to connect a local Jira Server on-premise to Unito. You can also connect your server via ngrok.
Here’s how to configure Jira if you aren’t using OAuth2 (click to expand)
- The Jira account connected to Unito must have administrator access with global permissions.
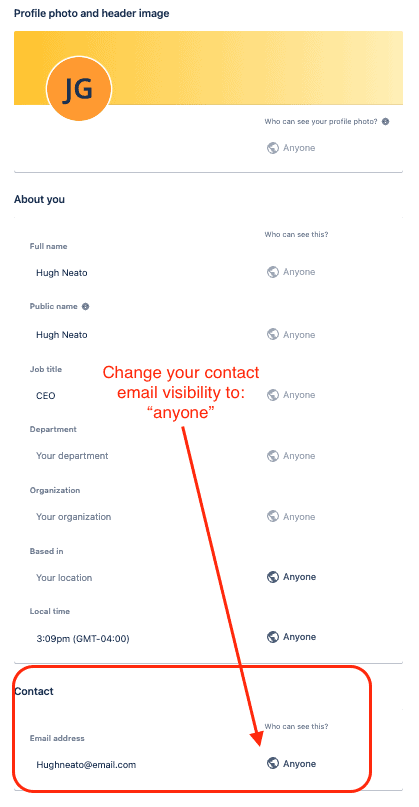
- Here’s a guide if you need help to configure Jira for Unito access before building your flow. Specifically you’ll need to:
- Set your Jira contact email visibility to anyone from your Jira profile page.
- Then, set up an application link in Jira so that your issues can sync.
Step 3. Choose a flow direction for creating new issues or spreadsheet rows
Your Unito flow lets you automatically create new spreadsheet rows or Jira issues based on your manual activity.
So in this step, you’re choosing a source and destination for automated card and/or issue creation:
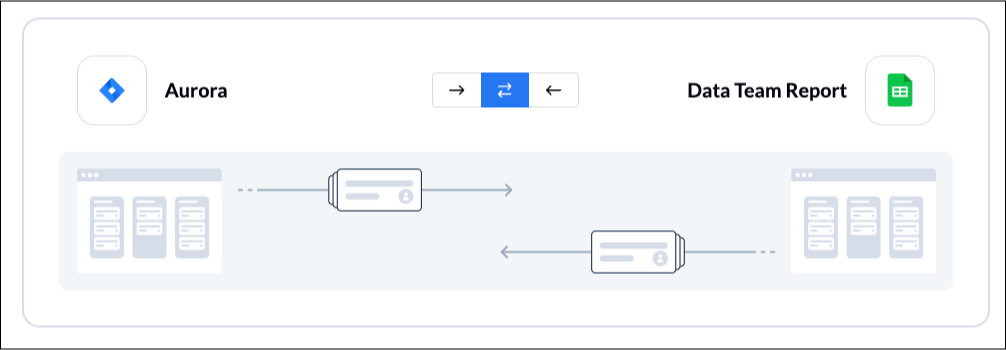
Click Confirm when you’ve chosen a flow direction.
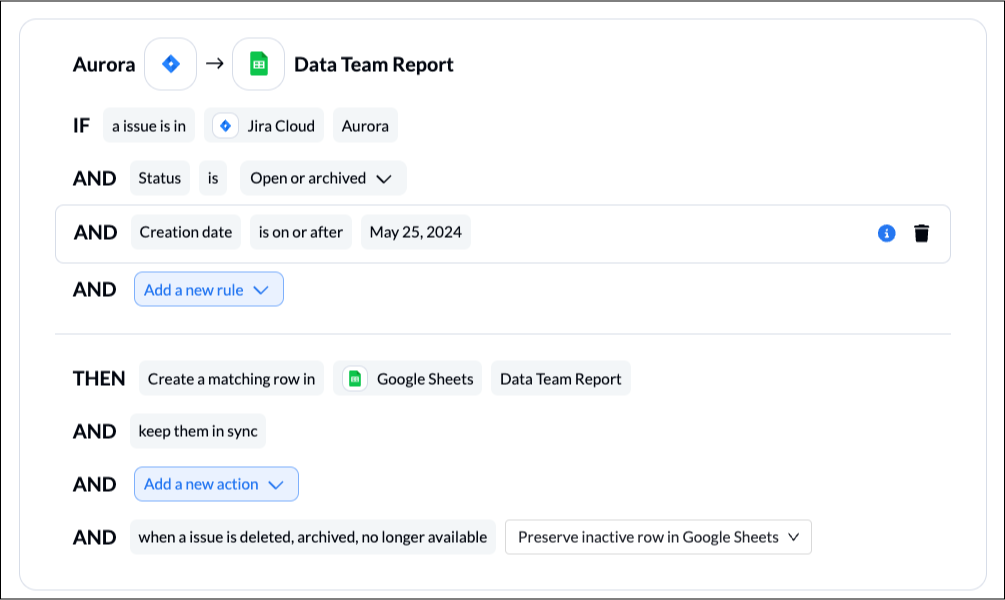
Step 4. Filter out unrelated data from syncing by setting rules
Now we can set up rules to determine which trigger events will create new Google Sheets rows or Jira issues.
The default setting will automatically create new work items (rows, issues, tasks, etc.) in your destination tool whenever work items are created manually in the source tool.
Select Add a new rule to establish your rules for each directional flow.
You can apply custom labels to your issues to be even more precise about what kind of data is shared. If you use drop-down fields in Google Sheets, you can apply rules to each field option in your rules.
And here’s a set of rules for creating Jira issues automatically based on rows in Google Sheets:
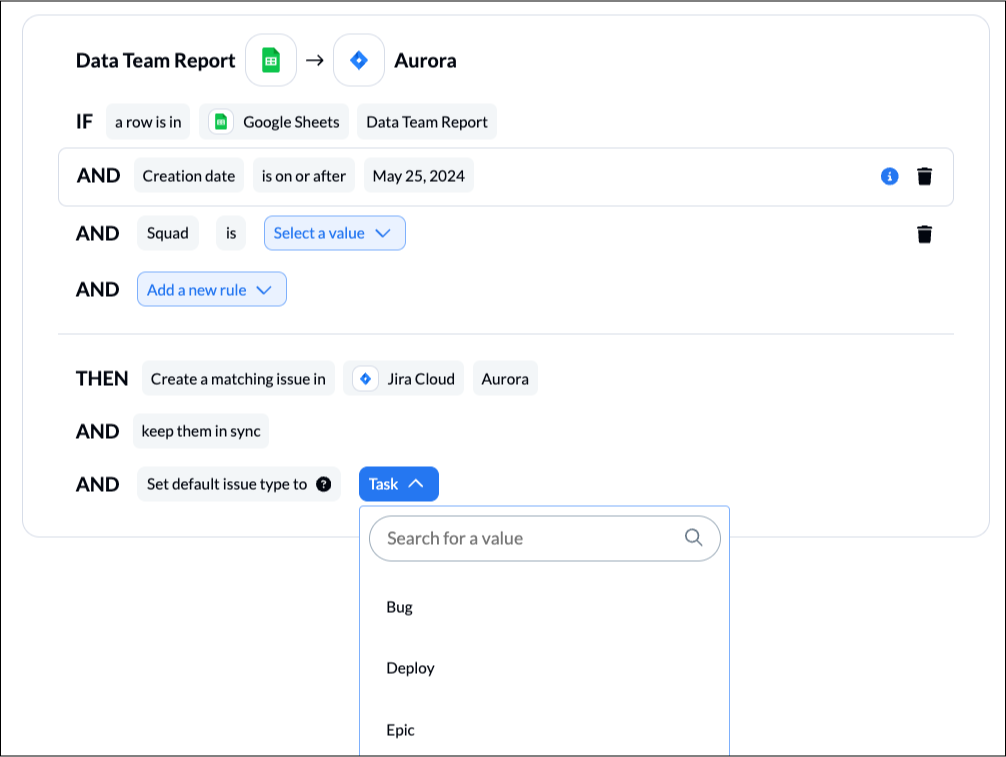
Find out more about setting rules.
Step 5. Link fields between Jira issues and Google Sheets rows
While rules are intended to set triggers for when and how data should be synced, choosing fields determines what information is synced. You’ll effectively tell Unito how fields in Jira and Google Sheets relate to each other, even if they’re named differently.
If you haven’t already created a header row, Unito will auto-populate the first row of your sheet now.
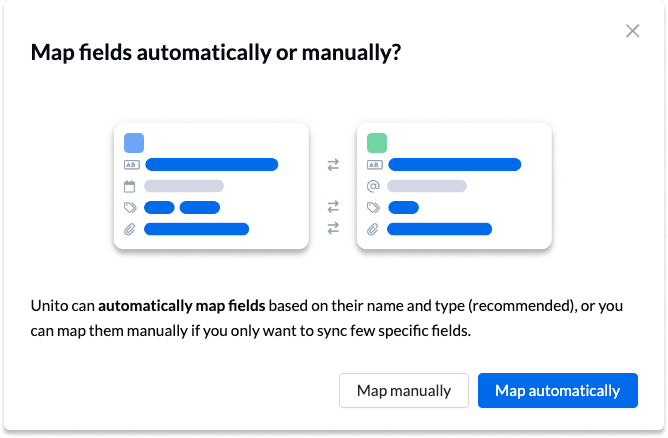
On the next screen, click + Add mapping to add fields to be synced. Then, Select a field for each tool, and find the appropriate field to map.

Selecting the gear icon beside a field will allow you to customize the values or statuses within those fields to further customize your flow in most integrations. In the above example, we can append the Jira issue number to the Summary field in Google Sheets.
Click Confirm when you’re satisfied with your field mappings to proceed.
Find out more about setting field mappings.
Step 6. Launch your Jira Google Sheets integration
And that’s it! You’ve just synced Trello and Jira in a 2-way integration. Congratulations!
If you’ve followed the steps above, your flow will now:
- Create an issue in Jira when a new row is added in Google Sheets.
- Add new rows in Google Sheets populated with Jira issue data.
- Allow your teams to collaborate between Google Sheets and Jira without having to switch tools, manually copy-paste project details, or request information from the other team about shared work.
Ready to optimize software development?
Meet with our team to see what Unito can do for your workflows.
What’s next after syncing, merging or mirroring Jira issues to Google Sheets?
Although Unito is a no-code solution (meaning anyone can use it without needing to write a line of code), it helps to understand the basics of integration technology. Training your colleagues on the platform is important to assist everyone in maneuvering through your Jira Google Sheets workflow post-integration.
That’s why we offer our users a range of resources based on how they prefer to learn, including:
Here are a few more specific resources to help you sync sooner:
- Find more resources for your Google Sheets integrations here.
- Learn how to duplicate this flow to suit other use cases you may have in mind.
- See how Passport Shipping uses Notion to report on Jira issues.
- Browse Unito’s Jira documentation
- Or follow a similar guide to:
- Sync Jira to Notion
- Sync Jira with Asana
- Link Jira issues with Trello cards
- Connect Jira projects to Wrike
- Connect projects between Jira and Jira Service Management
- Sync tasks between Jira and monday.com
- Sync jira issues between multiple projects
- Connect Jira and HubSpot
- Link Jira to Azure DevOps
- Merge issues between Jira and GitHub
- Sync Jira issues to Airtable
- Link tasks between Jira and ClickUp
- Send Jira issues to an Excel spreadsheet
- Connect Jira Service Management to ServiceNow
- Send tickets from Zendesk to Jira
- Connect Jira to Smartsheet
- Sync Jira and Salesforce
- Here’s a guide to integrate GitLab and Jira with Unito.
Tips for troubleshooting Unito’s Google Sheets integration:
- Best Practices and Troubleshooting Tips for Syncing Google Sheets
- Security & Permissions for Unito’s Google Sheets Integration
- How to Add Unito to Your Google Sheet
Always verify your Google Sheet’s sharing settings. Ensure it’s set to ‘Anyone with the link can view.’ Secondly, check that the embed link is correct. By keeping these tips in mind, you can circumnavigate common pitfalls and successfully embed Google Sheets, keeping your integration running smoothly.