How to Sync Jira Epics in Asana Seamlessly with 2-Way Updates
This guide will show you how to sync Jira epics to Asana with Unito’s automated 2-way workflow. You can also use this guide to share Jira epics to Trello, ClickUp, Wrike, monday.com or other project management tools by following the same steps.
Overview
- Tools: Jira and Asana
- Use cases: Product management, software development, task management, project reporting
- Great for: Product managers, project managers, software developers, QA and testers, marketing teams, customer success, team leads, executives and stakeholders
Unito’s two-way sync integration for Asana and Jira allows users of any technical background, from product managers to software developers and team leads, to sync Asana tasks, projects, and more with epics in Jira. This integration syncs updates back and forth between both tools, creates new work items, and can even automate repetitive actions. Syncing Jira epics to Asana projects with Unito can save loads of time by eliminating manual tasks, such as copy-pasting details Jira issues to Asana tasks. It means your dev team, data engineers, product or project managers, and anyone else who uses Jira or Asana can work more efficiently. We sync epics by connecting all the issues of a given epic to a chosen Asana project.
Need more from your integrations?
Unito Advanced Sync supports both tools mentioned in this walkthrough. Available with enterprise plans, Advanced Sync gives you unparalleled control over your integrations. This includes:
- An updated flow builder, which gives you direct access to all custom and native objects available in a tool’s API.
- Mixed hierarchies support, which syncs parent-child relationships between different work item types.
- Item matching, which identifies and syncs existing work items in another tool instead of creating duplicates.
- Lookups support, which sync non-hierarchical associations like assignees, dropdown fields, dependencies, and related items.
Advanced Sync can support more complex workflows, maintain relationships between different bits of data, handle massive data volume, and master flows that automatically centralize governance across tools.
Want to know more about the differences between Advanced Sync and Unito’s classic flow builder? Check out this guide.
This Jira Asana integration has two goals:
- Automatically populate an Asana project with issues from a single Jira epic.
- Maintain a real-time sync between issues and tasks so that teams can stay up-to-date on ticket progress even as work is performed.
Setup in Jira
Here’s a separate guide on how to connect a local Jira Server on-premise to Unito. You can also connect your server via ngrok.
Here’s how to configure Jira if you aren’t using OAuth2 (click to expand)
There are a few steps involved before we can set up a two-way sync with Unito, but we promise it’s worthwhile. The benefit of eliminating manual tasks for your team indefinitely far outweighs the time it takes to set up your automation rules now. So let’s dive in.
- The Jira account connected to Unito must have administrator access with global permissions.
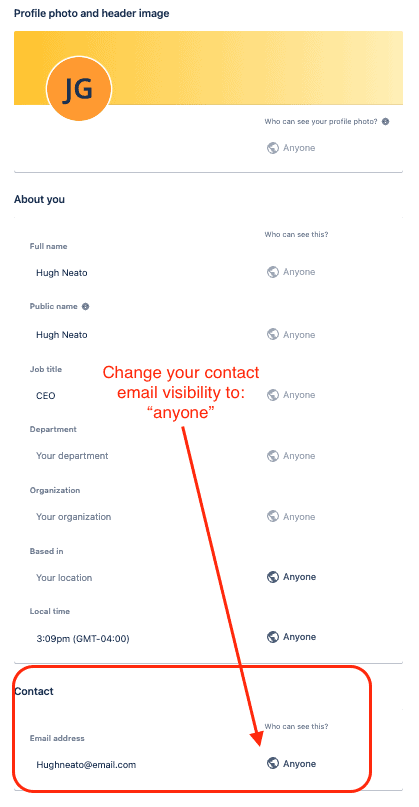
- Here’s a guide if you need help to configure Jira for Unito access before building your flow. Specifically you’ll need to:
- Set your Jira contact email visibility to anyone from your Jira profile page.
- Then, set up an application link in Jira so that your issues can sync to Asana.
Step 1. Connect Jira and Asana to Unito
- Login the Unito App and click + Create Flow.
- Next, click Start Here.
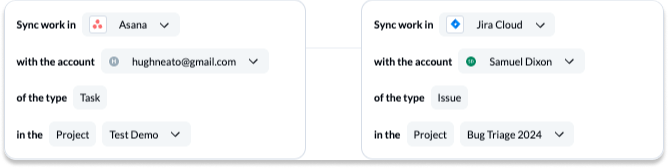
- Select +Add a tool to this flow in either column
- Then, +Choose account to specify the Jira and Asana projects you plan on syncing.
- Click Confirm.
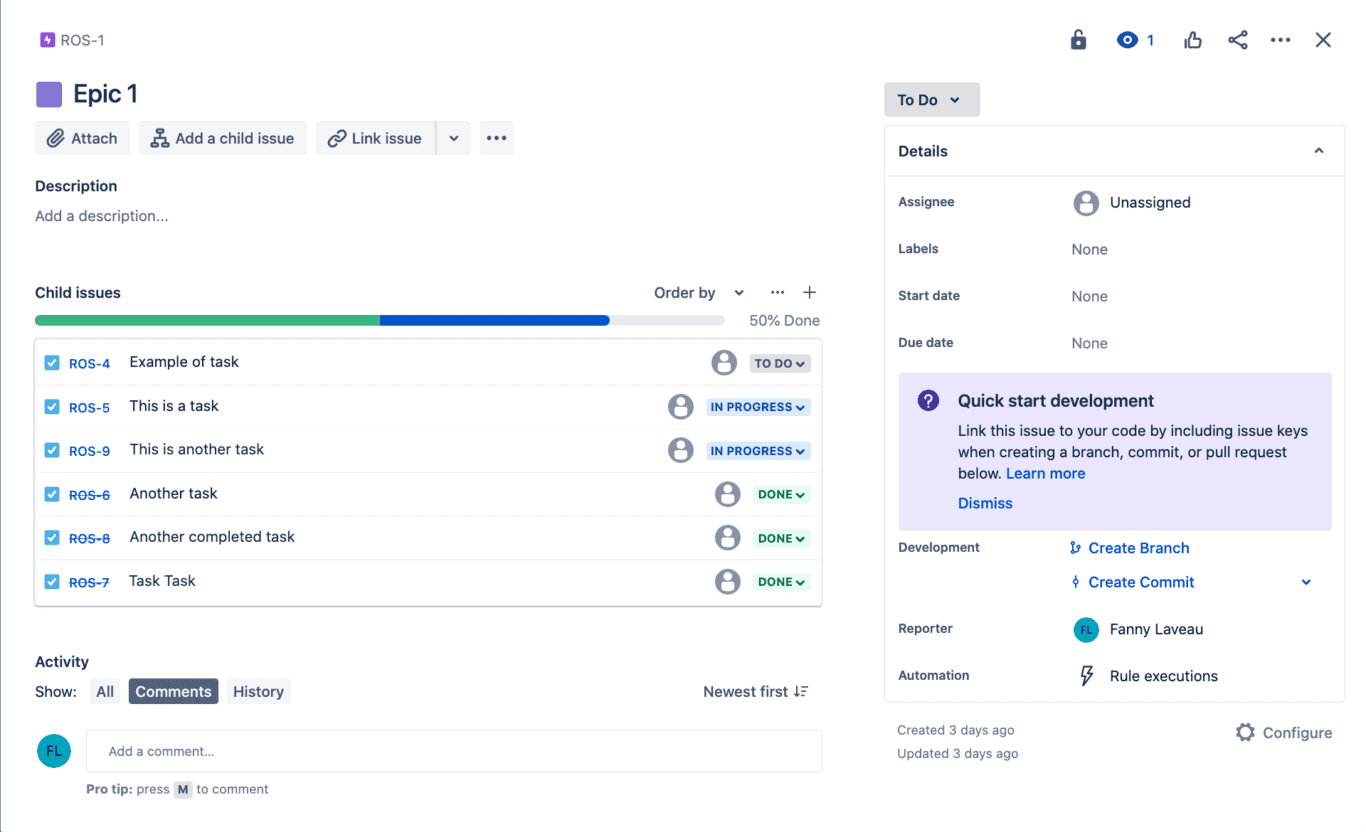
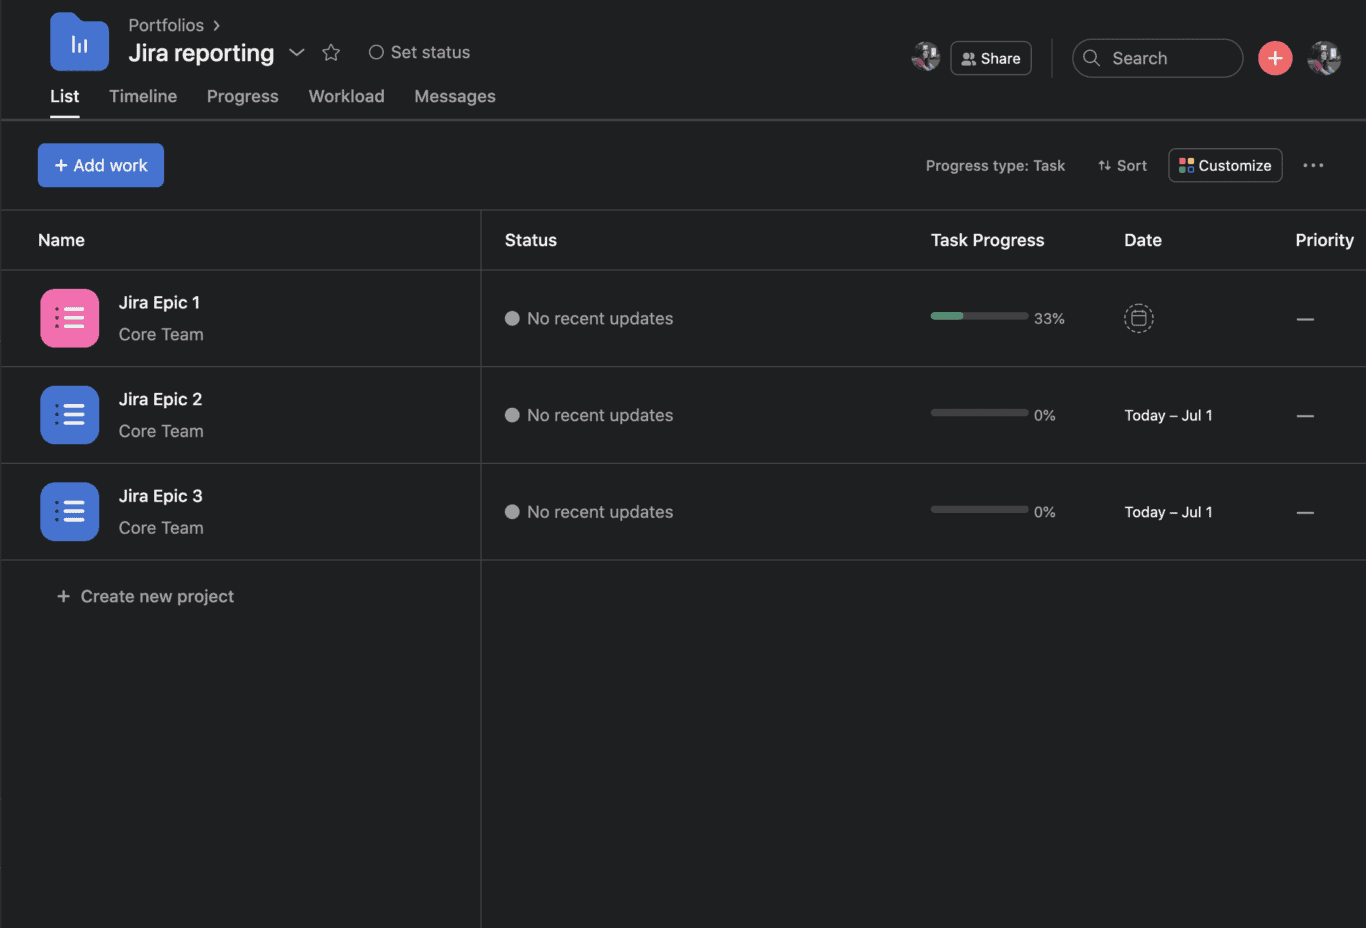
Although we’re going to sync epics from Jira to Asana, our work items are still tasks and issues, as you can see below:
When you’re ready, click Confirm.
Step 2. Set a flow direction for creating new Jira and Asana tasks
Your data can sync either from only one tool to the other or bidirectionally. Since our goal is to inform teams in Asana of our progress in Jira, we’ll select a one-way flow from Jira to Asana.
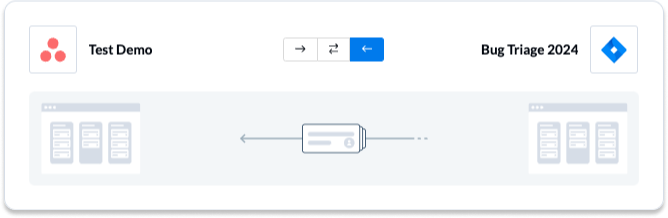
Click Confirm when you’ve chosen a flow direction.
Step 3. Exclude unrelated tasks or issues with rules
By default, Unito syncs all issues or tasks created after launching your flow. You can sync historical data (items created before launching your flow) by removing the creation date filter.
Select Add a new rule to set additional rules to include or exclude tasks or items.
If you only want to sync Jira epics to Asana, then simply adding the rule: Issue type is Epic will only sync epics and nothing else.
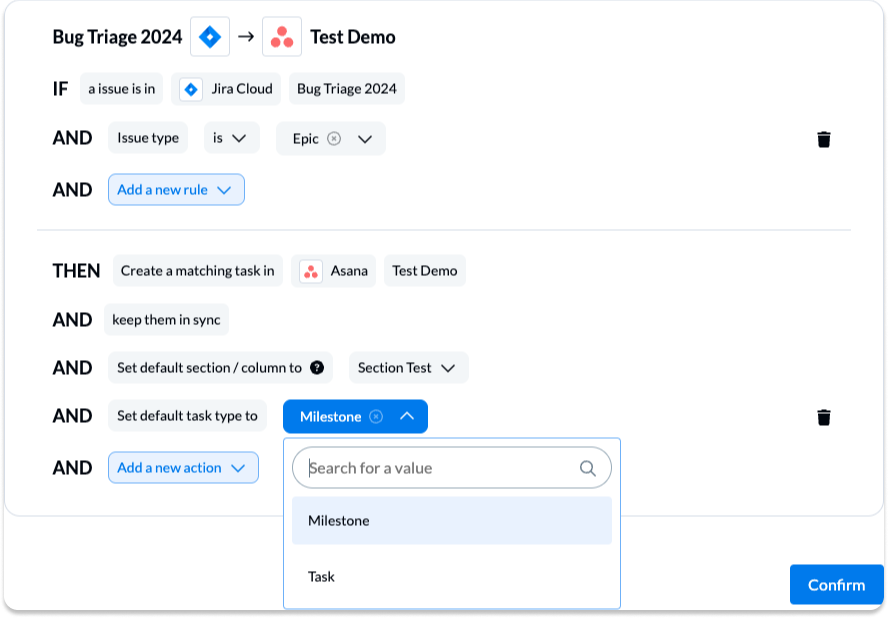
You can also decide what those epics should become in Asana by default. If you want epics to become milestones, for example, you can add an action in the lower portion of the rules window to set the default task type.
Find out more about setting rules.

Step 4. Link fields between Jira issues and Asana tasks
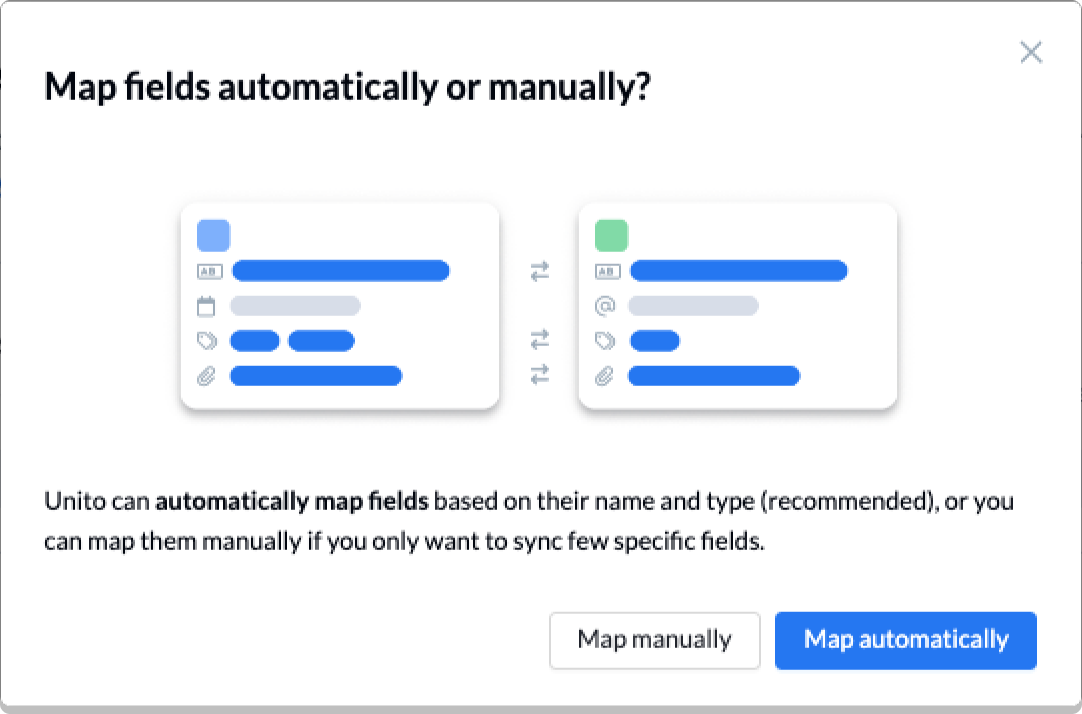
Field mappings determine which details of our synced issues and tasks are then shared between tools. If you select Auto-map, Unito will pre-populate a list of suggested field mappings which you can then adjust.
Learn more about field mappings between Asana and Jira.
Select + Add mapping to sync additional fields, then Select a field for each tool, and find the appropriate field to map.
Here is a comprehensive set of field mappings including custom fields (blue icons), multiple sync directions (to control direction of real-time updates) and statuses:
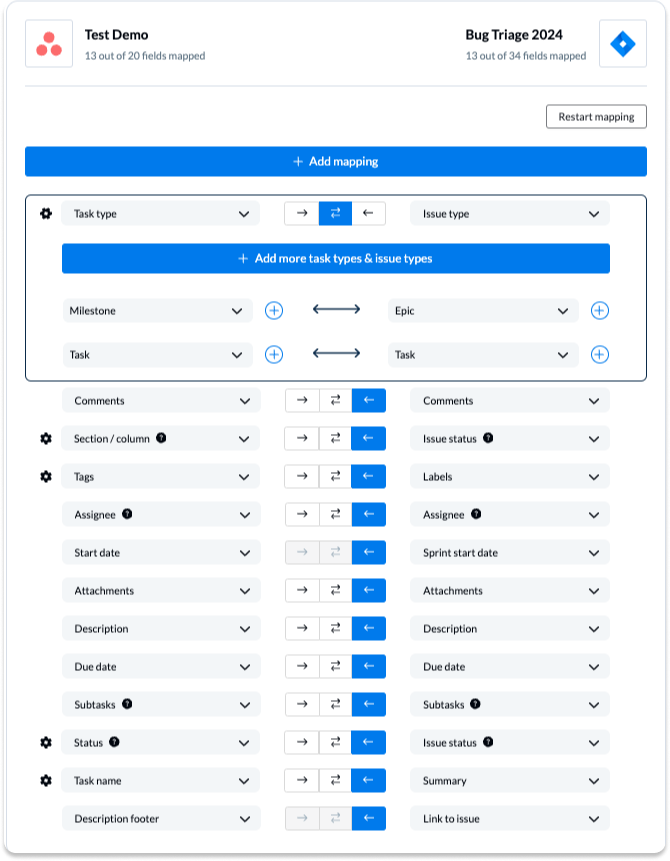
As you can see above, we’ve added a pair of fields: Task type and Issue type, then included options so that Unito knows that a Jira epic should become an Asana milestone, and that tasks should remain tasks in both tools.
Configuring your field mappings
If you don’t configure your fields as pictured above, then your flow will refer to your default rules when syncing.
Select the gear icon beside a field to configure the values or statuses within those fields to further customize your flow.
Adding issues numbers to tasks
When you open the field mapping with your Jira issue summary, you can toggle a switch to add the issue number at the end of the Asana task name:

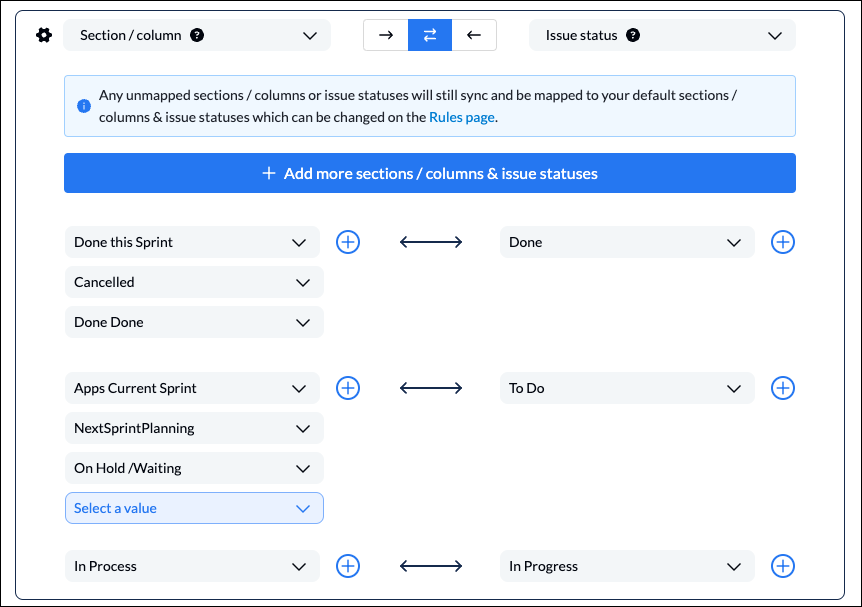
Aligning section/column to issue status
In this example, we’ve linked the Asana section/column to our Jira issue status:
Note: Here’s a guide on how to preserve the hierarchy of Jira epics as parent tasks in a Unito flow.
Click Confirm when you’re satisfied with your field mappings to proceed.
Find out more about setting field mappings.
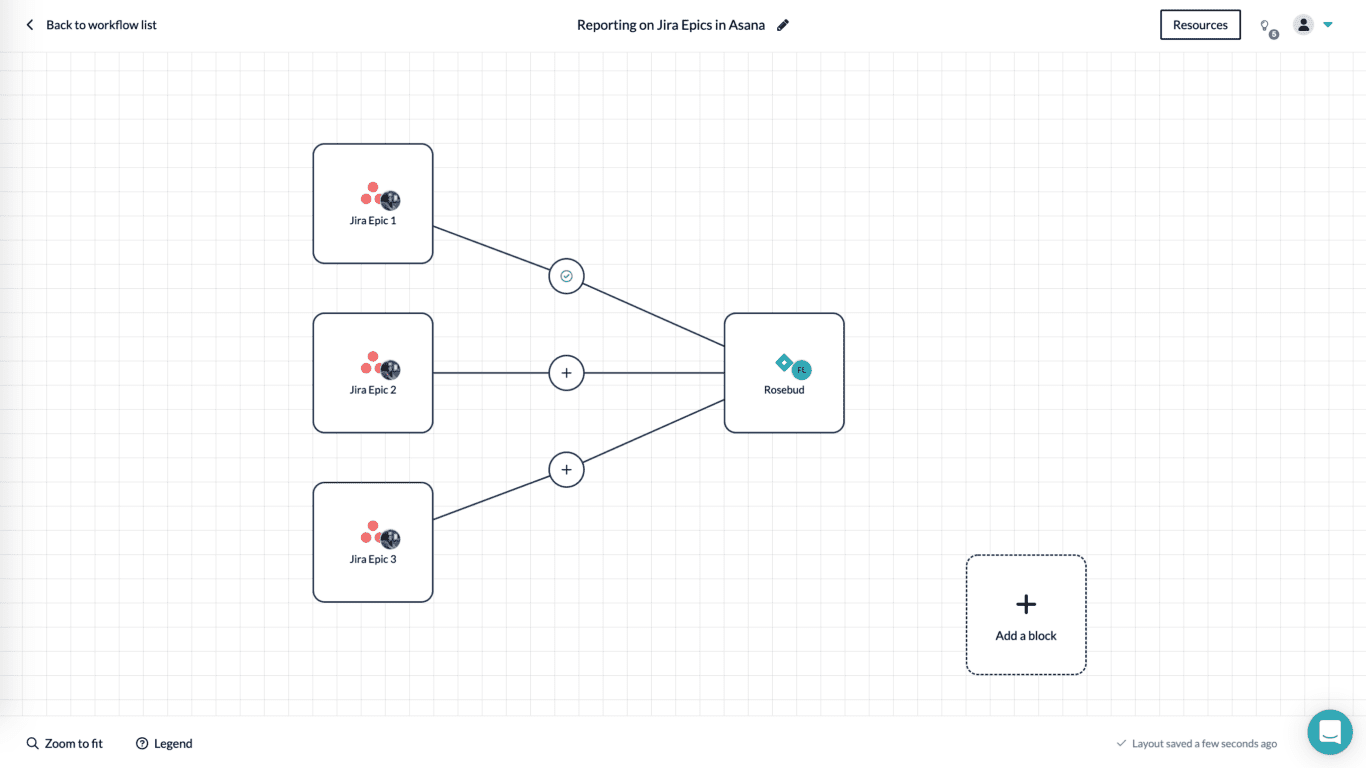
Here is what our completed Unito integration between Jira and Asana looks like:
Step 5. Launch your Jira to Asana integration
And that’s it! You’ve just completed a flow between Jira and Asana to share epic status with other teams. Congratulations!
If you’ve followed the steps above, your flow will now:
- Create a task in Asana for every open or archived Jira issue in our specified project.
- Allow teams to collaborate between both tools without needing to leave their preferred interface, copy-paste data manually, or request information from the other team about these projects.
If you have any questions, don’t hesitate to reach out and let us know. Our live support team is ready to jump in and lend a hand to make sure your flows always function as intended.
Ready to streamline development work?
Meet with our team to see what Unito can do for your workflows.
What’s next after syncing Jira Epics in Asana projects?
- Learn how to duplicate this flow to sync Jira epics to other projects or report on different metrics within the same accounts.
- Read more about Unito’s integrations for Asana and Jira to better understand their capabilities and limitations.
- Learn how to sync Asana with Bitbucket to centralize more software development data.
- Or follow a similar guide to:
- Sync Jira to Notion
- Link Smartsheet and Asana
- Link Jira issues with Trello cards
- Connect Jira projects to Wrike
- Connect projects between Jira and Jira Service Management
- Sync tasks between Jira and monday.com
- Sync jira issues between multiple projects
- Connect Jira and HubSpot
- Link Jira to Azure DevOps
- Merge issues between Jira and GitHub
- Sync Jira issues to Airtable
- Link tasks between Jira and ClickUp
- Send Jira issues to an Excel spreadsheet
- Export Jira to Google Sheets
- Connect Jira Service Management to ServiceNow
- Send tickets from Zendesk to Jira
- Connect Jira to Smartsheet
- Sync Jira and Salesforce
- Here’s a guide to integrate GitLab and Jira with Unito.
FAQ: Syncing Jira epics with Asana tasks
What are my options for integrating Jira epics and Asana?
Many software integration platforms offer integrations between Asana and Jira, but not all of them support Jira epics. Automation tools like Zapier are a popular option for integrating these two platforms, and Asana offers a built-in integration for doing this as well. But for a true two-way sync, Unito is usually the best option.
Why sync Jira Epics in Asana with Unito?
The goal of this Unito flow is to sync Jira epics to Asana so the development team can quickly and easily share visibility with other departments. The benefit of doing so with Unito is that the dev team can continue to work on tickets and stakeholders will always see the latest progress from Asana. This is especially useful when non-dev teams aren’t as comfortable using Jira as a project management tool. It means no one needs to waste time copy-pasting details from Jira to Asana that quickly become outdated as soon as they move on to the next project.
What use cases does this integration support?
Unito’s integration for Asana tasks and Jira epics can support just about any use case, including the following:
- Software development
- Project management
- Ticket escalation
- AI agent integration
- Record syncing
- Time tracking and billing
What do Unito rules do?
Unito rules allow users to do one of two things:
- Automate certain actions, like assigning work items or moving them between columns.
- Filter out work items you don’t want to sync, based on fields like due dates, assignees, and dropdowns.
These rules use simple trigger-action logic, making them easy to build and customize.
What do Unito field mappings do?
Unito field mappings pair fields with one tool with fields in another so data always ends up in the right place. Whether these fields have exactly the same names or are just compatible, Unito can pair them. In most cases, Unito can do this automatically, but you can also customize mappings further.