How To Set Up a No-Code Azure DevOps-Jira Integration
This guide will show you how to quickly create a 2-way sync between Azure DevOps and Jira that turns work items into issues. When this guide is complete, you’ll know how to easily set up a no-code integration that keeps your software development work up-to-date in real-time. Whether you’re a Jira developer wanting visibility into Azure DevOps or a lead software developer streamlining cross-team work, Unito has you covered!
Overview
- Tools: Azure DevOps and Jira
- Use cases: Software development, product management, task management
- Great for: Developers, engineers, project managers, product managers
Unito’s two-way sync integration for Azure DevOps and Jira allows users of any technical background, from product managers to software developers and team leads, to sync Azure DevOps work items with Jira issues. This integration syncs updates back and forth between both tools, creates new work items, and can even automate repetitive actions. This in-depth guide shows you how that’s done.
By the end of this guide you’ll have an Azure DevOps Jira integration that can:
- Create work items in Azure DevOps automatically whenever we manually generate specific issues in Jira, or vice versa.
- Maintain a real-time 2-way sync between issues and work items with automated updates whenever changes are made in either tool.
Before you start
Adjust your organization settings in ADO
Be sure to adjust your Organization Settings in Azure DevOps before building your flow. Just make sure that Third-party application access via OAuth is turned on and that your project is public.
Setup in Jira
If you’re connecting Jira to Unito via OAuth2, then simply follow the on-screen instructions when adding your account for the first time: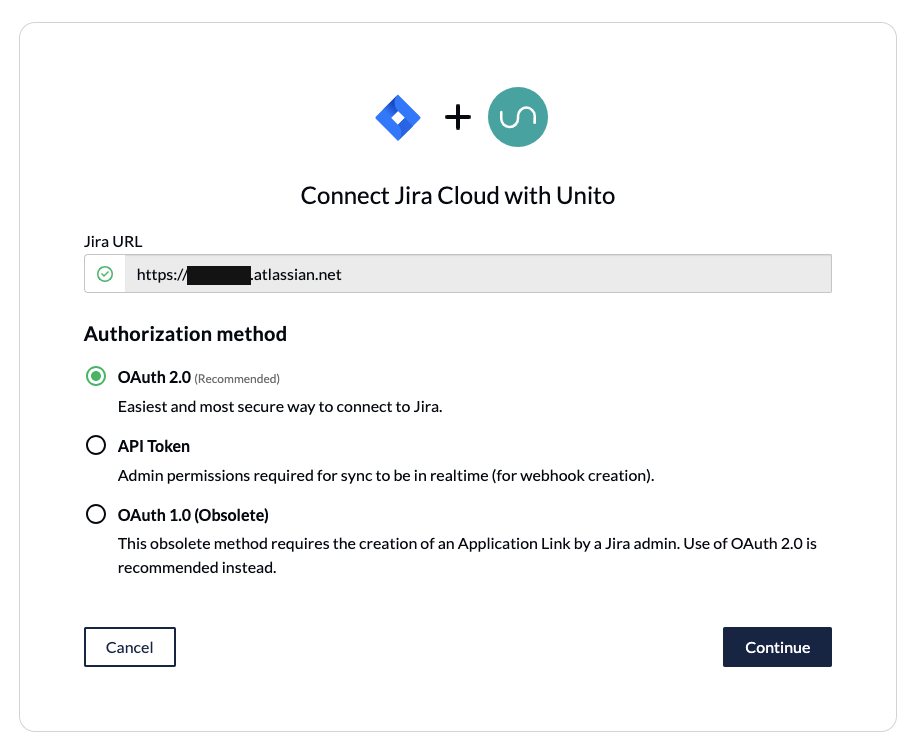
If you’re not using OAuth 2.0 to connect your Jira Cloud workspace to Unito, you’ll need to do the following:
- Set your Jira contact email visibility to anyone in your Jira profile page.
- Set up an application link in Jira to sync your issues to NetSuite.
If you’re connecting an on-premise Jira Server instance to Unito, you’ll need to follow this guide. You can also use ngrok to connect Jira Server to Unito.
Step 1. Connect Azure DevOps and Jira to Unito
- Sign up for Unito.
- Click +Create Flow in the Unito app.
- Click Start Here to connect NetSuite and Jira.
- Click +Choose account for each tool and complete the authorization process.
- Click Confirm.
Connecting tools to Unito for the first time? Here’s an in-depth guide.
Step 2. Choose flow direction for work items
With flow direction, you decide where Unito automatically creates work items to match those you create manually. You have three options:
- 2-way: Both Azure DevOps work items and Jira issues are automatically created by your Unito flow to match items you create manually in each tool.
- 1-way from Azure DevOps to Jira: Jira issues will be automatically created by Unito to match Azure DevOps work items you create manually. Unito won’t create new Azure DevOps work items.
- 1-way from Jira to Azure DevOps: Azure DevOps work items will be automatically created by Unito to match Jira issues you create manually. Unito won’t create new Jira issues.
For our demo, we’ll be setting up a flow that creates new Jira issues based on work items in Azure DevOps. So whenever we manually create a new ADO work item, then Unito will automatically sync it to a newly created Jira issue.
Select Confirm when you’ve chosen a flow direction.
Learn more about flow direction.
Step 3. Set rules to keep specific work items and issues in sync
Unito rules can do two things:
- Filter out work items you don’t want synced. For example, you could create a rule that only syncs Azure DevOps assigned to a certain person on your team.
- Automate certain actions. For example, you could create a rule that automatically sets a specific status in new Jira issues.
To start building your rule, click Add new rule, then choose a trigger and action.
Find out more about setting rules.

Step 4. Map fields between Azure DevOps and Jira
Next, you can set individual relationships between fields in Azure DevOps and Jira. Most fields can be assigned their own sync direction, so you can enjoy some customization here as needed.
But first, you can select Map automatically to begin your field mapping table with a prebuilt template.
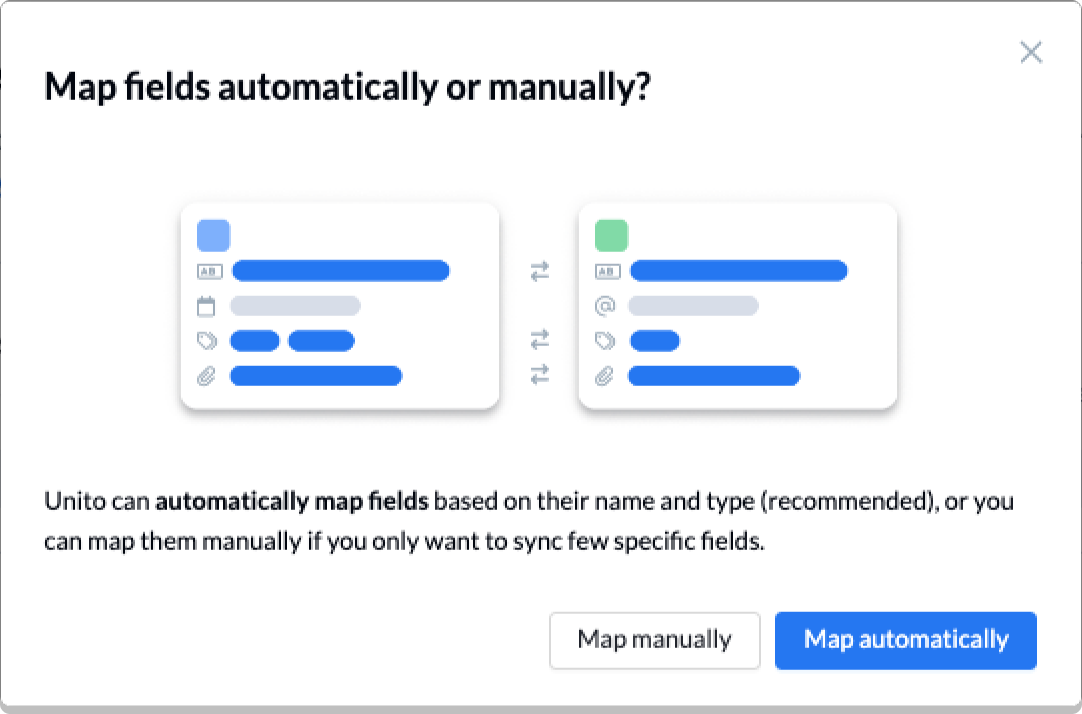
Here’s what you’ll see when Unito maps your fields automatically.
You can add a field mapping by clicking +Add mapping, then Select a field. When you choose the field you want to map in one tool, Unito will automatically recommend compatible fields in a dropdown under the other tool.
Some fields have a cog icon. They can be customized further once they’re mapped. For example, a Status field can be customized so its options match those in another field.
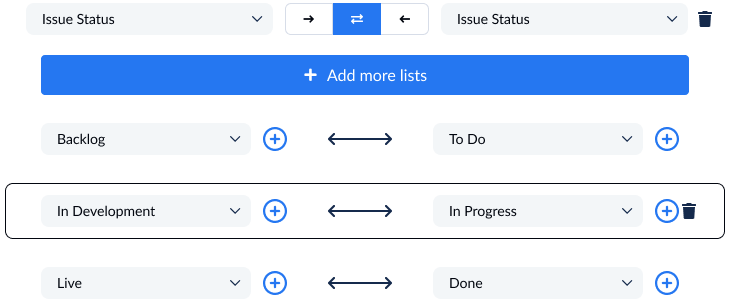
Examples of synced values in Azure DevOps and Jira
A gear or cog icon indicates additional options for configuring fields. In the case of single select or multi select field (also known as picklist (string) in Azure DevOps, this option allows you to align specific statuses between tools.
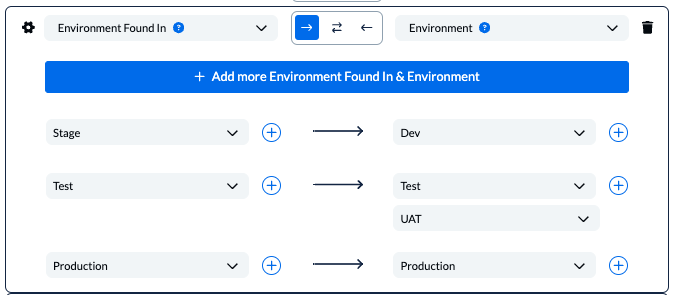
Learn more about Field Mappings
Step 5. Launch your Azure DevOps-Jira integration
The only thing left to do is decide whether or not to sync historical work items. You can make this decision from your flow’s overview page, or edit your rules as mentioned above.
And that’s it! You’ve just completed a flow between Azure DevOps and Jira. Congratulations!
If you’ve followed the steps above, your flow will now:
- Create an issue in Jira based on a work item in Azure DevOps;
- Enable collaboration between Jira and Azure DevOps with a clear view on progress across tools
If you have any questions, don’t hesitate to reach out and let us know.
Ready to optimize development work?
Meet with our team to see what Unito can do for your workflows.
What’s next after connecting Azure DevOps and Jira with Unito?
Now that you’ve set up your integration between Jira and Azure DevOps, you can unify project management and improve cross-team visibility across tools with real time two way updates. You can also read more about Unito’s integrations for Jira and Azure DevOps to better understand their capabilities and limitations.
Duplicate this flow to suit other use cases you may have in mind.
Now that you’ve got the hang of Unito, you can try syncing Azure DevOps to Airtable or Asana.
- Or connect Azure DevOps to Wrike, Asana and Azure DevOps, Azure DevOps and Airtable, Trello and Azure DevOps, Azure DevOps and ServiceNow or other database and project management tools.
- Or follow a similar guide to:
- Sync Jira to Notion
- Sync Jira with Asana
- Link Jira issues with Trello cards
- Connect Jira projects to Wrike
- Connect projects between Jira and Jira Service Management
- Sync tasks between Jira and monday.com
- Sync jira issues between multiple projects
- Connect Jira and HubSpot
- Merge issues between Jira and GitHub
- Sync Jira issues to Airtable
- Link tasks between Jira and ClickUp
- Send Jira issues to an Excel spreadsheet
- Export Jira to Google Sheets
- Connect Jira Service Management to ServiceNow
- Send tickets from Zendesk to Jira
- Connect Jira to Smartsheet
- Sync Jira and Salesforce
- Integrate GitLab and Jira
Frequently asked questions: Azure DevOps-Jira integration
Why integrate Azure DevOps with Jira
The integration of these robust tools primarily leads to time, effort, and cost savings. If team members are unfamiliar with either Azure DevOps or Jira, then adapting to a new interface can prove challenging and lead to errors.
Integrating work items from Azure DevOps to Jira eliminates the need to search for specific projects, issues, or other tasks in each separate tool. Instead, these items will automatically populate, creating a distributed truth.
- Facilitate software developer collaboration: Unito’s Azure DevOps Jira integration is particularly advantageous for project managers overseeing multiple teams concurrently, removing the need to constantly switch between tools.
- Building a united source of truth: A common challenge faced by teams utilizing various tools is sustaining a single source of truth for the latest project progress. In the realm of development teams, this relates to version control. By linking formerly isolated departments or collaborators, unity is achieved concerning project status, assignments, deadlines, and more.
- Reducing the number of meetings: Rather than endless status meetings, synchronizing issues with work items diminishes the necessity for constant updates, check-ins, or scheduled code reviews. This is achieved by granting appropriate team members access to synchronized data. Questions can be easily addressed through comments left in one tool, immediately visible in the other tool in real-time!
What Azure DevOps work item types can I sync with Jira?
Unito supports all native and custom work items in Azure DevOps, including epics, tasks, issues, test plans, test cases, features, user stories, product backlog items, impediments, and bugs. Each Unito flow you build can sync one type of object.
Is Unito a one-way or two-way integration?
Unito offers true, two-way synchronization between Azure DevOps and Jira, allowing changes made in either tool to sync automatically to the other. That means new work items are created in both tools, fields are updated, and comments are copied over. You can also build one-way integrations, which are a better fit for some workflows.
Do I need to know how to code to set up this integration?
All of Unito’s integrations are no-code, meaning you can build flows with a simple, drag-and-drop interface. Because Unito integrations are deeply customizable and flexible, you can build exactly what you need without any technical expertise.
How long does it take to set up this integration?
Most Unito users typically set up their first integration within days, if not less than that. Even more complex integration needs can be solved relatively quickly, compared to other integration solutions. Unito integrations start syncing changes in real-time as soon as they’re live, meaning you’ll see value right away.
How quickly do changes sync between Azure DevOps and Jira?
Unito syncs changes between Azure DevOps and Jira in real-time, meaning you can collaborate across tools seamlessly. Most other Unito integrations support real-time syncing as well, with the few exceptions syncing changes every 15 minutes.
What are the benefits of Unito’s 2-way integration?
- Improved Communication: Because Unito syncs fields, comments, and more, teams can work from the tools they need without worrying about losing any context. Everything from a task being closed to a request for additional information can be synced over, preventing misunderstandings and miscommunications.
- Increased Efficiency: Issues and other work items are created automatically, kept up-to-date, and closed across tools, meaning no project manager has to go scanning through both Azure DevOps and Jira to make sure everything’s up to date. This allows everyone to focus on their work instead jumping back and forth to make sure they have all the context they need.
- Enhanced Collaboration: With an integration that closes the gap between Azure DevOps and Jira, teams that otherwise wouldn’t collaborate can find new opportunities to work together.
What workflows does Unito’s ADO-Jira integration support?
Unito’s Azure DevOps-Jira integration can support a number of workflows, including:
- Ticket escalation
- Software development
- Project management
- AI agent integration
- Time tracking and billing
- Record syncing
Which Jira versions does Unito support?
Unito supports Jira Cloud, Jira Server, and Jira Service Management.

