
A Simplified Guide to Segments in Google Analytics 4
While raw data is powerful, for the majority of us, it’s not going to be very useful. In fact, we may only need a slice of that data to get the insights that we need. This is especially true for higher-level account management or clients. Being able to digest data quickly and understand its meaning should be the goal of every report.
Creating segments is one way of making this marketing data more digestible. By creating “mini chunks”, you can find trends within the statistics as well as identify your most important audiences. Now that we’re all using GA4, however, creating segments is a little different. But all the steps outlined in this article will be essential in setting up a highly-effective marketing dashboard in Google Analytics 4.
If you’re interested in syncing your GA4 data, here’s a guide to Unito’s latest integration to send analytics info straight to a spreadsheet.
In this Article:
- Importance of Segments
- Segments vs. Audiences
- Differences between UA and GA4 Segments
- Types of G4 Segments
- How to Build GA4 Segment Reports
The Importance of Segments
As mentioned in the intro, data for data sake isn’t really going to do much for us. Instead, we need to convert it into manageable subsets that display the info we really need. GA4 Segments do that for us. Establishing a segment will help us make small portions of data that meet certain requirements. For example, you could only view the stats around people who have come to the site from an Apple device versus an Android device.

The purpose of segments is to help you identify trends. If you’re an international business, you might realize that EMEA traffic converts more than US traffic. Or if you’re an app developer, then you could compare different device users to see which ones download the app more often.
Segments can be almost anything: marketing KPIs or goals, audiences, gender, age, device use, etc. They should, however, provide some meaningful GA4 insights for you.
Segments vs. Audiences in GA4
Before we go any further, it’s worthing making a note of the differences between segments and GA4 audiences. While they may seem similar, they’re actually quite different. For one, you can only access segments in the Exploration reports. Audiences can be pulled from nearly anywhere.
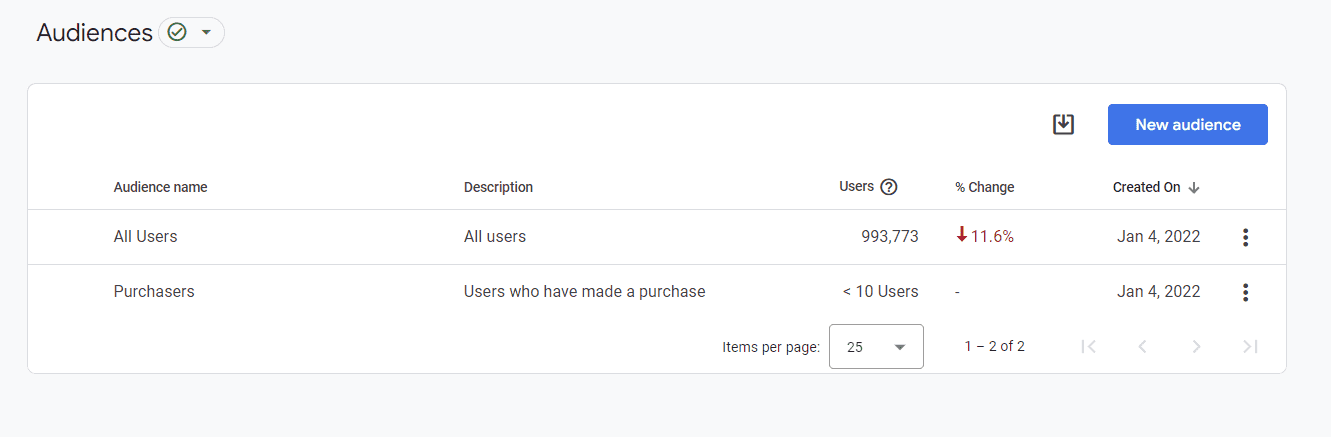
It’s true that both are designed to produce subsets of data that can be used for analysis purposes. Only GA4 audiences can be used for remarketing advertising. Audiences allow you to create groups of users based on their behavior, demographics, events and more.
Another key difference between the two is that audiences start pulling data from the date of creation. Segments can also pull from past events.
Differences between UA and GA4 Segments
In the old Universal Analytics (UA) setup, creating a segment was as simple as clicking a “+” sign. At the top of the page, you would see an option for adding a segment.
Have you migrated from UA to GA4? If not, here’s everything you need to know about switching to Google Analytics 4.

By clicking it, you would be taken to a screen where you could quickly add some segment options to create a more refined report.
With the added segment, your screen would look something like this.
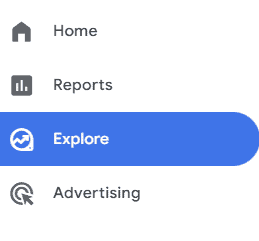
In GA4, however, it’s not quite as simple. For one thing, there is no longer the ability to add a segment to each section. Instead, you need to set up different reports within the Explore tab of GA4. Find out more about the Google Analytics 4 Explore playbook.
Types of G4 Segments
Like UA, G4 comes preloaded with User and Session Segments. Yet, it has also added Event segments as a default. It’s important to understand the differences between each type of segment since it can affect your reporting.
- Event segments: When selected, you’ll only see data related to specific event conditions. For example, if you only want to see someone who purchased a product, you’ll only see that data.
- User segments: These include everything related to your user subset, including related events and sessions. As an example, you could see the session and event data related to mobile device users.
- Session segments: These are similar to User segments, but instead the main focus is the session data that corresponds to your requirements. You’ll still, however, see user and event info.
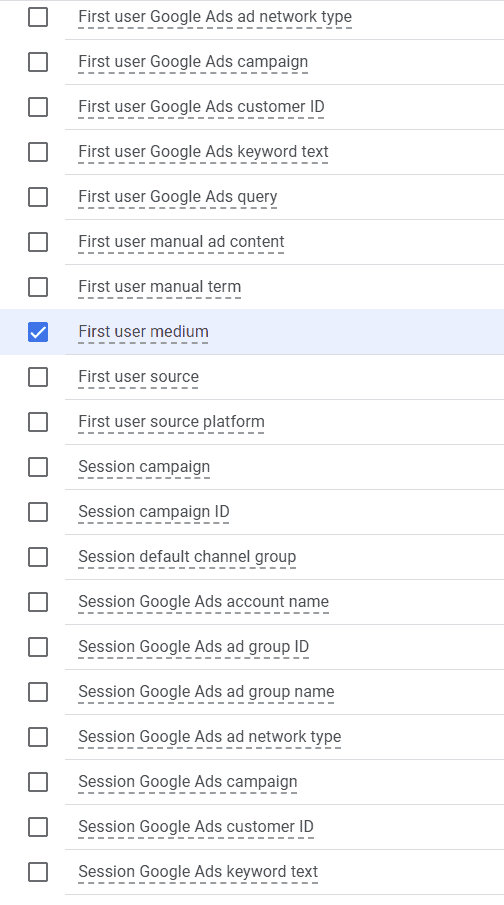
When setting up your segment report, you have different options for user, session, and event data. For example, you can filter by “First user medium” or “Session campaign”. Selecting your options will help better filter your data.
It’s important to note a few things. Once you create a segment in GA4, you can’t share it with other properties. Instead, you’ll have to set up new segments for each property that you own.
Another item to consider is that you won’t see your segment data as quickly as in the past. It takes GA4 longer to process data since it has higher sampling limits than the old UA setup.
Create from a suggested segment in Google Analytics 4
How to build GA4 segment reports
Now that we’ve laid the groundwork for segmenting, let’s get into creating your first reports. As mentioned, building your segment reports starts by going to the GA4 Explore tab.
In the Explorations section, you can “Start a new exploration”.
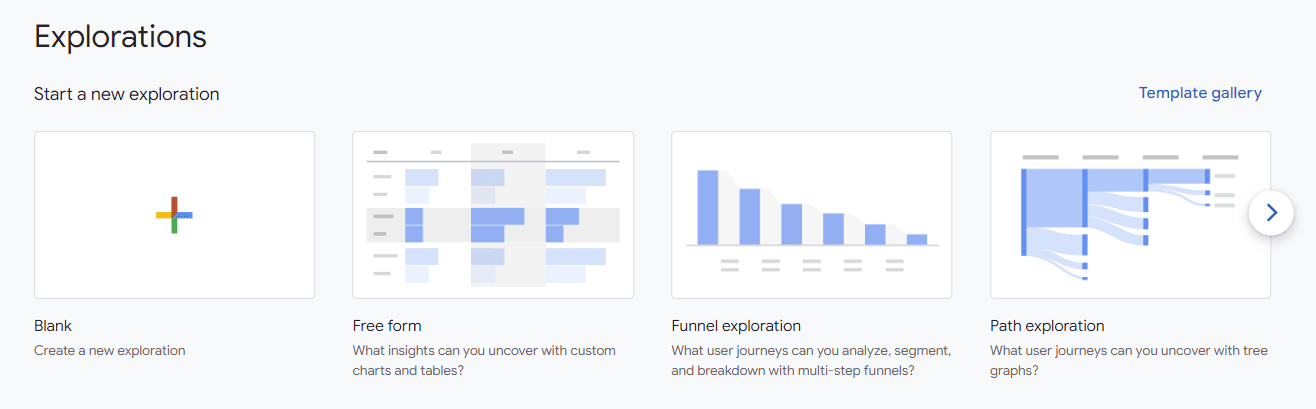
Choose a GA4 template or build a report from scratch
You can choose from one of the premade templates or build a brand-new report. Here’s an overview of reporting in Google Analytics 4. Once you select an option, head to the Variables column. In that column, you’ll see “Segments”.
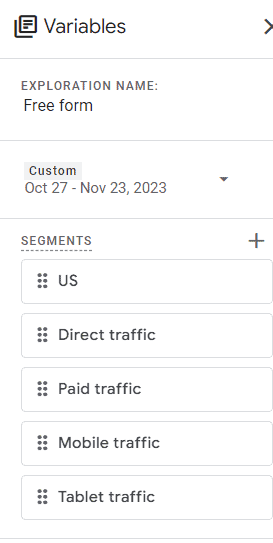
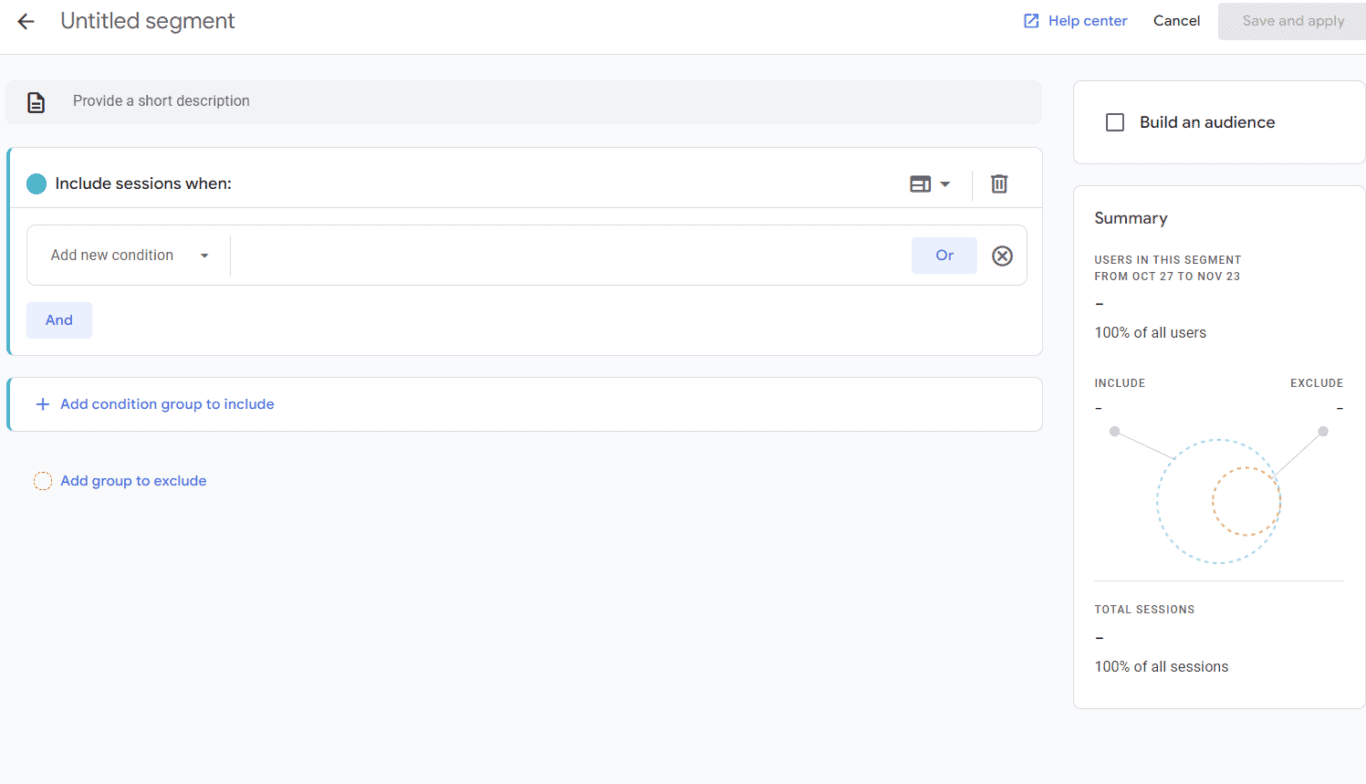
Create a new segment
To create a new segment, click on the “+” button. In this screen, you can start building your own custom segment or leverage one of the pre-built audiences. This is known as the Segment Builder.
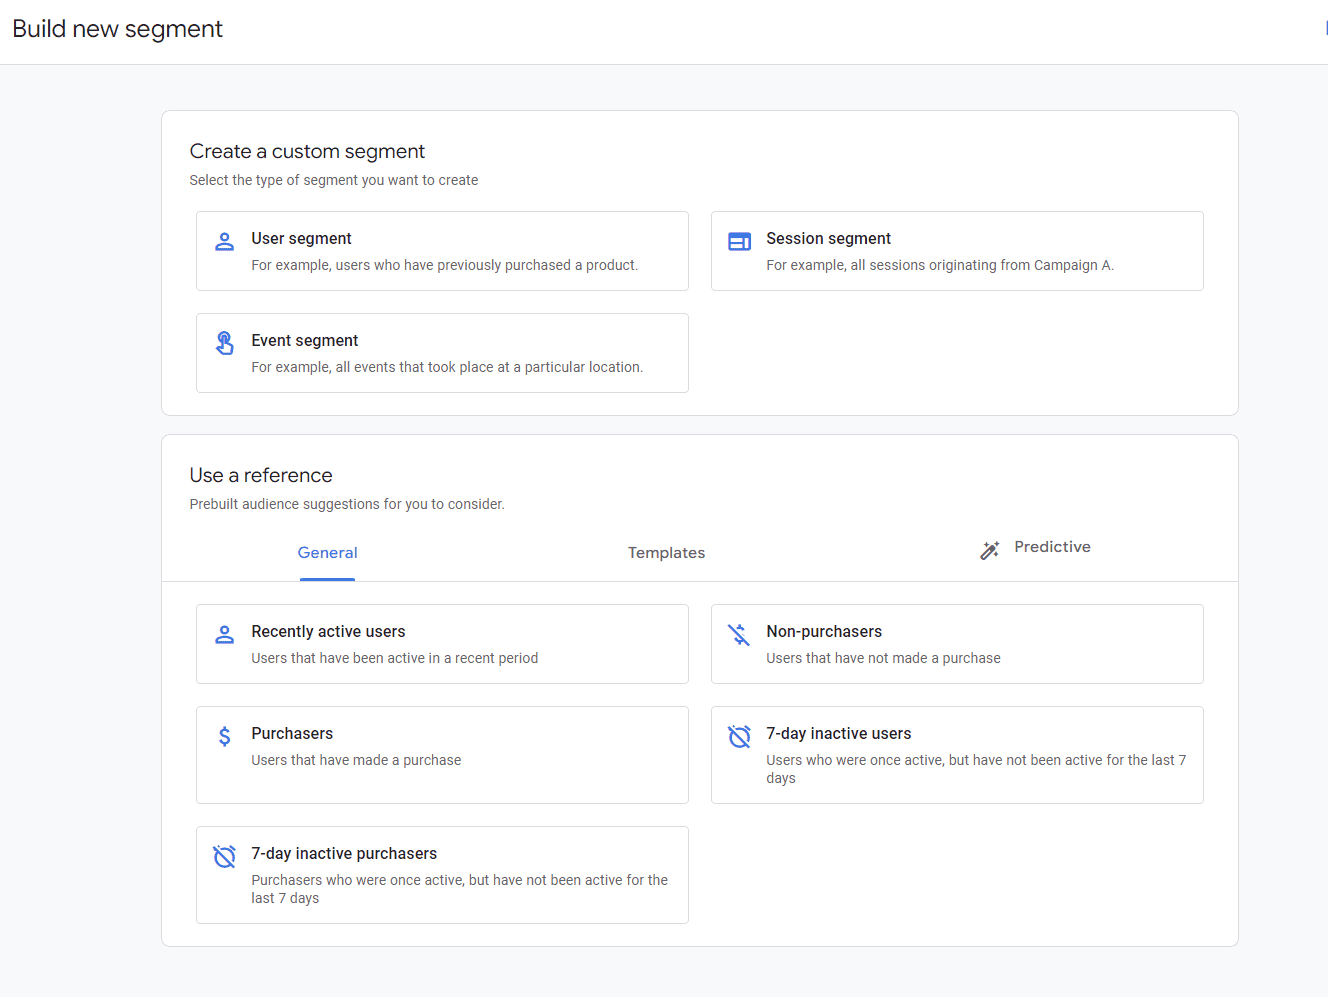
As we reviewed earlier, you’ll see that the main segment types are User, Event, and Session. For this example, we’ll select a Session segment. After you select one, you’ll be taken to a screen like the one below.
Set conditions for your GA4 segment(s)
In this screen, you can select conditions for your segment. These are important. When setting up conditions, you can add multiple criteria, including “and” or “or” conditions. This could be helpful if, say, you want to look at both the 18-24 and 44-50 demographic ranges.
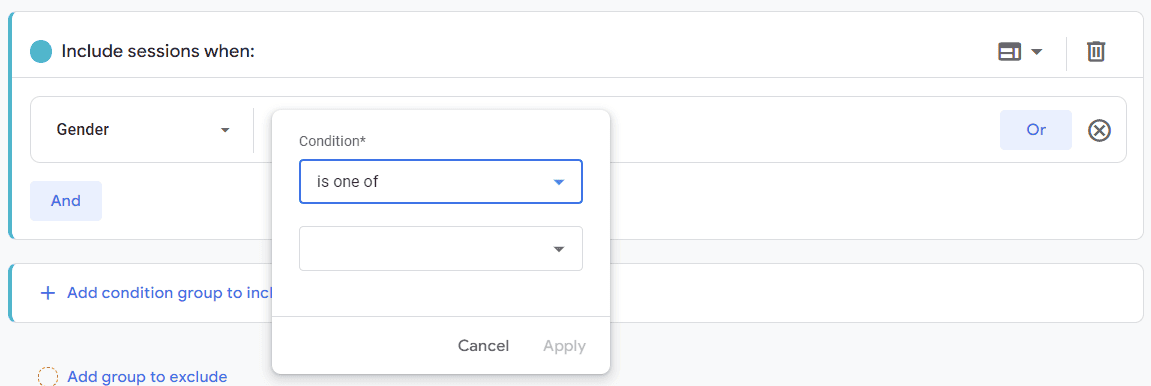
These condition filters allow you to set conditions like “is one of”, “contains”, or “does not match”. In the example above, we would select the Gender as either female or male.

You should also remember that you can’t apply all conditions to all types of segments.
- Session segments only allow for data within a single session or a single event.
- Event sessions only allow for data within the same event.
Build your audience in GA4
From a segment, you can build a GA4 audience that you can use for other purposes like advertising. You simply click the “Build an audience” checkbox.
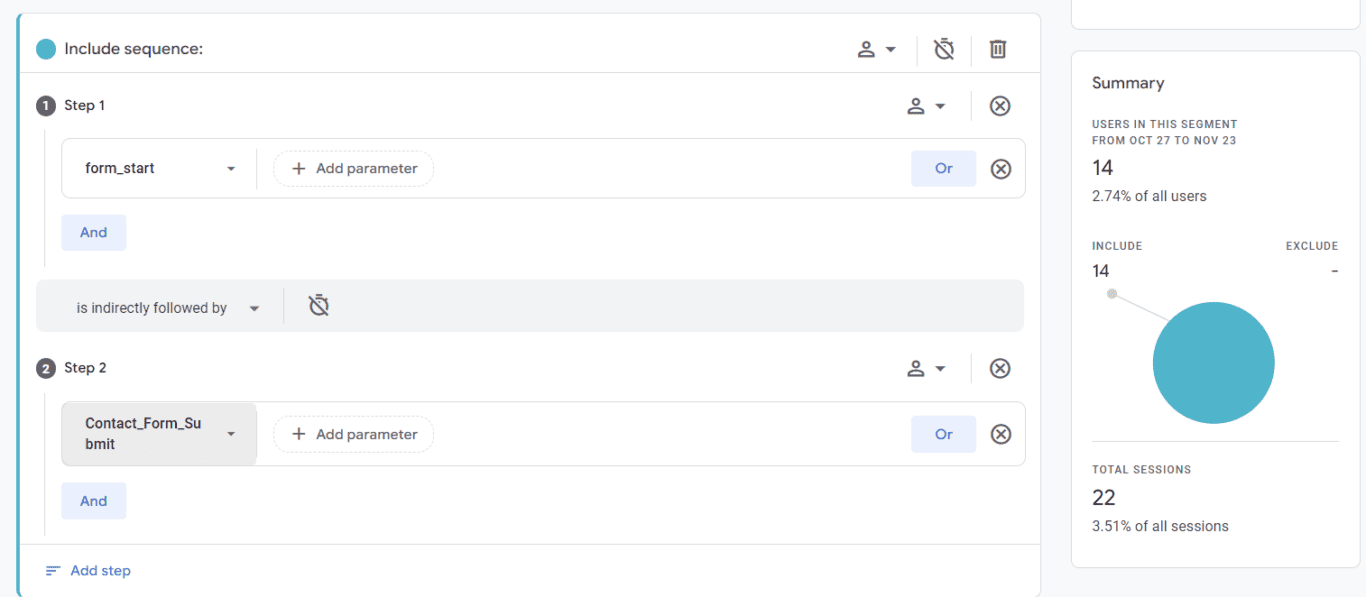
Besides conditional filters, you can also add sequential filtering to User segments. This filter allows you to see the steps someone took to complete an action. You can think of this as the old funnel setup.
You could, for example, add a landing page and determine how long it took someone to go from that landing page to a purchase. Since the default is conditional criteria, be sure to select the “trash” button at the top and then click “Add sequence to include”.
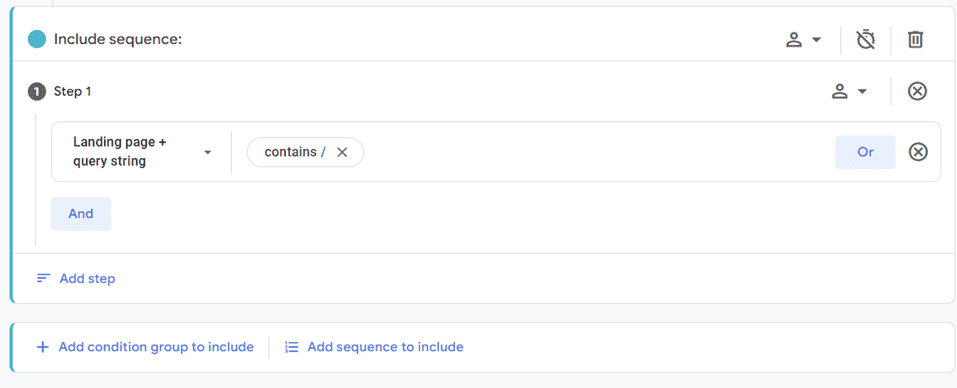
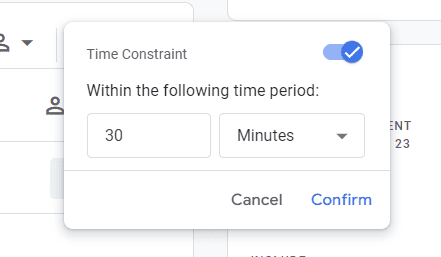
Within sequence scope, you can set up the parameters to affect only a single step or to affect all steps within the sequence. You can also set time constraints for the sequence.
In this example, we set it up to see how many people go from form start to form complete.
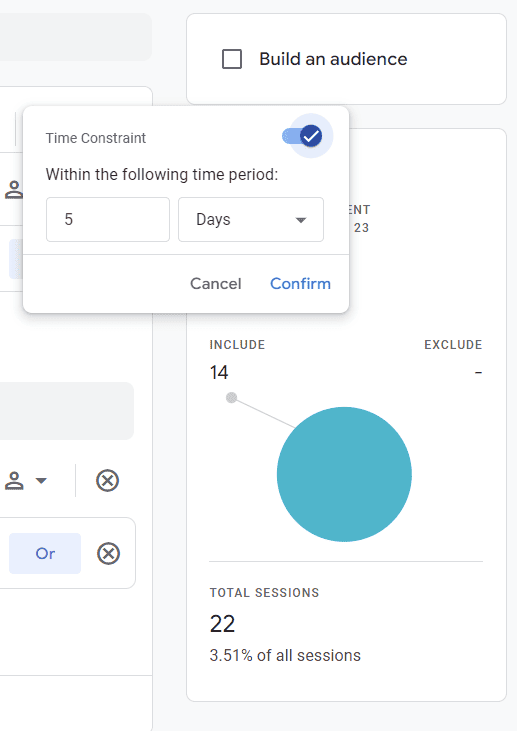
We could also add a time frame to see if that affects any of the data. (In this case, the data remained the same when we looked at a window of five days.)
Using similar steps, you can also add exclusions if you don’t want certain segments showing up in your reports. Here are some examples of audiences in GA4 and how to create them.
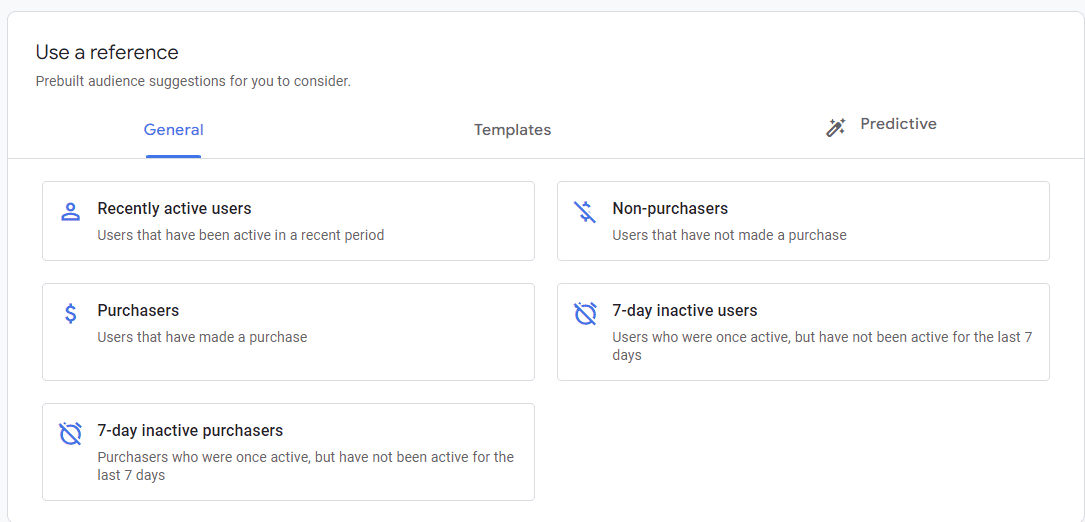
Google also provides you with suggested segments. If you have a shopping cart, the Purchasers and Non-purchasers templates could be useful to you.
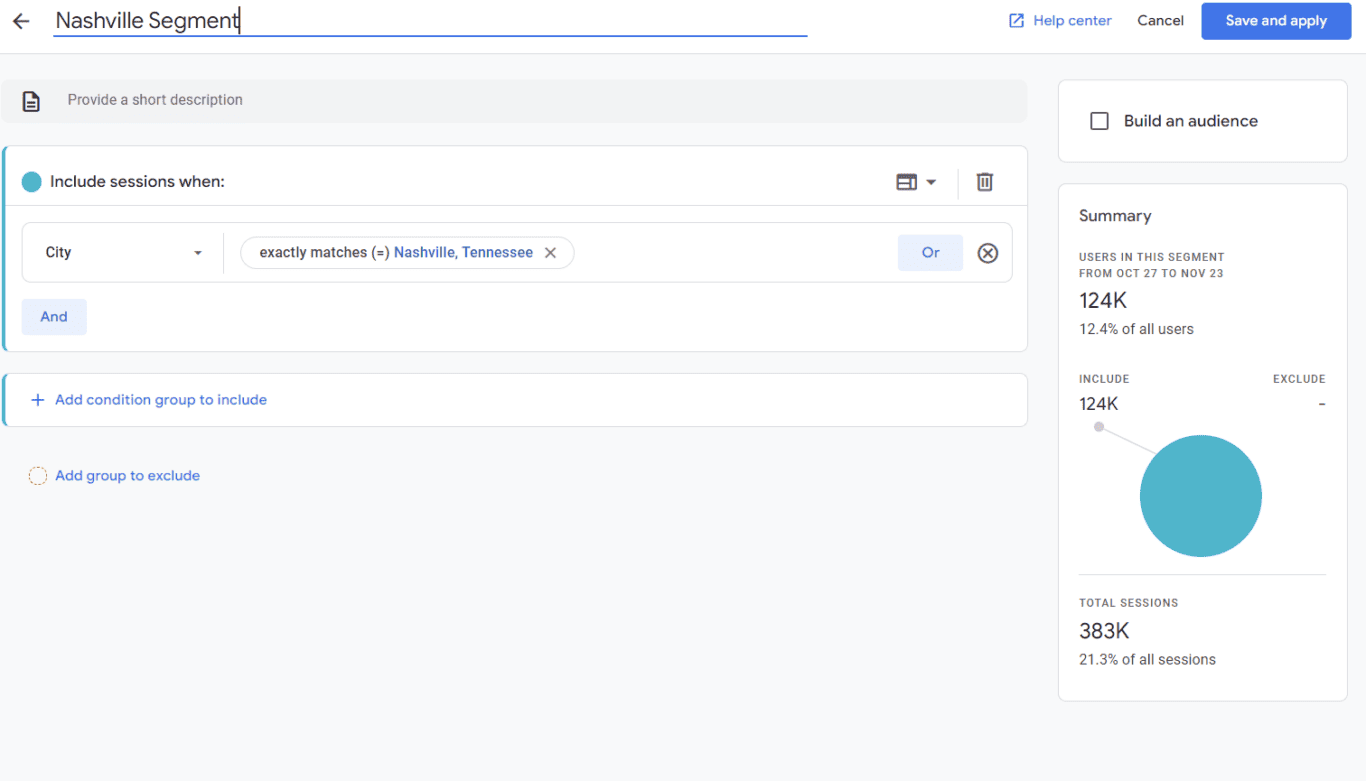
Once you add your criteria and conditions, you can select “Save and apply.” You can now start using this segment to compare to other data. In the below report, we compared Nashville (since it’s the main focus area of this business) to the US as a whole.
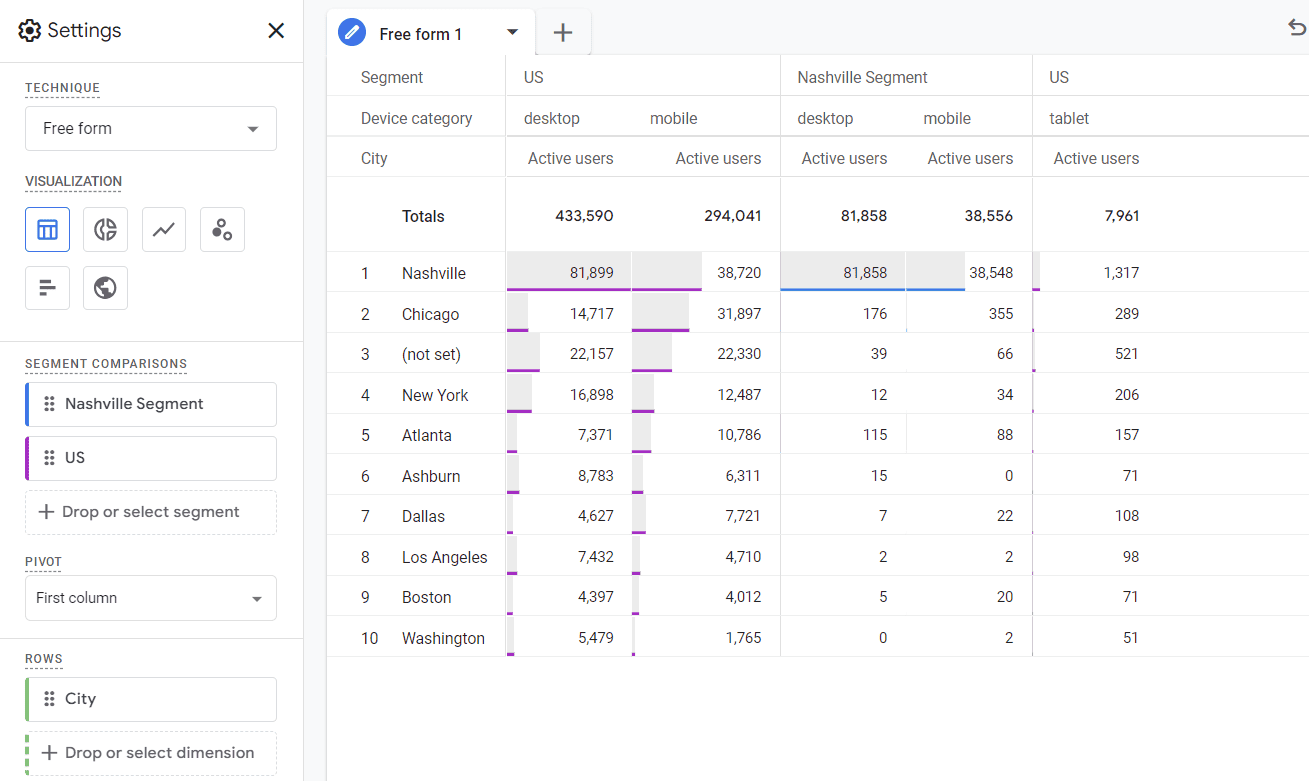
Your final product will look like similar to this report. You can set these segments up once and then save all your reports. This way, you can continually keep track of your important data.
Modifying existing reports in GA4
If you ever want to change your existing reports, you can do that as well in this screen. To add a segment, click “Drop or select segment”. You can also remove segments by hovering over the segment and clicking the “X” button. Here’s how to customize a detail report in Google Analytics.
If you’re only tweaking certain data, then you could duplicate your existing reports and use them as a template. This way, you can quickly build similar reports if only a segment or two needs to be changed.
Create a custom segment in Google Analytics 4
Make GA4 Reporting Even Easier with Unito
Want to make your GA4 reports easier to maintain and share? Unito will be releasing a connector that will make building these effortless. It connects with Google Sheets and automatically updates your data based on your criteria. No more slaving away on weekly, monthly, or quarterly reports.
Instead, set up the connector once, and you’ll be ready to impress your clients and stakeholders with your insightful stats.
Here’s how it works: