
How To Use a Google Sheets Spreadsheet as a Database (2 Methods)
You know you need a better way to store your data. Teams are constantly jumping between tools to get the information they need, manually entering data in spreadsheets, and groaning because none of their data sources seem to be accurate. You want to get a database built, but maybe you’ve balked at the cost or just don’t have the time to set one up. That means you want to know if you can use Google Sheets as a database — or if you’re better off holding on just a bit longer.
Well don’t worry; you can absolutely make things a bit brighter for your team. Here are two ways you can do it.
First method: Using Google Sheets as a database with manual exports
While Google Sheets has some limitations that you won’t find in a dedicated database tool — like a limit of 10 million cells — it’s a pretty solid option if you need a database right now.
To use Google Sheets as a database, all you need to do is get the data you need out of other tools and into your spreadsheet. The easiest way to do that is using a CSV export.
Most tools in your stack, from project management tools to contact management platforms, will have some way to create a CSV file, which you can then import to Google Sheets. Note that this is a manual process — unless you use third-party integrations or apps — so you’ll need to do this every time you want to update your database.
In this example, let’s look at how you could use Google Sheets to create a customer database using data from Mailchimp.
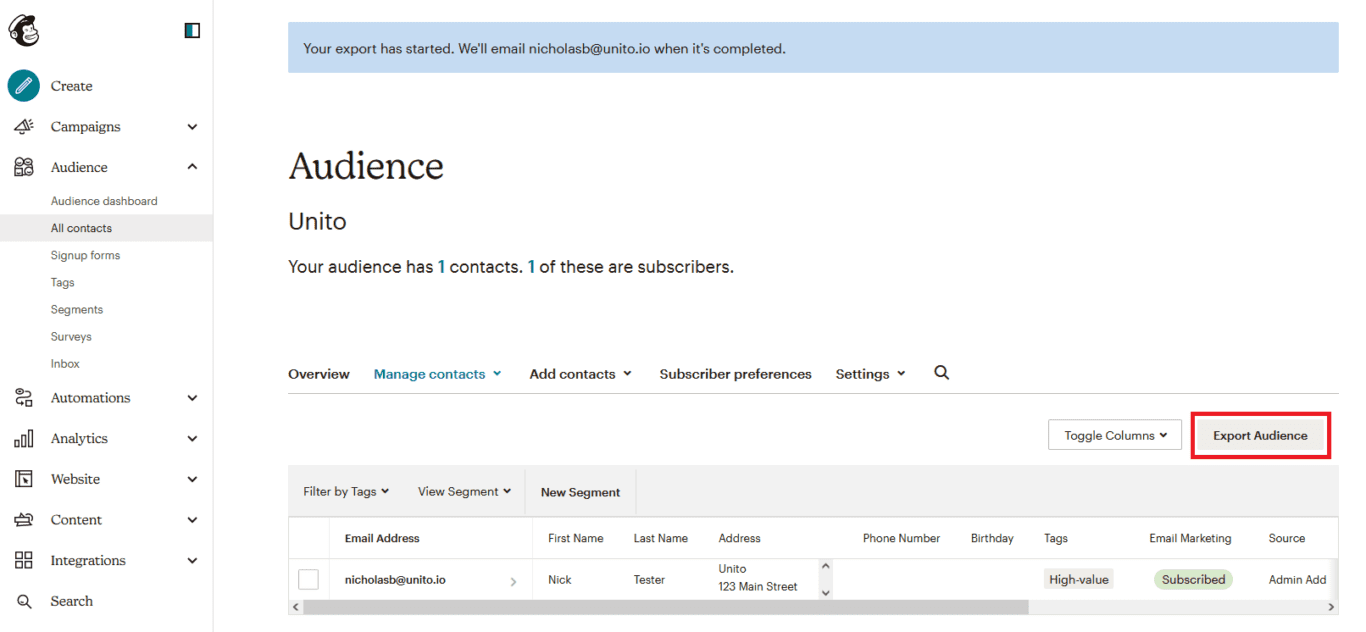
First, you’ll need to export the data you need. In Mailchimp, that’s as simple as finding the All contacts tab in the left-hand menu and clicking Export Audience.
Regardless of which tool you export your CSV file from, you’ll get something that looks like this.
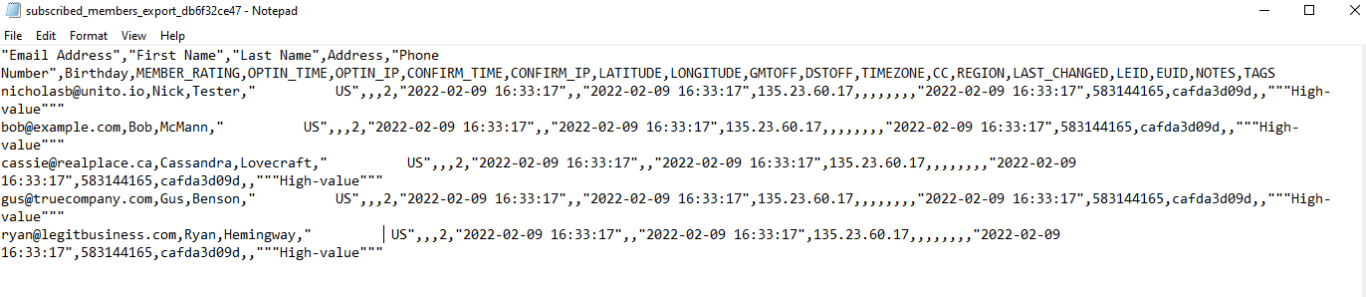
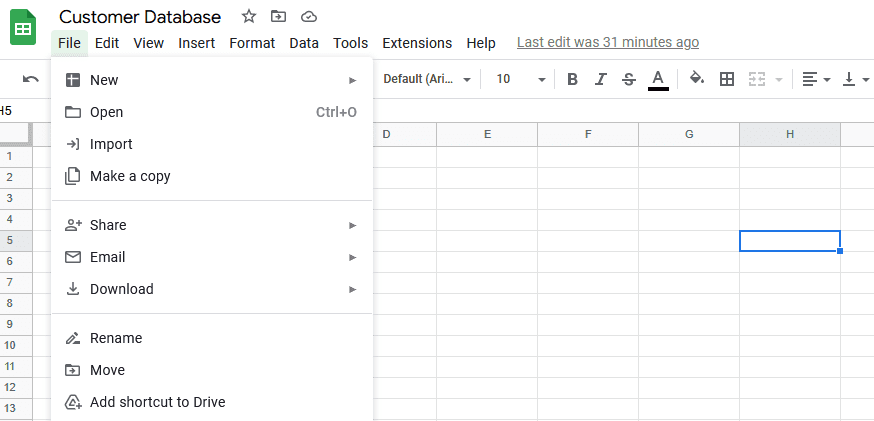
Doesn’t look like much, right? Just wait until you plug it into Google Sheets. Go to the spreadsheet you want your data to show up in and hit File.
Next, hit Import and choose Upload.

Drag your CSV file into this screen — or use the Browse button to find it. Then you’ll see this screen.
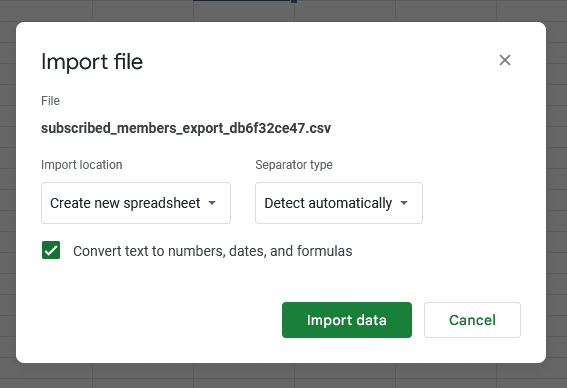
With the Import location dropdown, you can choose whether you want your data to land in a new spreadsheet, get added to an existing spreadsheet, or even replace the spreadsheet you have open. If you want to use Google Sheets as a database, that last option is probably your best bet.
The Separator type dropdown lets you choose how Google Sheets should determine which column your data goes in. Usually, you’ll want to leave this at Detect automatically.
Hit Import data when everything’s set up the way you want it.
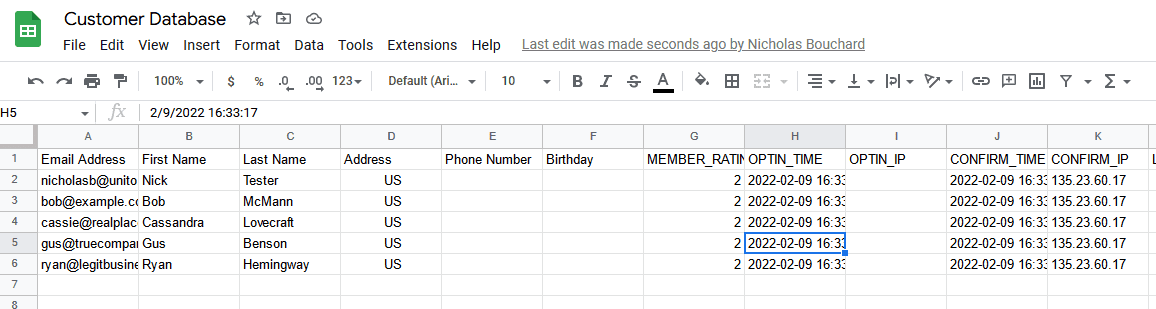
And just like that, you’ve pulled customer data from Mailchimp into Google Sheets. Do this regularly and you’ll have a simple database you can share with other teams, build reports from, and more.
Limitations of this method:
Manual exports have one major advantage over other methods: they’re simple. After all, most tools have some way to export data to a CSV file, which you can then import to Google Sheets and clean up. That said, there are a few reasons why these manual exports might not be the best method for your needs.
- It’s one-way: Databases aren’t just for storing data. You need to get it out again too, whether that’s to generate reports or feed dashboards in other tools. Exporting data as a CSV file is a one-way process, meaning you need a different export process — or even a completely different tool — to get the data back out of your Google Sheets database.
- It’s manual: This might seem fine if you only need to export data monthly, but it creates a big problem. Your data is outdated the moment it’s exported. Think about it. If you’re using Google Sheets to collect customer data, for instance, your database will be missing all the customers you gained between exports.
- Some tools have limitations: While CSV exports are pretty common, they’re not necessarily available with all tools. With some tools — like Trello — they’re locked behind specific paid plans. With others, they’re not even an option.
CSV exports are a quick and easy way to start using Google Sheets as a database, especially if you don’t have any other options right now. But are they the best method for building a robust database you can really work with?
Second method: Turning Google Sheets into a dynamic database with Unito
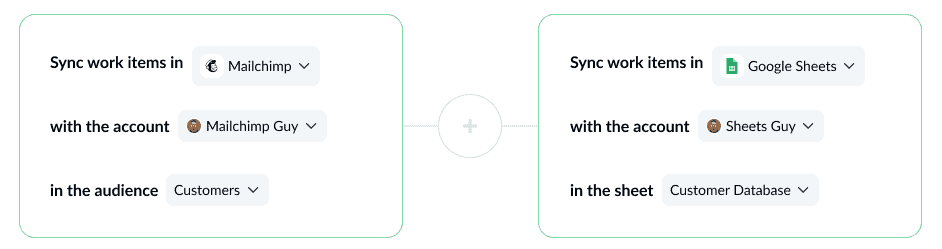
Unito is a no-code workflow management solution with the deepest two-way integrations for some of the most popular tools on the market, including spreadsheet tools like Google Sheets and Excel, as well as tools like Trello, Jira, Mailchimp, Hubspot, and many more. With a Unito flow, you can automatically sync data from any tool to Google Sheets, turning your spreadsheet into a live database with real-time updates.
Here’s why Unito is the best way to use Google Sheets as a database.
- It’s two-way: It won’t happen often, but it’s entirely possible that someone finds outdated data in Google Sheets. With manual exports, they’d have to communicate with someone who has access to the original tool so the change can be made there. But with a database powered by Unito, they can update that data in Google Sheets (here’s an example with Trello) and it’ll automatically get synced to your other tool.
- It’s automatic: Manual exports are just that, manual. Even if you export your data as often as you possibly can, it becomes outdated the moment you export it. With Unito, your data is kept updated automatically, so you never have to ask which tool has the latest data.
- It just works: Even if tools like Trello put a paywall between you and those CSV exports, they’ll still work with Unito. All 30+ integrations are available with a paid Unito plan, meaning there are no additional fees or upgrades to watch out for.
Now that you know why you should use Unito, here’s how it works.
Now here’s a step-by-step guide to setting up your first Unito flows.
Now that you know why you should use Unito, here’s the how.
- First, connect Google Sheets and your data source of choice to Unito. Then specify where your data is coming from and where it’s going.
Note that you’ll need to install the Unito Add-on for Google Sheets to do this. Here’s a full guide to doing that, if you need it.
- Next, set up rules to filter out the data you don’t want synced over.
You could filter out cards with a specific Trello label or records with a certain value in an Airtable dropdown for example.

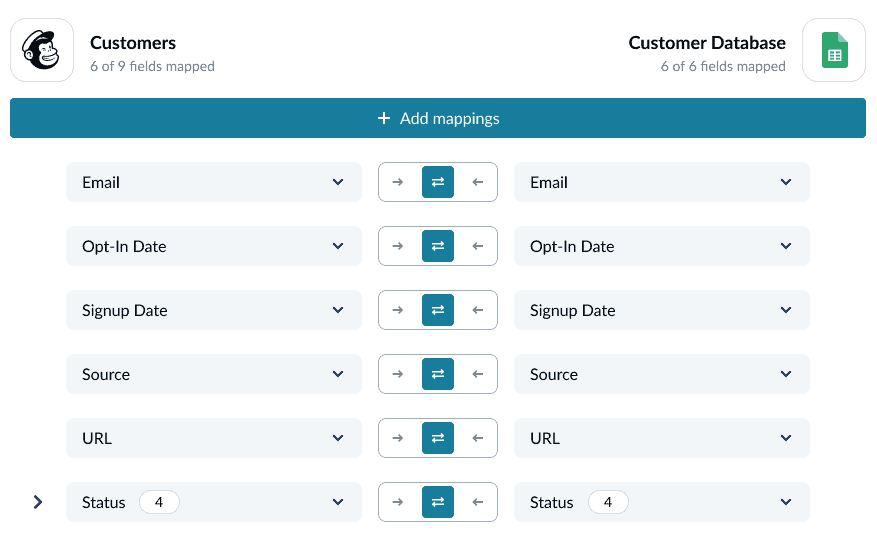
- Now map the fields from your data source of choice to columns in Google Sheets.
This will ensure that your data lands in the right place.
And that’s it! Now just launch your flow and watch as data is automatically exported from your data source to Google Sheets, turning it into a dynamic, living database.
FAQ: Setting up a Google Sheets database
Can Google Sheets be used as a database?
Absolutely! Your main challenge when using a Google Sheets database is making sure it has all the data you need. As long as you can feed data to Google Sheets, you can use it as a database. That may mean manually exporting information from other tools or using integration solutions. Also, note that Google Sheets can only support up to 40,000 rows, so you might need to look at a different tool if you have much more data than that to store.
Is it safe to use Google Sheets as a database?
While Google Sheets might serve as a database for teams that don’t have too much data, some experts say a dedicated database tool might be better. Cloud-based spreadsheet tools like Google Sheets can run a bit more slowly than dedicated databases and might be lacking in security features you’d find in these tools.
Can Google Sheets query a database?
If you keep your database in Google Sheets, you can use the QUERY function to pull up any data you need. But if you want to run queries on other databases with Google Sheets, you’ll need a software integration.