
How to Run a Google Ads Remarketing Campaign
When a visitor comes to your site or app and doesn’t take the action that you want them to – i.e. become a customer or subscriber – that doesn’t mean that you have lost them for good. In fact, you can set up a campaign that shows the visitor ads related to your website as a whole, the page the person visited, or the product that was viewed. This is known as Google ads remarketing, or retargeting, and it is still one of the most successful ways to drive conversions on your site and in your app.
In this article:
- What is Google Ads Remarketing?
- Advantages of Retargeting
- Google Remarketing Options
- How to Set Up Your Audiences
- Note on Creative
- How to Set up a Google Ads Remarketing Campaign
- Try syncing Google Ads to a spreadsheet with Unito
What is Google Ads Remarketing?
As mentioned, remarketing or retargeting is a way to show relevant ads to people who have previously visited your website or app. The goal of remarketing is to encourage people to come back to your site and complete whatever activity they were doing. For example, if someone added a product to a cart, but then abandoned it. Or if they visited a donation page and didn’t actually make a donation.
The main purpose of Google Ads remarketing is to remind visitors to complete the action that they just started, view what else your site or app has to offer, or even provide them with a special coupon or promotion.
Advantages of Remarketing
There are many advantages to setting up a retargeting campaign.
- You can reengage visitors who have been to your site or app: People who are already familiar with your brand and have interacted with your products are more likely to convert than others.
- These ads tend to cost less. You can effectively run a retargeting campaign for a few dollars a day and still get quality results. You just have to make sure that you’re hitting the right audiences.
- They follow the visitor wherever they go. We’ve all seen them. You click on a product and then you see an ad for it on a different website. Remarketing ads basically “stalk” a person no matter where they are on the internet.
But to reduce the chances of annoying someone, you should reduce the frequency of how often someone will see a remarketing ad. Or your visitors really will think that you’re stalking them. (In the Display campaign Additional settings, you can set a frequency cap. This limits how often ads are shown to the same person.)
Google Remarketing Options
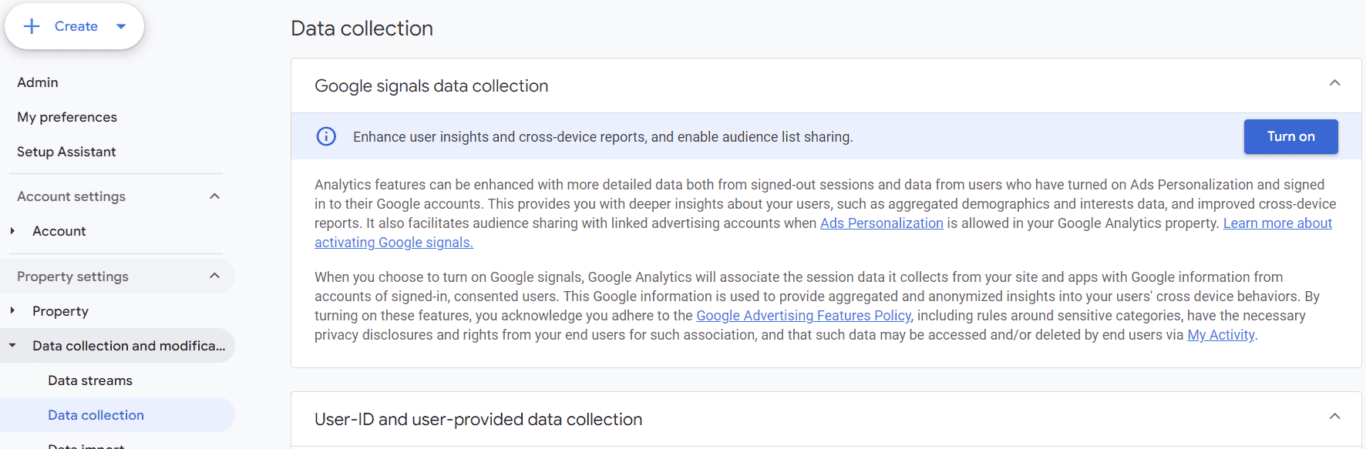
Before you can begin to set up a remarketing campaign, you must add the Google Ads remarketing tag to the pages that you want to retarget. In Google Analytics, be sure that Google Signals is turned on. This can be found in Admin -> Property Settings -> Data collection and modification. Click on Data collection and make sure that Google signals data collection is turned on.
You can also add the Google Ads tag to your Google Tag Manager setup. If you have both, it doesn’t hurt to set it up on each platform.
You have different options for setting up Google Ads remarketing campaigns:
- Standard remarketing: This is like a standard Display campaign, except ads will follow people who have interacted with your app or website across Google’s Display Network. You upload ads that are served to these people.
- Dynamic remarketing: With Dynamic remarketing, you can serve products and services along with regular display ads. You can even select placements for where ads are shown. You can set up Dynamic remarketing for Display, App, and Performance Max campaigns.
How to Set Up Your Audiences
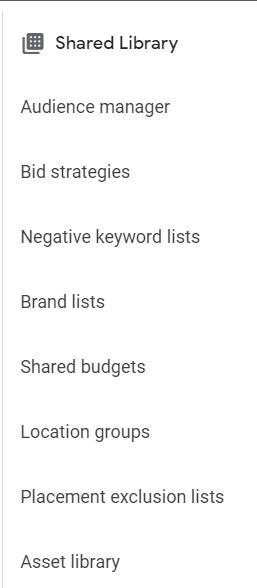
To set up your audience, log into Google Ads and go to Audience manager.
Click the “+” button on the left-hand side to start creating your new audience. For most people, it’s going to be website visitors. If you’re using an app, then you’ll want app visitors. You can also upload a customer list if you want to target specific customers or former customers.
When setting up your audience, you have the option to focus on visitors to your entire site or specific pages. For example, you might only want to show ads to people that have made it to a specific set of actionable pages.
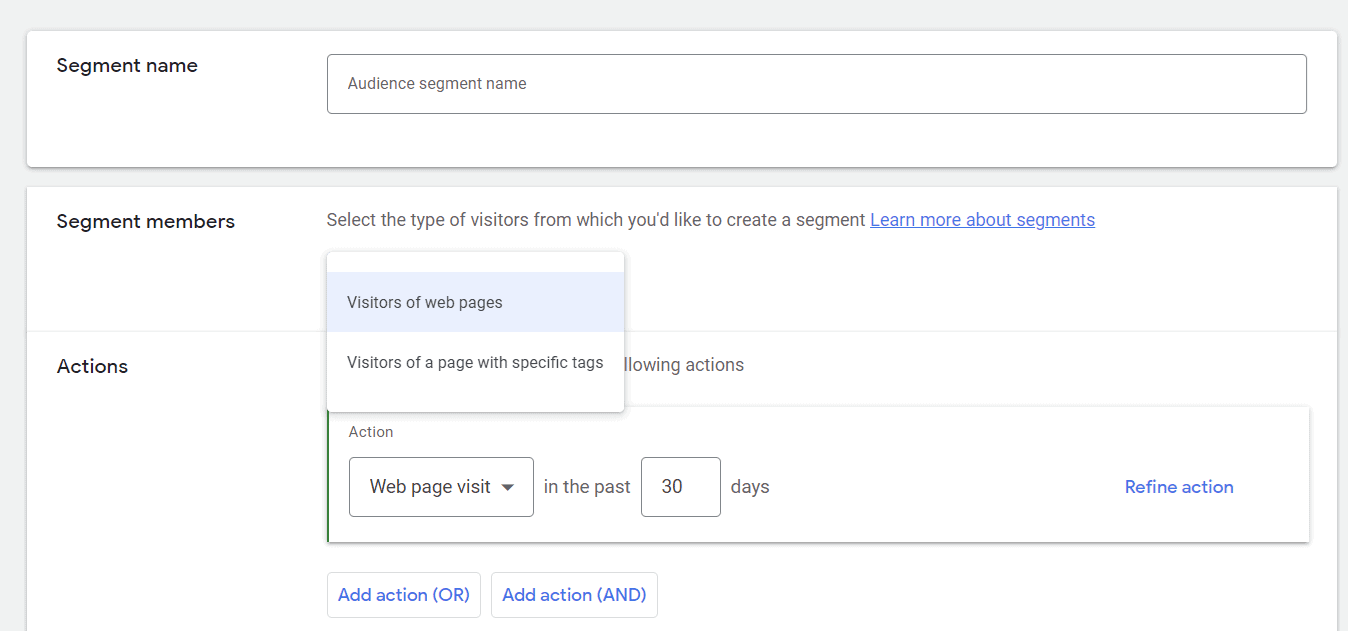
You also have the option for “and/or” actions. If you’re working with a funnel, you may want to look at people who landed on a product page and then went to the cart page but didn’t make a purchase. The pages will have to be tagged for you to set up an audience this way.
When setting up your audiences, you must exclude visitors who have converted. Most people are sent to a thank you page or cart complete page once they’ve done an action. You can exclude anyone who has reached this page.
While the default for setting up your audiences is 30 days, you can go back as far as 90 days or even 15 days. If you want to target all these differently, you can set up each one as a separate audience.
You should always give your audiences specific names to ensure that you can distinguish between them when setting up campaigns. You can even give the audience a description if the naming conventions are similar.
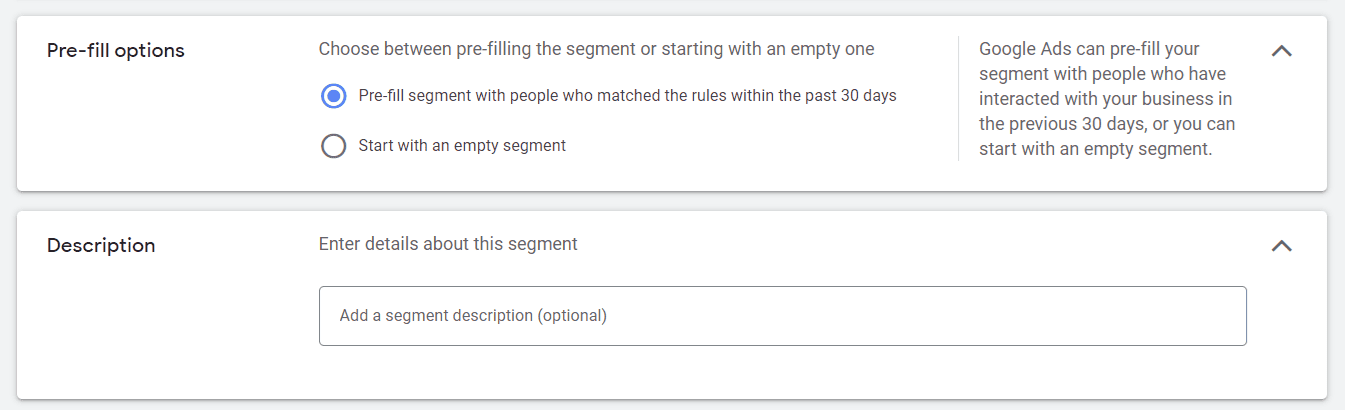
You also have the choice to start with a pre-fill segment or empty segment. Unless there are specific parameters that you want to focus on, it’s best to leave the default pre-fill segment.
Once you’re done, hit Create segment. You’ll see your audience in the list on the main page.

Note on creative work in Google Ads
While it might be tempting, you shouldn’t use the same creative for your regular ads as your remarketing ads. Why? Well, these people have already come to your site – and may have already come through previous ad. So, a generic “here’s what we do or sell” ad isn’t going to encourage them to come back. Instead, you need to make a specific offer.
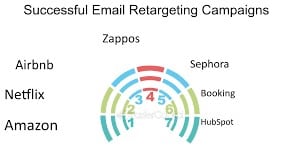
A good example is Zappos. Long before others were doing it, if you visited Zappos and looked a particular shoe, the company would show you remarketing ads for that specific shoe. This acted as a great reminder that you were looking at this item and that you should go back and buy it. There were no generic ads of “shoes” or “products”.
Instead, there was the shoe you looked at and you were considering. That’s a great strategy for getting people back to make a purchase.
Another idea is to show a specific remarketing offer. If someone was considering joining your gym, but didn’t sign up, send them a coupon for a free month or a percentage off a yearly membership.
Basically, to lay it out, you want your remarketing ad to be compelling and different from your standard advertising. The goal is to get the person to convert, not simply remind someone of your brand.
How to Set up a Google Ads Remarketing Campaign
Now that you have your audiences and creative, it’s time to create your campaign. The initial set up is the same as creating any other campaign.
Click on New Campaign:

You should choose between Sales, Leads, Website traffic or Brand awareness and reach as your objectives.
Next, select Display as the campaign type
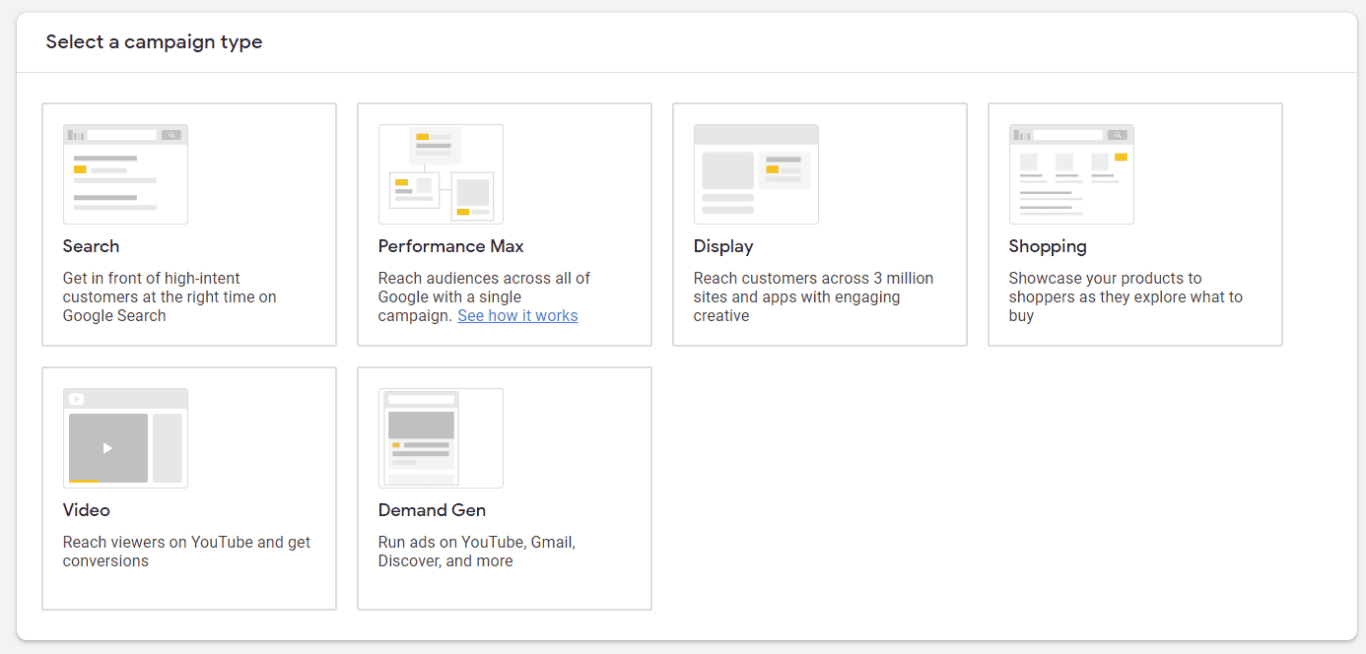
Add your website address and give your campaign a name. Hit Continue.
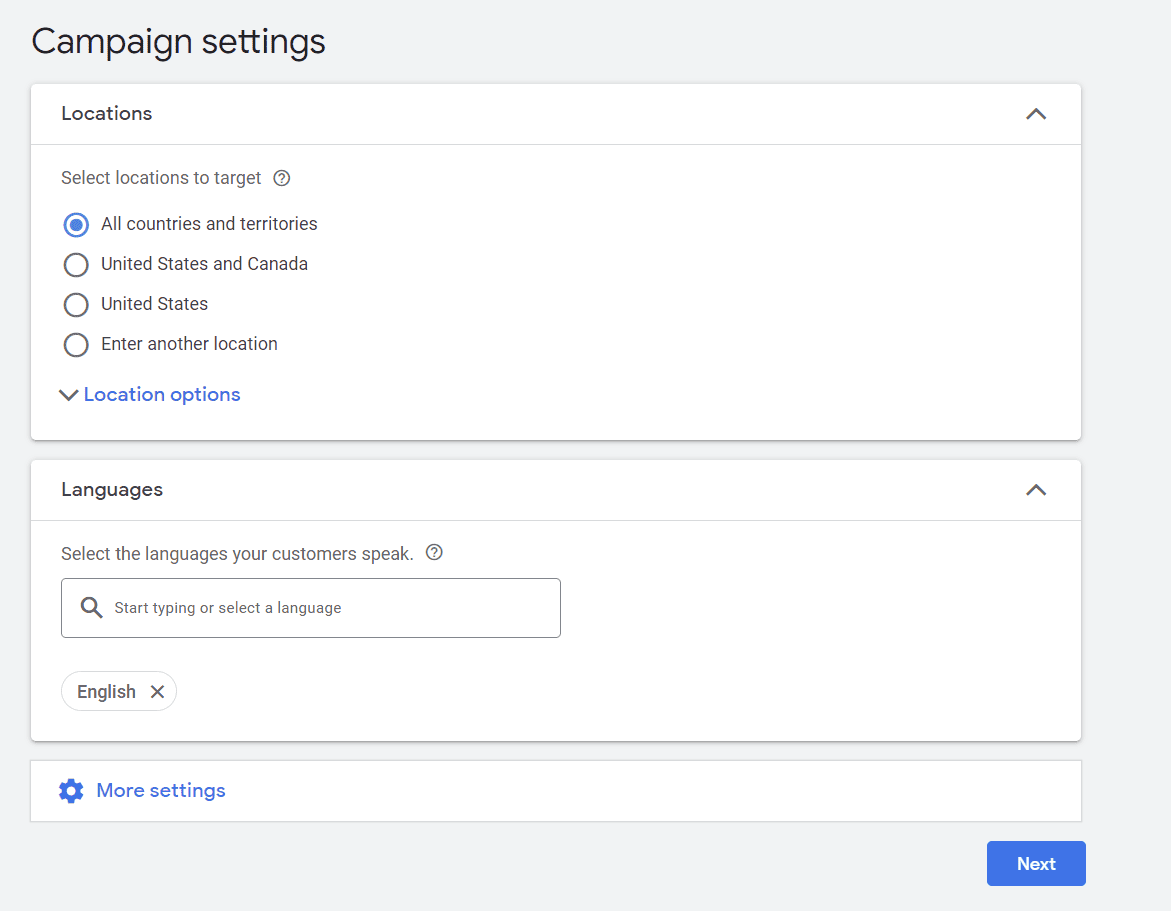
On the following page, you’ll add your campaign settings. This will be the languages and locations you are targeting. While this is less important in remarketing since you want to target the people who came to your site, you could use it as a narrowing option.
On the next page, you’ll set your budget. For remarketing, I would start with a lower budget like $5-$25/day. These ads typically cost less so you don’t need to waste too much of your budget on them. If they’re doing well, then you can always up your budget. Once your budget is set, you can use this Google Sheets template to make sure you get the most out of it.
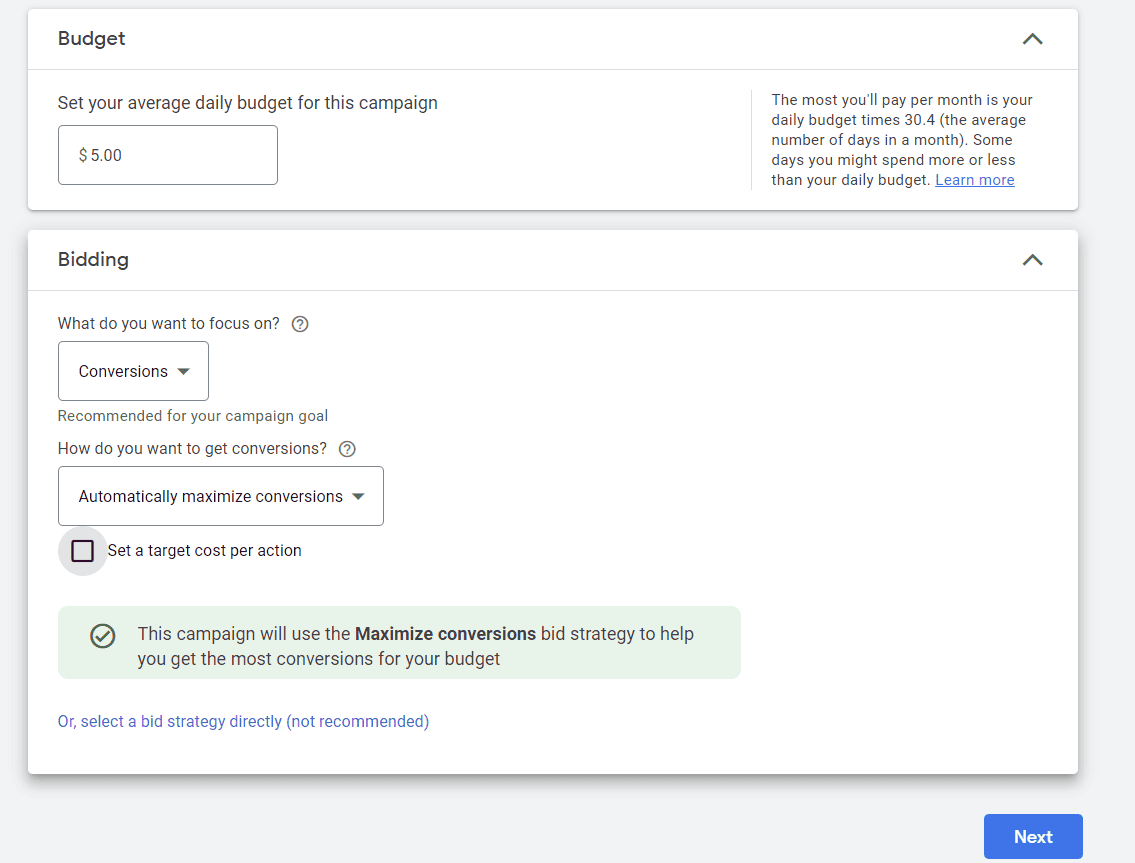
For bidding, your goal is Conversions. So, I would make that your bidding strategy. If you want to target a certain CPA, you can click “Set a target cost per action” and add the max CPA there.
On the next screen is where you’ll choose your targeting. If you have remarketing lists set up, you can browse to them and select the appropriate audience.

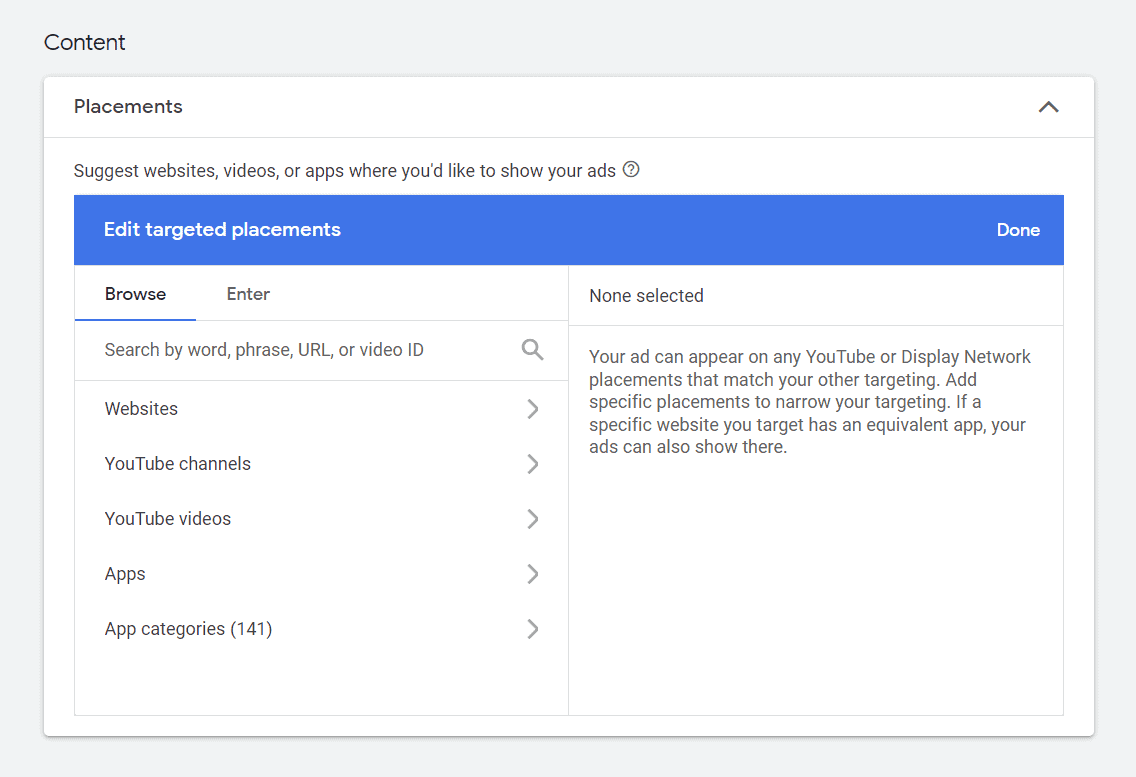
If you don’t want your content to run on all types of sites, for example, gaming or cryptocurrency sites, then you can edit your placements on this screen as well.
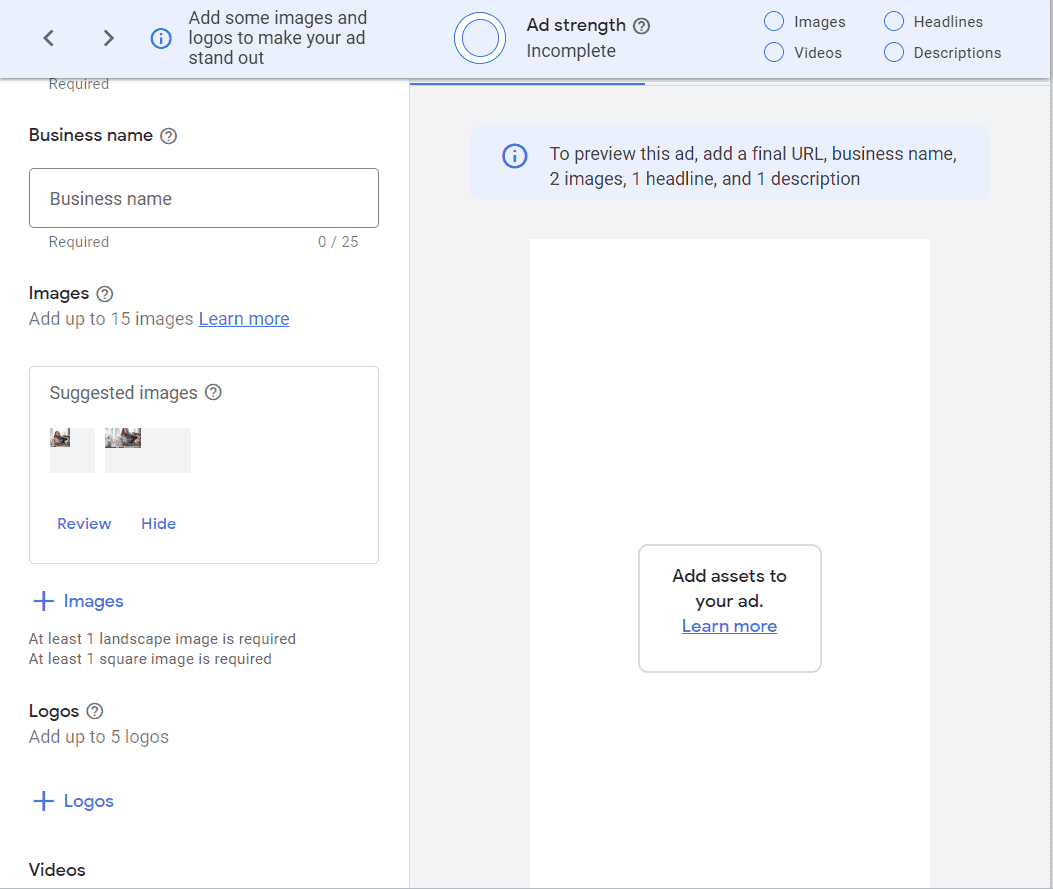
Once you select your audience, you can now add your ads. You can create responsive Display ads from assets on your site, upload new creative, or use existing creative (as mentioned, not the best option).
Once you’re done with your creative, you can review and launch your campaign.
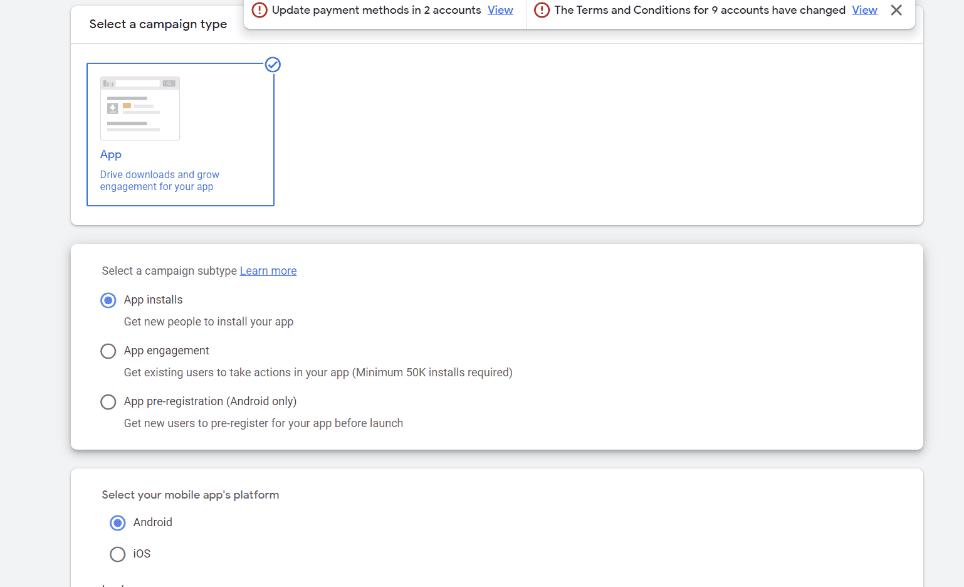
Note: If you’re running a Google Ads App campaign, then you want to choose App Promotion and App as your campaign type. You’ll also have to choose a subtype and your mobile app’s platform.
Under Show advanced settings, go to the Data feed field. Click the box that says, “Attach a feed to improve targeting and enable ads that feature your feed items”. You can choose from either a dynamic feed or a Google Merchant Center feed. Once you hit save, you can create your ads.
For Performance Max campaigns, your dynamic remarketing source will have to be either a Google Merchant Center account, or you’ll have to create a campaign feed. The steps are the same after this.
Key considerations
It’s important to monitor your remarketing campaign. Many simply “set it up and forget about it”. But it should be monitored like any other campaign. Since the goal is leads, ensure that you are getting leads – and at CPAs that make for positive ROI. If you campaign isn’t resulting in leads, consider changing your creative or even your audience settings.
If you’re running a regular Display campaign, consider investing in a Dynamic remarketing campaign. This might result in more leads since you’re showing specific products or services.
Try syncing Google Ads to a spreadsheet with Unito
Unito is now offering a Google Ads connector to help you create better, more informative reports. No more wading through all your data on your own. Clicks, conversions, impressions, and more will be pulled into easily digestible marketing report.
Here’s our step-by-step guide to syncing Google Ads and Google Sheets.