How To Set Up a No-Code Salesforce-ServiceNow Integration
This guide will show you how to integrate Salesforce objects and ServiceNow records. With a no-code setup and fully customizable two-way flow, Unito automatically syncs work items between Salesforce and ServiceNow so you can bridge the gap between sales teams, project managers, support teams, and more. Setting up an integration only takes minutes, and each Unito flow supports real-time updates, deep field mappings, and customizable rules.
All you need is an account in Salesforce and ServiceNow with permission to create and edit records and objects. Unito’s two-way integration supports all ServiceNow records and Salesforce objects, but this walkthrough will focus on an ITSM use case. Follow along for instructions on how to sync Salesforce cases and ServiceNow incidents.
In this guide:
- Tools: Salesforce and ServiceNow
- Use cases: Task management, account management, marketing reporting, project management, ticket escalation
- Great for: Project managers, marketing, sales, customer success, RevOps
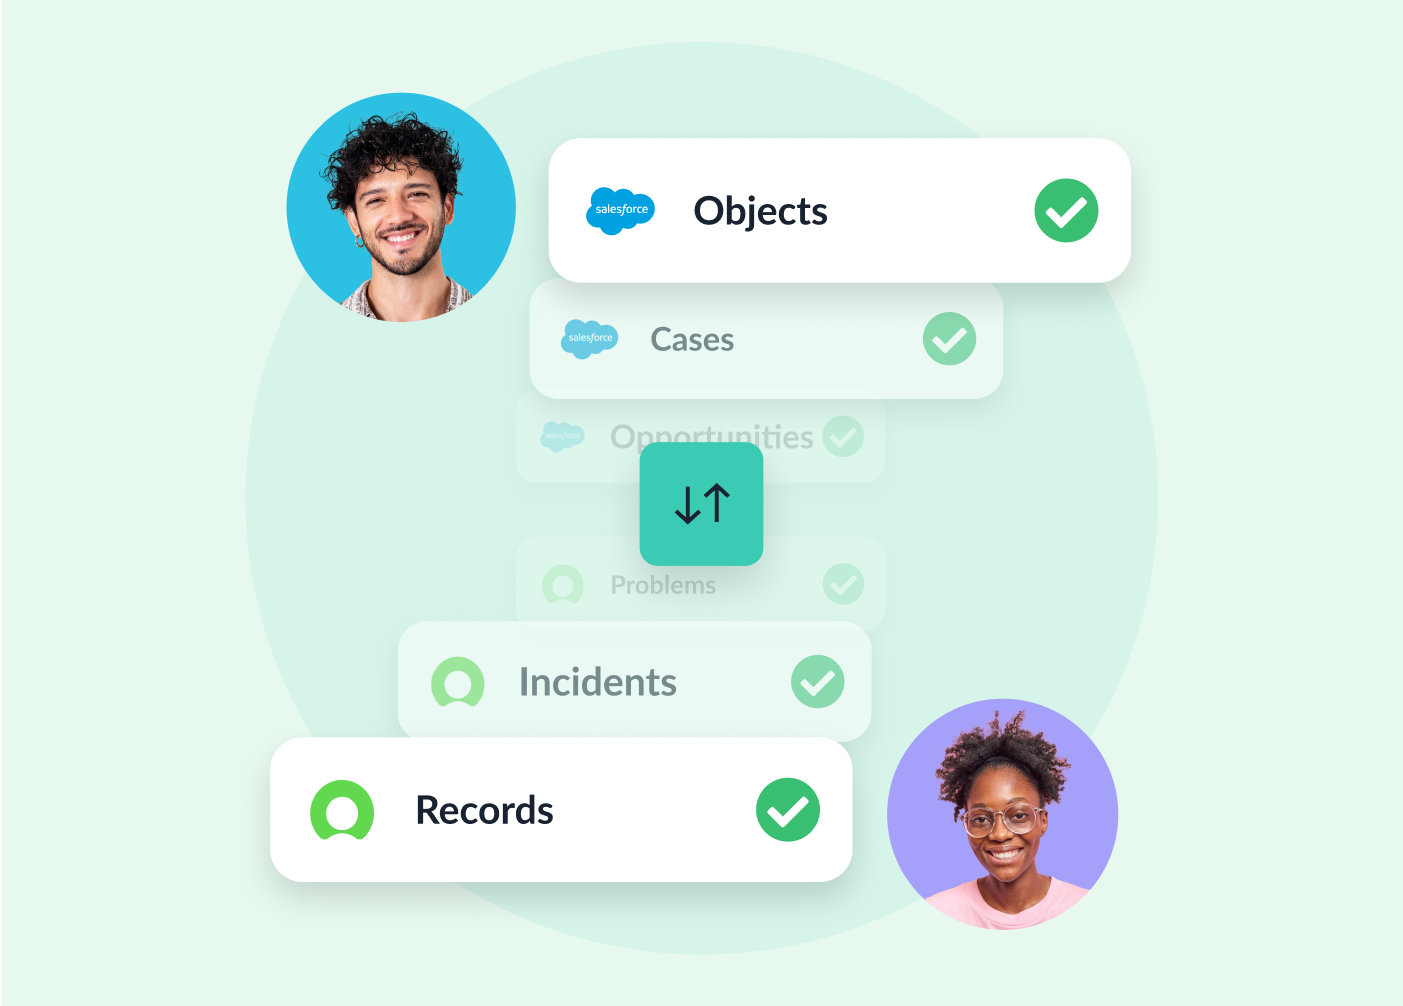
Unito’s two-way sync integration for Salesforce and ServiceNow allows users of any technical background, from product managers to software developers and team leads, to sync Salesforce objects with ServiceNow records. This integration syncs updates back and forth between both tools, creates new work items, and can even automate repetitive actions. This in-depth guide shows you how that’s done.
Need more from your integrations?
Unito Advanced Sync supports both tools mentioned in this walkthrough. Available with enterprise plans, Advanced Sync gives you unparalleled control over your integrations. This includes:
- An updated flow builder, which gives you direct access to all custom and native objects available in a tool’s API.
- Mixed hierarchies support, which syncs parent-child relationships between different work item types.
- Item matching, which identifies and syncs existing work items in another tool instead of creating duplicates.
- Lookups support, which sync non-hierarchical associations like assignees, dropdown fields, dependencies, and related items.
Advanced Sync can support more complex workflows, maintain relationships between different bits of data, handle massive data volume, and master flows that automatically centralize governance across tools.
Want to know more about the differences between Advanced Sync and Unito’s classic flow builder? Check out this guide.
Before you start
Setup in ServiceNow
In order to sync ServiceNow records, you must connect to Unito with a ServiceNow account that has CRUD rights (create, read, update and delete) for the records and tables you plan on syncing.
For example, if this is an ITSM use case, you’ll need an account with the ITIL role in ServiceNow. If you’re not an admin, you can ask your IT department’s ServiceNow admin to create a service account for you with the right permissions.
Connecting ServiceNow to Unito for the first time
You’ll need a ServiceNow admin to connect your account to Unito. From there, you’ll have two options: connecting by OAuth 2.0 or with your username and password. Here’s our guide to connecting by OAuth 2.0.
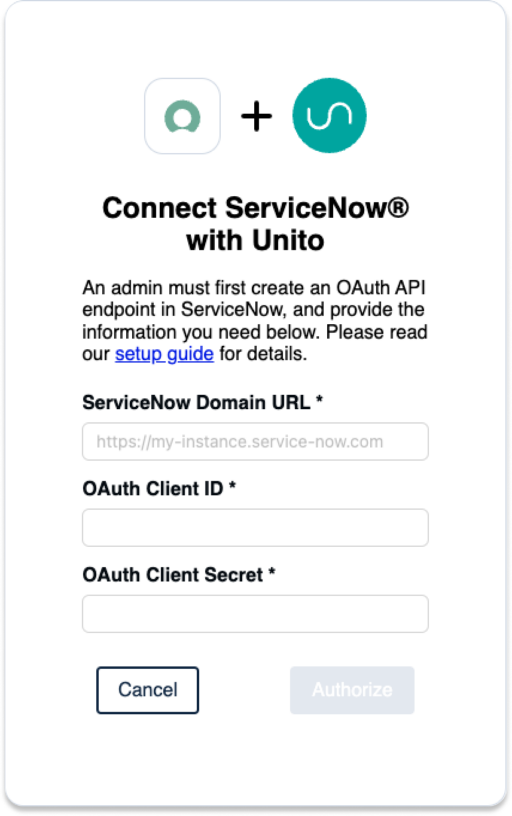
Make sure to have on-hand the following information:
- ServiceNow Domain URL: https://INSTANCENAME.service-now.com
- OAuth 2.0: An OAuth Client ID and Secret
- Username: Your ServiceNow username and password
Connect to Unito with a new ServiceNow account
Some ServiceNow instances require newly created users to change their password immediately upon login. If you’re using a new ServiceNow account to connect Unito, this can disrupt the authentication process by the forced password change.
Make sure that account has CRUD access to the same records and tables you plan on syncing.
One of the best ways to ensure you have an account with the right permissions is to create a ServiceNow Service account.
Here’s how to set up a service account with the right permissions (click to expand):
You’ll also need to disable the password reset flag on any new account or reset the password before connecting to Unito. Here’s how you can disable the password reset flag in ServiceNow:
- Log in to your ServiceNow instance as an administrator.
- Navigate to the User Administration > Users section.
- Locate the user account that you’ll be using for the Unito integration.
- On the user record, set Password needs reset to false.
- Save the changes.

Step 1: Connect ServiceNow and Salesforce to Unito
- Sign up for Unito if you haven’t already!
- Navigate to the Unito App and select +Create Flow.
- Select Start Here to connect ServiceNow and Salesforce.
- Then +Choose account for each tool and complete the authorization process.
- Select a specific type of Salesforce object to include in your flow.
- Click Confirm.
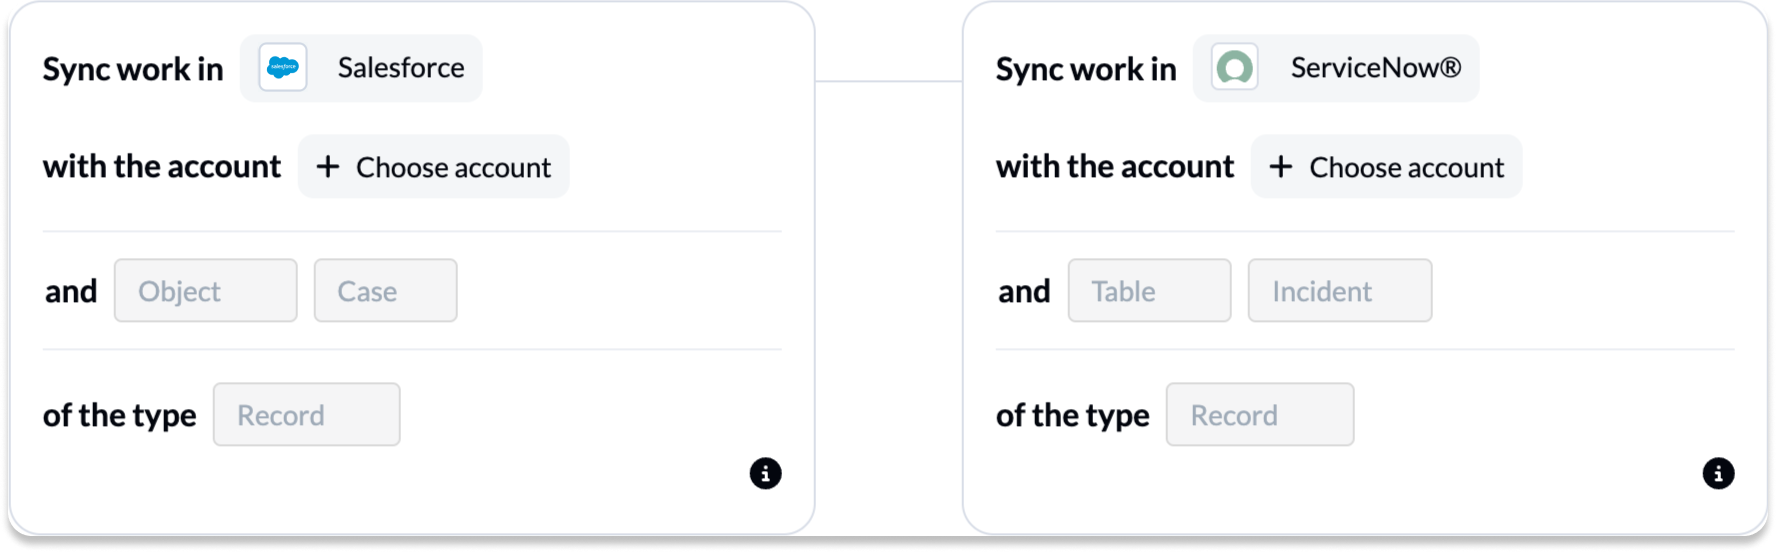
Choose a Salesforce object to sync
Unito can support any Salesforce object including standard and custom objects. But each flow can only sync one object at a time (e.g., tasks, cases, opportunities, etc.). In our demo, we’ve chosen cases – so all Salesforce records of that object type will sync to ServiceNow as newly created incidents.
Here’s more information about connecting tools to Unito for the first time.
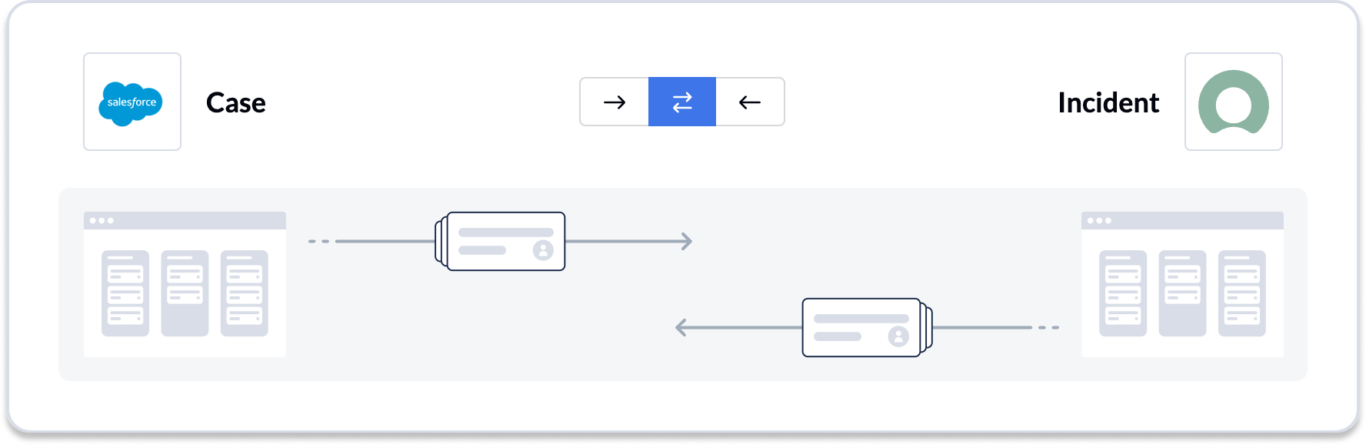
Step 2: Choose flow direction
With flow direction, you determine where Unito automatically creates work items to match the ones you create manually in either tool. You have three flow direction options:
- 2-way: Both Salesforce objects and ServiceNow records are automatically created by your Unito flow to match the items you create manually in each tool.
- 1-way from Salesforce to ServiceNow: ServiceNow records will be automatically created by Unito to match the Salesforce objects you create manually. Unito won’t create new Salesforce objects.
- 1-way from ServiceNow to Salesforce: Salesforce objects will be automatically created by Unito to match the ServiceNow records you create manually. Unito won’t create new ServiceNow records.
Select Confirm when you’ve chosen a flow direction.
Learn more about flow direction.
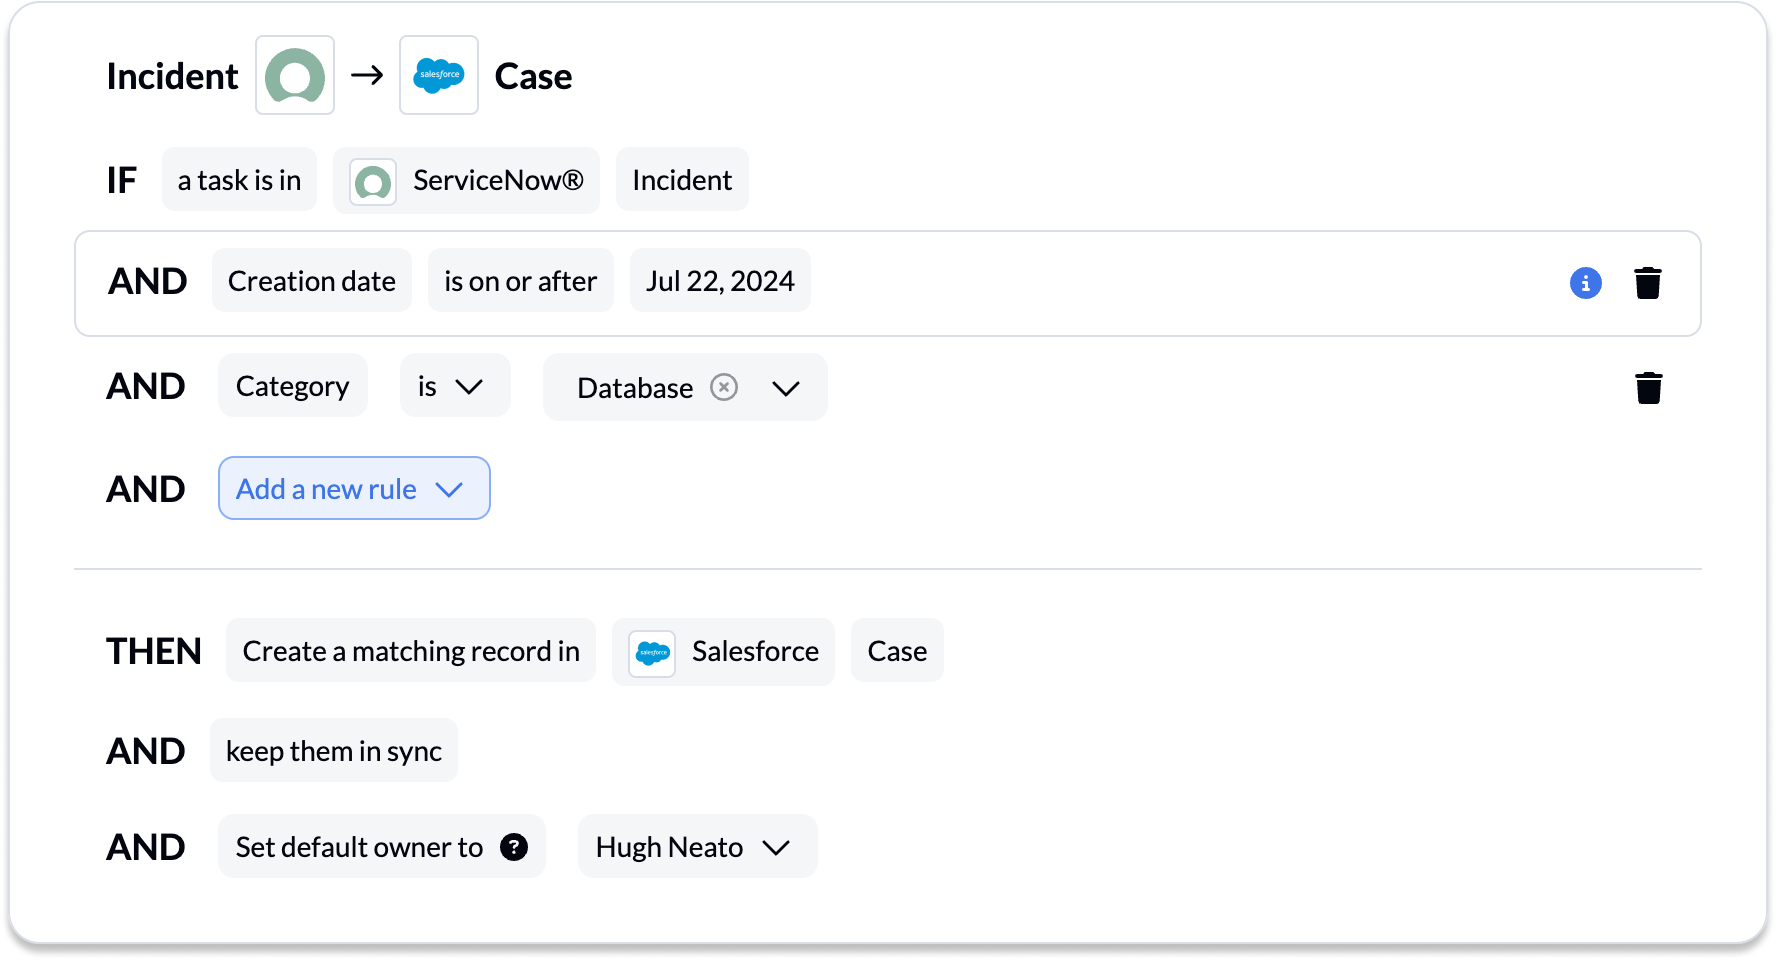
Step 3: Set rules to keep specific records and objects in sync
Unito rules can do two things:
- Filter out work items you don’t want synced. For example, you could create a rule that only syncs Salesforce opportunities with a specific lead source.
- Automate certain actions. For example, you could create a rule that automatically assigns new ServiceNow records to a specific person on your team.
Select Add a new rule to begin setting your rules.
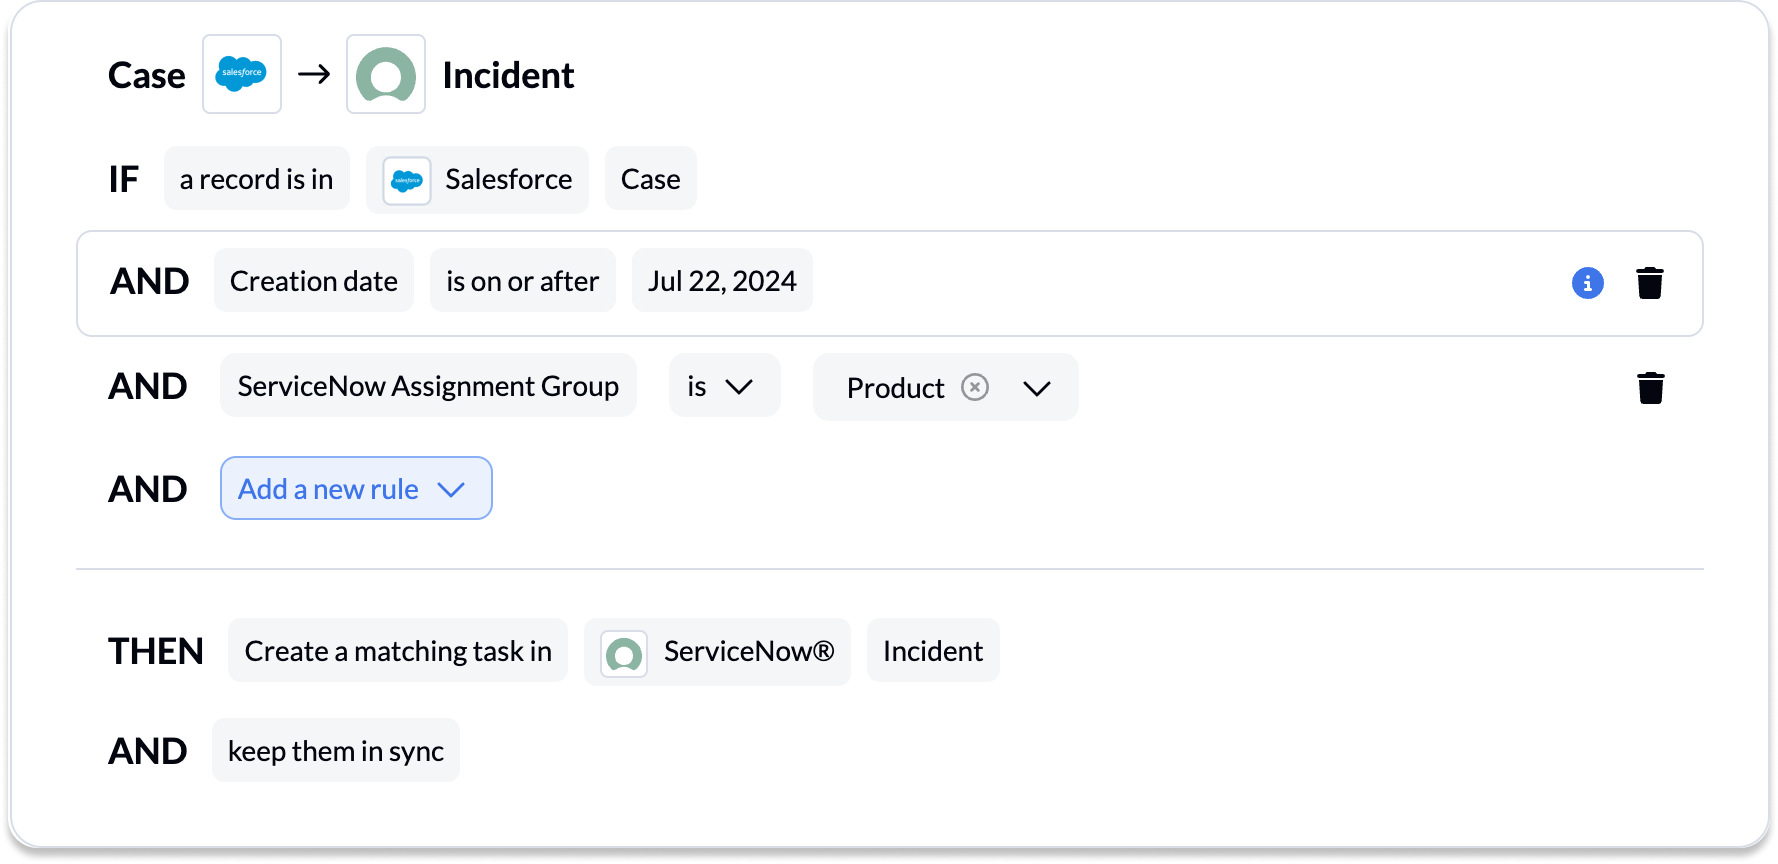
If you chose a 2-way flow direction in the previous step, you’ll need to set two pairs of rules: one for each direction.
Find out more about setting rules. Here’s information about Unito’s default rules.

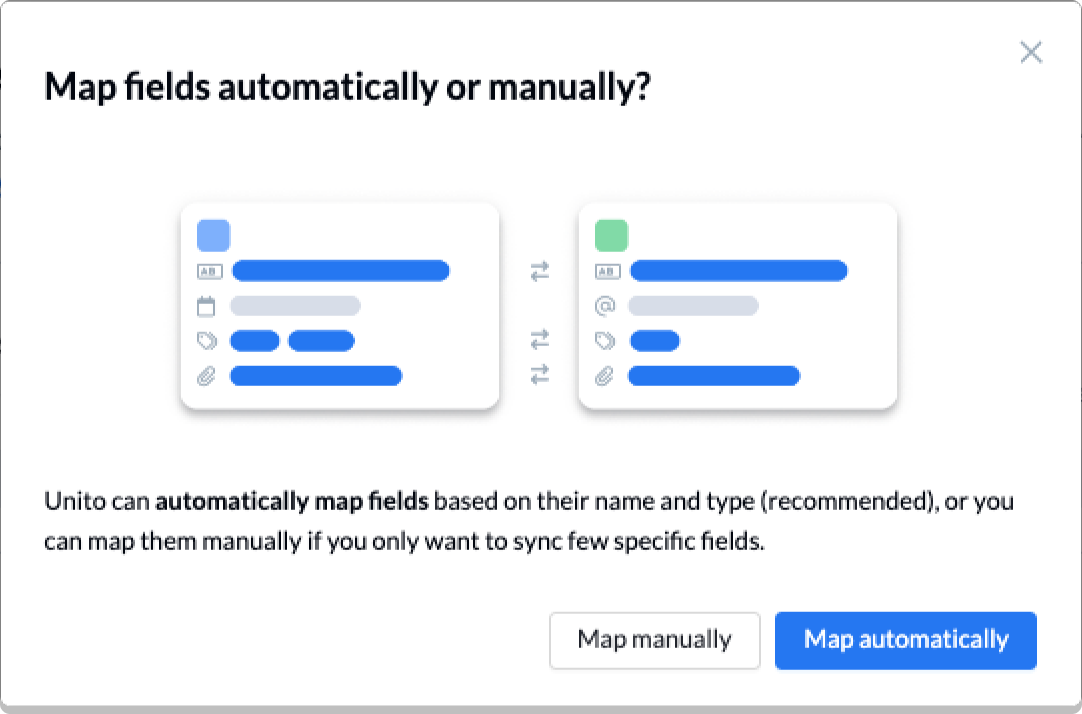
Step 4: Map fields between Salesforce and ServiceNow
Next, you can set individual relationships between fields in Salesforce and ServiceNow. Most fields can be assigned their own sync direction which determines how real-time updates occur.
But first, you can select Map automatically to begin your field mapping table with a prebuilt template.
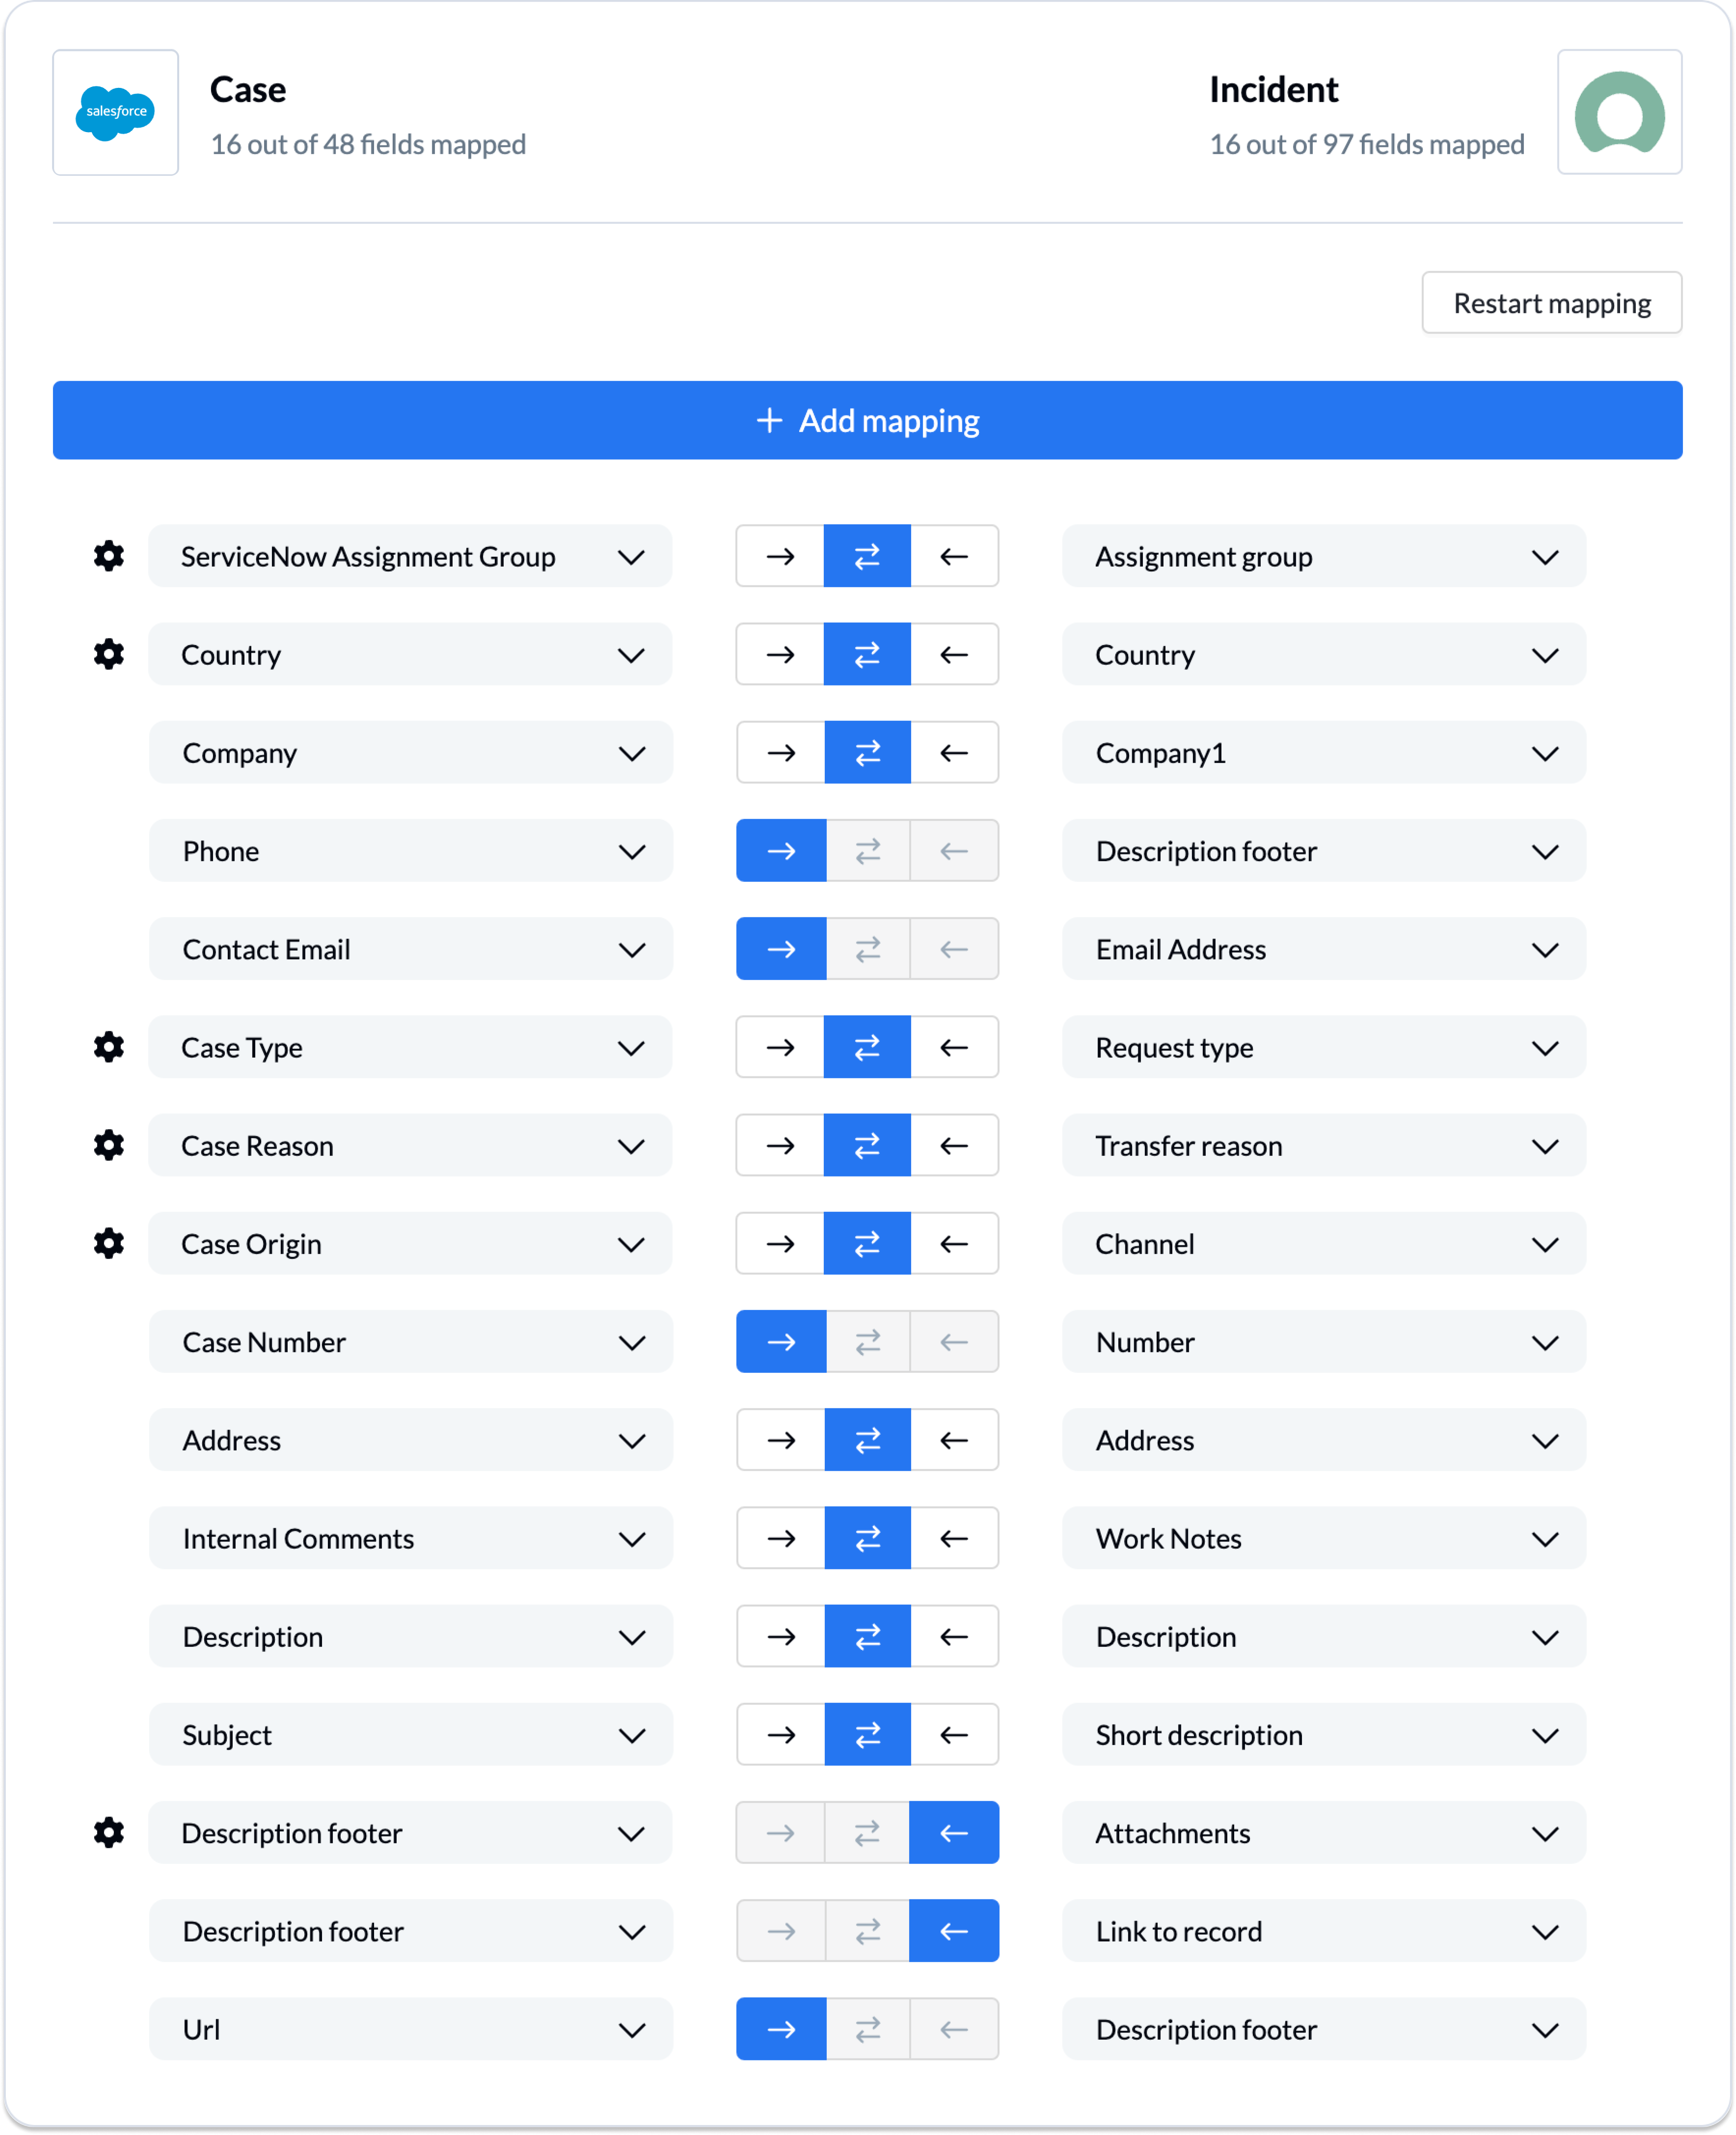
How to add field mappings in Unito
- Click + Add mapping to add additional fields to be synced.
- Then, Select a field for each tool, and find the appropriate field to map.
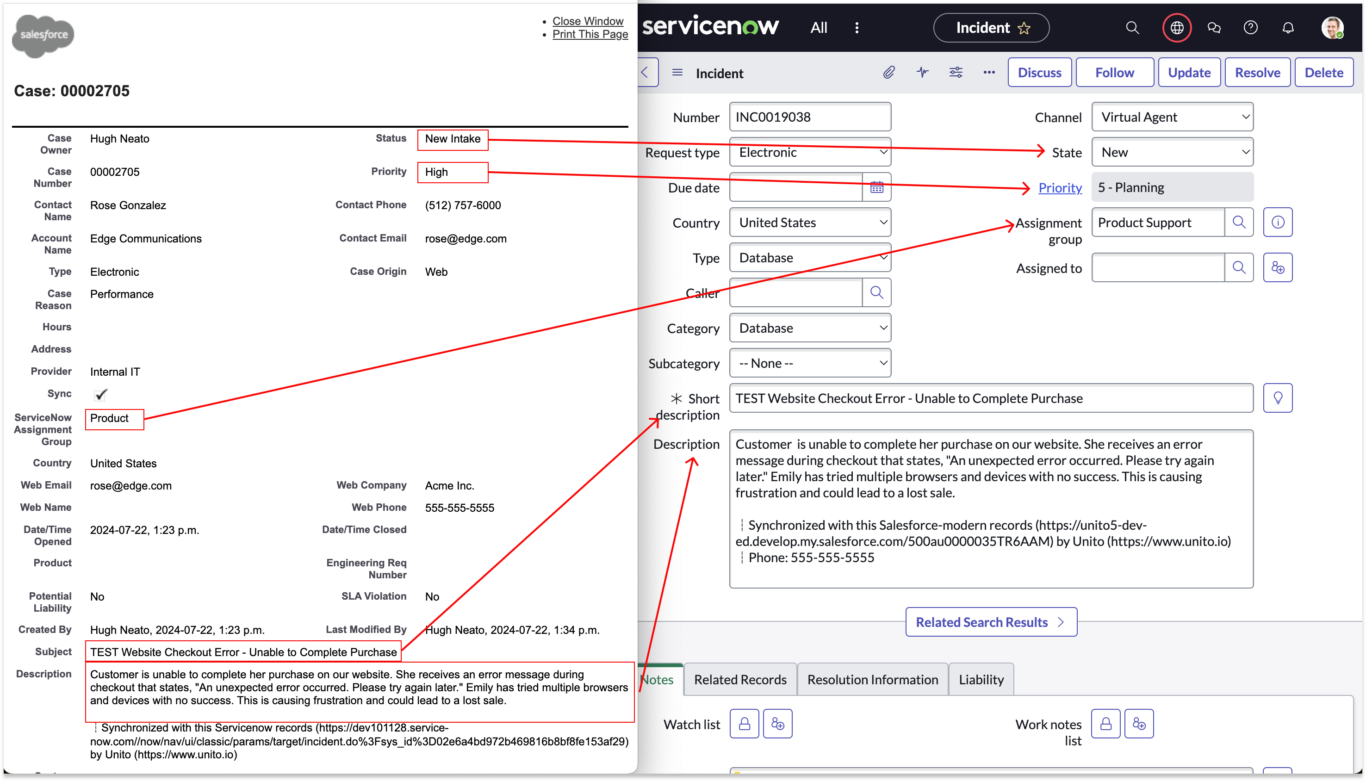
Here is our demo’s completed set of field mappings:
Configuring field values in Salesforce and ServiceNow
A gear icon beside a pair of fields indicates more options for configuration. Usually that includes choice, list, or picklist fields in Salesforce and ServiceNow.
In the example below, clicking +Add more Case Origin & Channel allows us to include the multiple options available in each field and match them in the other tool.

NOTE: If you’re syncing statuses, be sure to add every relevant status option for your Smartsheet row and Salesforce records. Here’s an overview of status syncing in Unito.
Click Confirm when you’re satisfied with your field mappings to proceed.
Learn more about Field Mappings
Step 5: Launch your Salesforce ServiceNow integration
The only thing left to do is decide whether or not to sync historical work items. You can make this decision from your flow’s overview page, or edit your rules as mentioned above.
And that’s it! You’ve just completed a flow between Salesforce and ServiceNow. Congratulations!
If you’ve followed the steps above, your flow will now:
- Create a ServiceNow incident based on specific Salesforce cases;
- Create Salesforce cases based on specific ServiceNow incidents;
- Keep synced cases and incidents current in real-time with 2-way updates.
If you have any questions, don’t hesitate to reach out and let us know.
Ready to optimize your support workflow?
Meet with our team to see what Unito can do for your workflows.

What’s next after you sync ServiceNow and Salesforce with Unito?
- Learn how to duplicate this flow for additional use cases
- Read an overview of Unito’s ServiceNow integration
- How does Unito stack up against ServiceNow Integration Hub?
- How to run a ServiceNow export to Microsoft Excel or ServiceNow to Google Sheets.
- Or if you found this guide useful, you can find similar articles on how to sync:
- Salesforce and Asana
- Salesforce and Smartsheet
- Salesforce and Jira
- Salesforce to Wrike
- Salesforce and Google Sheets
- Salesforce and monday.com
- Salesforce and Trello
- ServiceNow to Jira Service Management
- ServiceNow to Azure DevOps
- ServiceNow and monday.com
- ServiceNow with Google Sheets
- Smartsheet and Salesforce
- ServiceNow and Smartsheet
Frequently asked questions: Salesforce-ServiceNow integration
Is Unito a one-way or two-way integration?
Unito supports both one-way and two-way integrations. Unito’s two-way integrations allow data to flow seamlessly back and forth between tools, in real-time, enabling true cross-tool collaboration as teams work in their own tool without sacrificing any data. That said, some workflows benefit more from a one-way integration, which only creates new work items in one tool.
All Unito integrations can also be customized to create work items in one direction but update them in both directions.
Do I need to know how to code to set up this integration?
Unito’s integrations are no-code, meaning you don’t need any technical knowledge to set them up. Unito’s drag-and-drop interface allows you to build even complex workflows without looping in a developer.
How long does it take to set up this integration?
Most Unito users set up their first integration in a day or less. Even complex integration can be set up in days, rather than the weeks or months other integration solutions require.
How quickly do changes sync between Salesforce and ServiceNow?
Unito’s Salesforce-ServiceNow integration can sync changes as quickly as five minutes after they’re made.
What are the benefits of Unito’s 2-way integration?
Unito’s two-way Salesforce-ServiceNow integration has the following benefits:
- Improved communication: Unito integrations close the gaps between tools, meaning any comments left in Salesforce are synced over to ServiceNow, and vice-versa. Whether you’re escalating tickets from Salesforce to ServiceNow or sharing development updates for sales deals, Unito automatically syncs everything over. No need to rely on chat apps or lengthy email chains.
- Increased productivity: Working across tools often involves manually copying and pasting information between them or working with incomplete context. Unito’s integration eliminates that administrative work while ensuring everyone can work at their best from their own tool.
- Enhanced collaboration: Unito integrations put all the data from all your tools at everyone’s fingertips. That unlocks new opportunities for collaborative workflows, and everyone in your organization will benefit.
What workflows does Unito’s Salesforce-ServiceNow integration support?
Unito’s Salesforce-ServiceNow integration supports any workflow, including the following:
- Ticket Escalation
- Software Development
- Project Management
- AI Agent Integration
- Time Tracking and Billing
- Record Syncing
What fields does Unito’s Salesforce-ServiceNow integration sync?
Unito can sync all native and custom fields in Salesforce objects, like cases, tasks, and deals. Many of these fields can also be used to filter data.
Unito’s ServiceNow integration can sync nearly every field, and any that aren’t supported by default can be activated with a custom configuration.