
How to Export a Salesforce Report to Excel (2 Methods)
Running reports is a tiresome, repetitive task. Pulling data, formatting it, and syncing everything in one single Excel file takes time. Even when the tools we use have their own reporting systems, formal reports are typically submitted in a different format.
Thankfully, if you work with Salesforce, there are easy ways to pull reports and sync data. While Salesforce has a built-in system for downloading reports, Unito can help amp up your process. Keep reading to learn more about how to export a Salesforce report to Excel, and how to create automatic syncs between both tools.
First method: export a Salesforce report to Excel manually
Knowing how to export a Salesforce report to Excel is simple, but before you get started you need to ensure you have the correct user permissions. Check with your administrator and have them enable “Export Reports” for your Salesforce account.
Once your permissions are set, you can follow these simple steps to export Salesforce reports to Excel automatically:
Step 1: From the “Sales Console” page, click the drop-down icon and select “Reports.” On this page, you’ll see a list of all active and available reports. Each report will be listed as an individual line item.
Step 2: On the far-right side of each line, you’ll see another drop-down icon. Click on this icon for the report you want to export, and then select “Export.”
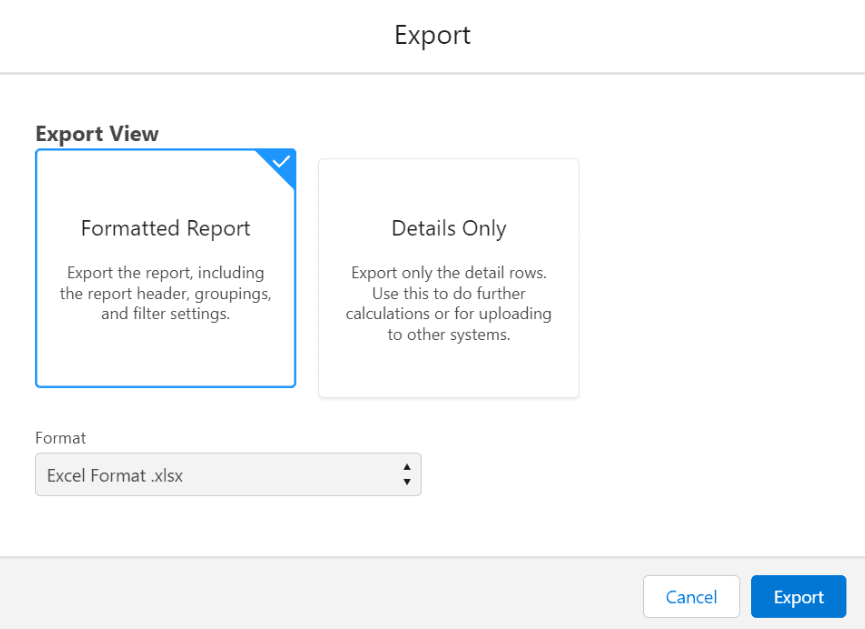
Here, you can pick between a Formatted Report or a Details Only Report:
- Formatted reports will include headers, groupings, and filter settings, and can only be exported as .xlsx files.
- Details only reports will have no formatting and can be exported as .xls, .xlsx, or .csv files. This is helpful if you plan on manipulating data later in Excel using custom formulas, or want to use the data to create charts, graphs, or pivot tables.
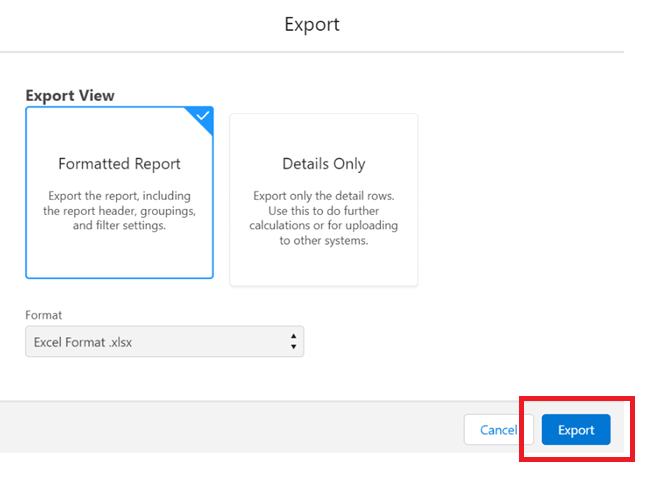
Step 3: Once you select the type of report you want, click the blue “Export” button in the bottom right-hand corner.
There you go — in three simple steps you can export Salesforce data to Excel automatically!
Limitations of this method
While exporting reports from Salesforce to Excel is simple, there are some limitations to this built-in method.
- It’s a manual task: This method requires someone to manually export the reports from Salesforce every single time. This will eat up a lot of precious time and resources for that person.
- Data may be out of date: After exporting a Salesforce report to Excel, the data stays as-is. Since it’s being exported manually, it won’t update, and you won’t be able to tell if you have the most recent information. If you’ve spent all week putting together a report and then need to make a last-minute change, you’ll need to do another manual update to get the latest data. There’s no automation with this method, which can be inconvenient.
- Human error: Every manual task runs the risk of human error. You might export the wrong report and then have to start over, or accidentally format the data incorrectly once it’s in Excel.
- Security: Data recorded in Salesforce is secure, but exported data in an Excel spreadsheet loses that protection. You’ll need to ensure any sensitive information is kept secure.
“Some other tools we looked at were kind of crazy when it came to pricing. Another big thing for us is 2-way sync for our Salesforce instance. Most of those options only offer directional sync and Unito is bidirectional, which is what we really needed. Plus they offered the best pricing for us at this stage.”
– Anel Behric, IT Manager, Cloudwerx
Second method: export a Salesforce report to Excel automatically with Unito
While Salesforce offers its built-in method mentioned above, Unito boasts powerful integrations that will keep all your Salesforce objects (custom and standard) updated with real-time, 2-way updates for your whole team.
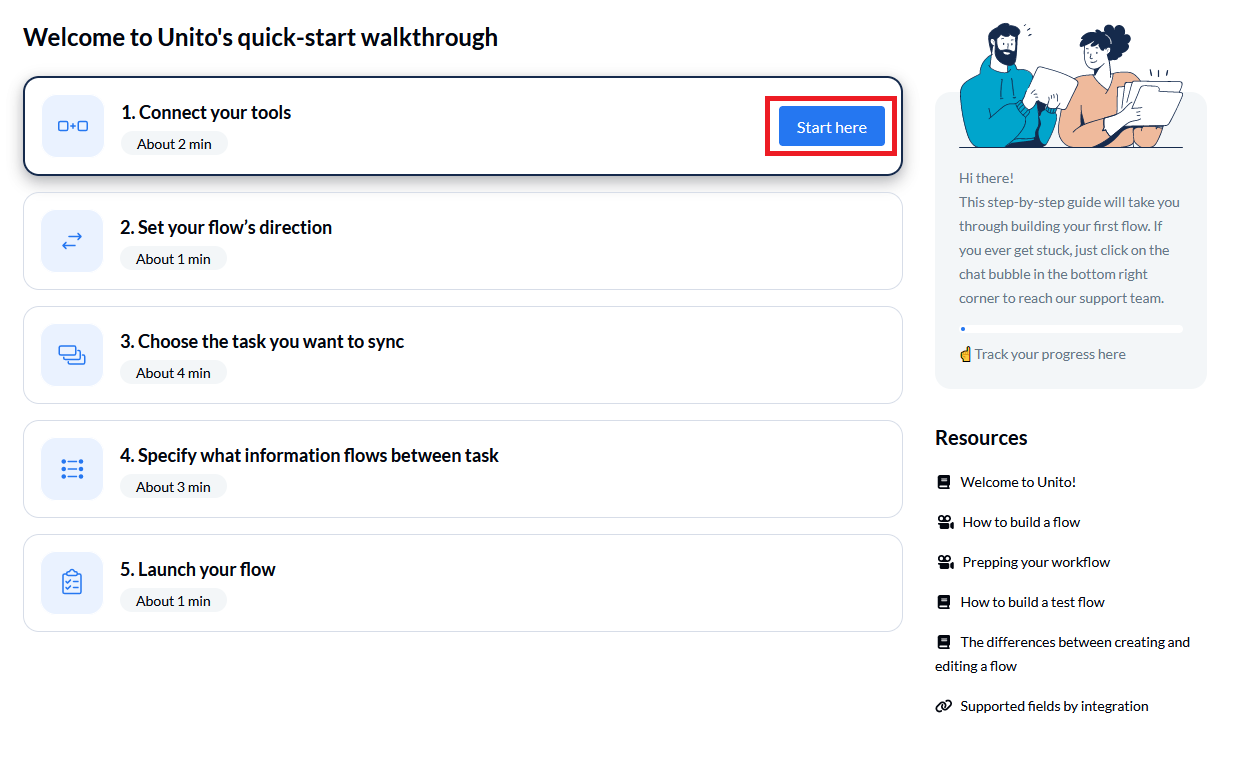
All you need to do to get started is set up a new workflow in Unito. Here’s how:
Step 1: Sign in to your Unito account (or sign up if you don’t have one yet!).

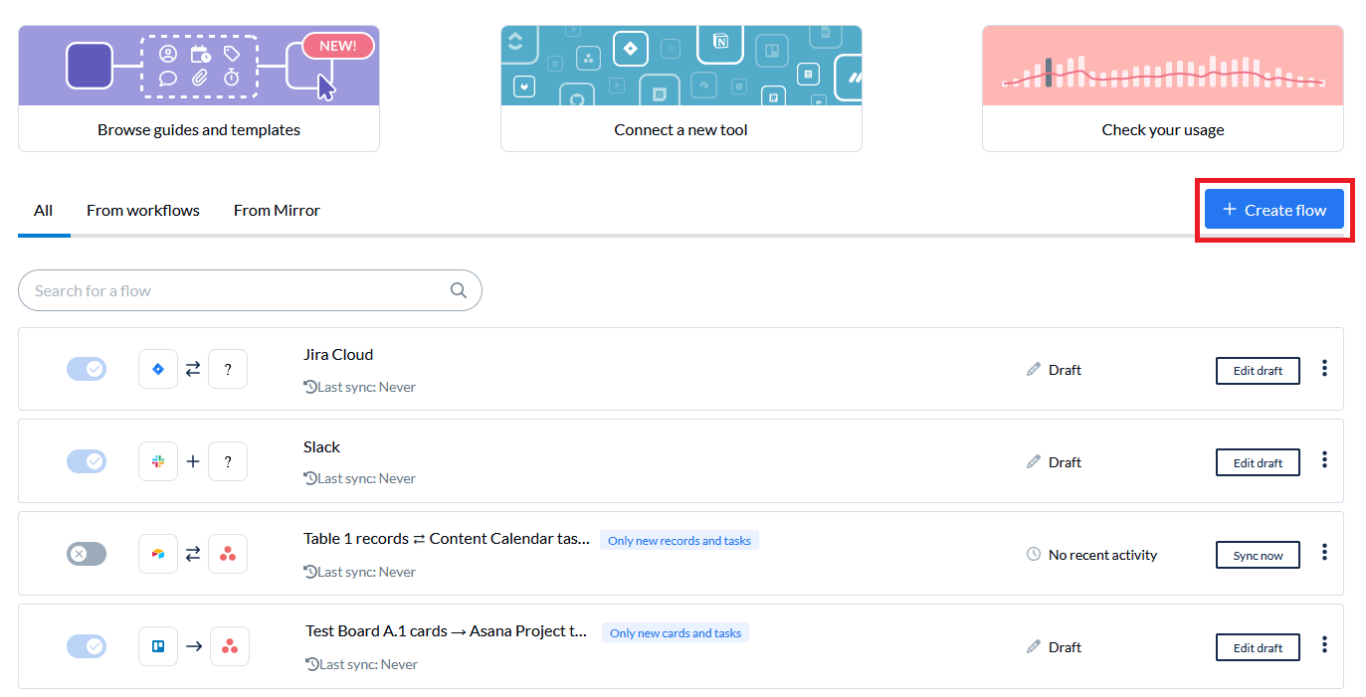
Step 2: On the dashboard click + Create flow and then select the blue “Start here” button.
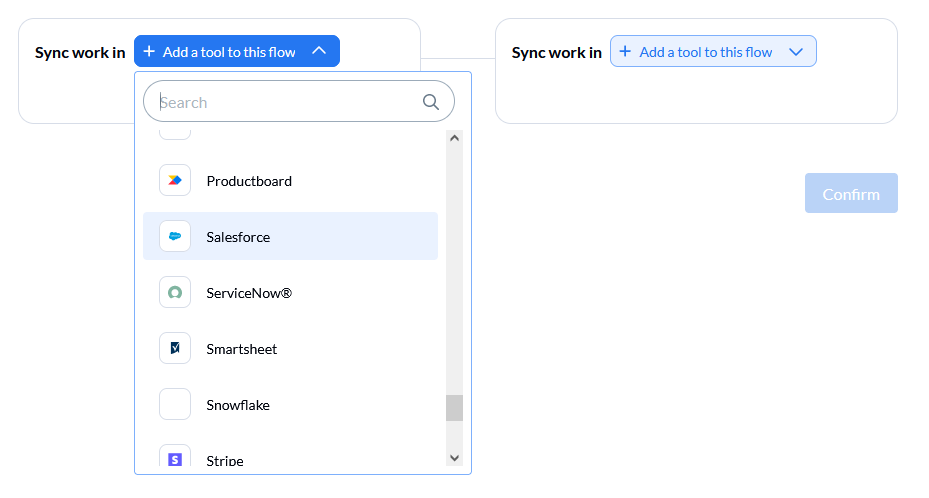
Step 3: Select the tools you want to sync. Then, click Add a tool to this flow and search for Salesforce. Then, connect your Salesforce account to Unito and choose an object type to sync.
Step 4: Follow the same steps for Excel (or another tool).

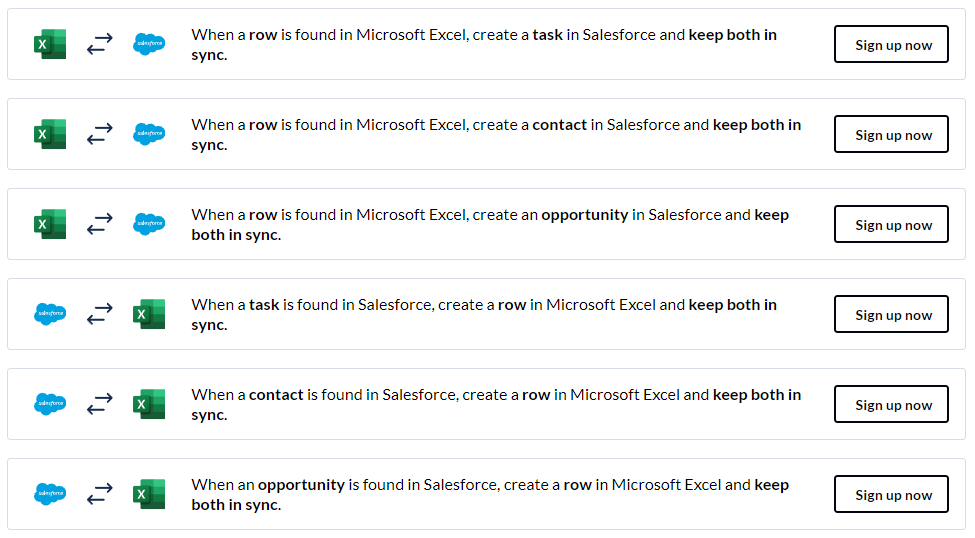
When you’re setting up your workflow, you can also pick a 1-way flow (creating Salesforce objects based on Excel rows or adding Excel rows linked to Salesforce objects) or 2-way flow (to create and sync data from Salesforce to Excel, and Excel back to Salesforce) depending on your needs.
There are also more advanced options for custom rules and individual fields that can be synced, as well as field mappings and additional configurations.
Step 5: Once everything is selected, click on the blue Confirm button in the bottom right-hand corner.
Setting up a new workflow is straightforward and simple – anyone can do it! Unito also offers support if you run into any issues.
Why Unito is the best solution
Over 50,000 users across the globe have chosen Unito to help them keep work synced between teams. Here are some of the reasons why people love it:
- Automatic updates: Say goodbye to manually pulling reports and synchronizing data – Unito will automatically update exported data from Salesforce for you! And with proper formatting in Excel, you can turn raw data into detailed reports for any kind of reporting.
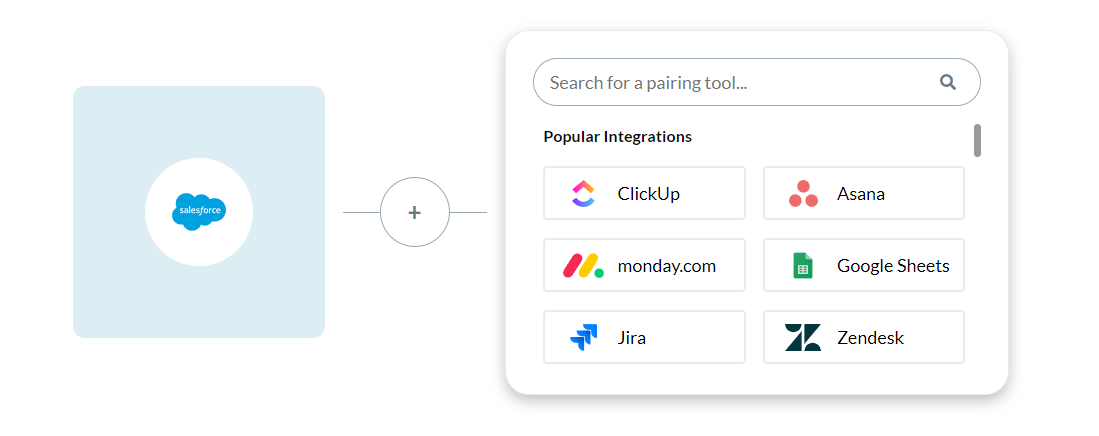
- Configuration: You can configure each Unito flow to fit your specific needs. You can pair Excel and Salesforce and integrate with other tools such as ServiceNow, monday.com, Wrike, and more. If you prefer Google Sheets over Excel, Unito can help you integrate that with Salesforce too.
- Historical data flows: Want historical data included in your integrations? No problem! When setting up your workflow you can indicate how much, or how little, data to sync.
- 2-way sync: Data can easily flow from Salesforce to Excel and vice versa. Gone are the days of updating multiple tools with the same change — Unito will do this boring work for you.
- Sign up for free: If you’re still not convinced, you can sign up for a 14-day free trial to test out Unito and see if it’s the right fit.
You can learn more about Unito’s two-way integration for Salesforce here.

How to install the Unito add-in for Excel
To start using Unito to pull data from Excel, you can either get the Unito add-in for Excel in your browser or follow these steps:
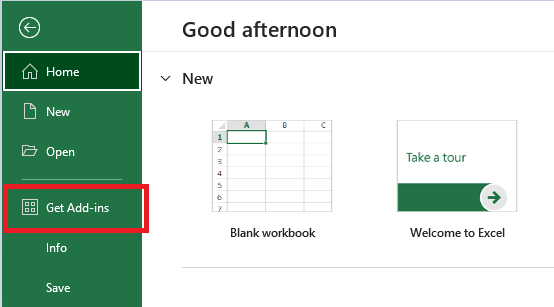
Step 1: At the top of Excel, click “File” and then select “Get Add-ins.”
Step 2: In the search bar, type “Unito” and hit enter. “Unito for Excel” will come up in the results.
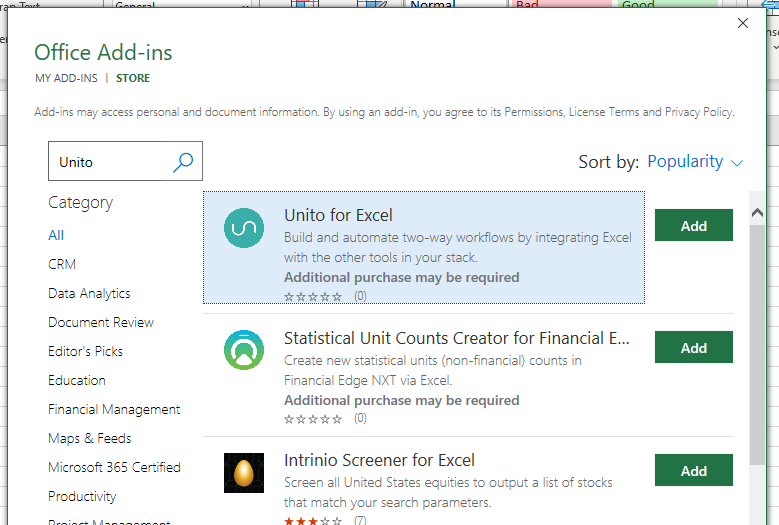
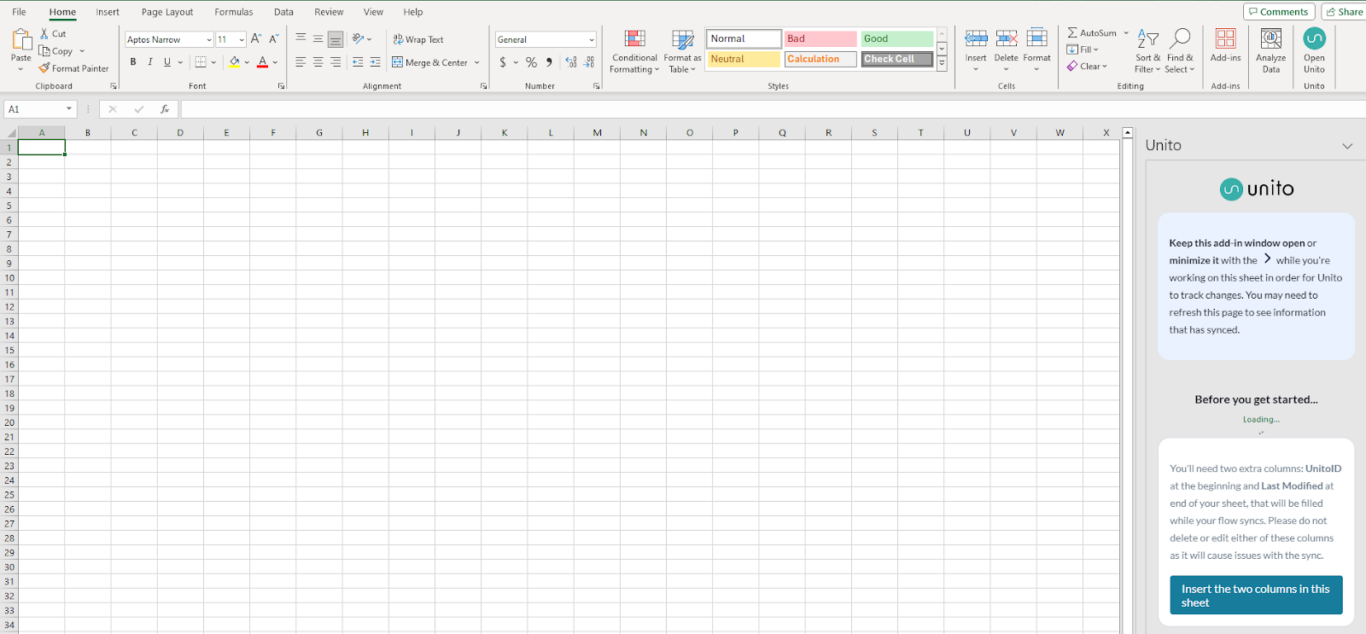
Step 3: Click “Add” and then continue to accept the terms and conditions. Now the add-in will appear on the right-hand side of your workbook to use.
More information on how to use the Unito Excel add-in can be found here.
Looking for other ways to integrate Salesforce?
Here are some of our other in-depth guides to integrating Salesforce with other tools using Unito:
- Syncing Salesforce and monday.com
- Integrating Salesforce with Trello
- Syncing Wrike and Salesforce
- Integrating Salesforce and Google Sheets
FAQ: Export a Salesforce report to Excel
Can you export a report from Salesforce to Excel?
Yes, you can export Salesforce reports to Excel in one of two ways:
- Using Salesforce’s built-in exporter, which allows you to export reports in .xls, .xlsx, and .csv formats. These can then be opened and managed in Excel. Note that with this method, reports will quickly become outdated.
- Using Unito’s 2-way sync integration, which will automatically create rows in an Excel spreadsheet to match work items in Salesforce. It will also update everything in Salesforce and Excel automatically as you work.
How do I get data from Salesforce to Excel?
When exporting data from Salesforce reports to Excel, you can use one of the following methods:
- Salesforce’s built-in exporter: As long as you have the right user permissions, you can use built-in features to export Salesforce reports as files you can open in Excel.
- Automation tools: Platforms like Zapier and Mulesoft allow you to set up automations that push data from Salesforce to Excel as you create new work items. You can also set up automations that update simple fields, but you’ll still have to do most of the updating manually unless you spend extra time setting up complex automation chains.
- 2-way sync platforms: Tools like Unito create two-way relationships between work items in Salesforce and rows in Excel spreadsheets. That keeps your reports automatically updated in both tools without any extra manual work.
Can you automatically export a Salesforce report to Excel?
While Salesforce allows you to export Salesforce reports to Excel, you have to do this manually. If you want to automate this, you’ll need to use third-party tools. Platforms like Zapier and Mulesoft allow you to automatically push Salesforce data to Excel with a scheduled export, but they won’t keep that data up to date.
A 2-way sync platform like Unito will both automatically export Salesforce reports and keep them up to date.