How To Use Data Validation in Google Sheets
You know the phrase “one bad apple can spoil the whole bunch”? The same is true for data. If you’ve ever worked in Google Sheets or Microsoft Excel, you understand firsthand that a single error or inconsistency in your data can have a domino effect — impacting the integrity of an entire dataset and your results. This is where data validation can help.
In this post, we’ll explain what data validation is, explore the benefits and importance of data validation, walk you through how to use it effectively in Google Sheets, and provide examples throughout to showcase its practical applications and use cases. Let’s get started.
What is data validation in Google Sheets?
Data validation lets you set established rules and criteria for the kind of data that can be inputted into specified cells in a Google Sheet. When somebody adds invalid data to the Sheet, they’ll either receive an error or warning message or have their input that doesn’t adhere to the set criteria or parameters rejected.
For example, imagine you’re a sales team manager who is using Google Sheets to report on team member performance. If you have a column for “value of monthly closed deals” you could use data validation to make sure the values are realistic and accurate by setting criteria that only allow numerical values between $0 and $15,000 to be inputted.
This helps prevent and flag errors such as if your imported data contains typos (such as an extra 0 on an amount) or if somebody submitted their results in written-out word format rather than numerically. By catching these errors, data validation helps ensure your results are as accurate as possible.
Some examples of data elements that can be added or specified include:
- Cell content: Determine whether the cell should contain numerical data, text, dates, email addresses, times, or other formats
- Data ranges: As in the example above, you can set an acceptable range of values, such as minimum and maximum values, a specific list of items, or values from a range or another sheet
- Date and Time: Make sure that the data inputted is a valid date and time
- Dropdown menus: Allows you to add preset multiple-choice options to your Sheet
- Checklists: Lets you add checkboxes to specified cells
- Custom formulas: Enables you to set criteria and apply custom formulas and functions to certain cells
Why is data validation important?
Your Google Sheets are only as good as the data you fill them with. If your data is incorrect, inconsistent, or not formatted correctly, it can negatively impact your entire workflow and undermine the reliability of your analyses and decision-making processes. Bad or insufficient data can result in misleading insights, flawed conclusions, and costly mistakes — making it difficult to trust the results gained from your Google Sheets.
For example, imagine working on a project in Google Sheets only to discover at the end that your data set was skewed by one or more pieces of incorrect or irrelevant data. You’d have to go back through all data added to your sheet through data integration to not only manually find the offending Google Sheet cell(s) but double-check all of your data to make sure there aren’t additional pieces also affecting your results. Not exactly a great use of your time.
When you use data validation, you can ensure the accuracy and integrity of your data by setting clear guidelines and constraints for data entry, eliminating errors, and maintaining data consistency. It acts as a safeguard, allowing you to establish rules and parameters that enforce data quality standards — something that’s especially important when sharing Sheets with others across your organization or externally.
How to use data validation in Google Sheets
While there are a few different ways you can use data validation in Google Sheets, we’re going to start with the basic foundations. Here’s how to get started:
Setting up basic data validation
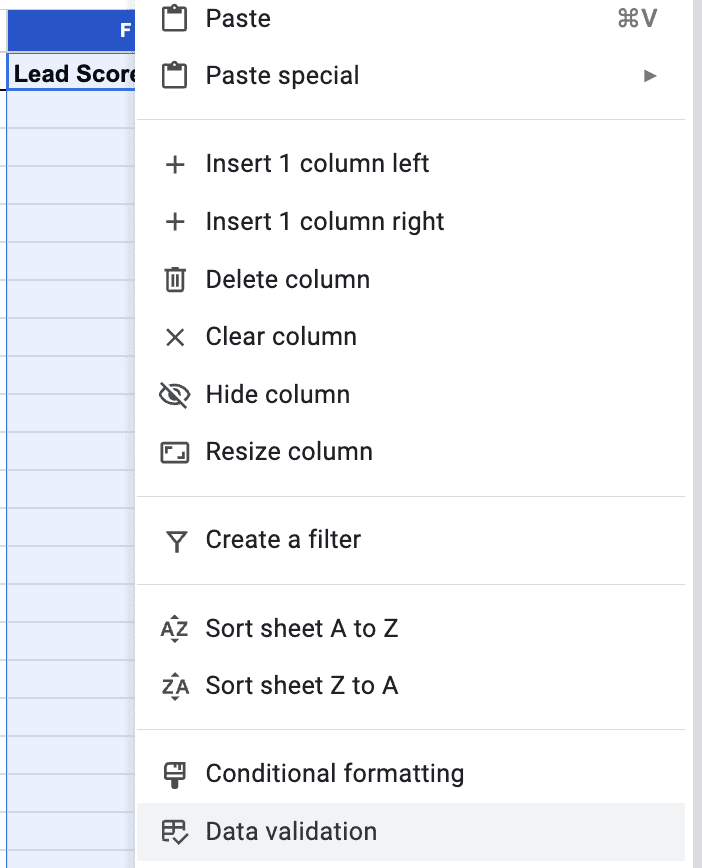
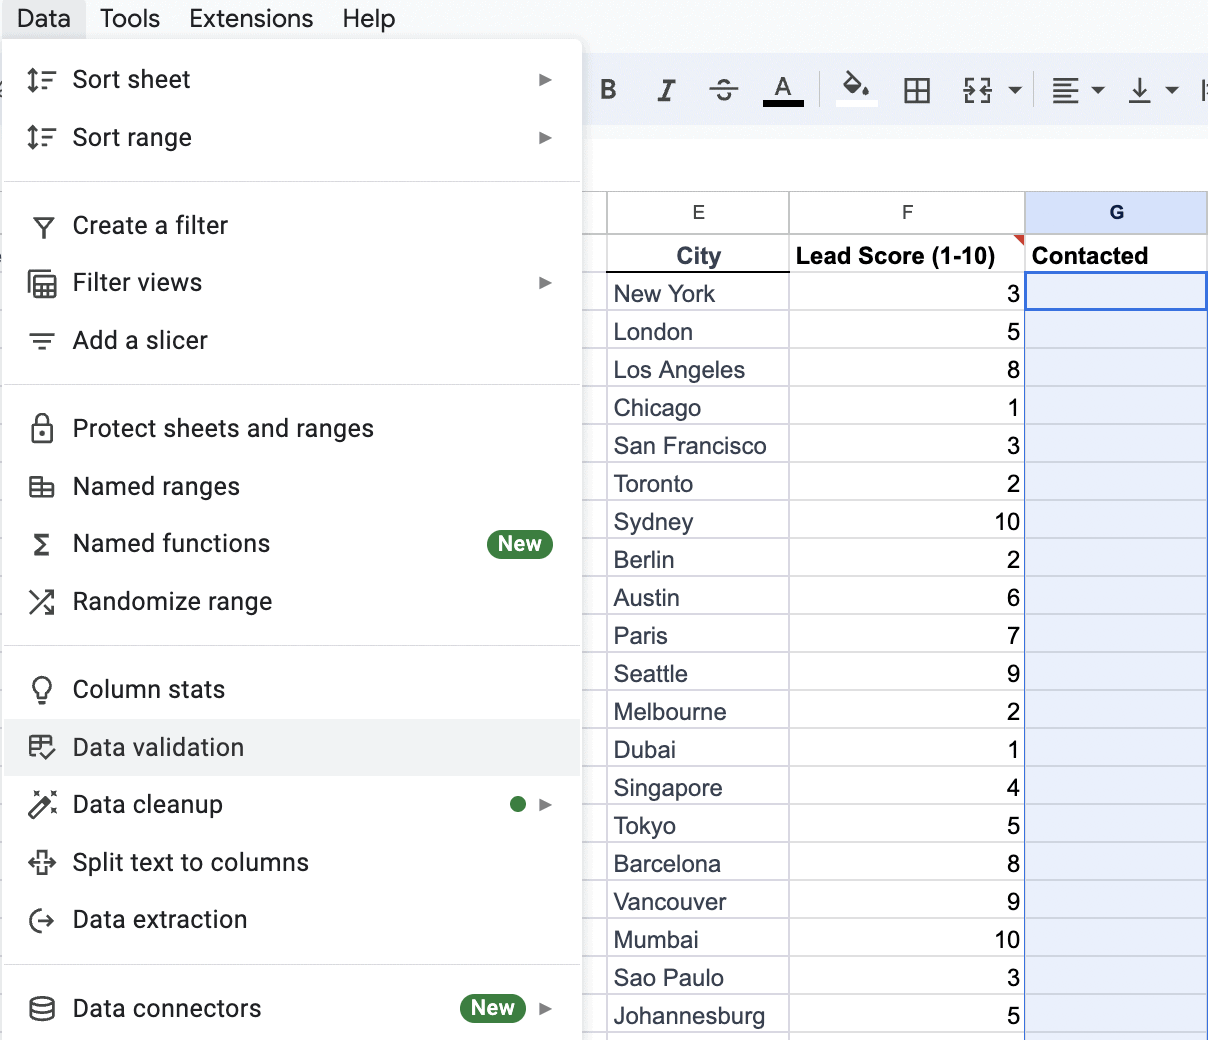
Step 1: Open your desired Google Sheet and navigate to the cell or range where you want to apply your rules or parameters. Right-click the top of your column (column “A” in this example) and select “Data validation” from the list of options.
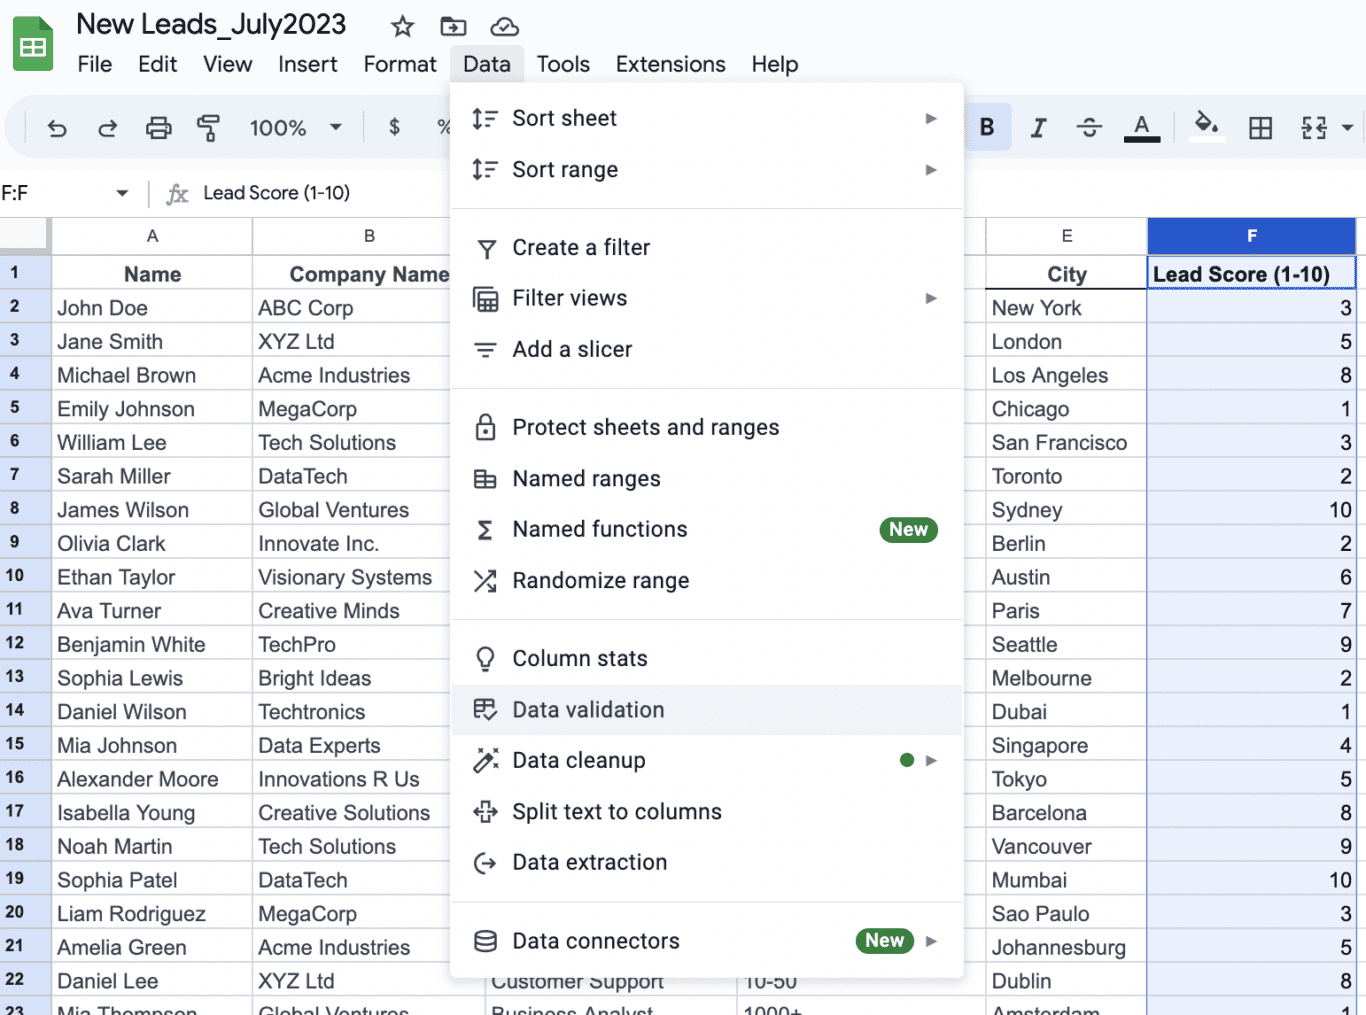
Alternatively, you can also click the top of the column, click “Data” from the menu bar, and select “Data validation” from that drop-down menu.
Step 2: Click “+ Add rule” in the sidebar.

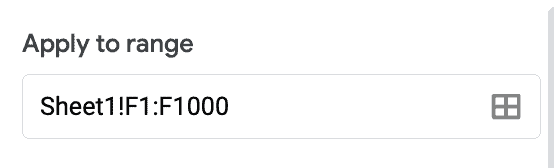
Step 3: Select your range of cells to apply your rule to. If you’ve highlighted the top of a column, this will usually automatically apply to the entire column already.
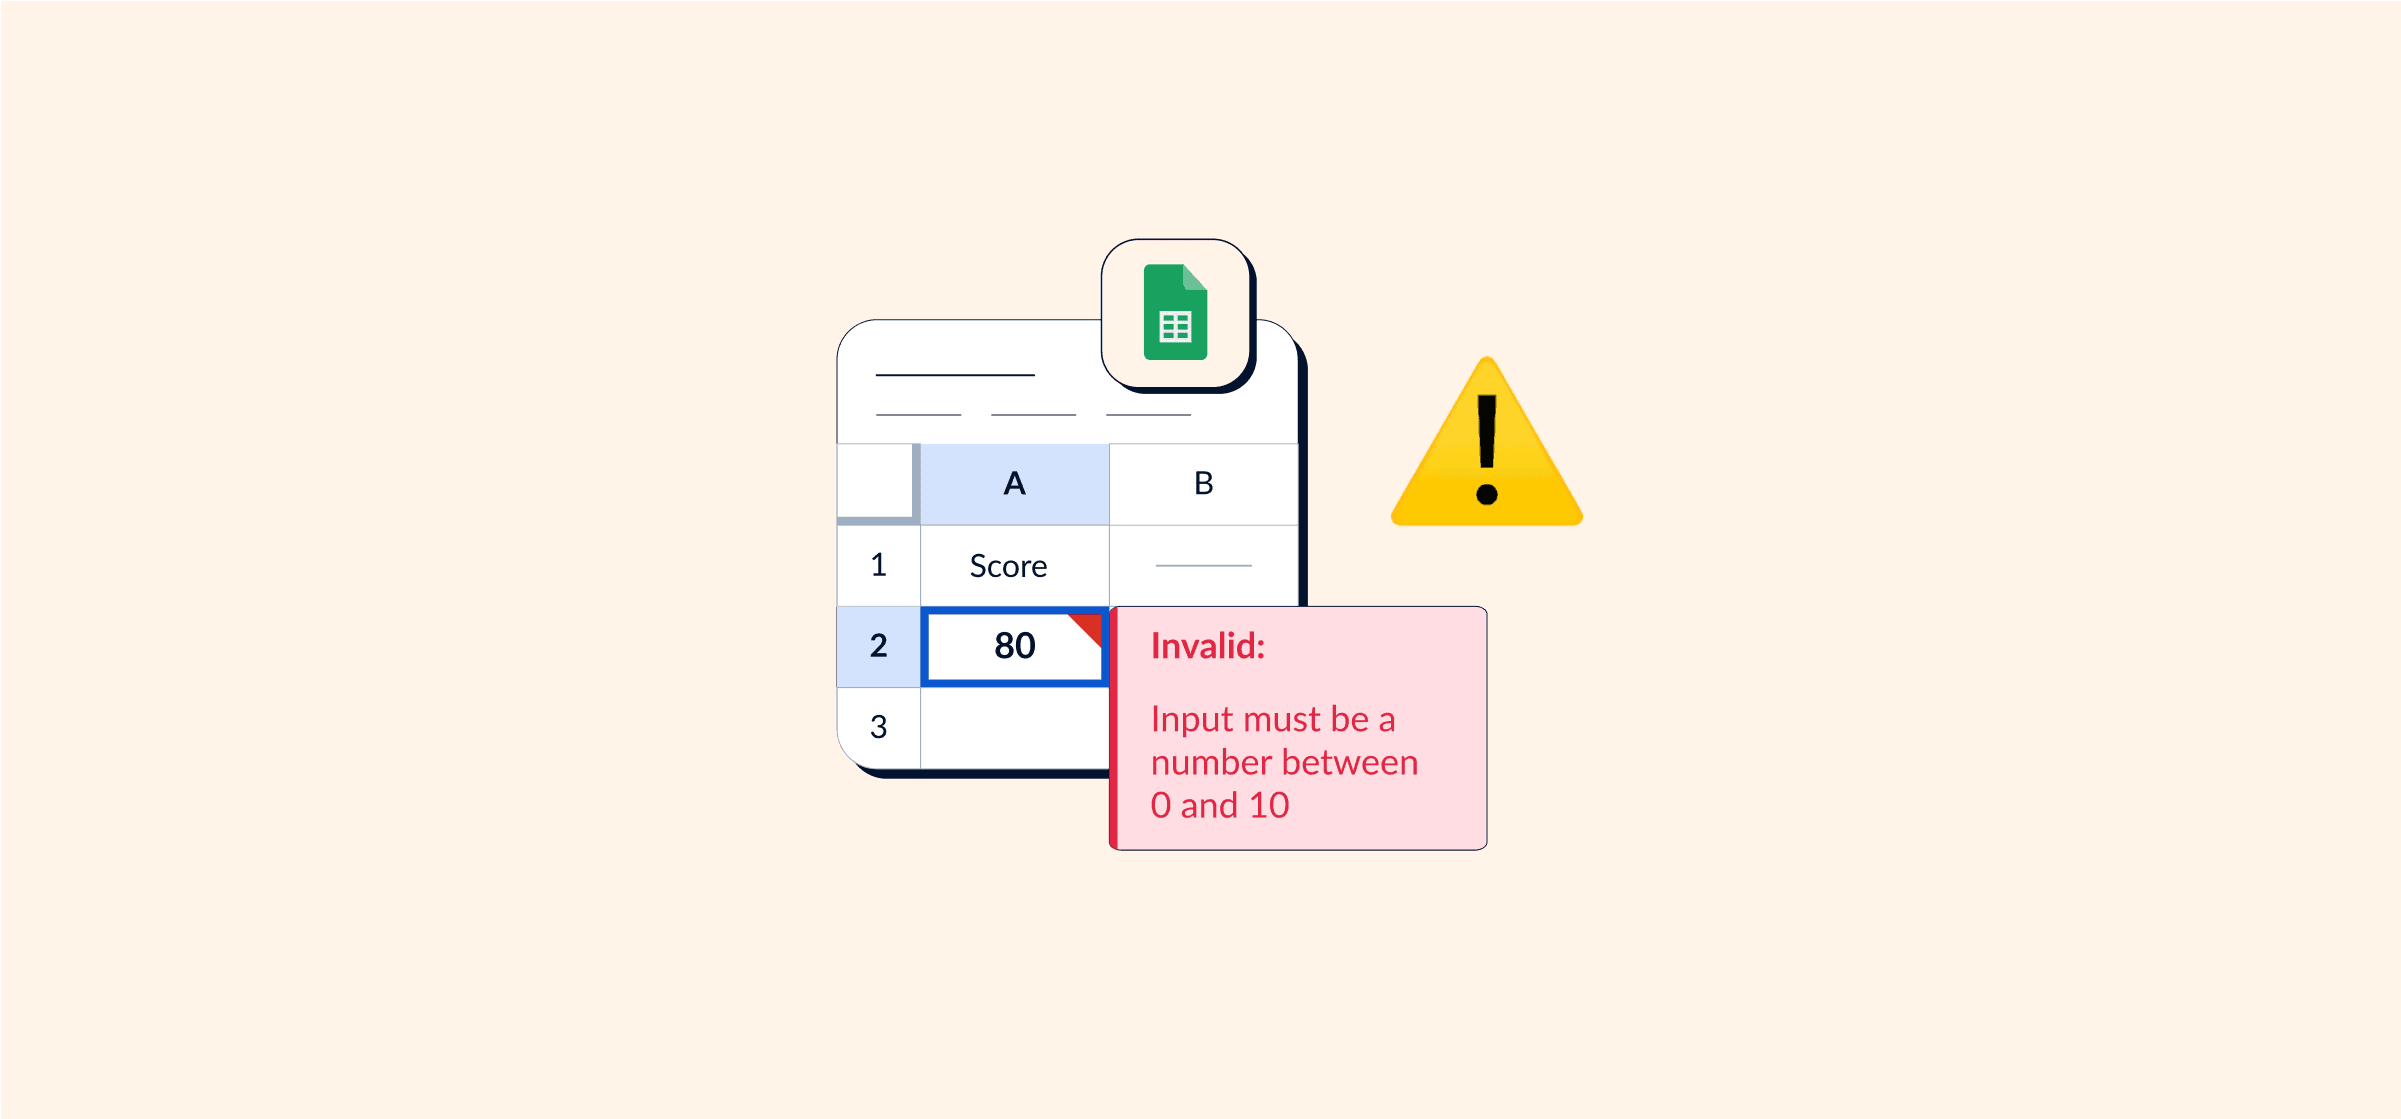
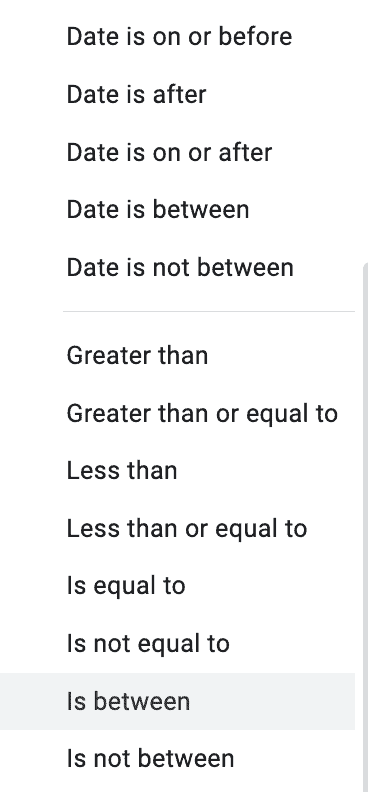
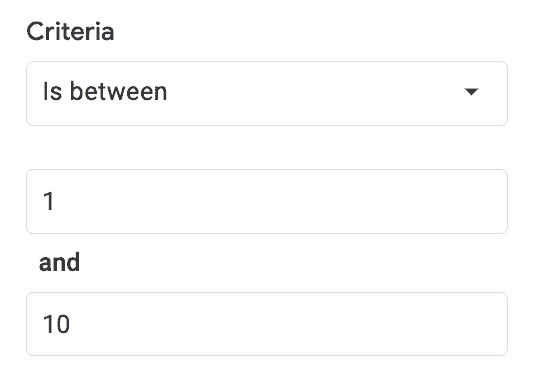
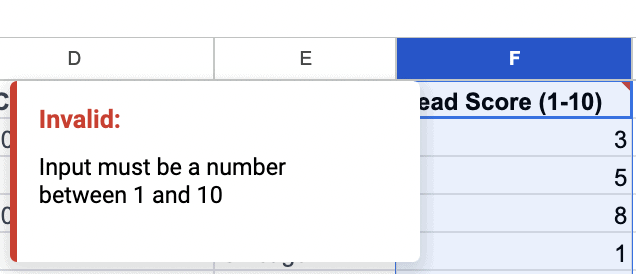
Step 4: Choose your criteria by clicking on “Criteria” and scrolling to find the option you want to set. For this example, we want to make sure that any number inputted into the “Lead Score” column is between 1 and 10, so we’ve selected “Is between” and filled out the inputs with 1 and 10.
Step 5: Decide how you want to alert the user when an input is invalid. You can choose to either “Show a warning” or “Reject the input.”
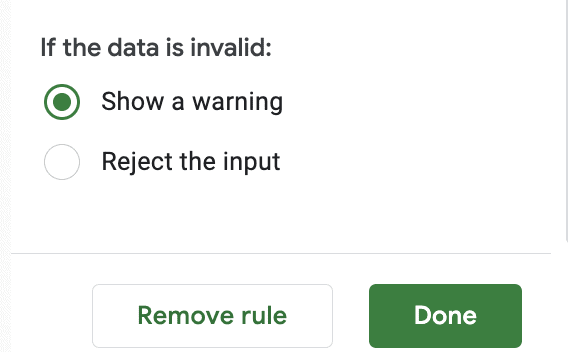
Choosing “Show a warning” will display an alert message (like the one seen below) explaining the issue.
Creating a dropdown list using data validation
Another way to use data validation in Google Sheets is by adding dropdown menus to your cells. This helps limit inputs to preset, established responses which ensures accuracy and saves time for all involved. Here’s how to do it:
Step 1: Highlight the cells you want to add the dropdown menu to. Click “Data” on the menu bar and then click “Data validation.”
In Google Sheets, you can also highlight your cells, right-click, and then select “Dropdown.”

Step 2: Fill out the response options in the boxes provided.
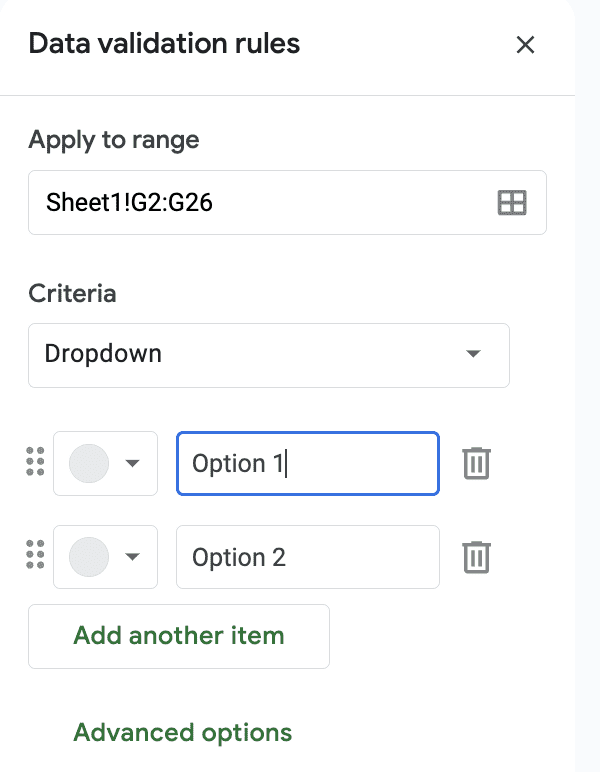
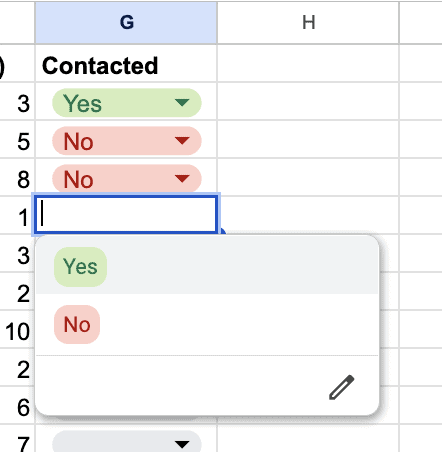
In this example, we’re adding “Yes” and “No” response options under the column determining whether a lead has been contacted yet. Here, you can color code your response options and add additional response options by clicking “Add another item.”

Step 3: Test to make sure your dropdown menu works and looks the way you want it to.
Whether it’s limiting inputs to specified ranges, making sure data is formatted correctly, or adding dropdown menus, data validation helps ensure your data is reliable while boosting the efficiency of your overall workflow. When data validation is used, you can confidently extract meaningful insights and draw well-founded conclusions from your data — plus save valuable time and resources in the process.