A Guide to Trello for Beginners: Creating Boards, Cards, and More
Have you just started a new gig and you need to learn how to use Trello? Or maybe you’ve been on pen and paper until now, and you know you need a change? For many, Trello is the first work management tool they’re exposed to. That may just be because of its popularity, but for many, it’s the most user-friendly tool they’ve used. That’s why many will recommend Trello for beginners.
In this guide, we’ll give you a primer on Trello, teach you the interface, and show you how to create boards and cards.
How Trello works for beginners
Trello follows the Kanban methodology, in which each task is represented by a card on a board — think Post-Its on a whiteboard. These cards are organized in columns to track progress. While these columns can be customized, they usually follow this pattern:
- To-do
- Doing
- Done
So when a task first comes in, it’ll get a card in the To-do column. When work begins, it’s moved to the Doing column. And well it’s done — well, you get the idea.
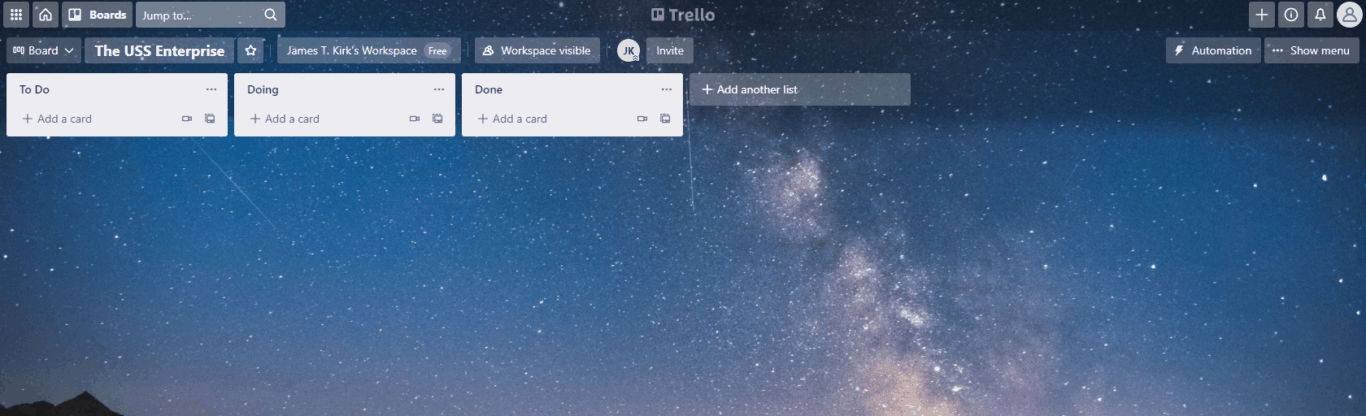
Think of Trello like a digital whiteboard. It has boards to represent that whiteboard, and cards to represent tasks. A Trello board for a busy team might look something like this:
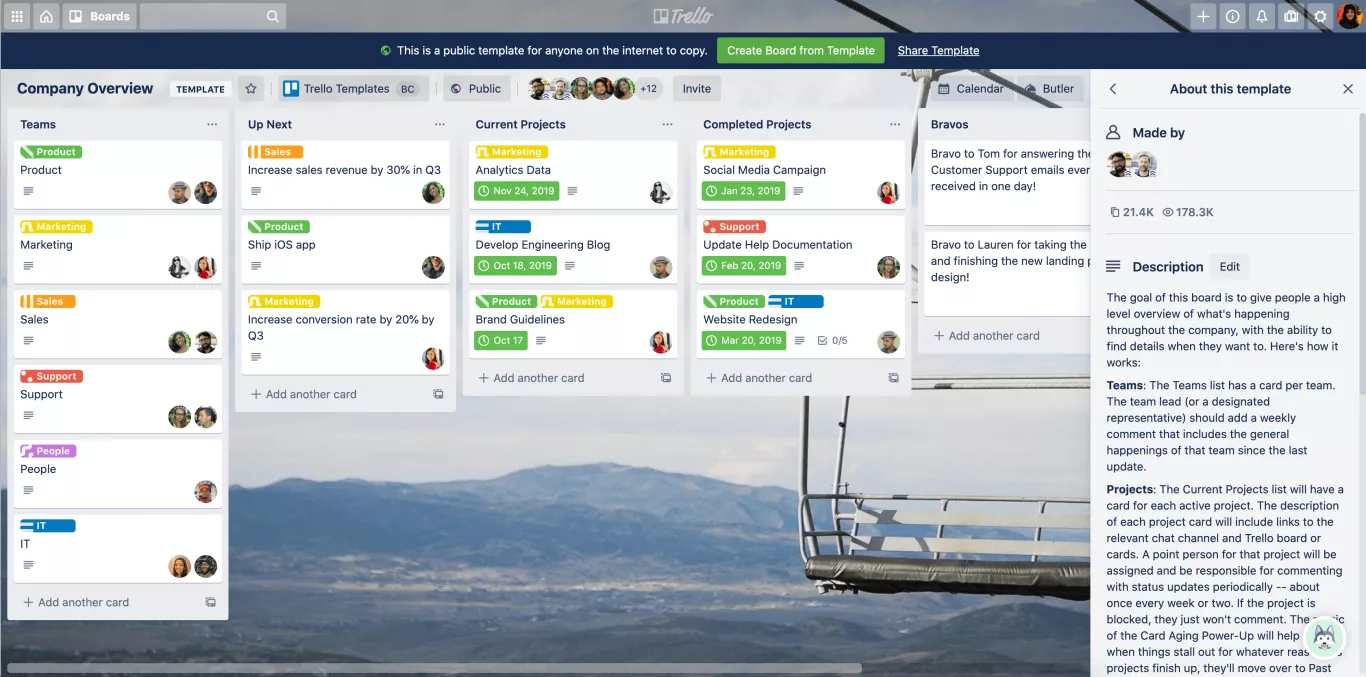
Now that you understand the methodology behind the Trello board, let’s dive into the tool itself.
How to use Trello’s interface
The first step in this guide for Trello beginners is familiarizing yourself with the interface. There are three main parts you should get used to: the workspace, the top menu, and the right-hand menu.
The workspace
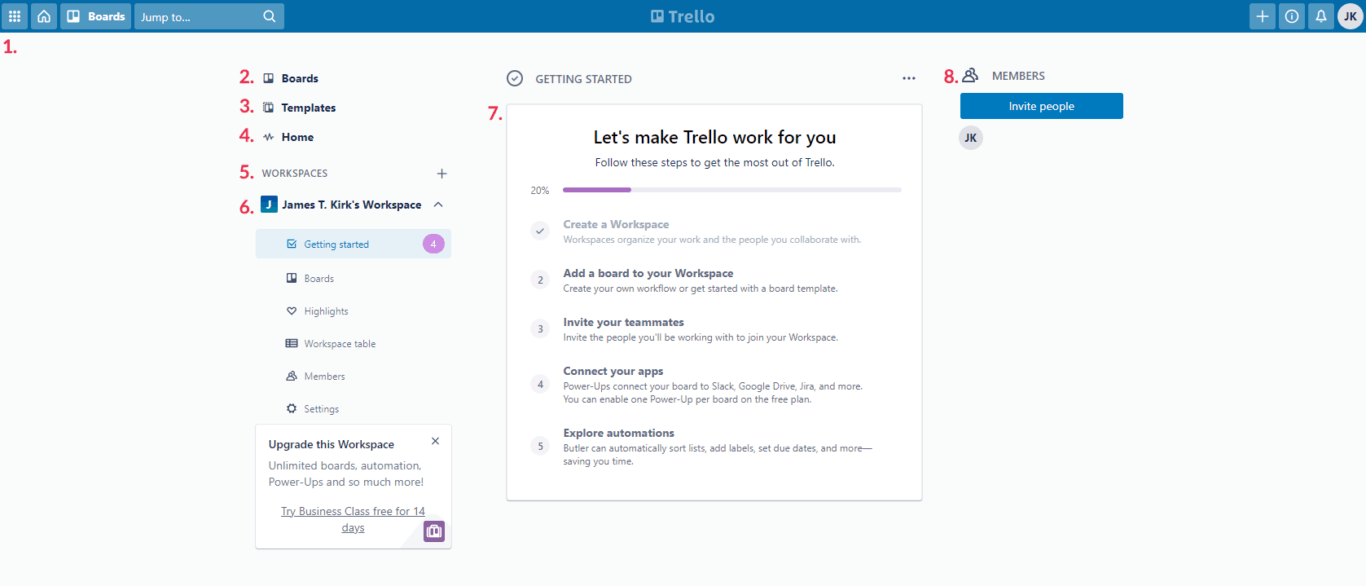
Here’s what you’ll find on the workspace screen:
- The top menu: This menu will follow you no matter where you go in Trello. More on it in a minute.
- Boards: This will show you all boards you’re a contributor to, whether they’re in your workspace or not.
- Templates: Takes you to Trello’s template library.
- Home: Jump back to Trello’s main screen.
- Workspaces: Lists all workspaces you’re part of, each their own dropdown.
- Workspace dropdown: Access a workspace’s boards, get just a few highlights, or customize workspace settings.
- Onboarding: When you first sign up, Trello will guide you through its onboarding process with easy-to-follow steps.
- Members: Track your workspace’s members here and invite new ones.
Now let’s cover the top menu.
The top menu

- Atlassian dropdown: If you’re using multiple Atlassian apps, you can switch between them here.
- Home: Go back to Trello’s main screen.
- Boards: A dropdown used to switch between Trello boards.
- Search bar: Search up Trello boards, individual cards, and more.
- Create: Need a new board? A new workspace? Do it all here.
- Information: Get quick access to Trello tips and tricks for beginners, the Trello blog, pricing, and more.
- Notifications: Your notifications will all be collected here, whether that’s direct mentions or updates to cards you’re a contributor for.
- Account: Add other Trello accounts, change account settings, log out, and so on.
Alright, now that you’ve been through Trello’s main screen, let’s look at the right-hand menu you’ll find once you’ve created a Trello board.
Right-hand menu
Once you’re in a Trello board, you’ll access this menu by clicking Show menu on the right-hand side.
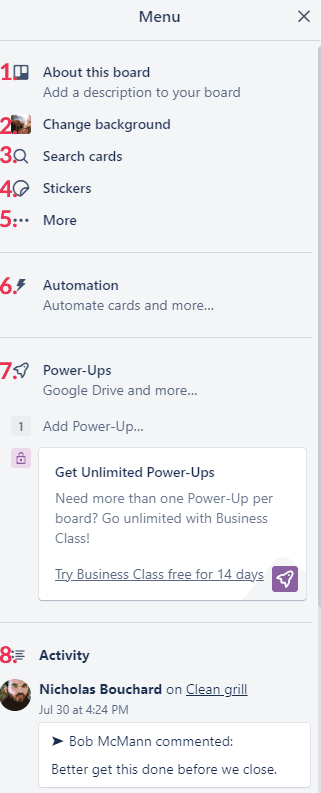
- About this board: This will show a list of board admins, the board’s description, and permissions.
- Change background: Give your board a fresh coat of paint.
- Search cards: Find a specific card here.
- Stickers: Drag and drop stickers onto your cards to give them a bit more pep.
- More: This will open in-depth board settings, let you customize labels, and close the board.
- Automation: Here you can set up automations for recurring cards, create custom buttons, and more.
- Power-Ups: With Power-Ups, you can add integrations and extra features to your board.
- Activity: Your board’s most recent updates will show up in a feed here.
Alright, enough with the menus. Time to create your first board.
“I was really impressed by what the Unito team helped us achieve. Using Board Sync with our Trello Hub Board has really made us more efficient as a team because we’re working at such a large scale now.”
Sandra Owen, Finance & Operations, Acara Property Management
Creating your first Trello board
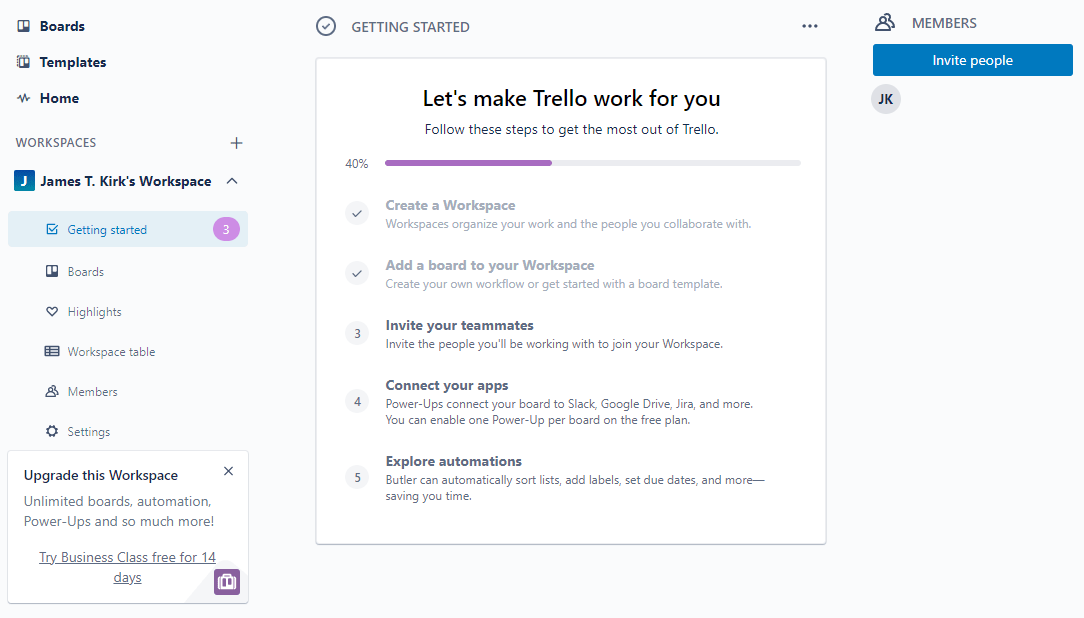
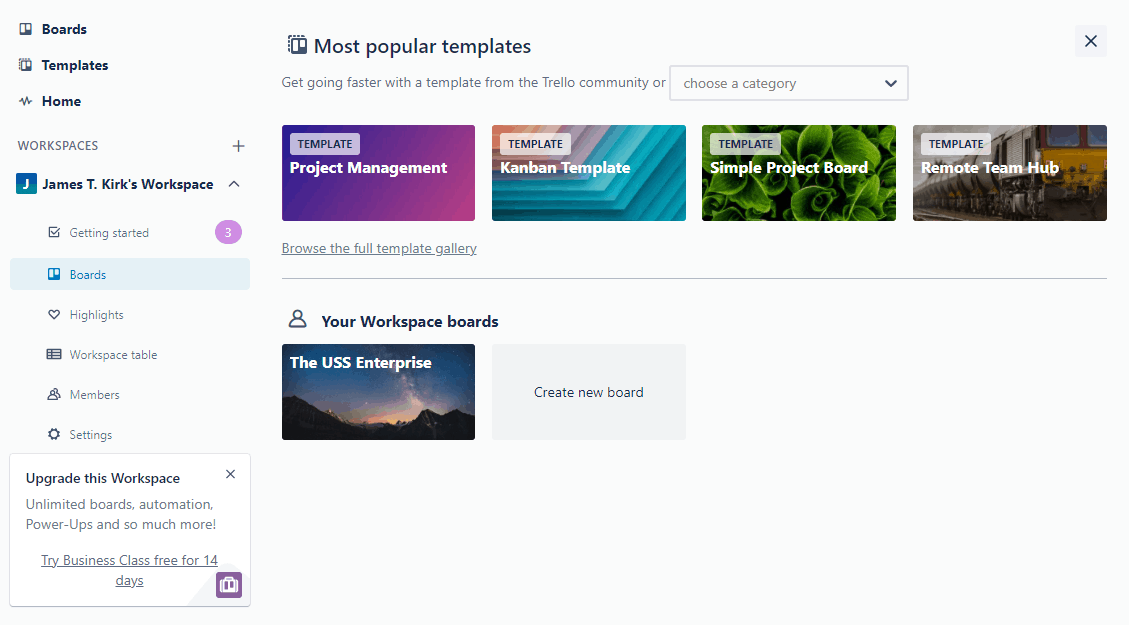
Remember this screen?
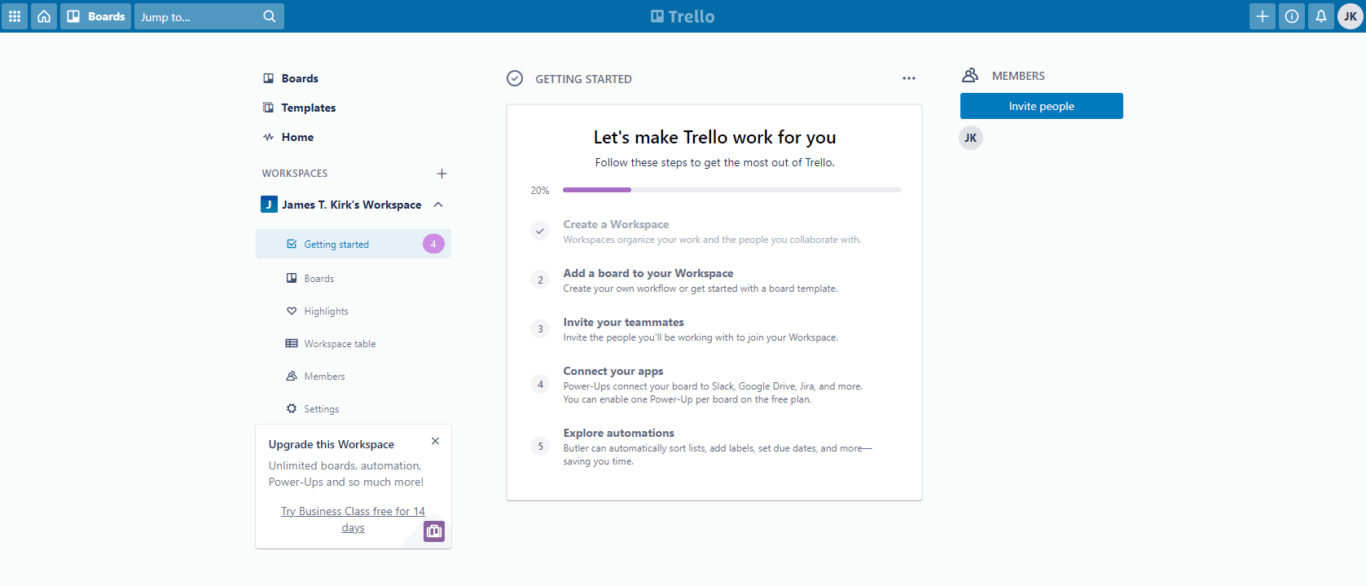
You can create your first board a few different ways, but since the folks at Trello are kind enough to onboard you, click on Add a board to your Workspace.
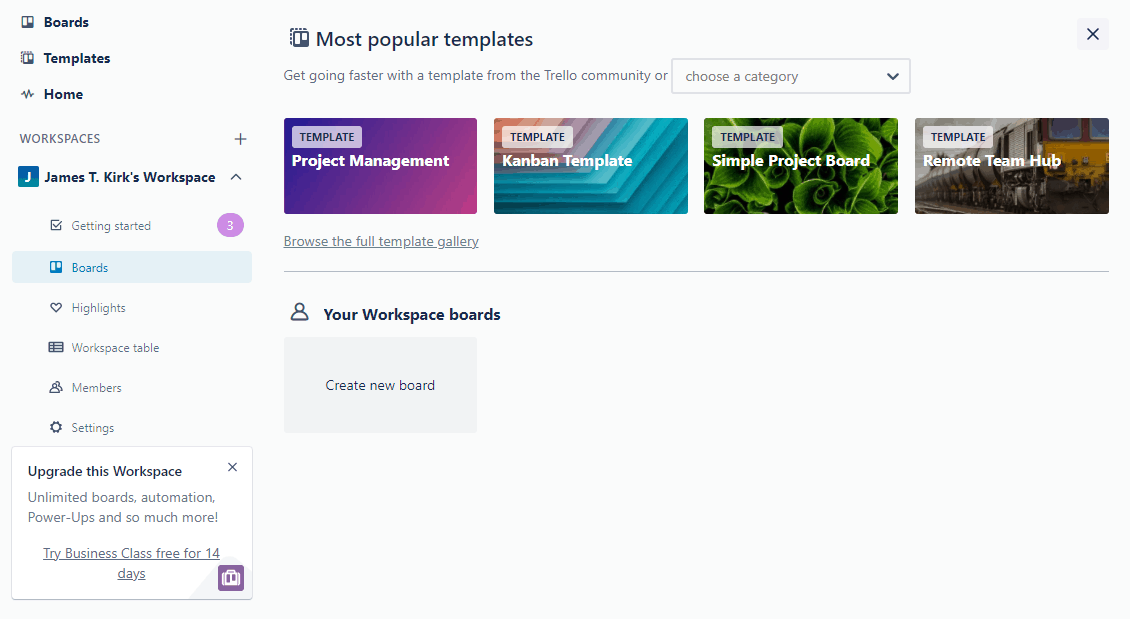
You’ll find two rows. One holds popular templates, while the other is a big empty space for your Workspace boards. Let’s start a board from scratch by clicking on Create new board.

In this pop-up, you can give your board a name and choose a theme. You could even go back to picking a template if you wanted. For now, just add a name, pick a theme, and click on Create board.
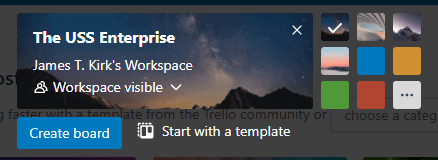
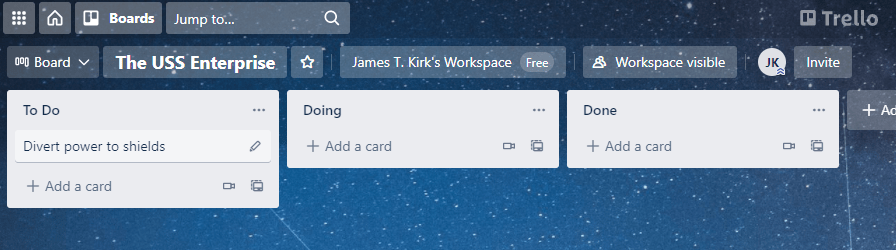
And, just like that, you’ve created your first board.

Note that you’ll have three columns automatically created: To Do, Doing, and Done. Now what if you wanted to use a template?
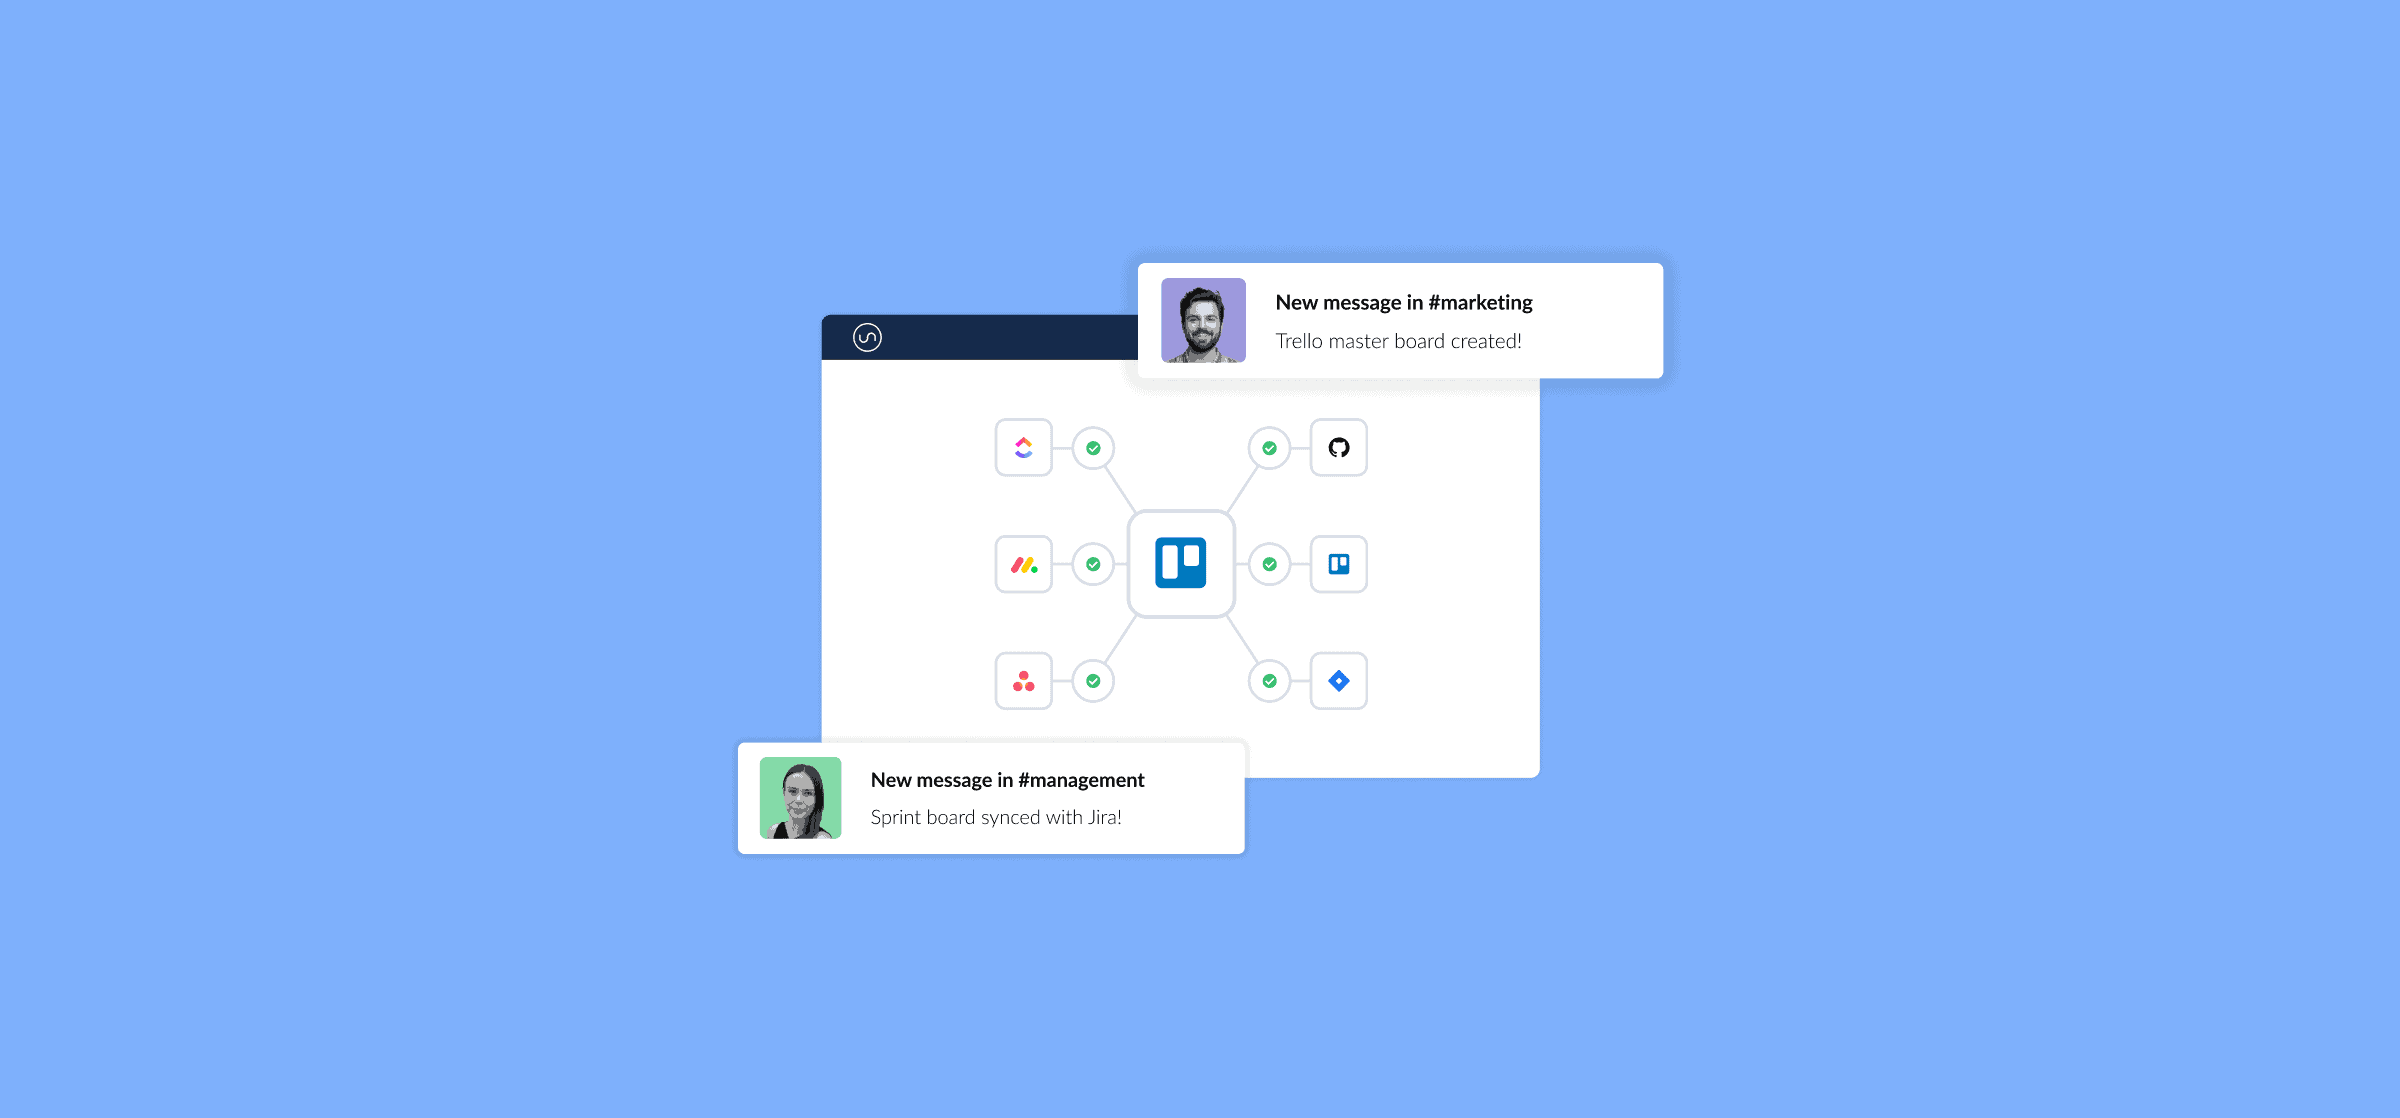
Pro tip: the Trello master board
Because creating a Trello board is so easy, you’ll be tempted to have a board for each of your projects. You might also have a board for your own to-do lists, for tracking specific meetings, and more. You see the problem? Soon, you’ll be switching back and forth between so many boards that you’ll hardly have time to actually get things done. But by using Unito, you can sync these multiple boards to a single place, allowing you to keep an eye on high-priority work items without constantly switching between boards.
Learn more about the Trello master board
Trello templates for beginners
Templates are one of the best things Trello has for beginners. Start by clicking on the Home button in the top menu. This will take you back to your workspace.
Click on Boards in your workspace.
You’ll get the two same rows as before. Pick a template from the top row and click on it. Like, say, Remote Team Hub.
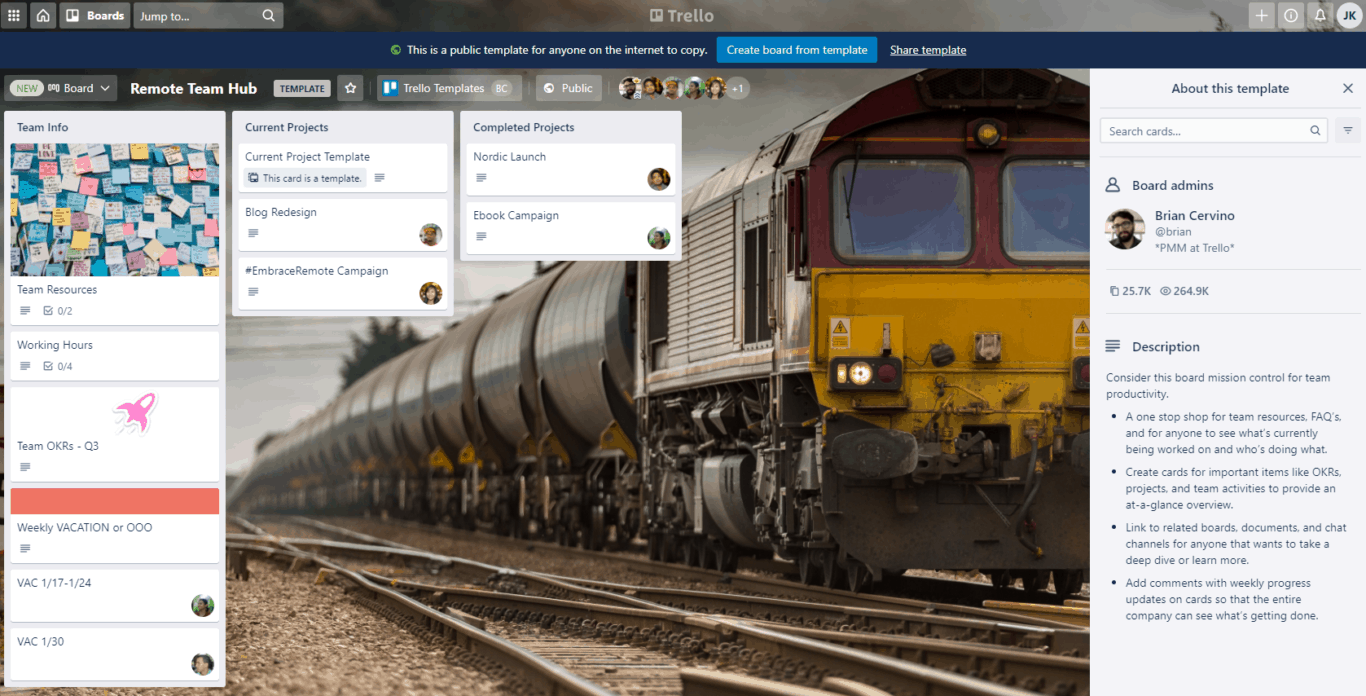
This will take you to a public board showing you the template in action. Click on the blue Create board from template button.
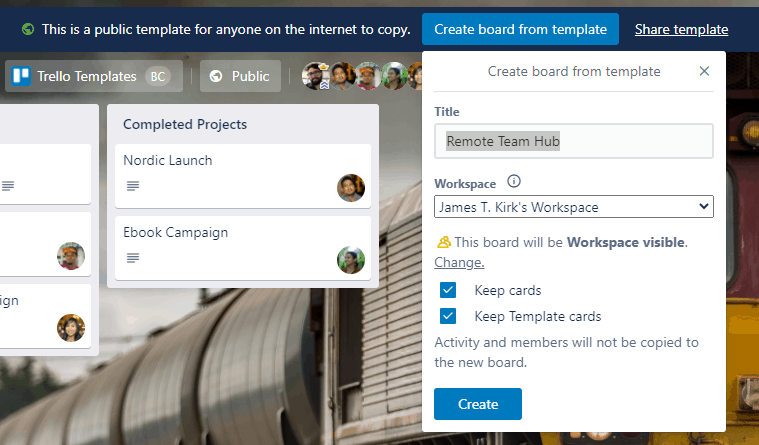
Give your new board a name, make sure it’s in the right workspace, then click Create.
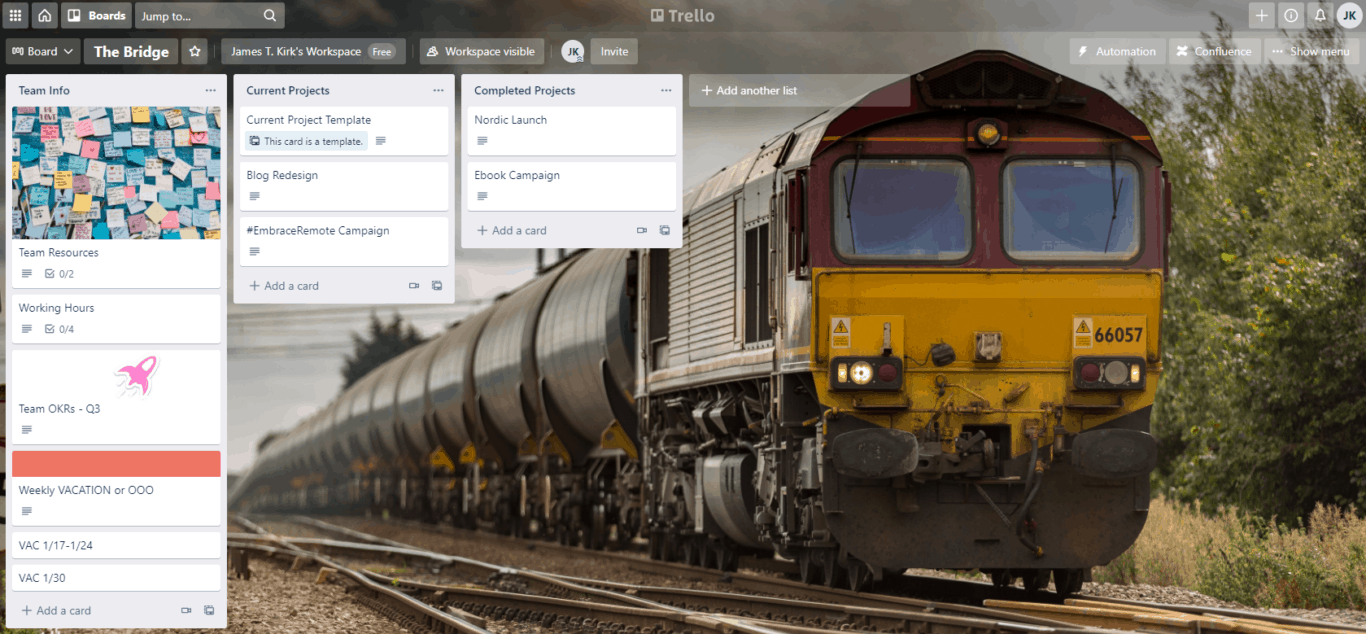
And just like that, you’ve created a board from a template! You can also check out these great Trello templates to help you find the one you want.
Now, time to fill it with cards.
A guide to Trello cards for beginners
Let’s go back to that empty board from before.
It’s time to add some cards and get work done. Mouse over to the To Do column and click on + Add a card.
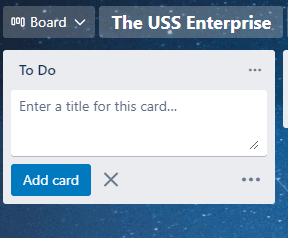
Give your card a title and click Add card.
Congratulations! You now have a Trello board and you’ve populated it with your first card. Let’s take a look at it.
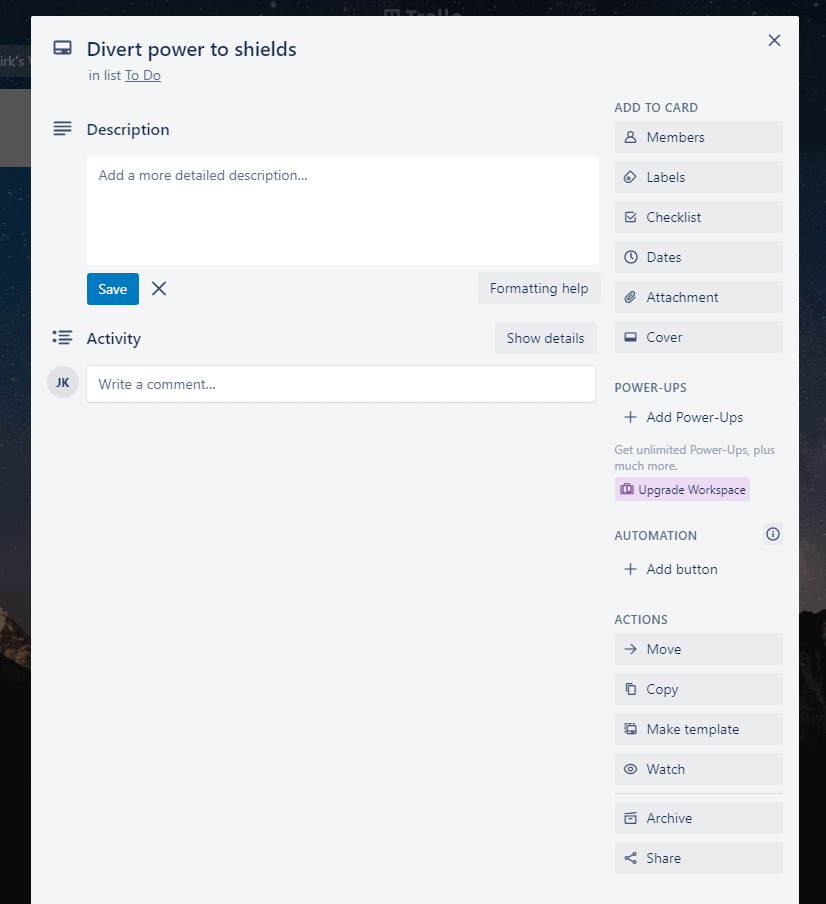
A Trello card can be used to track every aspect of an individual task. You can use the Description field to describe the task in detail, as well as providing updates along the way. Below the description, you can add comments as work goes on. Collaborators can ask questions, get their answers, and more from here.
On the right, you’ll see a host of actions you can take to help track your work. Add Members to a card so they’re kept updated as you work. Use Labels to categorize and organize your cards. Checklists can track the small rocks that make up a bigger task, while Dates help you stick to your deadlines. Finally, add documents, deliverables, and other files with Attachments.
That’s just a brief overview of the things you can do with a Trello card.
How to manage Trello cards across boards
One of the biggest challenges with Trello is keeping track of cards across multiple boards. Because Trello is so easy to use, it’s tempting to create a board for every project, your own to-do list, your team’s responsibilities, and more. But then you end up with a ton of time spent bouncing back and forth between boards to make sure you have all the latest updates at your fingertips.
You’ll find a ton of Power-Ups that can automatically create new cards in a board to match cards in other boards, but they have one common problem: they don’t keep those cards up to date.
That’s where a Power-Up like Board Sync comes in. Board Sync doesn’t just connect your Trello boards and create new cards automatically; it can sync Trello to a spreadsheet or keep everything in sync on both boards. New comments in one card? Board Sync adds them to the other. Five cards all got assigned to a new PM? Board Sync updates all associated cards automatically.
Curious to see this in action?
How to integrate Trello with other tools
Learning how to use Trello is great, but what about slotting it in with your tool stack? Without the right integration, you can spend hours just copying and pasting information from tool to tool so everyone’s in the loop. Just because a tool is great for your needs doesn’t mean it works for another team. No one should be forced to use a tool that doesn’t fit their workflow.
Want to save time and effort? Try Unito. Unito has the deepest two-way integrations for some of the most popular tools on the market, including Trello, Asana, Jira, Google Sheets, and more.
Sync data across tools seamlessly, use rules to filter out irrelevant information, and map fields so everything ends up exactly where it needs to go. All of that in just a few minutes.
FAQ: Trello for beginners
Is Trello easy to learn?
Trello is one of the easiest project management tools to learn, which is why it’s also one of the most popular. The Kanban methodology is simple enough that anyone can grasp it, and it can applied to a ton of projects. You don’t have to be a project manager to figure out Trello.
What is Trello mainly used for?
Trello is primarily a project management tool. Trello cards are used to represent tasks that need to be completed before a project can be closed.
That said, people will also use Trello to build personal boards that track all the work they’re personally responsible for, and the Kanban methodology is flexible enough that you can use a Trello board for just about anything.
How does Trello work for beginners?
Here’s the best way to understand how Trello works if you’re a complete beginner. Trello boards are like a whiteboard, and Trello cards are like Post-It notes. When you’re managing a project, you’ll write out every task you can think of on those Post-Its and put them at the far left of the whiteboard, under a heading called “To-Do.” Then you’ll write two other headings: “Doing” and “Done.” As you start working on a specific task, you’ll take its Post-It and move it to the “Doing” column. Once you’ve completed that work, you move it to “Done.”
And that’s the basic premise behind a Trello board! You can have as many of these headings as you want — which are called Trello lists — to represent more complex workflows.