How to Set Up a Salesforce→Outlook Integration (2 Methods)
As your business grows, your CRM grows with it. Customer-facing teams, in particular, have to keep up with a constant influx of contacts in tools like Salesforce while ensuring their data is accurate to work effectively.
One of the problems that come from this? These teams often work almost exclusively out of their email inbox and calendar, through a tool like Microsoft Outlook. Without some way to keep data in both tools up-to-date, your team is stuck with two partially complete contact lists and a lot of confusion.
That’s why a Salesforce Outlook integration is essential for your sales team.
Luckily, there are a few ways of doing this. Let’s break down two popular methods.
Why a Salesforce to Outlook integration?
While Salesforce is a versatile CRM tool, it’s not always the most popular way to manage contacts within your organization. It has a steep learning curve and expensive licenses. If you’re used to working out of Outlook, Salesforce can seem daunting, making essential contact info out of reach.
One solution might be to rely on other teammates to access the contact information for you, but that slows down everyone’s workflow and isn’t scalable beyond a one-off ask. You could also manually add contacts from Salesforce into Outlook, but that’s also very tedious and the process is prone to human error.
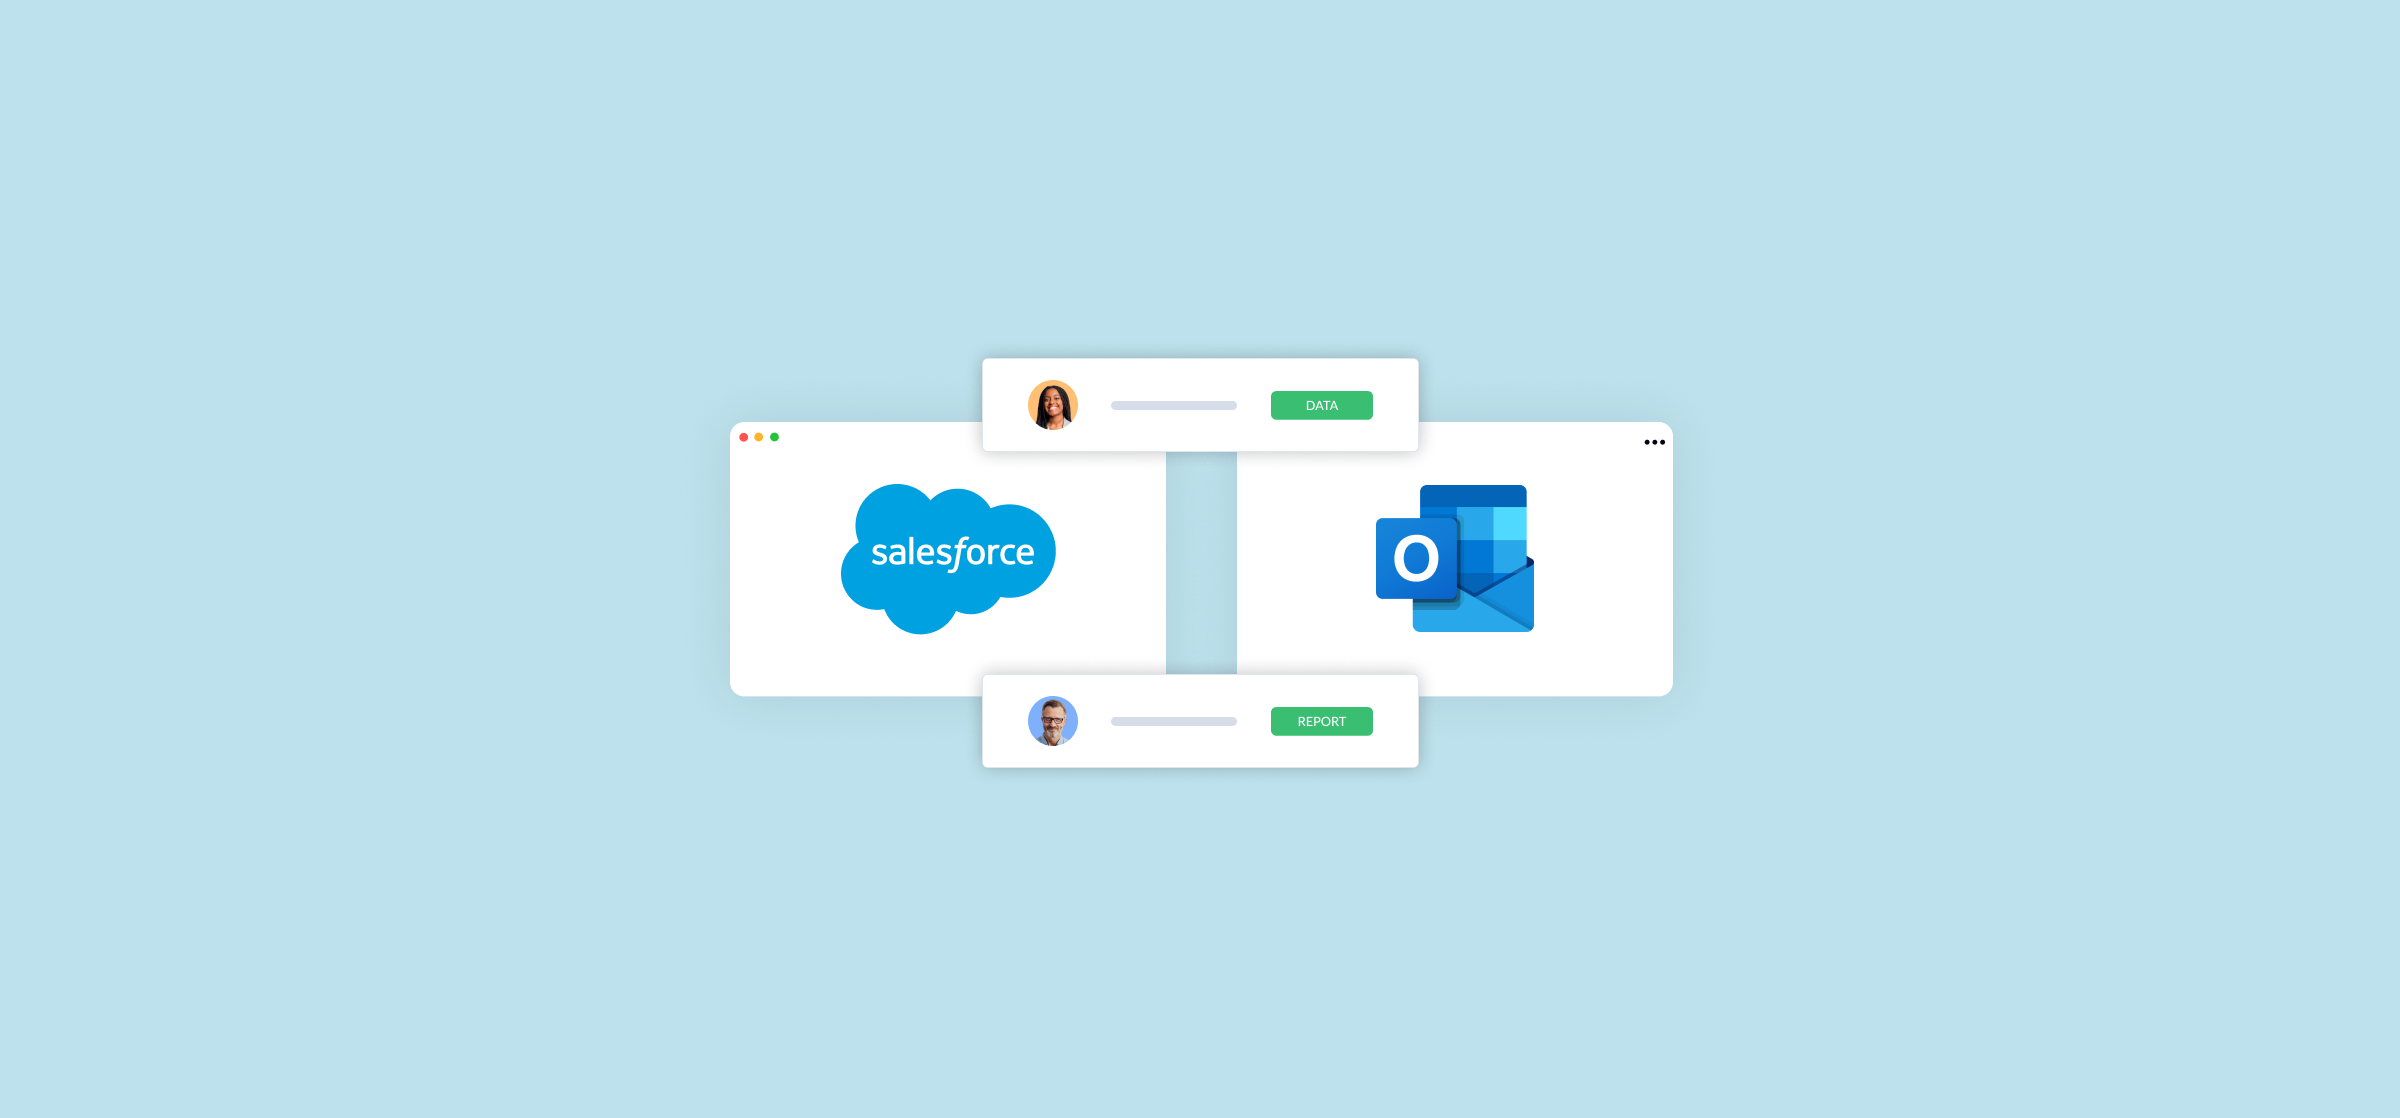
By syncing Salesforce contacts directly into Outlook, your team has up-to-date contact information at their fingertips no matter where they work from.
First Method: Using a built-in integration
The first method uses the Outlook integration from Salesforce via Einstein Activity Capture. Before setting this up, each individual Outlook user will require a Salesforce license to install the add-in. To do this, connect with your Salesforce administrator or IT department.
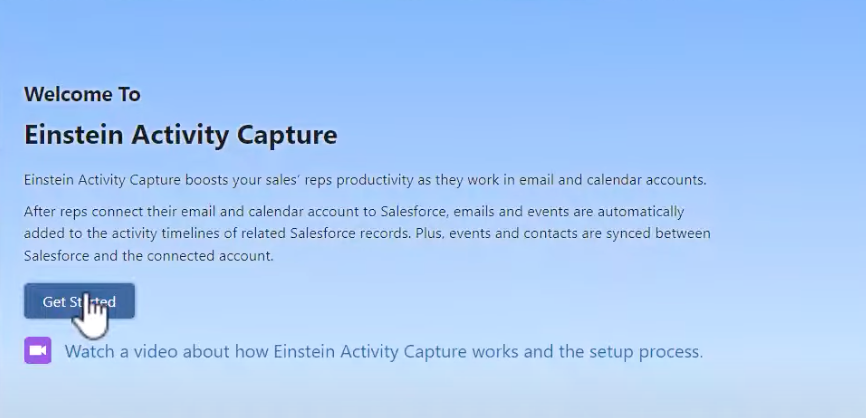
Once the add-in is installed, each user must set up Einstein Activity Capture to enable contact syncing. Here’s how to do that:
First, have your IT or Admin team grant the right permissions to each applicable user.
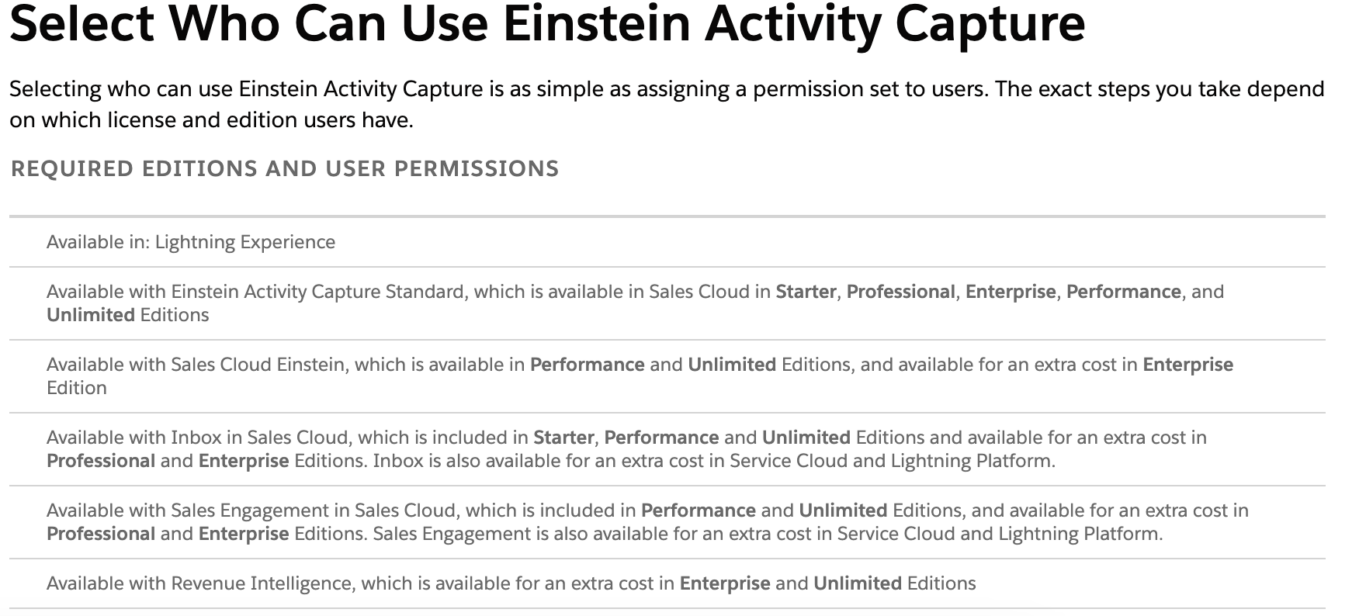
Next, click the gear icon, and click Setup. In your Quick Find box, type “Einstein Activity Capture.” After that, the software will guide you through a few prompts to connect to the server, configure what you’d like to sync, and assign certain users to the sync.
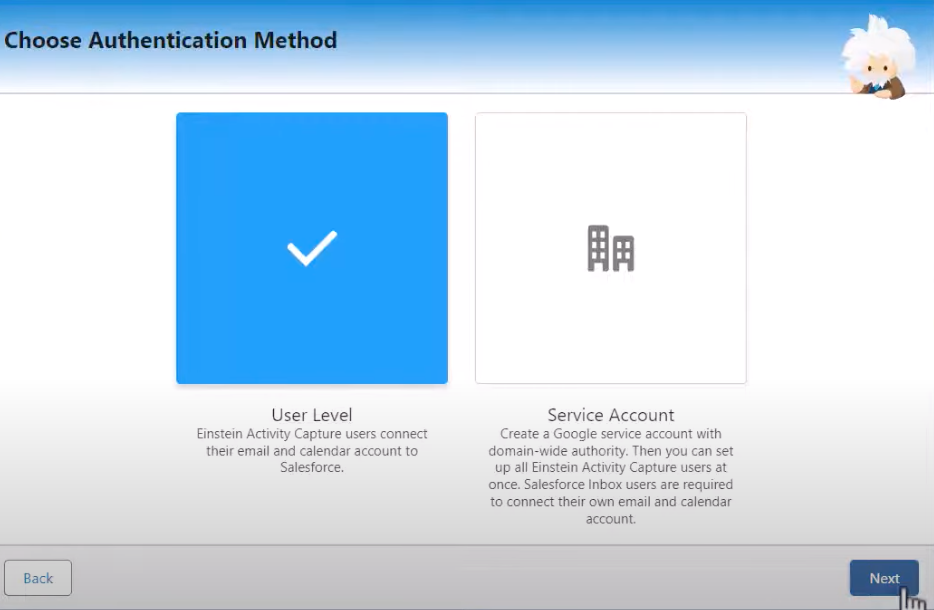
After choosing your Microsoft instance, you can choose to authenticate from the User Level or Service Account level.
Then, you can make simple configuration adjustments to determine what and how you’d like to sync.
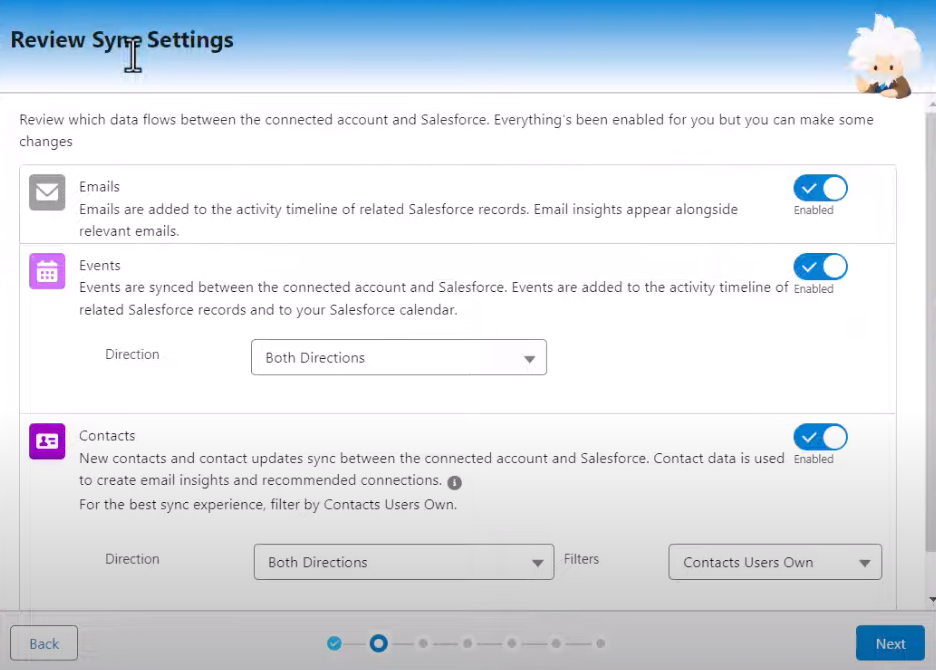
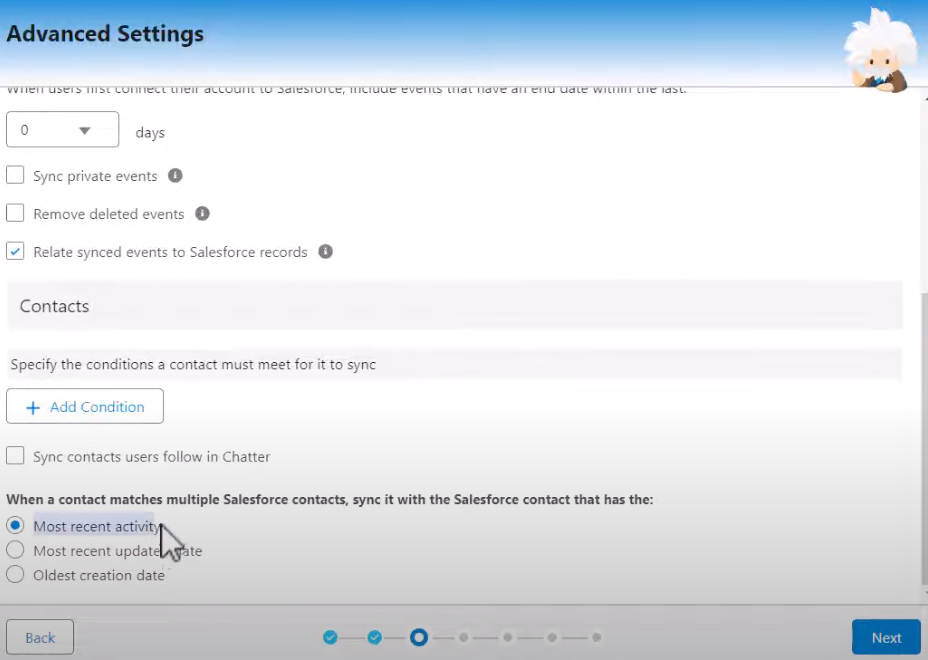
You will then be guided through more advanced settings to determine which conditions suit your team’s configuration best.
After following all of the steps, and assigning applicable users (who have licenses) you’re ready to launch!
Limitations of this method
Though this method is relatively straightforward, there are a few limitations to keep in mind before you launch.
You need to loop in the IT folks
Each individual rep on Salesforce needs to install their own add-on in Outlook. Also, only specific Salesforce instances support this type of integration, so you need to connect with IT for the go-ahead. This can slow down your work, delay the integration launch date, and could be more costly if you need to upgrade or add more licenses in Salesforce.
If your configuration needs maintenance, adjustments, or updating, expect to keep reaching out to IT to assist down the road as well.
It’s not customizable
There are limited filtering options, trigger options, and field updating options with Einstein Activity Capture. So if you can’t set up the contact sync exactly as you had envisioned, it’ll be a bit of an adjustment and a learning curve for your team.
There are user limits
On the default (free) version of Einstein Activity Capture, you can only add 100 users to your configuration. As your company scales, this may quickly become an issue. Pricing for additional users increases quickly, so it’s something to consider if your team is looking to be budget-conscious.
Second method: Integrate Salesforce and Outlook using Unito
The second method for establishing your Salesforce to Outlook contact sync is to use Unito, a user-friendly live syncing tool already trusted by organizations like Netflix, Logitech, Tesla, and Harvard University. Here’s why this method might work for your team.
A no-code flow that’s fully configurable
There’s no need to connect with IT or a system admin to set up Unito. It’s a no-code solution that offers deep field syncing between Salesforce and Outlook. Users can also choose between different filters to trigger the sync, so there’s no need to compromise and change your team’s current workflow.
Unlimited users on any plan
Each Unito pricing plan comes with unlimited users. You could add as many users as you’d like into your workspace, and they could explore dozens of integration use cases. Your team can also set up integrations for not only Salesforce contacts, but opportunities and tasks as well.
You can sync all your contact data from Salesforce to Outlook with a single Unito flow. Here’s how easy it is to set up.
First, connect your Salesforce and Outlook workspaces to Unito.
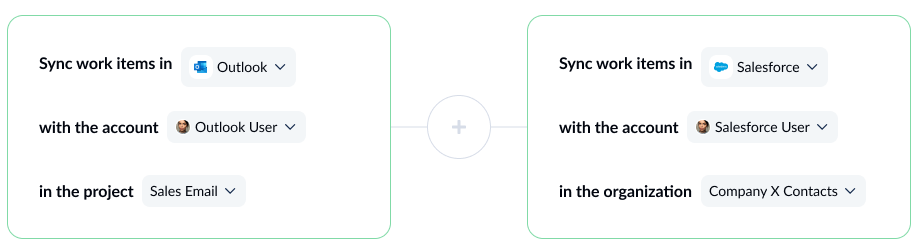
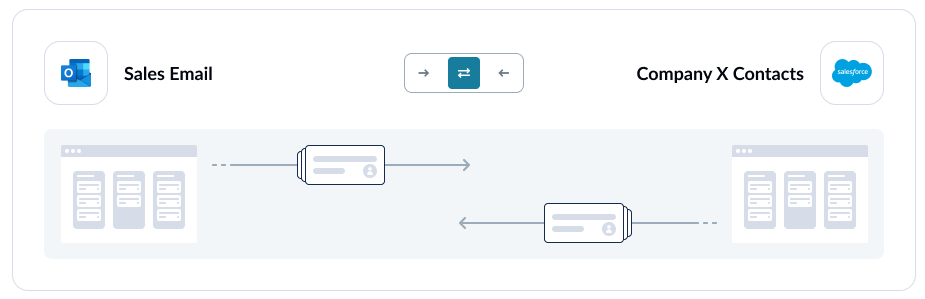
Next, set your flow direction. This will determine where new contacts are created when you add them to one tool.
Next, create your rules. You can choose simple field filters like Contact Owner and Lead Source, but Unito also supports filtering by custom fields such as Textarea, Checkbox, and Autonumber.
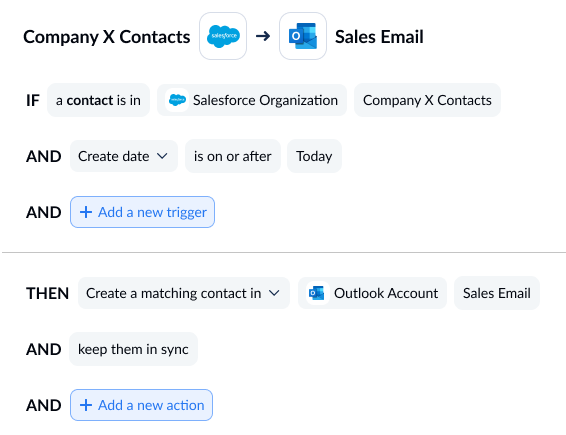
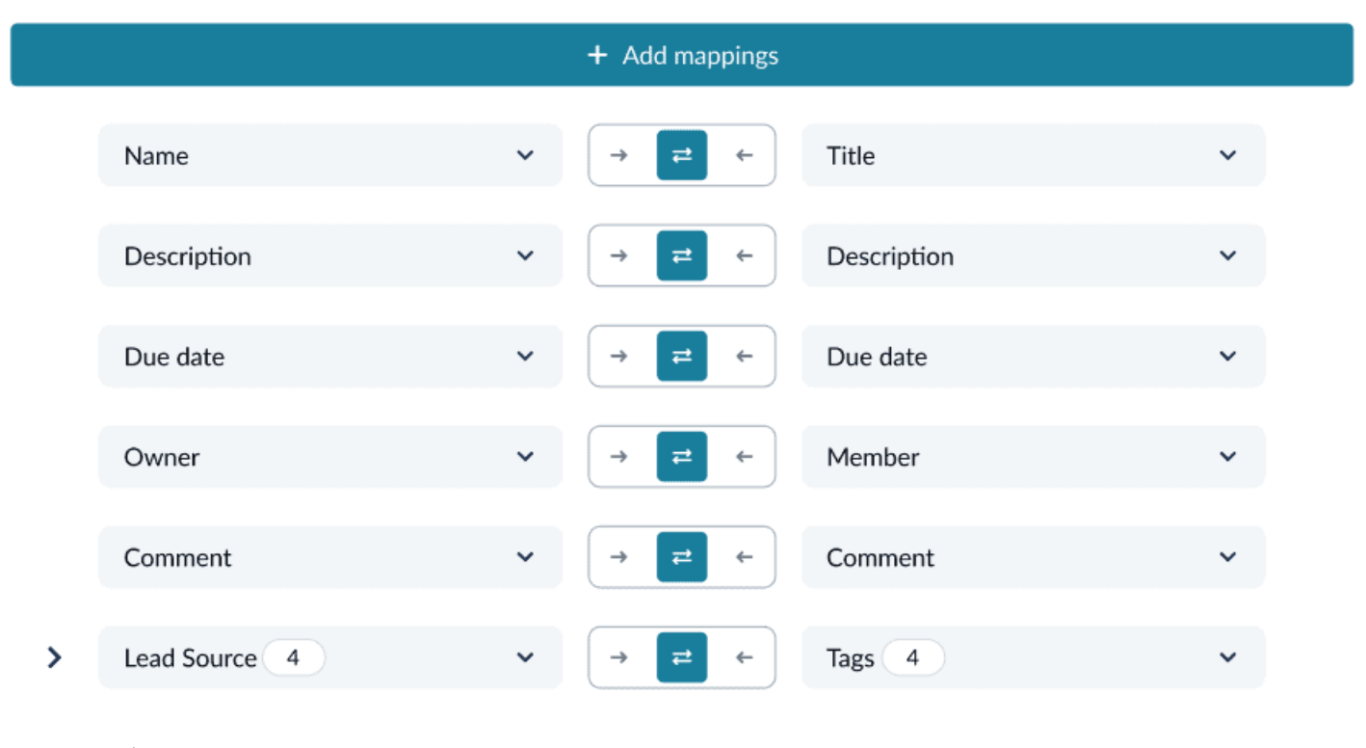
Then, map the fields you’d like to keep updated. Unito will also allow you to auto-map your fields to make the process even quicker.
And that’s it! You’re ready to launch and sync your Salesforce contacts right over to Outlook. Updates will flow both ways so nobody from either tool misses a beat.

Stay in contact
Eliminating the need for your team to hop between Salesforce and Outlook for contact information will hugely improve both productivity and frustration. Manually copying and pasting data or paying for unnecessary Salesforce licenses isn’t scalable. But if you choose a method with a simple, customizable integration, you can’t go wrong. Unito goes way beyond contact syncing. If you’re looking to streamline your whole tool stack, you can learn more here.