3 Ways You Can Build Airtable Reports With Unito
Managing a team or leading a big project is really hard when you don’t know what everyone is focused on. Before you delegate tasks or allocate resources to an initiative, you need to have a handle on your team’s workload and priorities. When the average knowledge worker uses nine different SaaS apps each day, actually finding this information can be a huge challenge in and of itself. Building Airtable reports lets you put the right resources at your team’s fingertips, report on the health of your projects, and even build marketing budgets.
Here’s how.
Why use Airtable and Unito?
Anytime you need quick answers to a complex question, Airtable is a great place to start. This flexible database tool allows you to capture and organize information to perfectly suit your desired use case. In that sense, it’s a perfect choice for all your reports. Especially when paired with Unito.
Unito is a no-code integration tool that allows you to build two-way connections between all the tools you use in your business. In just a few clicks, you can build flows that automatically update records across all your Airtable bases. That means that, with Unito’s help, you can capture all the work your team is doing across multiple tools from a single Airtable view, offering that snapshot your reports need.
In Unito’s Report on Reporting, 37% of respondents said they spent at least three hours a week on reporting. With the right tools, you can cut that time down to minutes.
Airtable report #1: Team resources report
A resource management report offers a rapid look at how each team member spends their time and effort. With this type of report, you should be able to quickly judge who has a lot on their plate, where their focus lies, how things are progressing, and when tasks will be completed. On a broader level, it should allow you to answer questions like “Who can I assign work to?” and “Who needs help?”
To build a resource management report in Airtable, you need to identify the fields that will allow you to properly gauge your team’s priorities and workload.
Start with Unito’s resource management report template. You’ll notice the template includes the following fields:
- Task name: Use a single-line text field to capture the name of each task synced to this base.
- Assignee: Depending on your team size, you may want to use a single-line text field or single select dropdown to capture the assignee for each task. Considering you’re trying to judge the team’s resources, this is really the most important field.
- Description: Use a long text field to capture task descriptions for that additional context.
- Due date: Use a date field to capture the due date of tasks, so you can who’s running behind and who’s crushing their deadlines.
- Status: Use a single select dropdown to capture task status. Create dropdown options for to-do, in progress, and done, or add additional status options to meet your internal workflow.
- Last modified time: This field identifies how recently the task has been modified, so you know you’re working with up-to-date information. It’s also essential to make Airtable work with Unito.
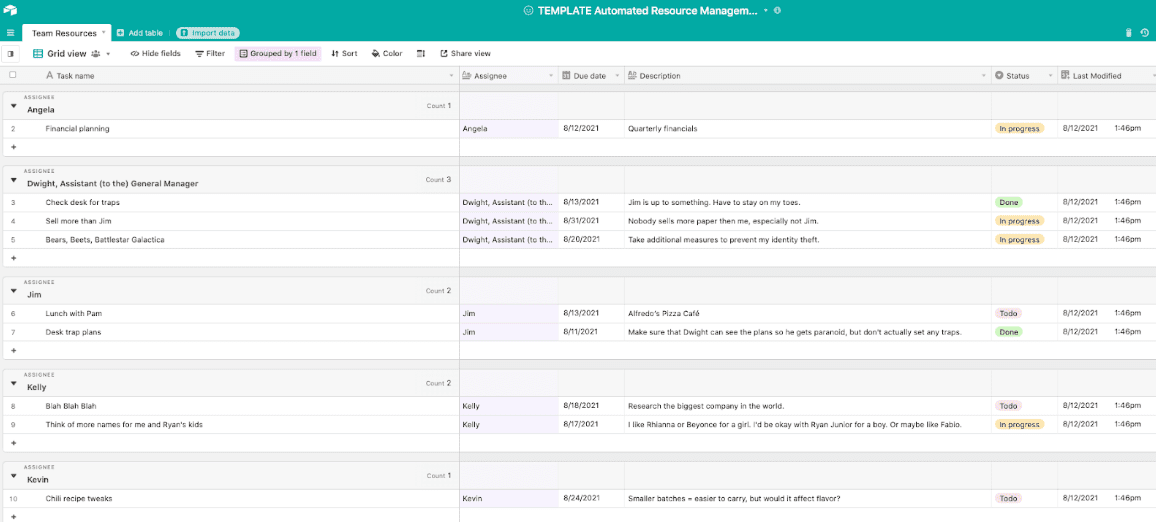
The final, important step in establishing your report is to group the data by assignee. This will group each person’s tasks, providing that high-level view of a person’s workload you’re craving.
The end result — populated with a few example tasks — should look something like this:
How to populate a resource management report with Unito
With your team resource report set up in Airtable, it’s time to build the Unito flows that will automatically update it as your team works. Here’s how it’s done.
Start by connecting Airtable to Unito.
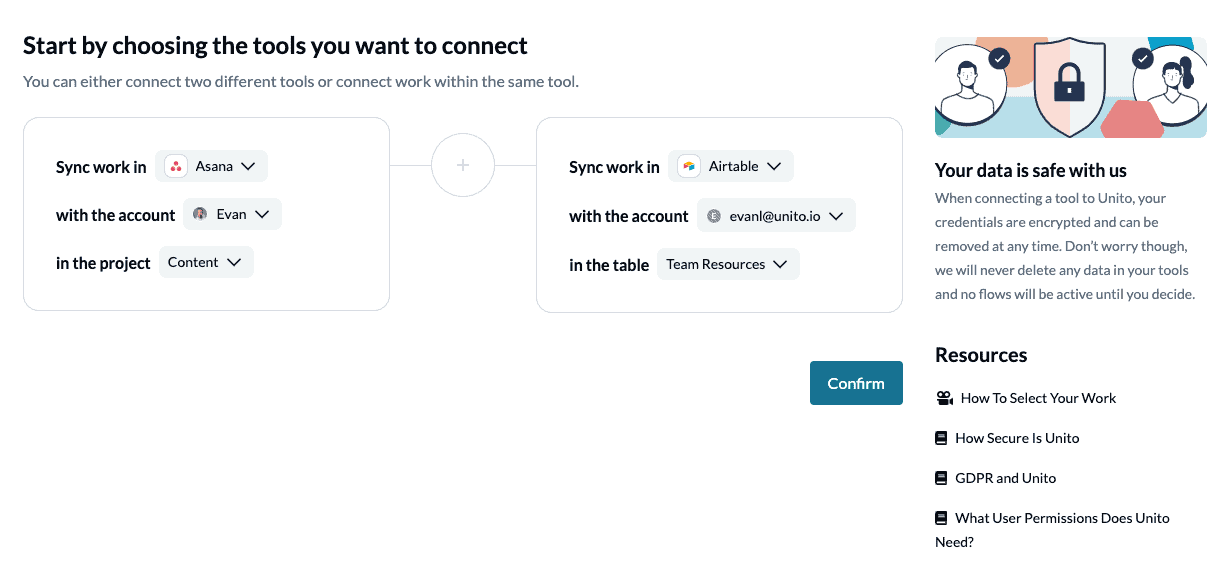
Next, pick the team resource report base. Then, select your secondary source of team tasks. This could be another Airtable base, an Asana project, a Jira project, or equivalents in dozens of other tools. You’ll need to connect this tool to Unito and then select the relevant project. In this example, we’re using an Asana project.
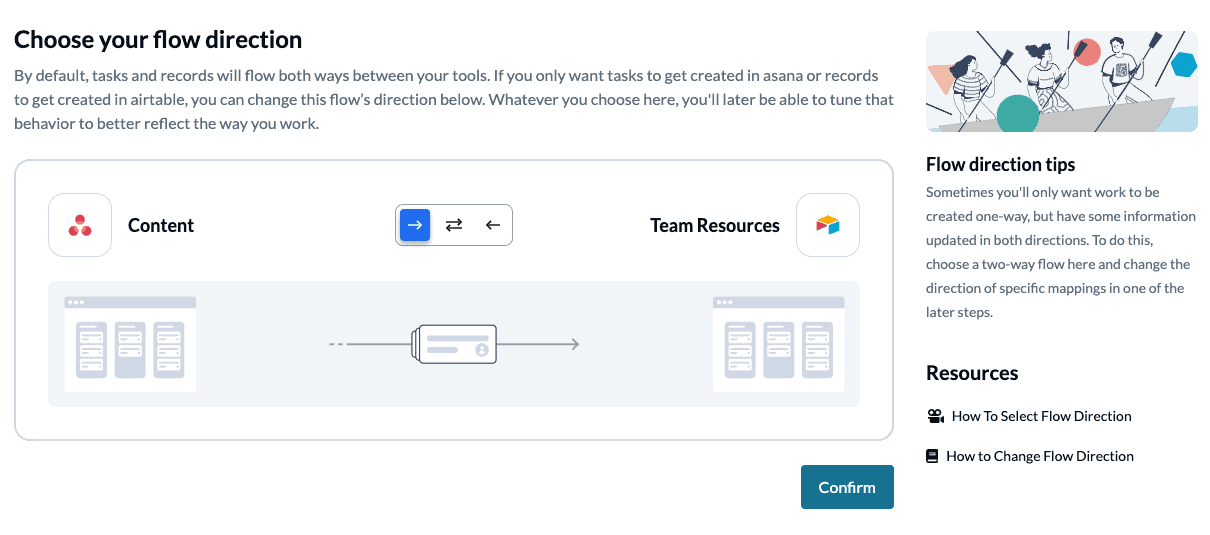
Choose a flow direction
By default, Unito will create new records in Airtable to match tasks in your Asana project, and vice-versa. You also have the option of creating a one-way flow, meaning that new records in Airtable won’t become Asana tasks.
Filter out unrelated work
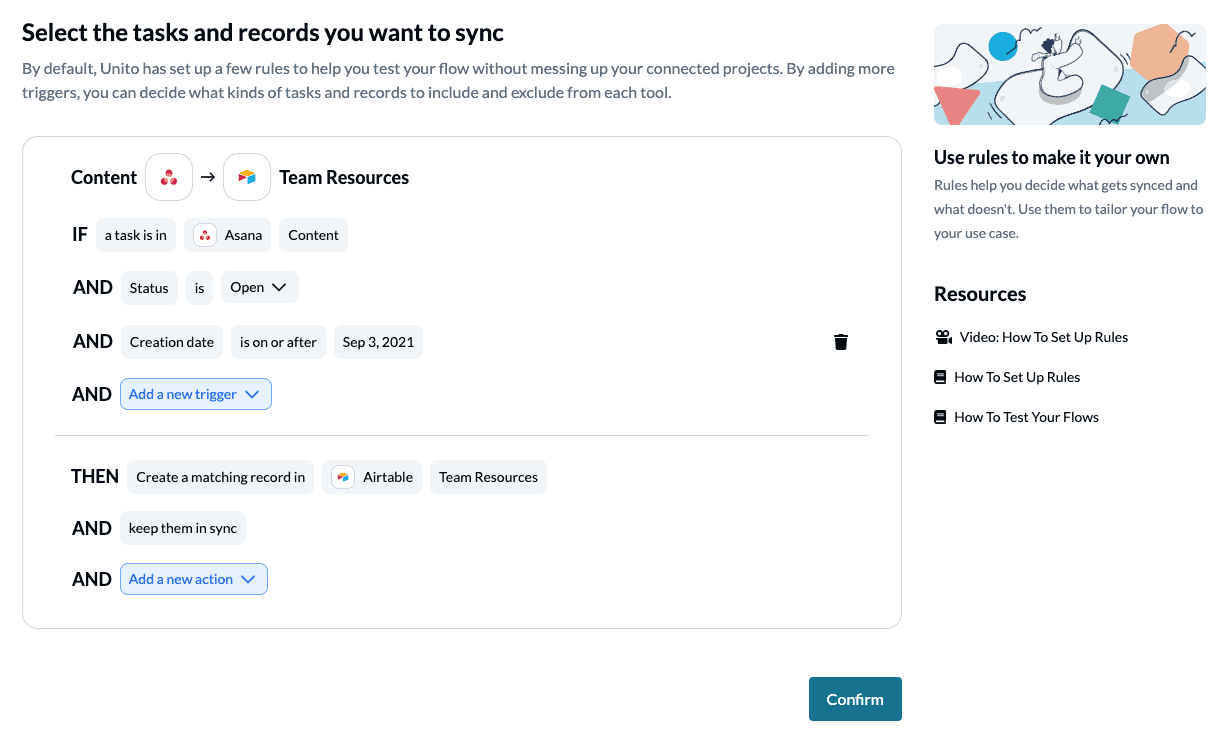
From there, you can build custom rules to decide how much information gets synced to your report. If, for example, you don’t want to sync all Asana tasks into Airtable, you can create rules to that effect. You’re in complete control whether your flow captures tasks relating to specific initiatives, tags, or team members.
Customize field mappings
Essentially, you can decide where each Asana field lands inside your Airtable base. Unito automatically maps similar fields (task title to task name, description to description, etc.). But again, you can manually map things however you want.
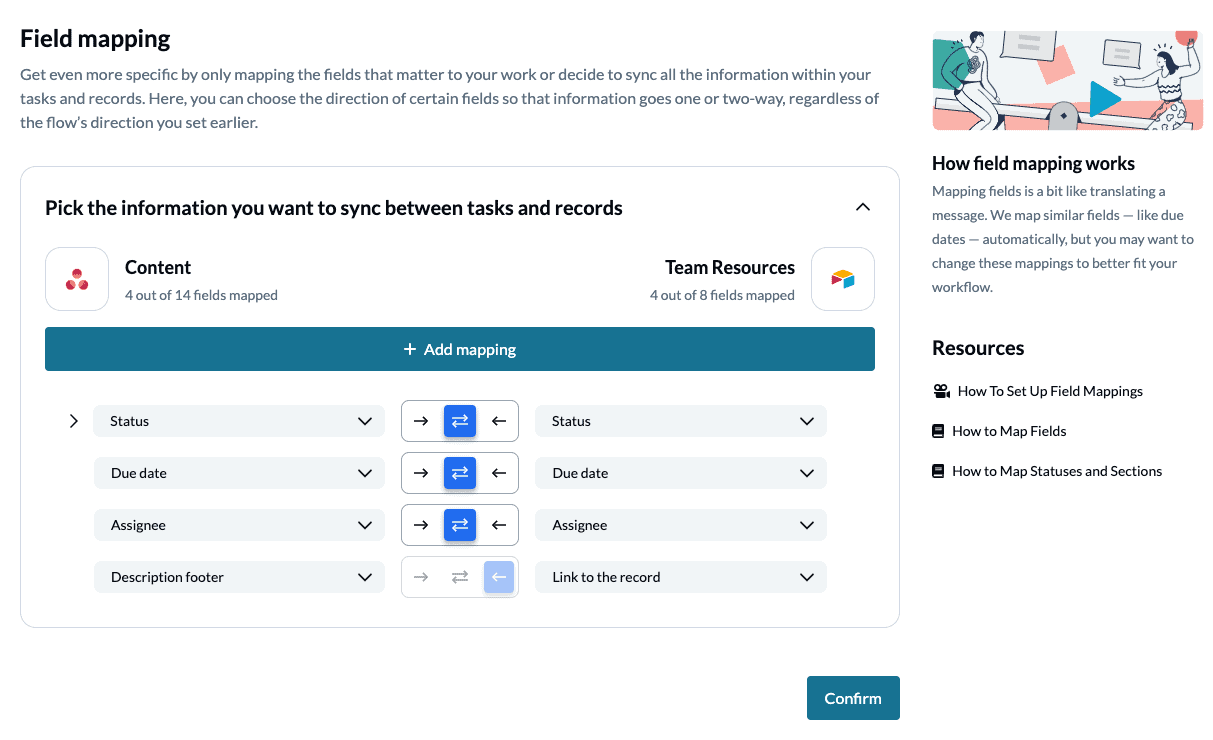
Make sure your fields are mapped for two-way updates. By mapping each field two-ways, you can edit within your report and see those changes appear on each end. This gives you the ability to reassign work, edit due dates, and more.
After mapping your fields, you’re done! You can launch your flows and watch as tasks flow into your team resources report automatically. You can then consolidate tasks from multiple sources by creating additional flows with your Airtable resource report as the endpoint.
Essential Unito features for this Airtable report
Real-time updates
A report is only useful if the data contained within it is accurate. That’s why manually updating reports is such a taxing process. You’re constantly copying and pasting information to keep up with task progress. Unito updates your Airtable resource report automatically in real-time, so you’ll see a true reflection of your team’s workload.
Custom fields
Airtable is a customizable platform stuffed full of custom fields. With Unito, you can sync these fields back and forth with flows that adapt to your projects. You can then add more impact with unlimited custom field support that comes with Unito’s Company and Enterprise plans.
Advanced mappings
Customizing your field mappings to ensure data lands in the right part of your report is pretty important. The more complex the report, the more you’ll get out of custom field mappings.
Airtable report #2: Automated proejct health reports
Ever felt out of the loop? That’s a common complaint among stakeholders who are responsible for multiple projects. Too often, they’re chasing updates through multiple tools or scrolling through multiple reports. And that’s not to mention all the work that goes into constantly building those reports.
Usually, a stakeholder will get regular reports to do this. But both creating and consuming these reports takes time and effort. In Unito’s Report on Reporting, more than a third of people surveyed said they spent at least three hours a week on reporting. With the right tools, you can automate that process, so everyone stays in the loop without the work.
With Airtable, you can build any report you need and customize it to your needs. But we also built a ready-made template just for this use case. Here are the columns you’ll find in it.

- Date of Update: A date field that lets you sort through recent updates.
- Project status: A single-select field that communicates how the project’s going.
- Key updates: Use this text-field for high-level information.
- Next steps: A text-field that details what’s coming up next in your project.
- Completion: This number field can tell you how many tasks in a project are completed.
- Link to project: Use a URL field to give people an easy way to check the project your report is for.
- Last modified: You’ll need this field for your Unito flow to work.
Your report doesn’t have to follow this exact template, of course.
Populating your report with Unito
Now that you’ve got your report, it’s time to make it sing with Unito. Here’s how you can set up your flow in just a few clicks.
Start by connecting Airtable to Unito.
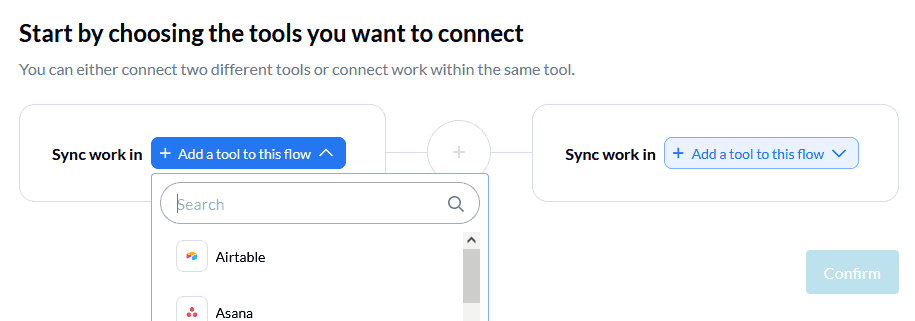
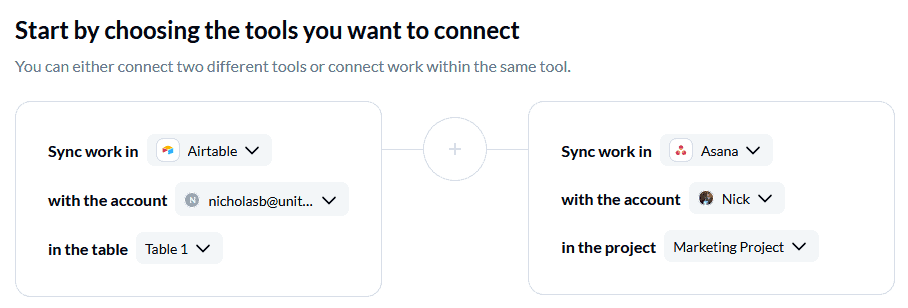
Next, pick the projects you want to report on. They can be from any of our integrations. In this example, we’re using Asana.
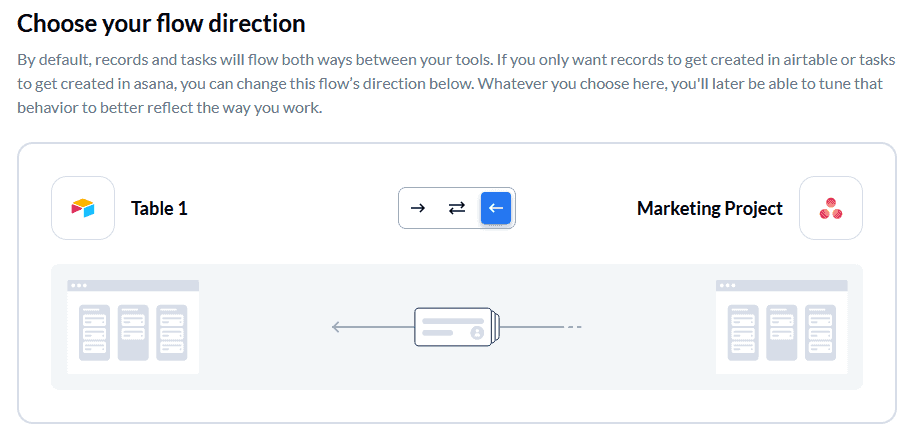
After this, it’s time to set up flow direction. Usually, you’ll want to use a two-way flow to automatically keep information updated in both tools at once. But since you’re reporting on a project, you’ll probably want to set up a one-way flow here.
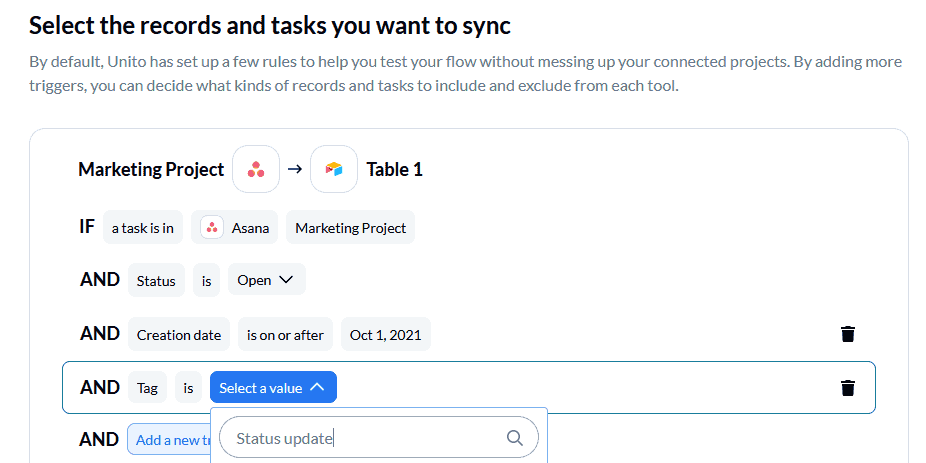
Now it’s time to set up your rules. With rules, you can filter out information you don’t need. Unito always sets default rules that only look for new, open work items. The rules you set up for this use case will depend on your projects. One way to make this work is to have tasks in your projects that serve as “status reports,” and give them a label to that effect. Then, you can sync just tasks with that label to your Airtable report using a rule.
Once you’ve set up your rules, you can customize your field mappings.
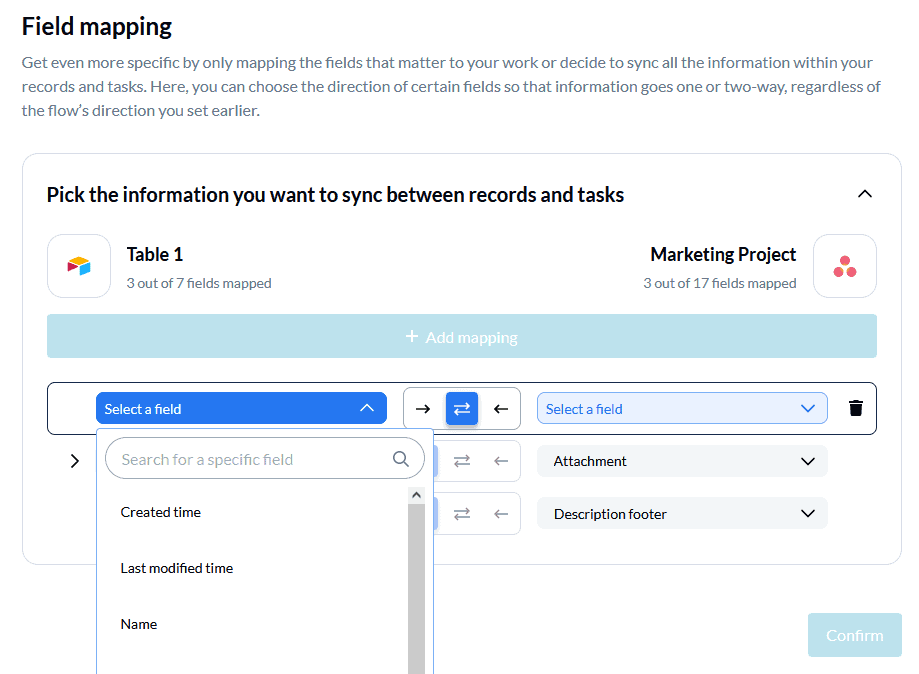
Many of our integrations automatically map similar fields, but you’ll want to do things a bit differently for this use case. When you get to the field mapping screen, all you need to do to start pairing things together is click on +Add mapping. With a tool like Asana, you can create custom fields to match the fields in our template.
When mapping your fields, make sure you map them for two-way updates — by keeping the two-way arrow selected on each mapping. That will keep information flowing back and forth.
Once this is done, your flow’s ready to launch! You can build more for each project you want to report on, and even sync them all to the same Airtable report.
Essential Unito features for this use case
Custom fields
Tools like Asana and Jira use custom fields to give users more flexibility. With Unito, you can sync these fields over to any other tool — especially one like Airtable that has versatility built into it. Find out which Unito plans enable you to sync custom fields on our pricing page.
Flow direction
Most integration solutions are one-way by default; more akin to simple automation than full integration. When you want detailed reports, you need a way to keep things automatically updated in both your tools.
Advanced mappings
When you’re dealing with versatile tools, you need an integration that can keep up. Because Unito is just as customizable as your tools, you can make sure information lands where it’s supposed to. No matter how different your tools are.
Airtable report #3: Marketing budget report
How do you track your marketing budget? For many people, the answer is “I’m not.” And for many others, it’s “In about 10 different spreadsheets.”
Why is it so hard to keep track of the numbers? Well, when consultants are sending you invoices (perhaps with Xero) by email, ad spend is being tracked in Google and Facebook, and you’ve set up automatic monthly payments for dozens of tools in your stack, things can quickly get a little messy. Throw in multiple systems, currencies, and budget owners, and you’re left with a tracking system that resembles your headphone wires after an hour or two of pocket time.
Tracking budgets has always been one of the most challenging aspects of marketing. But what if there was a way to automate away that work, so you always knew how much money was flying out the door?
A marketing budget report is a table that shows you how much you’ve spent on a monthly basis (or at a recurring interval of your choosing) and how that compares to your budget forecast. The report should tell you (or your bosses) at a glance where you’ve underspent or overspent and how much you’re planning on spending in the months to come. Using Unito and Airtable, you can build an automated marketing budget report with minimum work.
Building your database in Airtable
Building a new base in Airtable is easy. You can start from scratch, or use Unito’s marketing budget template, to save yourself some valuable time.
While every business’ marketing budget is going to look a little bit different, there are a few core fields that will almost always be present:
- Expense: This is what it all comes down to — what are you ultimately spending money on. In the expense field, you’ll be tracking both your projected expenses and unplanned expenses, which you can add along the way.
- Expense type: The best way to organize your marketing budget report template in Airtable is by expense type — essentially a category of spend. This makes it easily digestible for viewers at a glance. Some common expense types are tools and software, advertising spend, and freelancers/consultants. Of course, it’s always good to have a miscellaneous type, to capture all those random expenses that don’t quite fit anywhere else.
- Monthly forecast: How much are you planning to spend on each expense every month? The forecast is helpful both for setting your annual budgets, but also simply to compare your monthly spend to your estimate.
- [X month] spend: You’ll want a dedicated field for each expense every month, again to track your actual spend versus your forecast. Some businesses might track spend quarterly rather than monthly — do what works for you.
- Year-to-date spend: As the months progress, you’re going to want to be able to track your total spend per expense so far in the year. This helps you readjust your spend in the remaining months. Or, you know, beg for more budget!
Once you’ve put together your template, don’t forget to sort the table by expense type. The end result — populated with an example — should look something like this:
Now that you have your budget template, here’s how to save yourself even more time on reporting.
Populating your marketing budget report with Unito
Sure, a marketing budget template will save you a bit of time. But the game-changing time savings come from automating your report with Unito. Here’s how to do it.
Start by connecting Airtable to Unito, then connect the budget template base.
Next, pick any of the other work tools where some of this budget information is stored. Do other members of the marketing team manage specific budget expenses? Does the finance team use a Google Sheet to track your spend based on invoices? Or do you have multiple Airtable bases depending on expense type?
No matter your situation, pick the second data source and connect it to Unito. For this example, we’re using Trello.

Once that’s done, it’s time to choose your flow direction. For your marketing budget report, you’ll probably only want data flowing one way, into the Airtable base. But, you could create a two-way flow and have budget items filtered from your report back into those secondary data sources. Follow your bliss!

With the flow direction set, you have the chance to build custom rules to help your filter in only relevant information. Whether it’s a label/tag, assignee, or some other qualifier, Unito will follow your lead, ensuring the data you need ends up in your marketing budget report — and nothing else.
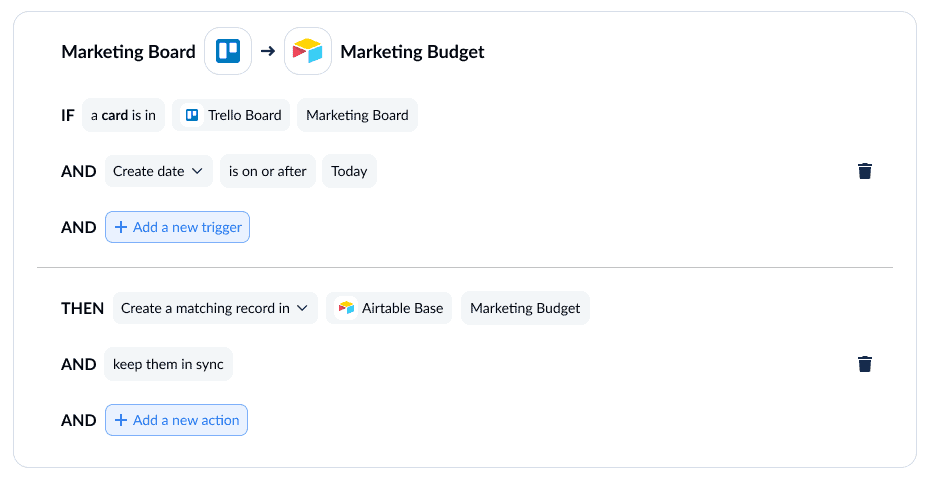
Then, you’ll have the opportunity to customize your field mappings. Unito will automatically map similarly-named fields across data sources, but you can also customize it to your liking.
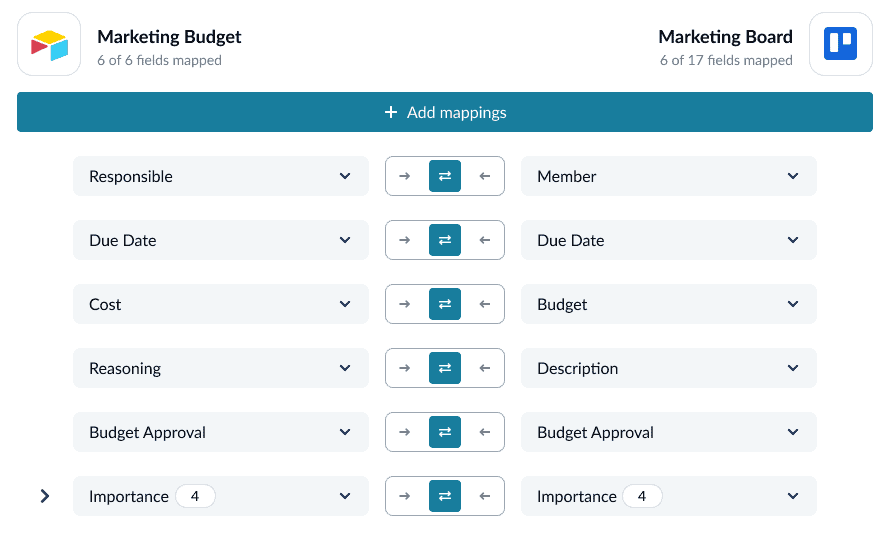
Finally, push that big button and launch your flow! Watch data flow into your report automatically, in real-time. No more copy and pasting budget information. No more struggling to track down the numbers. Sound too good to be true? The best things usually do!
Do more with Airtable and Unito
Airtable is a fantastic tool, and with just a bit of work, it can be your organization’s reporting powerhouse. Pair it with Unito, and all those reports can be automated — meaning they’re even less work to maintain. Have a report you need a template for? Let us know!

