
A Beginner’s Guide to Jira
Project management is about preventing problems, tracking the ones that inevitably arise, and solving them. Enter Jira.
As much a project management tool as an issue tracker, Jira is well-known to many developers and managers in the software space. It’s constantly evolving, customizable, and powerful. You can use it on the cloud or on-premise. Whether you’re just curious about using Jira or you’re ready to implement it into your workflow, you’re in the right place.
This beginner’s guide covers some of Jira’s many features and functionality, including:
- Navigation
- Jira’s project templates
- How to create your first issue
Navigation
The navigation bar
Here’s what Jira’s main screen — the projects screen — looks like.
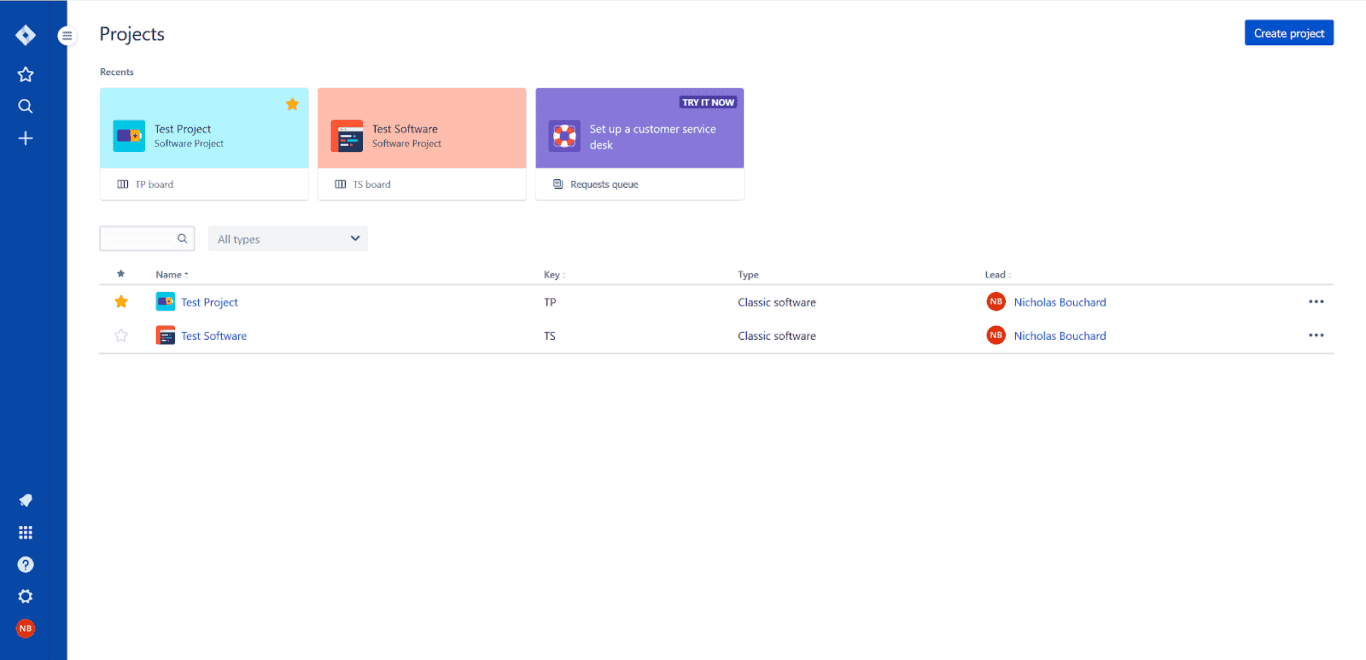
You’ll see that I’ve created a couple of projects in the process of preparing this beginner’s guide. We’ll be going over those in just a moment. For now, I want to bring your attention to the blue navigation bar on the left side of the screen.
From top to bottom, here’s what these buttons do:
- Jira Software: This is your home button; clicking on it will bring you back to the projects screen.
- Starred and recent: This feed shows your recent activity, divided by boards, projects, filters, dashboards, and issues. You can also favorite or “star” issues and projects to have them show up in this menu.
- Search: Looking for something specific? Clicking on this will open up the search bar.
- Create: This little plus sign is where you create issues. You’ll get an in-depth look at how to do this later in this guide.
- Notifications: If you’re tagged in an issue, this is where you’ll find out. You can also get notifications for issues you’re watching (by clicking the “eye-con” on the issue itself).
- Switch to: Through here, you can access admin settings if you’re an administrator. There’s also a list of shortcuts for some of Atlassian’s other products, such as Confluence and Opsgenie.
- Help: If you’ve got a question this guide doesn’t answer, you’ll want to click here. This button gives you access to Atlassian’s documentation, their community, and more.
- Settings: Manage your users, your billing info, and a slew of other settings through this screen.
Now that we’ve gone over the nav bar, let’s cover the toolbar, as it looks when working on a project.
The toolbar
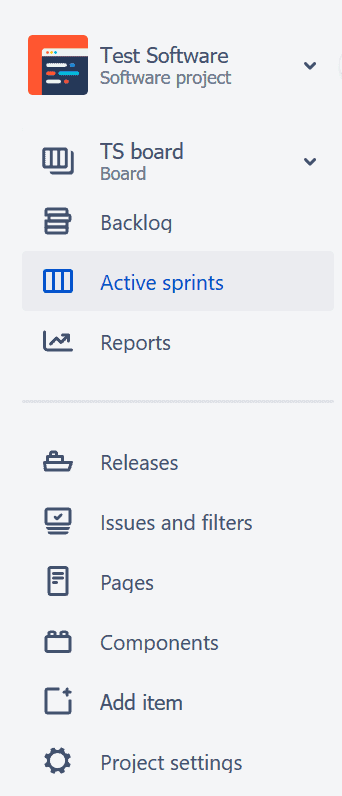
The above screenshot is an example of a toolbar you’d get when working with the Scrum template. This menu could be very different — depending on the template you use — but is generally the same for the Scrum and Kanban templates. I’ll be covering some of the options here in the “Project templates” section of this guide. For now, we’ll focus on everything from “Reports” down.
- Reports: Jira has a ton of options for project managers needing to analyze their team’s performance. You have Agile reports such as the Cumulative Flow Diagram, issue analysis reports like Average Age Report, and forecast reports like the Time Tracking Report.
- Releases: If you’re using Jira’s “versions” feature, this window will show your project’s versions, as well as their status. If you have issues assigned to your version, you’ll also get a snapshot of how many issues have been resolved. You’ll also release versions from this window once they’re finished.
- Pages: Using Atlassian’s Confluence tool, this tab lets you keep all of your documents in one place. Pages can be used for onboarding information, policies, meeting notes, and more.
- Components: This is another way to group issues within a project. Usually, you’ll use components of your software to do this. You can also use components to group issues according to things like features, teams, or anything else you can think of.
- Add item: Clicking here triggers a pop-up that gives you the option to add a shortcut leading to external sources, a GitHub or Bitbucket repository, and Confluence pages. If you’re looking to add a task, hit the “C” key on your keyboard.
- Project settings: This section lets you edit the basic characteristics of your project, such as the name, description, and project lead.
Now that we’ve gone over Jira’s toolbars, let’s go over project templates and what you can do with them.
Jira’s project templates
Jira has a huge number of project templates to help you organize your work, all deeply customizable. That makes it impossible to cover every use case. That’s why we’re focusing on two of the most common templates here: the Kanban and Scrum boards.
The Kanban methodology is almost synonymous with project management and renowned for its simplicity and ease of use. That’s why it’s one of the most popular templates for Jira. Setting up your workflow is quick, and because it’s so simple you can tinker with it over time as your work evolves. You’ll barely notice it’s there, and you can just focus on what you need to get done instead of how it gets done.
The Scrum board comes from Agile methodology, another project management style that’s popular in the software development world. Fundamentally, Agile is about prioritizing individuals over processes, and quick response to change over pre-made plans. It encourages ongoing iteration by helping you organize the development process. Jira’s Scrum project template is built with these ideas in mind.
Let’s see what these templates look like.
The Kanban board
Overview
Jira’s Kanban board is your visual to-do list. The classic Kanban board is three columns, “To Do,” “Doing,” and “Done.” Tasks transition through these as they’re completed. Kanban boards are a way to represent issues and how close they are to being resolved.
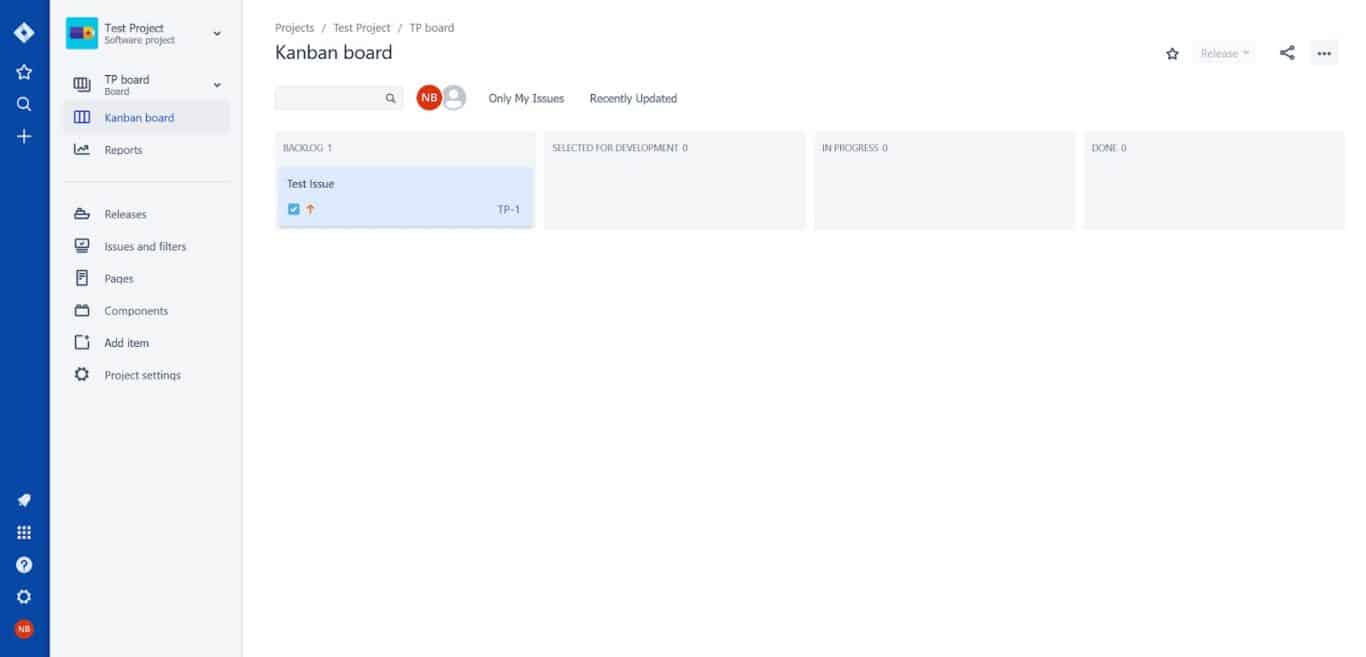
The default Jira Kanban board represents a typical development process. New issues are automatically dropped in the Backlog column, and move through Selected for Development, In Progress, and Done columns. As you work on an issue, you can click on issues and drag them to other columns, moving them from left to right until they’re “done.”
If you’ve already worked with Kanban boards, this isn’t new to you. So let’s go into how you can customize Jira’s Kanban board for your needs.
Settings
Jira has a slew of settings for customizing your Kanban board. Here’s an overview of what they do:
- General: Change your board’s name and administrators, and move it between projects. You can also set up filters to exclude certain kinds of issues from your Kanban board.
- Columns: You can add, remove, and rename columns, much like you can in other tools. You can also set constraints for your columns. Constraints can be maximum or minimum amounts of issues each column can hold. You could use a constraint to limit the number of issues that can be added to the “In Progress” column so your developers don’t get overwhelmed. You can also set up a Kanban backlog, which is kept separate from your board.
- Swimlanes: A swimlane is a row which groups issues together across columns. In these settings, you can create and maintain swimlanes, and determine what kind of issues you want them to contain.
- Quick filters: You can create additional filters for your issues here using JQL (Jira Query Language) queries. Here are the basics of using JQL.
- Card colors: You can use colors to differentiate your cards and get a better read on your board at a glance. You could use colors to represent priority more visually, for example.
- Card layout: This setting lets you tailor which fields are visible when your issues are on the board. For instance, adding the “Reporter” field means you would see who created the issue without opening it.
- Working days: Some of Jira’s analytics and reports use working days as a metric. By default, working days are Monday to Friday.
Jira’s Kanban boards are deeply customizable and can be useful for any team. But what if you need more than a Kanban board?
The Scrum board
Jira’s Scrum board is based on Agile methodology. This method uses a series of sprints to manage projects and workloads. Sprints are short bursts of hard work aimed at completing specific tasks, such as a hand-picked selection of bugs. Jira empowers the use of Agile methodology by helping you organize your team’s backlog and sprints.
The backlog
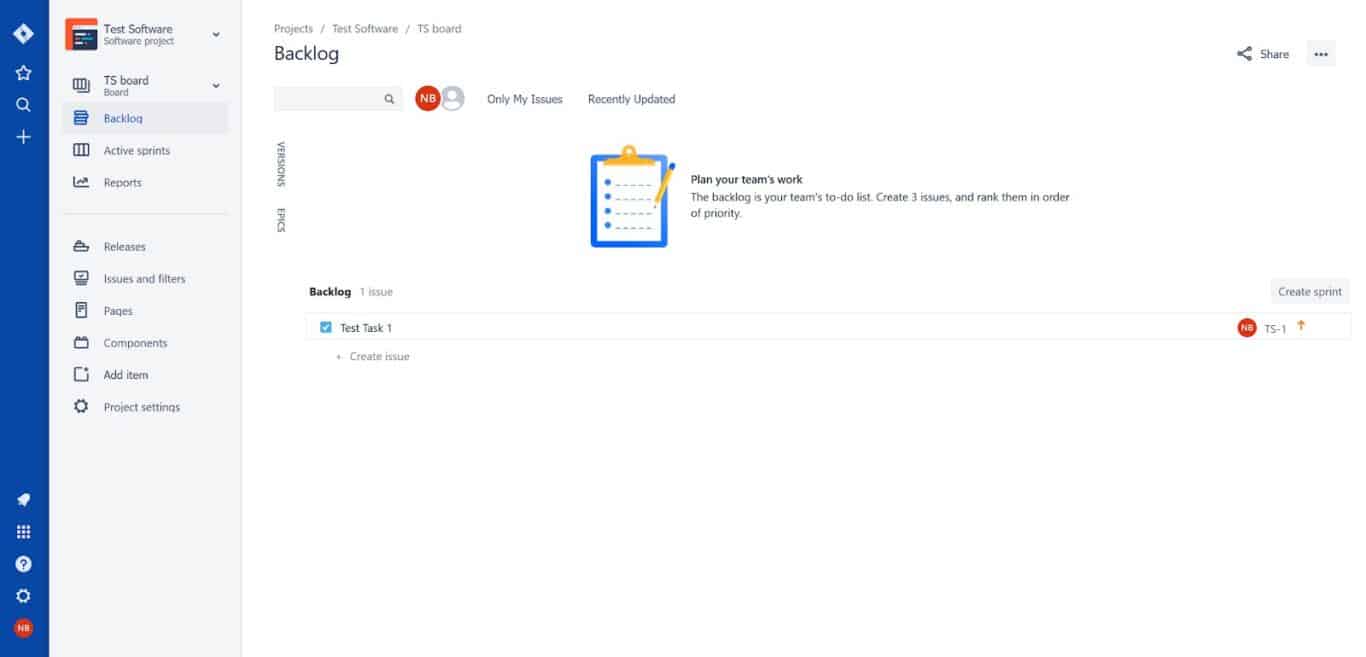
New issues will automatically land in the backlog unless you assign them to a sprint. The backlog serves as a repository for all your issues, and it’s from there that you’ll pick out the issues that will be worked on during a sprint. You can order issues by priority to help plan your sprints.
The backlog screen has two additional panels that you can use to order your issues:
- Versions: When working on software, versions are used to organize your work on a timeline. Organizing issues around versions gives your team milestones they can work towards over time.
- Epics: There are two main uses for epics. One is to break down large user stories into smaller chunks. The other is to group multiple user stories when you notice patterns that you want to address as a whole. User stories are used to describe features and problems in an informal way, from the perspective of the end-user.
Sprints
Sprints allow you to focus a team’s efforts on specific issues for a predetermined amount of time. These issues are selected and prioritized prior to the start of a sprint. When you create your sprint, you can attach product requirements, meeting notes, and other documents you might have drafted up during the planning stage. This ensures everyone’s on the same page.
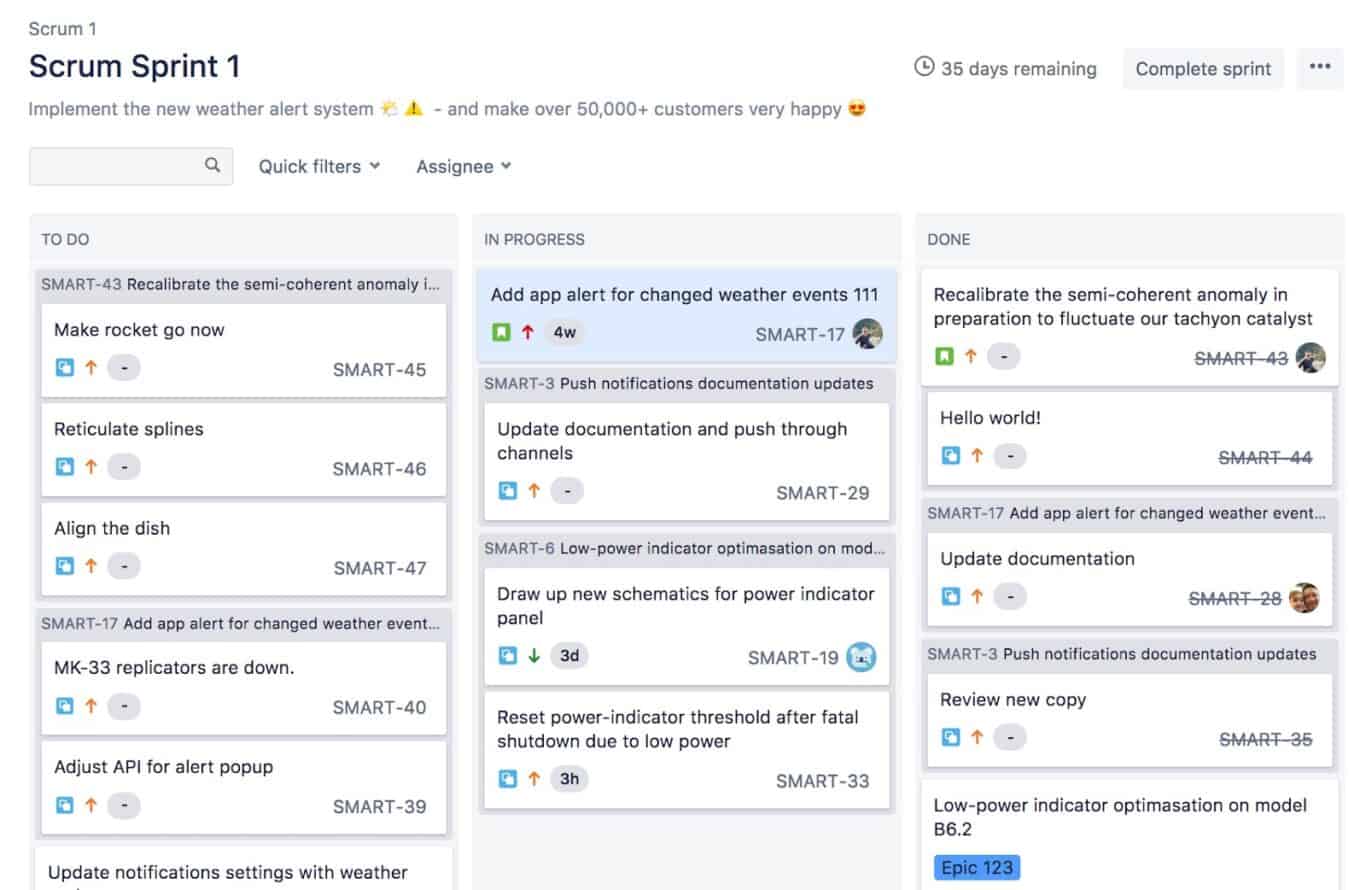
When an active sprint has issues assigned to it, Jira uses a Kanban board to show you which tasks are at “to do,” “in progress,” and “done.” You can add comments to these issues, track how much time was spent working on them, and give them subtasks.
There’s also a countdown in the top right corner of the screen to show you how many days are left in a sprint.
Want a deeper guide to creating sprints? Read it here.
Creating your first issue
Creating an issue in Jira is super simple, which is great, since you’ll spend most of your time dealing with them. Start by clicking on the plus sign on the blue toolbar to the left of the screen (or hit “C” on your keyboard). This will bring up the “Create issue” screen. This screen is deeply customizable, and you can add or remove fields as you wish. I’ll be going through the default fields. Note that I’ll be creating a Task in a project using the Kanban template.
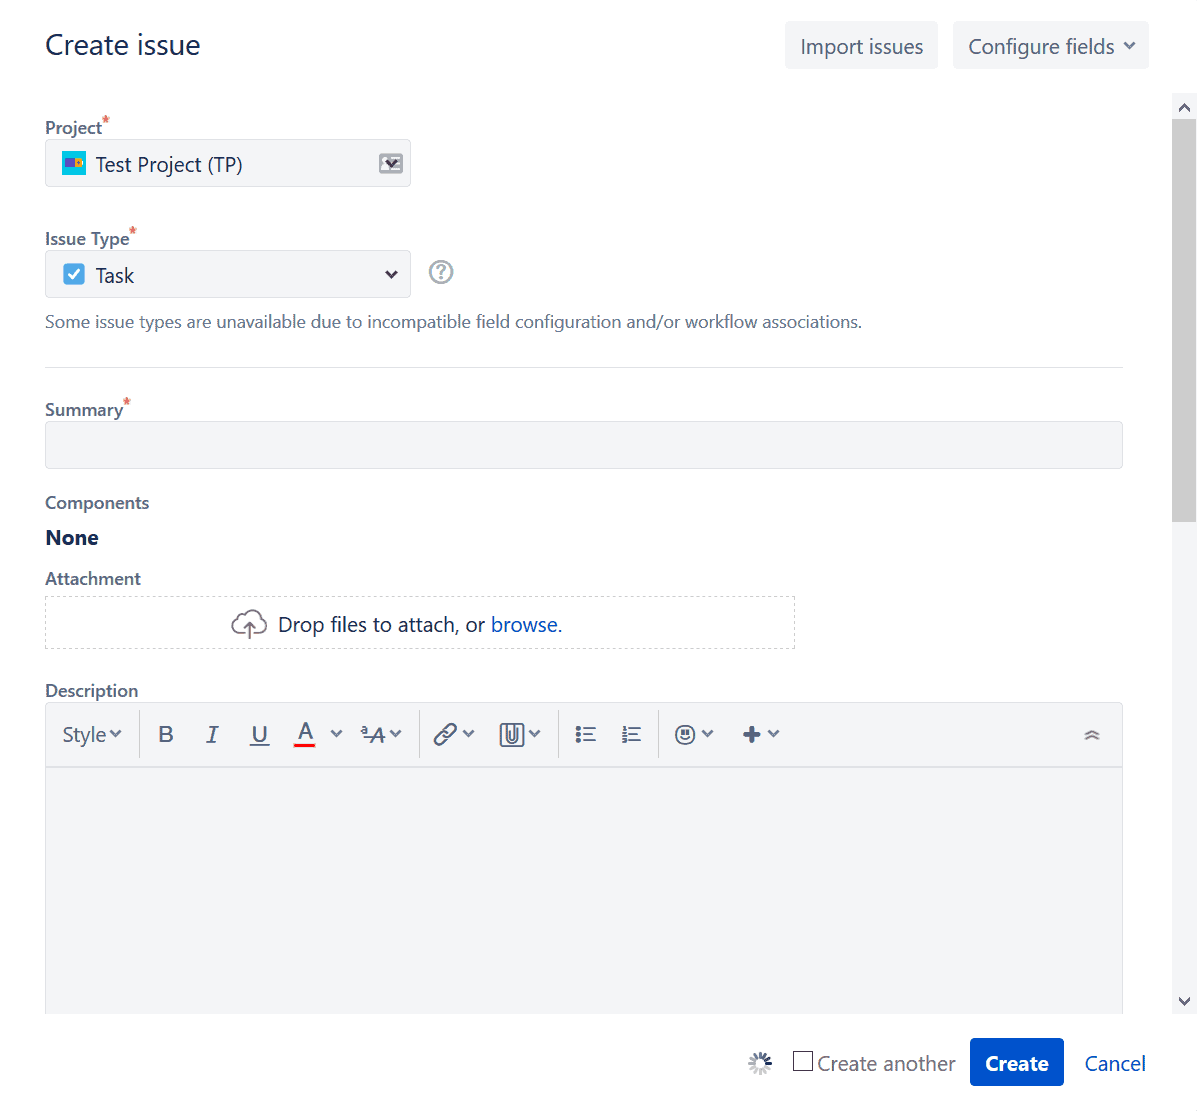
There are a few fields to go over here, starting with the project field. If you’re working on multiple projects, this dropdown will allow you to drop your new issue directly into the right project.
Next, you’ll need to select the issue type.
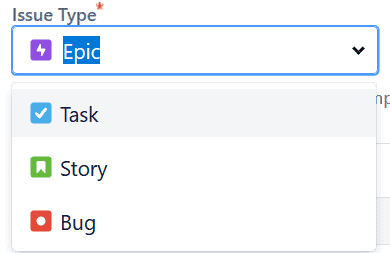
Jira has several. Although there’s no standard for how to use issue types, here’s how they’re commonly used:
- Epic: Epics can be used to represent large user stories that will be broken down into smaller chunks. Or they can group multiple user stories together.
- Task: For tracking individual bits of work that need to get done.
- Story: User stories are best used to describe features from the perspective of the end user.
- Bug: For things that aren’t working right. You can include screenshots and track all the work going towards fixing the bug.
To keep things simple, select the “Task” issue type.
After this, you’ll need to give your issue a summary. Ideally, you’ll want something quick and descriptive.


The component field is where you can assign an issue to one of the components you’ve created for your project. For now, this can be left blank.
You can add attachments to your issues, such as screenshots or text files. They can be uploaded directly from your computer, or attached from Google Drive and Dropbox. For this example, we won’t be adding any attachments.

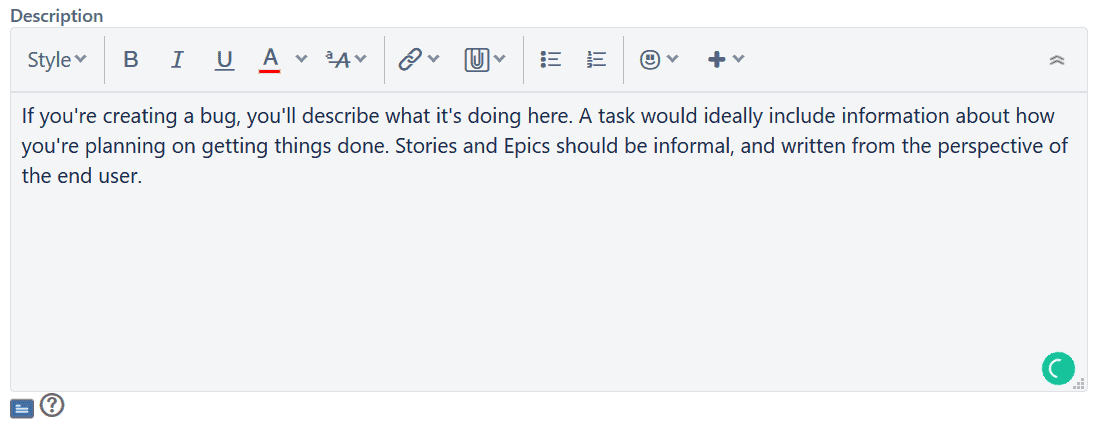
The description field is where you’ll put any additional information you and your team might need.
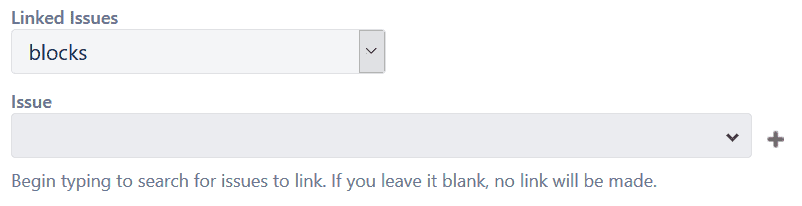
Issues don’t always happen in isolation. If your issue is blocked, linked to, or duplicated by another, you’ll use this setting (and the dropdown) to connect them. Since this is your first issue, you shouldn’t have anything to add here.
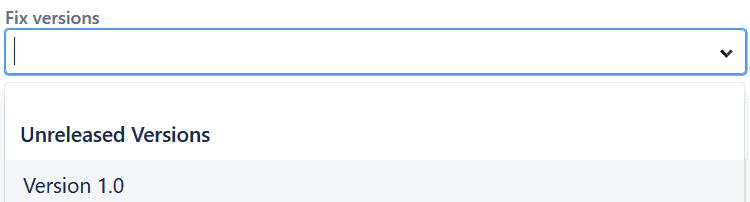
When you’re a Jira expert, you’ll be organizing your issues through versions and releasing them once they’re completed. For the purpose of this example, I’ve created an unreleased version I can assign this issue to.
Once you have multiple people in your Jira projects, you’ll be able to assign issues directly to them. For the moment, I’ll leave the assignee at “Automatic,” which will assign it to me (since I’m the only person in this Jira project).

The priority field is where you can determine how important an issue is.

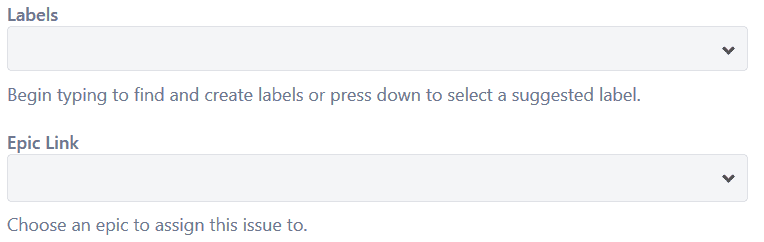
After this, you can add labels to an issue and link it to an epic. Labels will help you when filtering issues, whereas Epics can be used to group issues related to the same user story. We’ll leave these blank for this example.
And with that, we’re done! Click create!

And that’s it, you’ve created your first issue. Notice that it gets dropped right into the “Backlog” column of the Kanban board.
Jira is an incredibly powerful, customizable project management tool for developers. While this post provides a simple overview to get you started, the potential is endless. Dive in and see what it can do for your team.
How to integrate Jira with other tools
Learning how to use Jira is great, but what about slotting it in with your tool stack? Without the right integration, you can spend hours just copying and pasting information from tool to tool so everyone’s in the loop — or manually exporting Jira issues. Just because a tool is great for your needs doesn’t mean it works for another team. No one should be forced to use a tool that doesn’t fit their workflow.
Want to save time and effort? Try Unito. Unito has the deepest two-way integrations for some of the most popular tools on the market, including Jira, Asana, Trello, Google Sheets, and more.
Sync data across tools seamlessly, use rules to filter out irrelevant information, and map fields so everything ends up exactly where it needs to go. All of that in just a few minutes.