Automated Google Sheets Sales Pipeline Template With Salesforce Data
Salesforce is one of the most powerful sales tools out there: it’s in the name. But sometimes, you need another way to make that sales data available to other teams. That can be because they don’t have access to Salesforce at all, or they need to process sales data through an intermediary, like a spreadsheet. That usually means manually copying and pasting data from Salesforce to that spreadsheet or spending hours cleaning up a data export.
But it doesn’t have to be that way.
With Unito’s integration for Salesforce and Google Sheets, you can automatically export Salesforce data to your spreadsheets while keeping everything in sync. That means anything your sales teams do in Salesforce happens in Google Sheets, and vice-versa.
Here’s a guide to set up Unito’s Salesforce Google Sheets integration.
With this free template, you can have a ready-made spreadsheet built specifically for this export.
How the template works
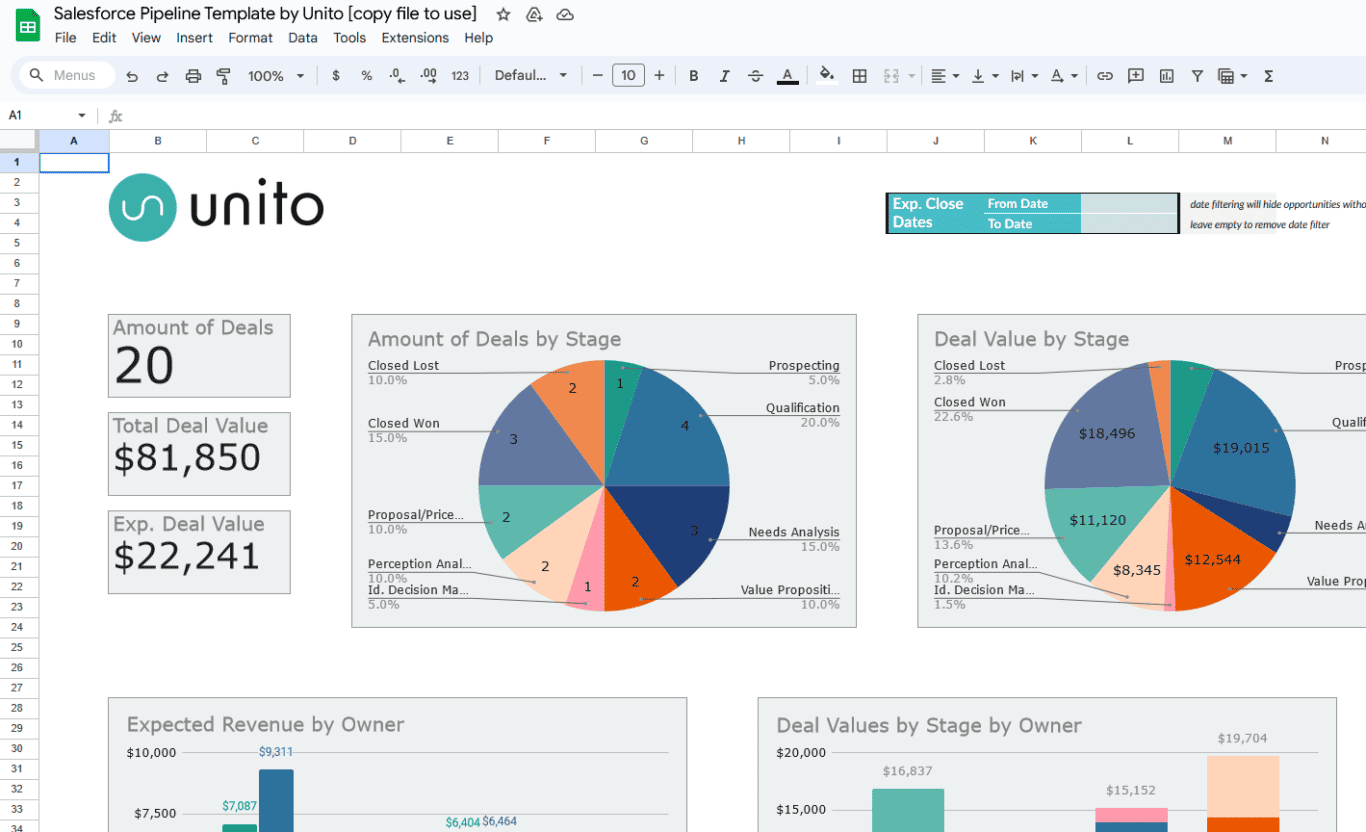
Step 1: Click USE TEMPLATE in the corner to create your own copy
Step 2: Sign up for a 14-day trial with Unito
In order to keep data in sync between Salesforce and Google Sheets, you will need a Unito account. Head to https://unito.io/ to create an account.
Step 3: Build a flow with Salesforce and Google Sheets
We’ve included steps below to walk you through the process. We recommend you follow the field mappings shown below.
“Some other tools we looked at were kind of crazy when it came to pricing. Another big thing for us is 2-way sync for our Salesforce instance. Most of those options only offer directional sync and Unito is bidirectional, which is what we really needed. Plus they offered the best pricing for us at this stage.”
– Anel Behric, IT Manager, Cloudwerx
Step-by-step instructions for setting a Unito flow
This template is pre-formatted to turn Salesforce data into a powerful sales pipeline and reporting tool built right into a spreadsheet. But it works best when you use Unito to feed that data into Google Sheets automatically.
Step 1: Connect Salesforce and Google Sheets to Unito and pick your blocks of work
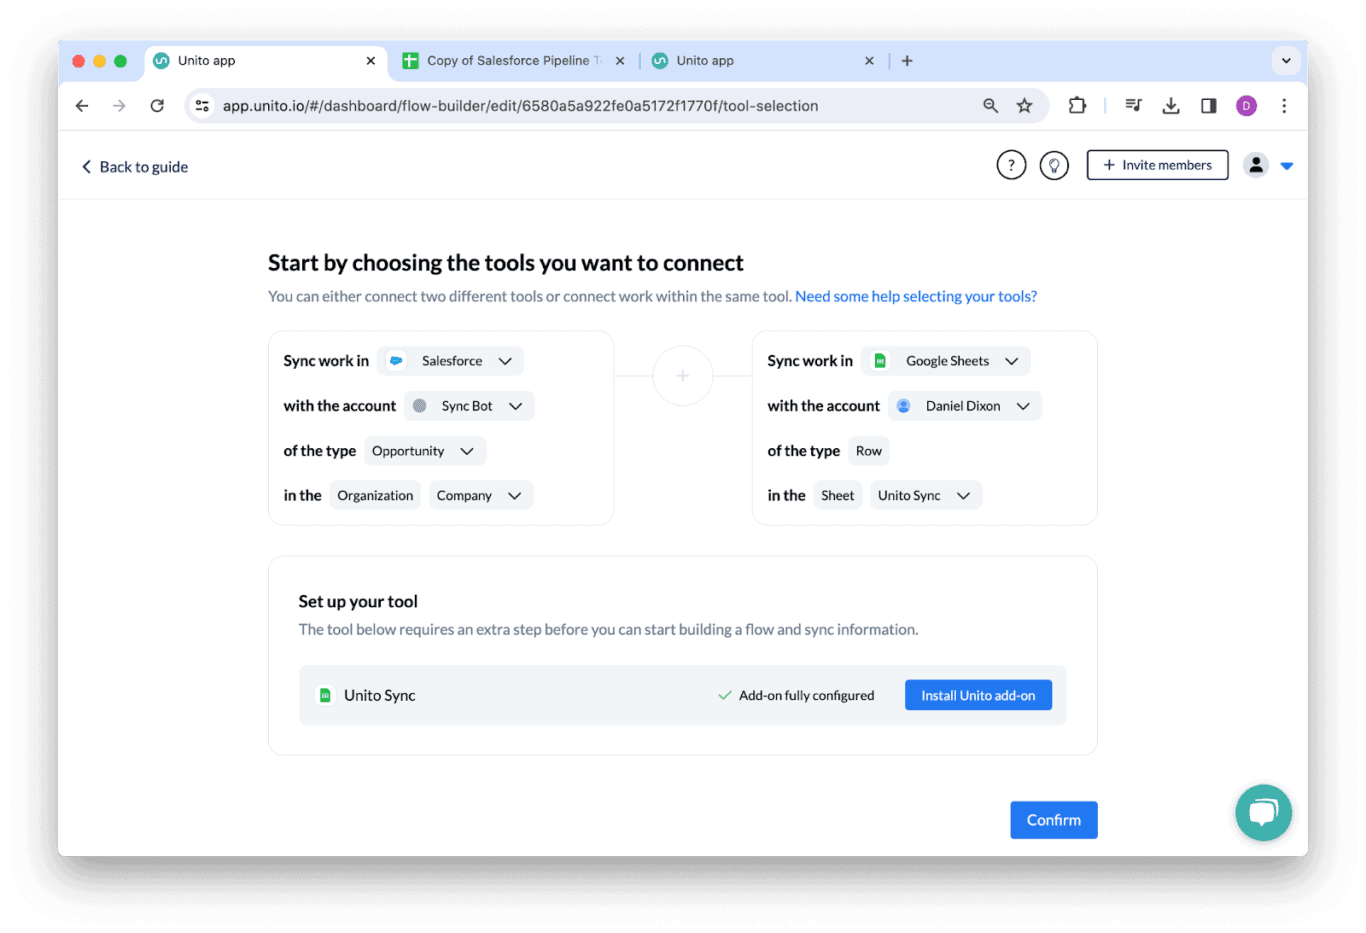
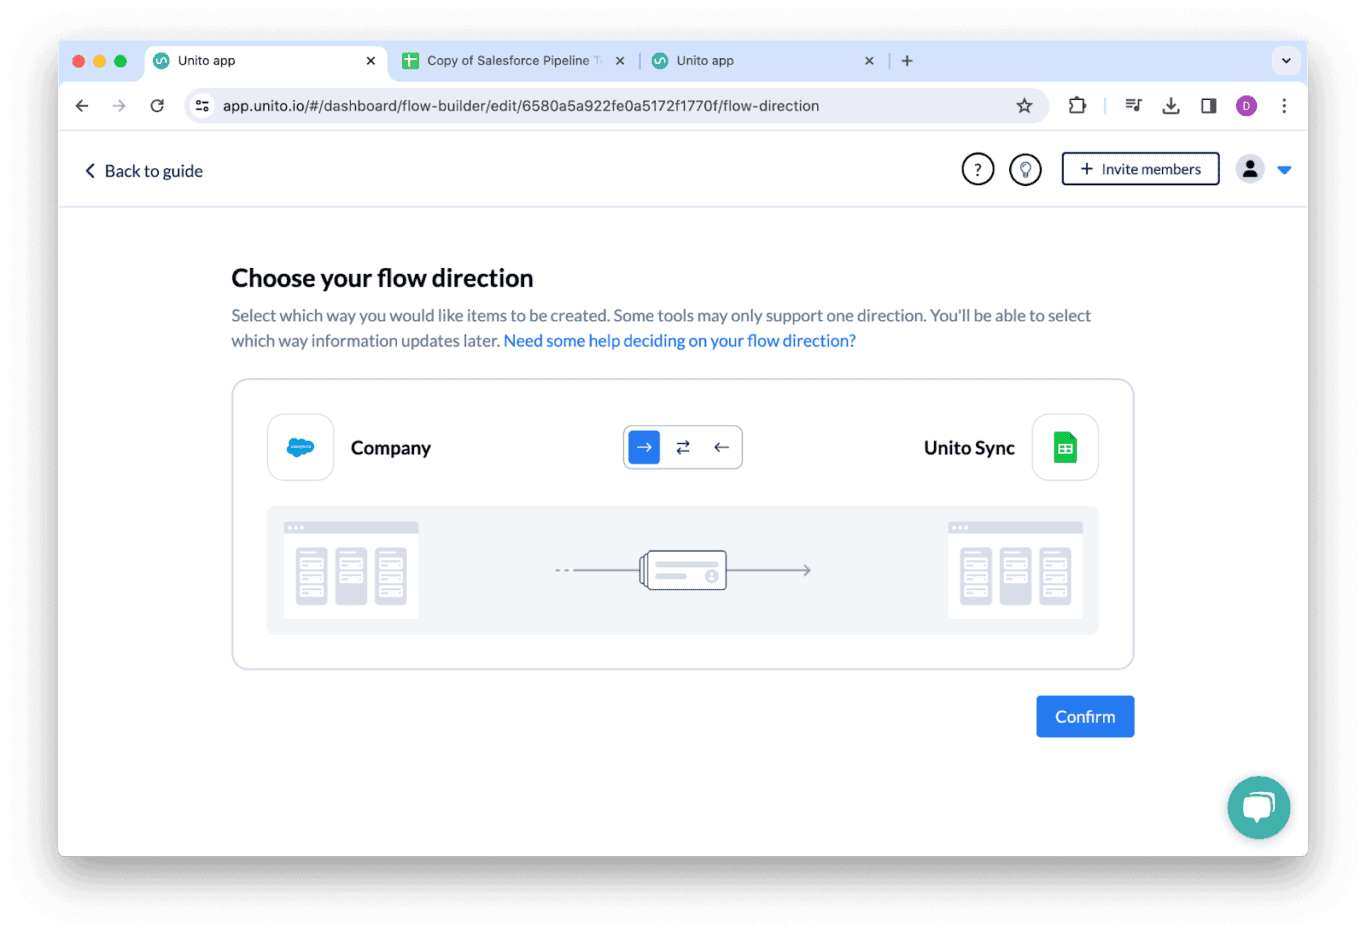
Step 2: Set flow direction to one-way, from Salesforce to Google Sheets
This will automatically create new rows in Google Sheets any time a new work item (an opportunity, a task, a contact) is created in Salesforce. You can also set this to two-way if you want new Google Sheets rows to create new Salesforce work items.
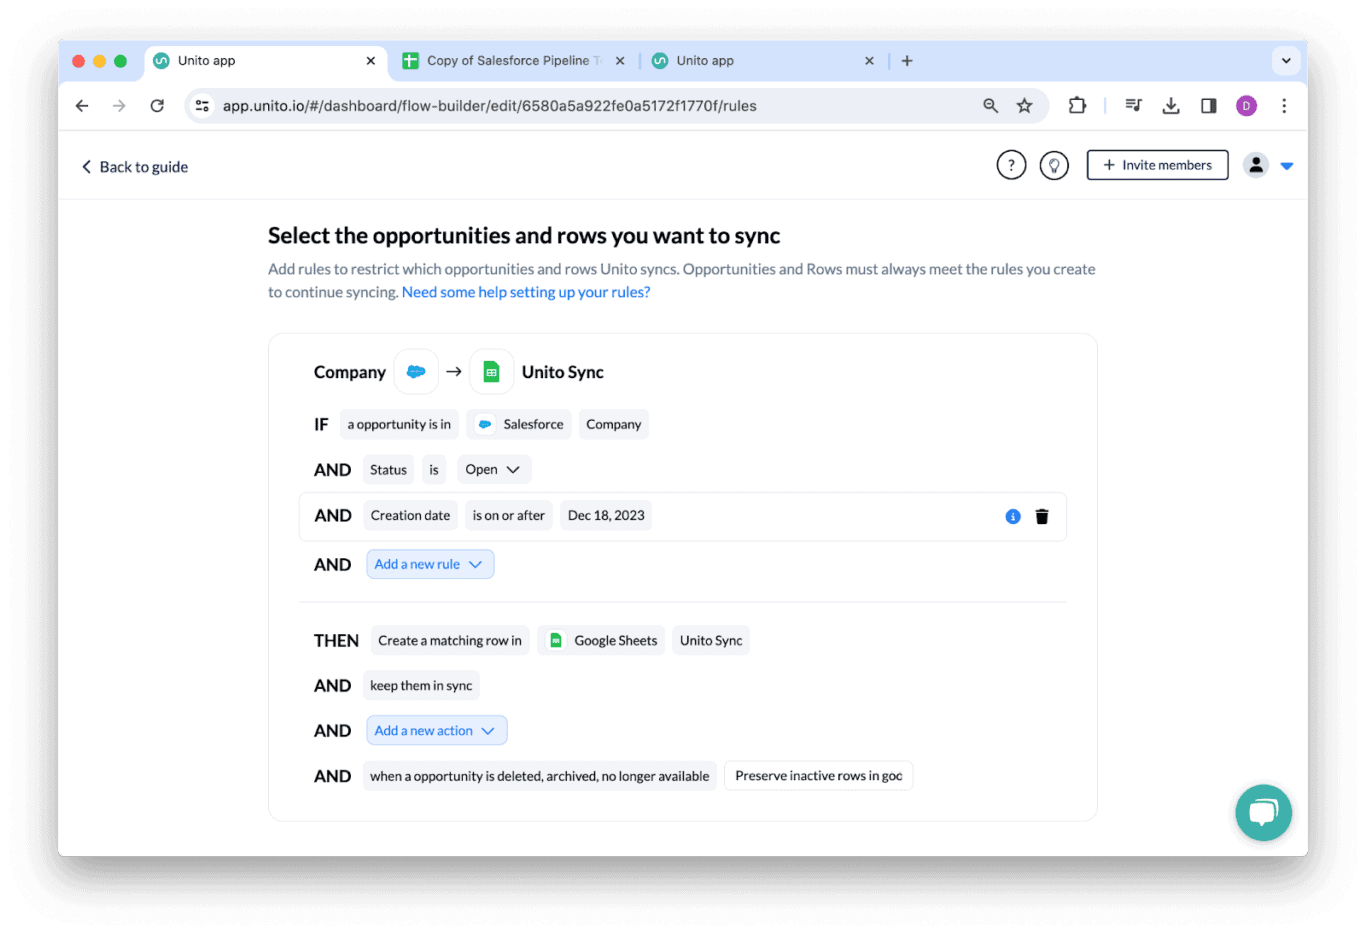
Step 3: Build your rules
With rules, you can filter out Salesforce work items you don’t want in your Google Sheets report. You could choose to exclude all Salesforce opportunities tagged with a specific campaign, for example.
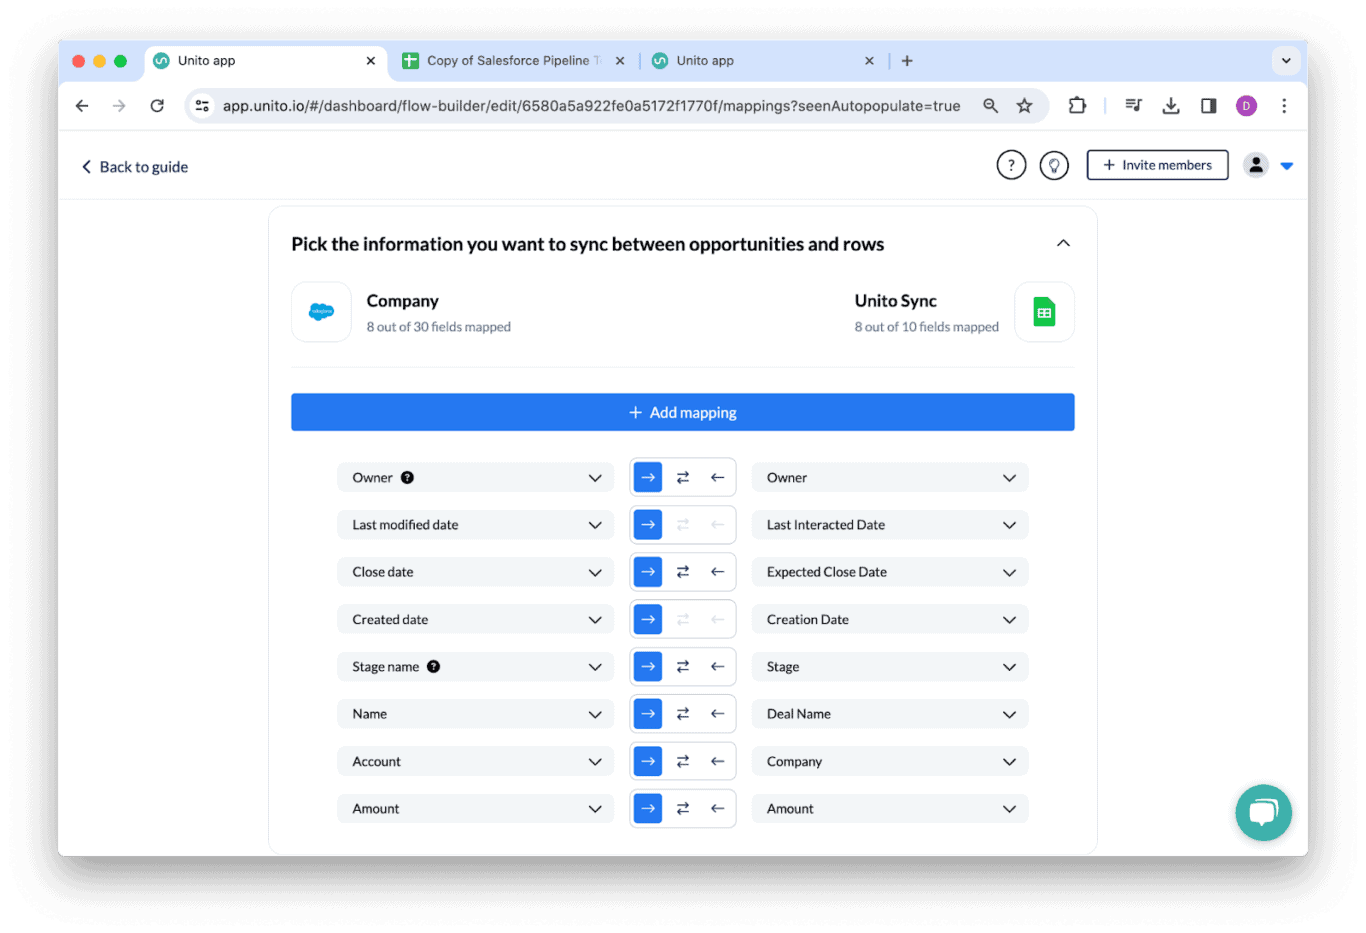
Step 4: Map your fields
If you only want data to sync from Salesforce to Google Sheets, set all your fields to one-way updates. If you want to be able to make changes to Salesforce from Google Sheets, set them up for two-way updates.
Step 5: Launch!
After mapping your fields, you’re good to go! Now just sit back and watch as Salesforce work items are automatically synced to your report in Sheets.
FAQ: Google Sheets sales pipeline template
What is a Google Sheets sales pipeline template?
A Google Sheets sales pipeline template turns sales leads and deals from other apps into Google Sheets rows. This allows your sales team to represent important deals in a fully customizable Google Sheet to make sales pipeline management and reporting a breeze. Many of these templates will also come with prebuilt charts and graphs that break down sales deals based on which stage they’re in, potential revenue, and other variables. These pre-built pipeline templates allow your sales team to quickly deploy a method of tracking deals without paying for a dedicated tool.
Can you use Google Sheets for your sales pipeline?
Yes, you can use Google Sheets for your sales pipeline. Since Google Sheets is a flexible, customizable tool, you can build a sales pipeline to your exact specifications. If you don’t have a dedicated sales tool, this allows you to start using a sales pipeline, report on deals more effectively, and build a stronger, data-driven sales strategy. If you have a sales tool like Salesforce or HubSpot, using Google Sheets for your sales pipeline allows you to centralize contact and deal information in a platform everyone in your organization has access to.
Why use Google Sheets for your sales pipeline?
Google Sheets is one of the most common tools across industries, and its flexibility makes it uniquely suited to all sorts of administrative tasks. If you need a custom tool for your sales pipeline, either because you don’t have a dedicated sales tool or you need a better way to report on sales performance, Google Sheets is a strong choice. You can start with a pre-built template and easily modify it to match your sales process over time. Few tools will allow you to do that.
Do you need software integration for a Google Sheets sales pipeline?
While you can manually load customer and deal data into your Google Sheets sales pipeline template, it’s far from the most efficient method, especially if you have customer data in tools like Salesforce or Google Contacts. Software integration can automatically pull contact and deal data from the rest of your tool stack, plug it into your sales pipeline template, and clean it automatically so it’s consistent no matter where it’s from. A two-way sync integration like Unito can keep the data in your Google Sheets pipeline up to date by regularly checking other versions in the rest of your tools.

