How To Use Slack: A Guide for Beginners
Never used a messaging app at work before, but the team you’re joining is using Slack? Or maybe your team is growing and you want to introduce a better communication channel than texting and email? Whatever the case may be, you could do worse than learning how to use Slack.
In this guide, we’ll break down how Slack works, walk you through the interface, and show you how to create Slack channels and send messages.
How Slack works
Slack is an instant messaging app, often used by businesses to give collaborators a way to communicate asynchronously across teams and departments. There are two main ways you can send messages in Slack:
- In channels: Anyone can create a new Slack channel, usually around a specific theme or team. For example, you could create a channel called “marketing,” just for marketers to collaborate, or a “from the CEO” channel, where the company’s CEO can speak directly to everyone. You can also create private channels, meaning people have to be invited to them in order to contribute.
- Direct messages: Find the person you want to talk to directly and send them a message. Only the two of you can see these messages. You can also create direct messaging channels with more than two people. Think of direct messages as Slack’s equivalent of tapping someone on the shoulder or bringing a few people into a meeting room.
There are other ways you can communicate in Slack, using video and voice calls, but people typically use channels and direct messages for the majority of their communication.
Now let’s go over the app itself.
How to use Slack’s interface
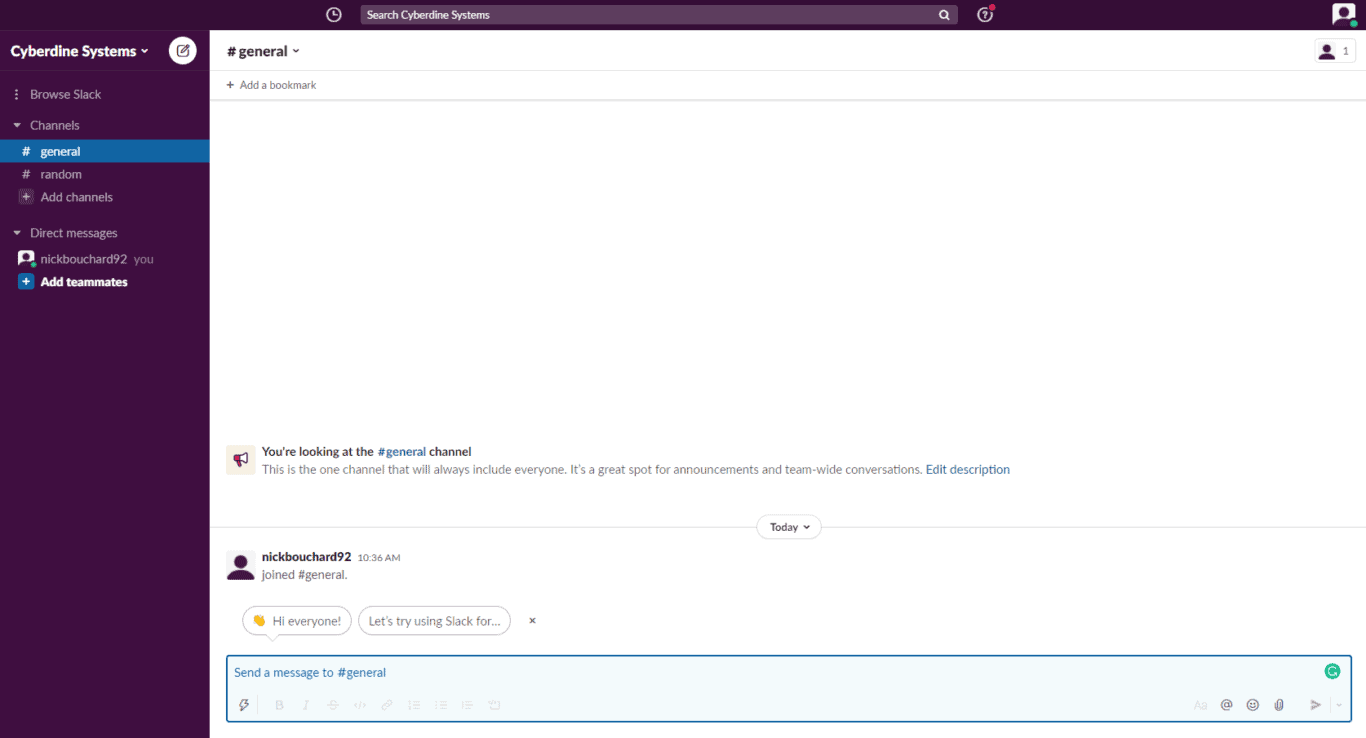
Before you can start messaging all your work friends, you need to have a grasp of Slack’s interface. For this guide, we’ll concern ourselves with four sections: the left-hand menu, the top bar, the profile dropdown, and the messaging box.
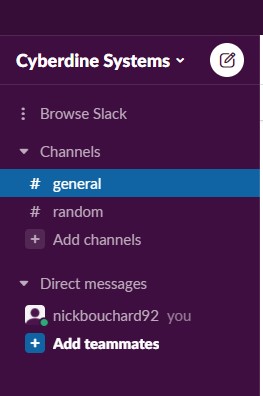
The left-hand menu
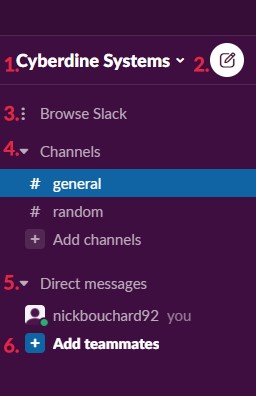
Here’s what you’ll find in the left-hand menu:
- Workspace: When you click on your workspace, you’ll get a menu that lets you customize settings, preferences, and access tools like Slack’s analytics and workflow builder.
- New message: This will take you right to a brand new, blank message.
- Browse Slack: This useful menu will give you direct access to all unread messages, DMs, the file browser, Slack apps, and more.
- Channels: All channels you’re a part of will be listed here. Just click on one and you’ll be taken right to it. Note the Add channels button, which will come in handy later.
- Direct messages: All your direct message conversations will show up here. Click on one to open it.
- Add teammates: When you need to add a new coworker to your workspace, this is how you do it.
The top bar

Let’s have a look at the top bar.
- History: This pop-up menu will show a list of the channels and direct conversations you’ve clicked through recently.
- Search bar: Looking for something specific? Use the search bar to find messages, files, channels, and people.
- Help: Get access to Slack’s Help Center and contact page.
- Profile: Click this to go right to the profile dropdown.
Profile dropdown
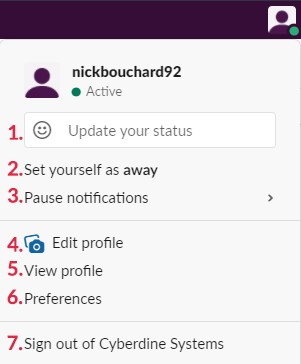
The profile dropdown lets you control your own personal Slack experience. Here’s what you’ll find:
- Update your status: Your Slack status can be used to warn colleagues that you’re out of office, deep in focus mode, or anything else that affects your attention to their messages.
- Set yourself as away: A Slack status lets you describe what’s going on, but being away is a clear indicator that you won’t be taking anyone’s messages.
- Pause notifications: If you need to focus — or you’re in a meeting — you can pause Slack notifications for any length of time.
- Edit profile: Change your display name, your role, time zone, and more through this menu.
- View profile: See your profile the way your coworkers would.
- Preferences: Change your Slack theme, the app’s language, and more through this menu.
- Sign out: For when you’re done for the day.
Messaging box

This is where you’ll spend most of your time, so let’s take a look:
- Text box: Click here to start typing your message.
- Shortcuts: Start a call, access installed apps, and use custom options. What you’ll find in this menu will depend on how you customize your workspace.
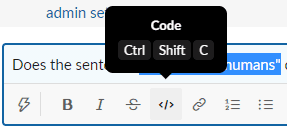
- Formatting options: Italicize and bold text, use code blocks, and more.
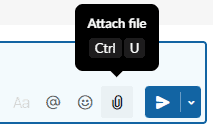
- Message actions: Mention someone directly, add emojis, and attach files to your message.
- Send: Send your message as soon as it’s done or schedule it for later.
Alright, that covers the interface. Now let’s dive into adding your first Slack channel.
Creating your first Slack channel
An important step in learning how to use Slack is knowing how to create a channel. Remember the left-hand menu?
Click on Add channels, then on Create a new channel.
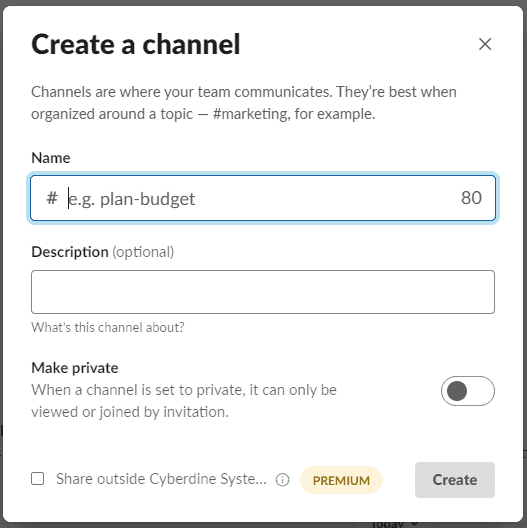
Now, let’s give this new channel a name.
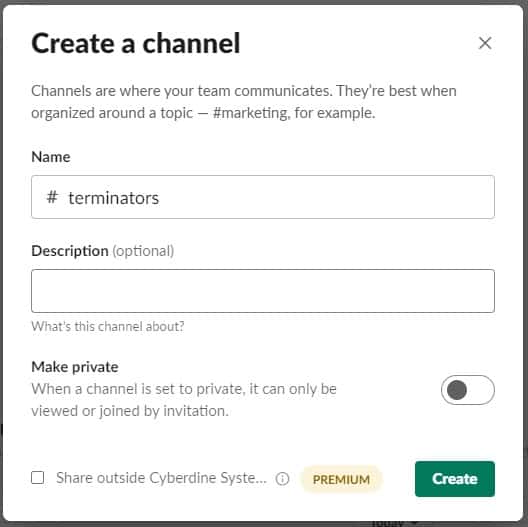
Next, add a quick description.
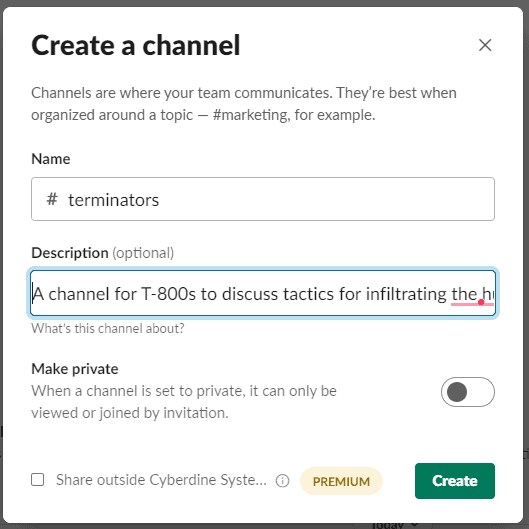
If you want your channel to be invite-only, click on the Make private toggle. For this example, let’s leave that off and hit Create.

You’ll get a pop-up asking you to add people. Since I don’t have anyone else in my workspace, I’ll skip this step. But I will check the toggle at the bottom, which will automatically add new Slack users to my new channel.
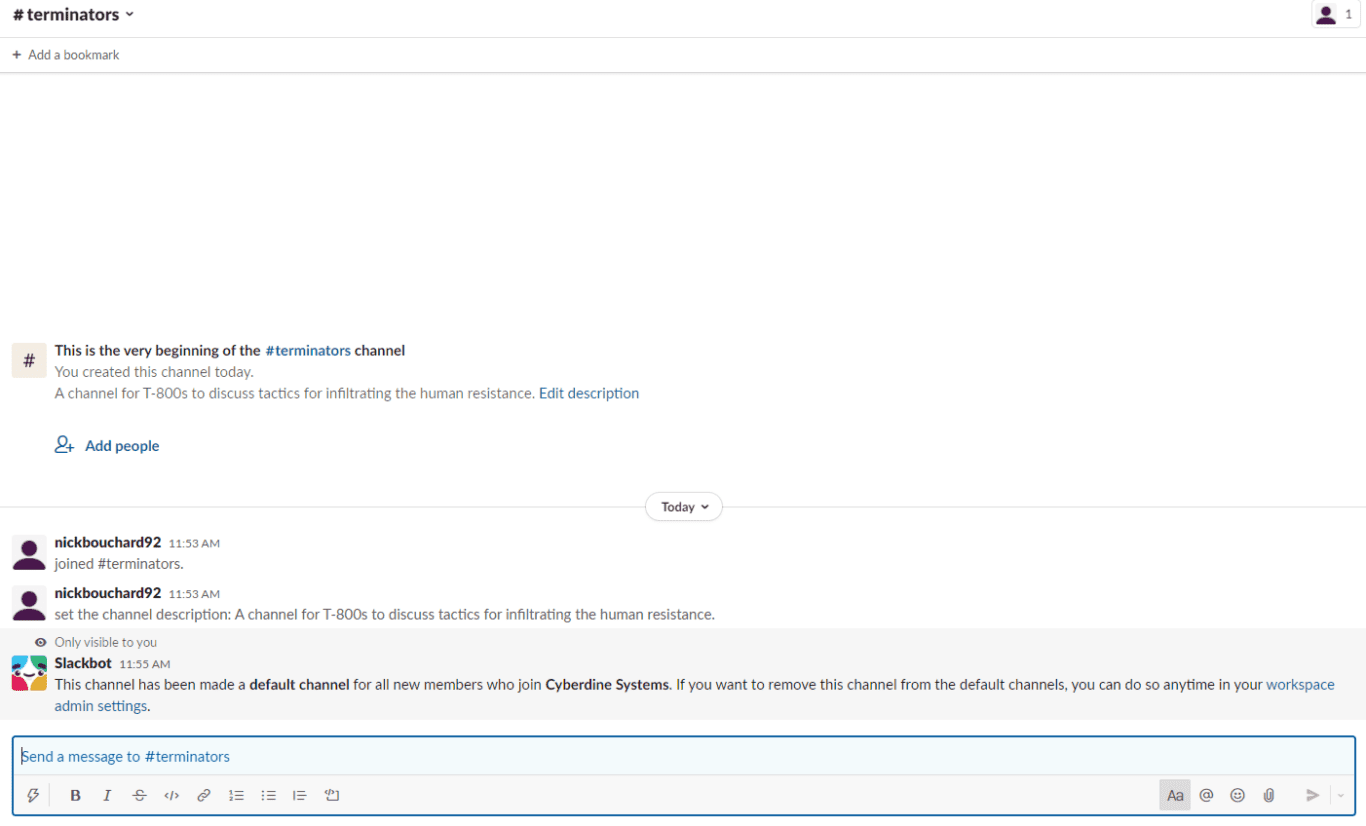
And just like that, I’ve created my first Slack channel. Now let’s learn how to send a message.
Sending your first Slack message
Now that you know how to use Slack enough to create channels, let’s go over sending messages. Starting from the new channel you created, just go to the message box at the bottom of the screen.

Click near the top of the box and start writing your message.

If you want to add any special formatting, just highlight any part of your text and choose the formatting option you want.


To mention another user, add an emoji, or attach a file, just click on the appropriate option on the right.
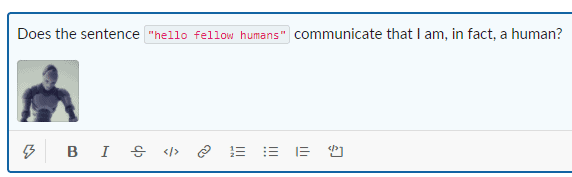
When your message is ready to send, just click on the blue send button the right — or hit Enter on your keyboard.
And just like that, you’ve sent your first Slack message! This guide covered sending messages within a channel, but the process is pretty much the exact same when sending direct messages. You’ll just want to pick a person in the left-hand menu rather than a channel.
Look at that! You have everything you need to start using Slack.
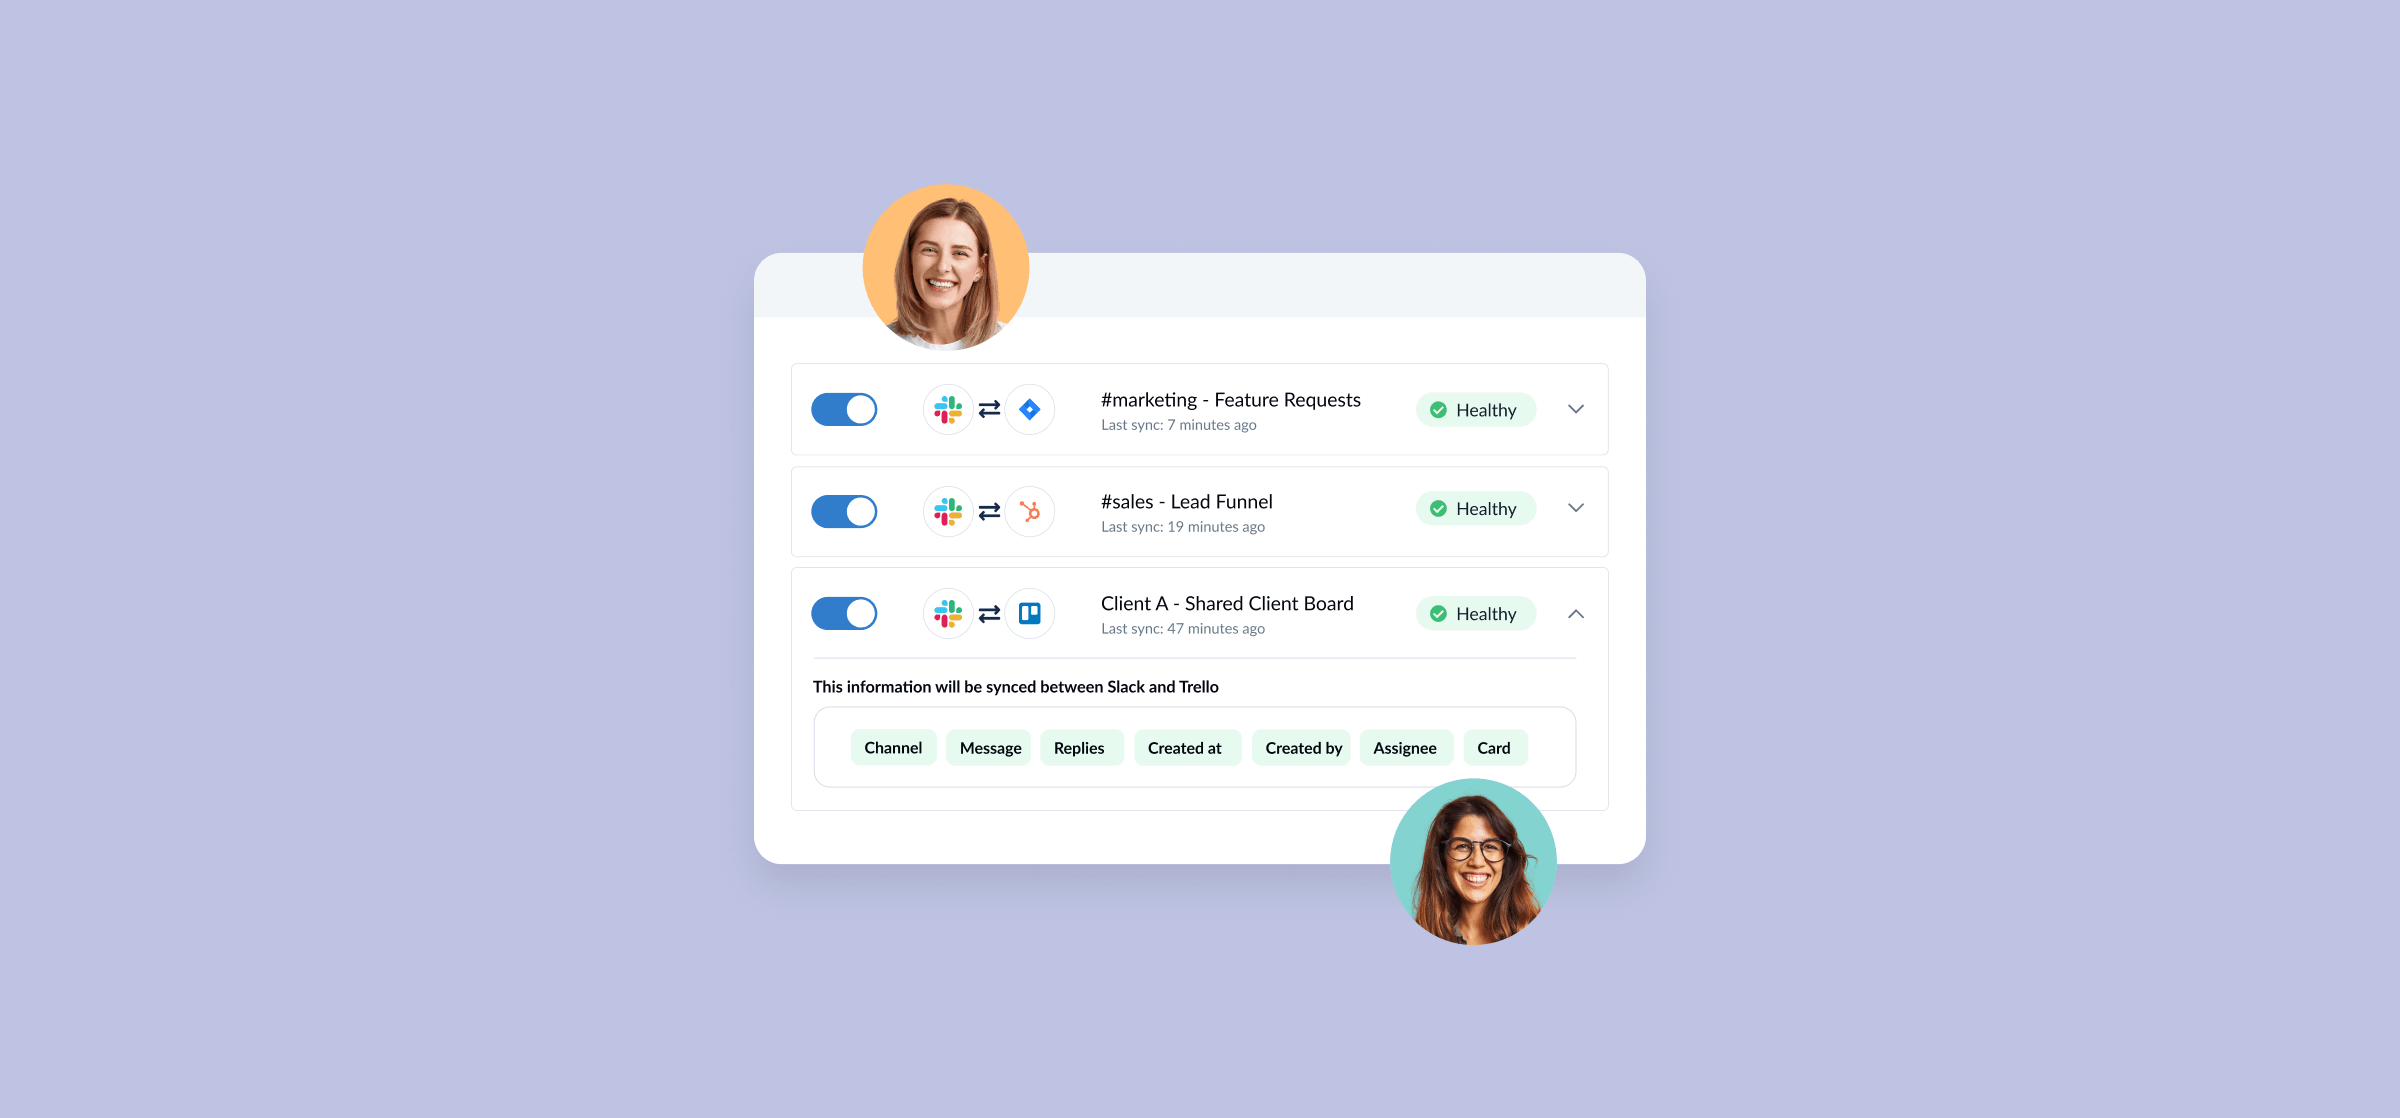
How to integrate Slack with other tools
Learning how to use Slack is great, but what about slotting it in with your tool stack? Without the right integration, you can spend hours just copying and pasting information from tool to tool so everyone’s in the loop. Just because a tool is great for your needs doesn’t mean it works for another team. No one should be forced to use a tool that doesn’t fit their workflow. Slack’s built-in workflow builder can get you some of the way there, but it’s not the best option.
Want to save time and effort? Try Unito. Unito has the deepest two-way integrations for some of the most popular tools on the market, including Slack, Asana, Trello, Google Sheets, Zendesk, and more. You can even learn how to connect Slack to another tool with Unito right here.
Sync data across tools seamlessly, use rules to filter out irrelevant information, and map fields so everything ends up exactly where it needs to go. All of that in just a few minutes.