
How to Sync Microsoft Excel and Google Sheets with Automated Updates
This guide will show you how to sync Microsoft Excel with Google Sheets automatically using a simple 2-way no-code integration for spreadsheets. Connecting Excel and Google Sheets with automation eliminates the need to manually copy paste data between different spreadsheets.
This can be useful for building performance reports, managing human resources, analyzing financial details, handling operations management, reviewing project status and so on. The best part of this workflow is that any changes you make to a synced spreadsheet will automatically appear in the other while you work. You can even set filters so that only specific cells update 2-ways, while others only update 1-way.
If you’d like to learn more about Unito before proceeding, check out our integration overview for Microsoft Excel and Google Sheets.
By the end of this Excel Google Sheets guide, you’ll be able to:
- Generate new rows in either Google Sheets or Microsoft Excel based on activity in the other.
- Keep your spreadsheets automatically up-to-date in a real-time two-way sync with a simple set of code-free instructions.
In this guide:
- Tools: Microsoft Excel and Google Sheets
- Use cases: Project reporting, data migration
- Great for: Data analysts, project managers, stakeholders and executives
Before you sync Microsoft Excel with Google Sheets:
- You’ll need an account in both tools with the right permissions to access and modify data.
- Install Unito Spreadsheet Sync for Google Sheets and install the Unito add-in for Microsoft Excel Online.
- Create a header row to help Unito identify the data in your columns.
TIP: Use the first row of each spreadsheet as a table header for your fields. Unito uses the table header to know where to sync spreadsheet cell data. Your Excel and Google Sheets table headers don’t need to be identical as long as you know which fields should sync together.
Install Unito Spreadsheet Sync from the Google Workspace Marketplace
From the Google Workspace Marketplace you can install Unito Spreadsheet Sync, which is required in order to sync your spreadsheets.
If you don’t know how to categorize the data you want synced, you can use our Google Sheets template and/or Microsoft Excel template to get started.
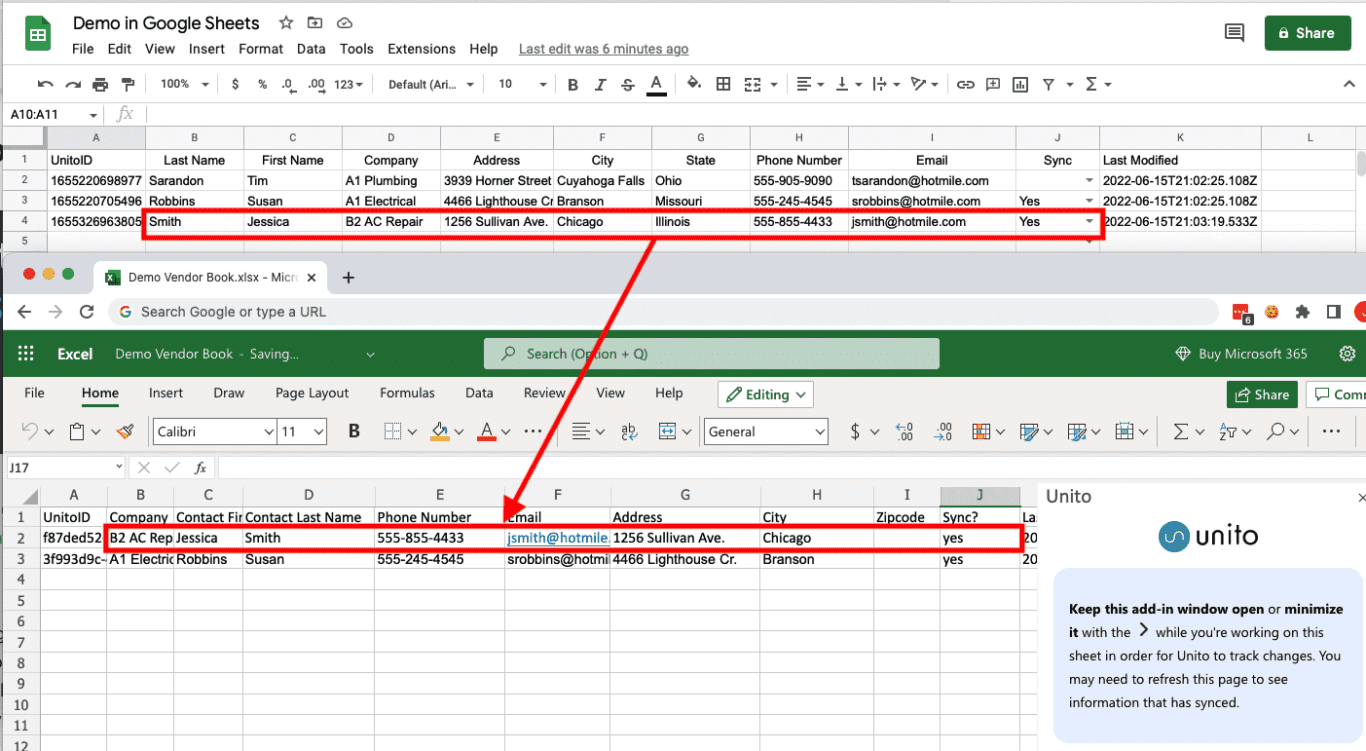
Step 1. Prepare your spreadsheets
When you sync row data between spreadsheets, those rows will be matched to specific columns. Unito uses the table header to figure out what counts as a field and what doesn’t.
Set up a table header in each spreadsheet
Go to the first row in both Google Sheets and Microsoft Excel and make sure each column has a clearly labelled title.
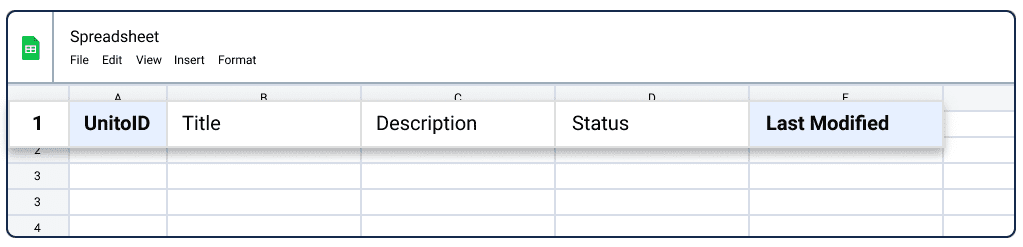
Insert two additional columns into each spreadsheet
From your spreadsheet, open the Unito app and click Get started with Unito.
Then, select Insert two columns. This is what it looks like in Google Sheets:
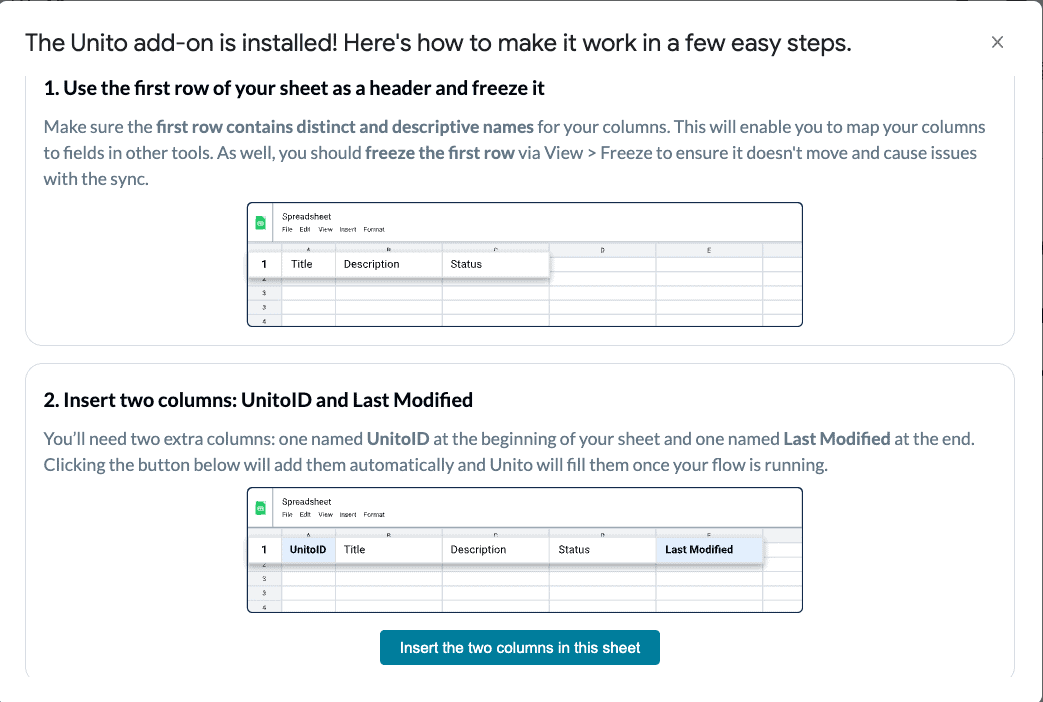
Unito uses the columns UnitoID and Last Modified to define the boundaries of your spreadsheet sync. Only columns between those two will stay in sync with Unito.
Step 2. Connect Microsoft Excel and Google Sheets with Unito
Navigate to the Unito App and select +Create Flow.
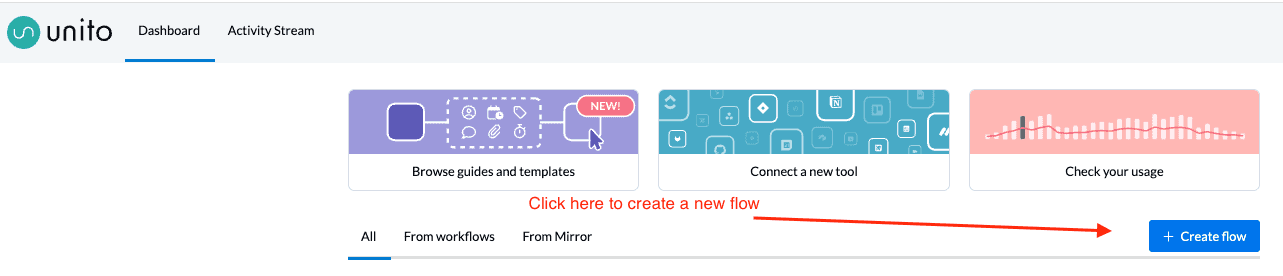
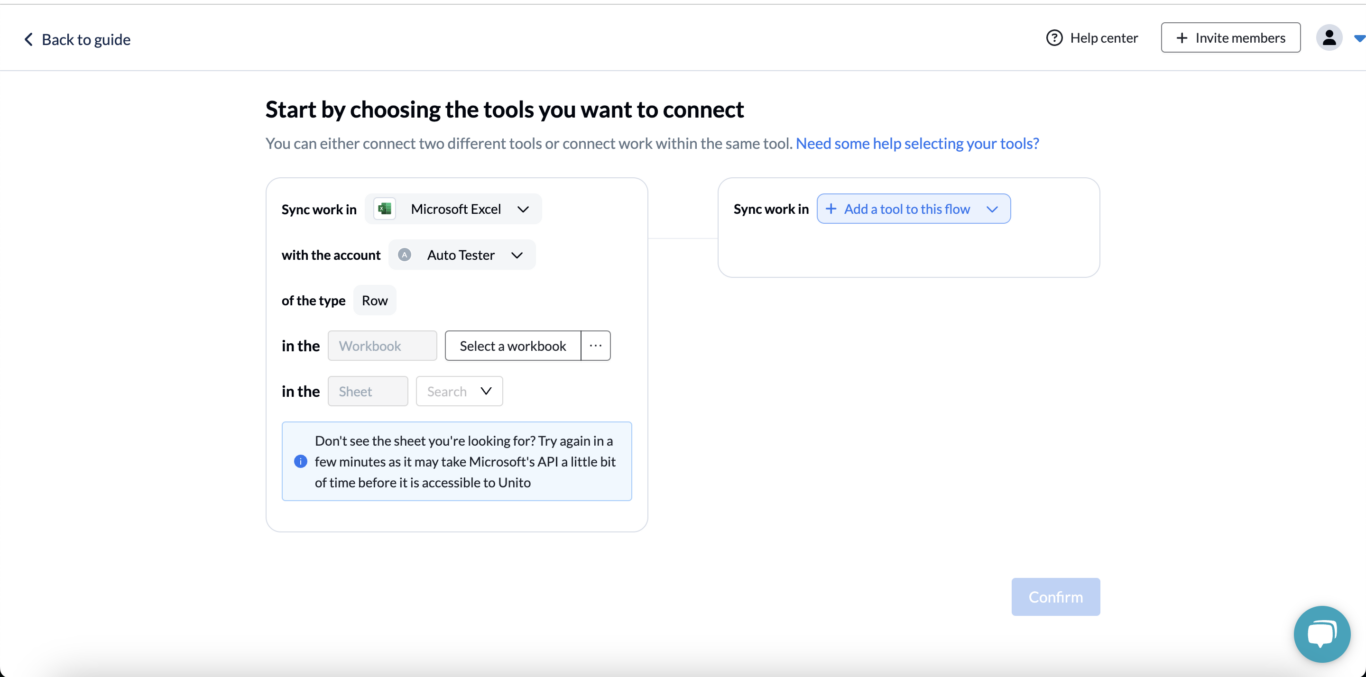
On the next screen, select Start Here to connect Microsoft Excel Online and Google Sheets.
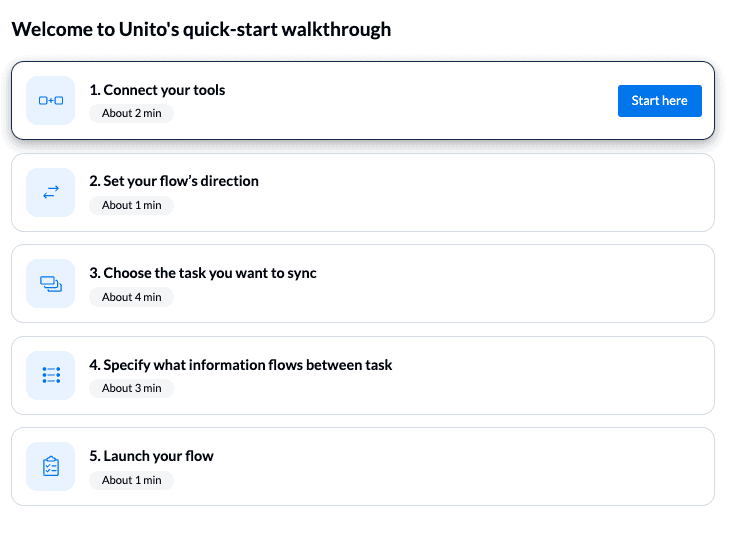
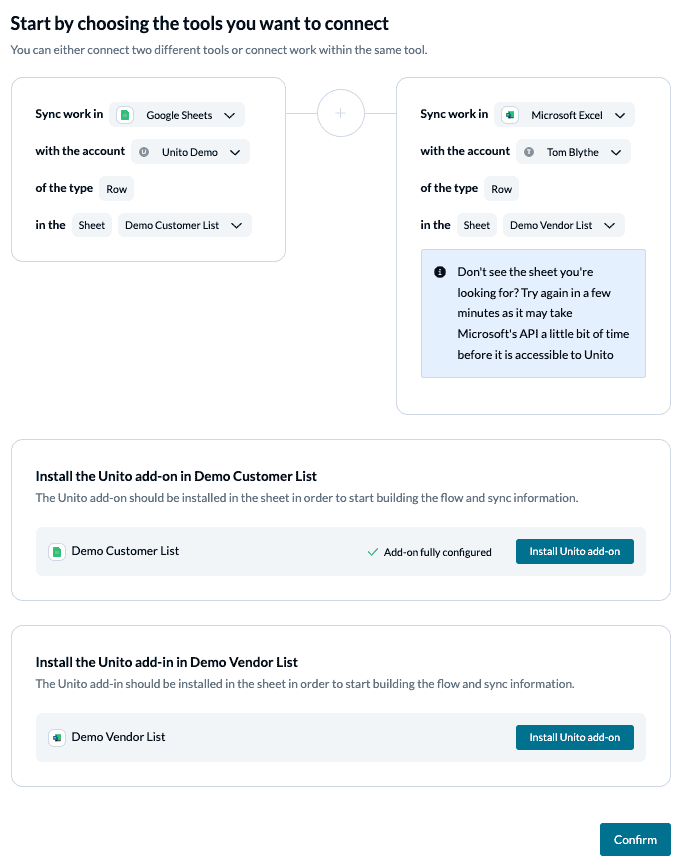
We’ll begin our demo with Google Sheets on the left, and Microsoft Excel on the right. You’ll need to specify which account and sheet you want to sync with Unito.
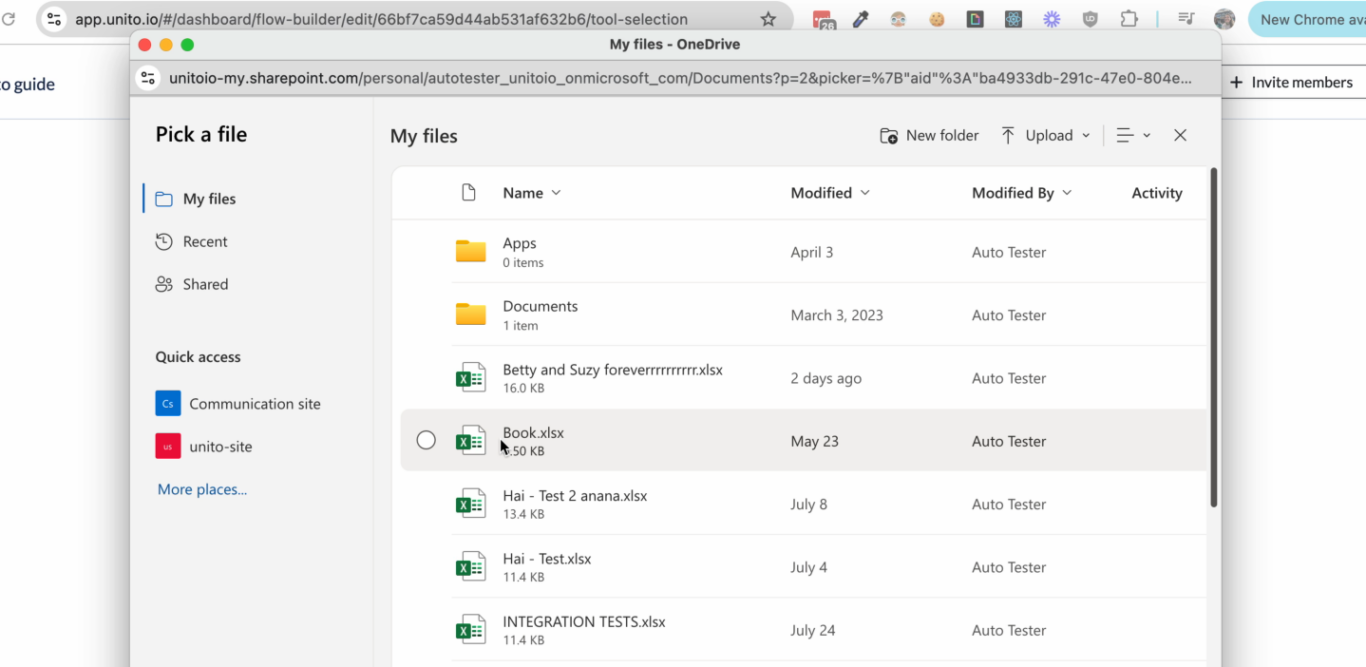
You can pull up your Excel spreadsheet by hitting Select workbook and picking the spreadsheet you want to sync.
Step 3. Tell Unito where to create new spreadsheet rows between Excel and Google Sheets
Flow direction determines how new rows are created but not modified in your spreadsheets.
So if we choose a 1-way flow to Excel, that would mean adding any new rows in Google Sheets would add identical rows to your Excel spreadsheet, but not the other way around.
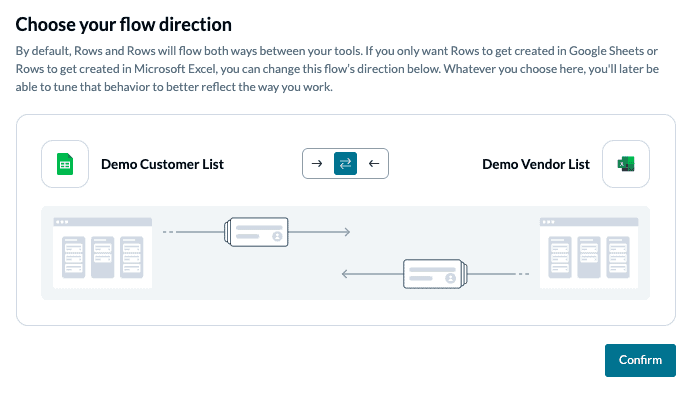
Click Confirm when you’ve chosen a flow direction.
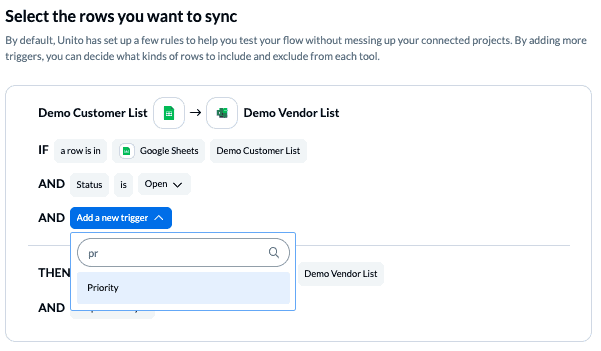
Step 4. Set rules to filter data between your spreadsheets
Rules determine which triggers cause rows to be created in your other spreadsheet tool. You can use rules to filter out unwanted rows from syncing. Here’s how it works:
Sync a column if it has a value. Imagine one title in your header row is called “Priority” and you only want to sync columns that have been prioritized.

Next, Add a new trigger, search for the field “Priority” and select it.
Then Select a value and choose Any value.
This tells Unito to only sync fields from rows in which “Priority” has a value. That value can be anything you choose: an X, “yes”, a filled-in checkbox, etc.
When you’re ready, you can click confirm to proceed to field mappings.
Step 5. Select field mappings based on header rows
Here we can give individual field mappings their own flow direction. These allow us to decide exactly which rows will sync between Google Sheets and Microsoft Excel.
The options are based on your header row names. Each field can be synced one-way — from either tool to the other — or bidirectionally.
With most tools, Unito gives you the option to auto-map fields with identical names. However, since all fields in your spreadsheets are custom (defined by you), we’ll Start from scratch.
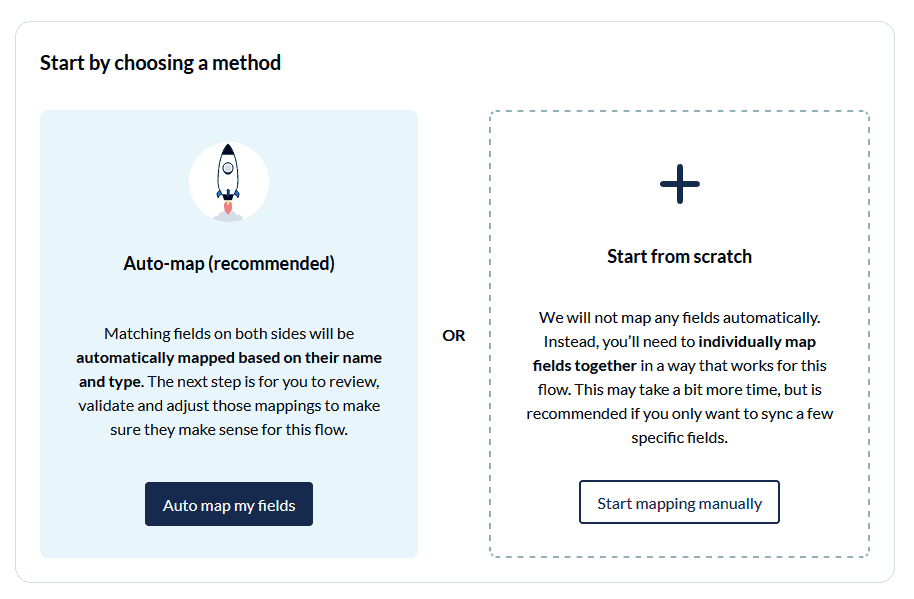
First, click +Add mapping to create a new pair of fields that will sync together.
Then, Select a field for each tool, and find the appropriate field to map in each spreadsheet.

If you change the header row names while working in Unito, you’ll need to refresh your browser to see the new names appear.
Find out more about setting field mappings.
Tip: You could set a one-way flow for certain fields so that only changes in the source spreadsheet affect the other. You might find this useful if you needed to provide an external contact with an update in their spreadsheet, but not allow their changes to affect yours.
Note: If you change a column name in a synced spreadsheet, be sure to update your flow’s field mappings in Unito or else your data will stop syncing.
Click Confirm when you’re satisfied with your field mappings to proceed.
Step 6. Save and close to launch your flow between Google Sheets and Microsoft Excel
And that’s it! Follow the remaining instructions to complete your flow and it should start syncing momentarily. Congratulations!
If you’ve followed the steps above, your flow will now add rows in either Google Sheets and/or Microsoft Excel based on rows added in the other.
If you have any questions, don’t hesitate to reach out and let us know.
What’s next after syncing Excel and Google Sheets with Unito?
- Learn how to duplicate this flow to suit other use cases you may have in mind.
- Read our Microsoft Excel primer and Google Sheets primer to better understand each integration’s capabilities and limitations.
- Connect Google Sheets to HubSpot to streamline sales reporting.
- Try syncing Google Calendar to Trello, Asana, or Notion.
- Follow a similar guide to sync Trello and Excel, Microsoft Excel with ClickUp, Excel and monday.com, Excel and Wrike, and Jira with Excel.
- Find more guides and tutorials on syncing spreadsheets with Unito.
Best practices and troubleshooting for Unito’s Google Sheets integration
Common error messages
If you see either of the error messages below, it likely indicates that one or both of the columns: “UnitoID” and “Last Modified” have been deleted or modified from your sheet. You’ll need to re-insert them (either manually or with the add-on) before your data will sync again.
“We’ve detected that mandatory columns have been removed from your Google Sheet. Let’s get you back up and running.”
“The container configuration does not allow us to sync.”
Why sync Microsoft Excel to Google Sheets with Unito?
Syncing Microsoft Excel to Google Sheets with Unito enables you to automatically populate any spreadsheet with data from another. This makes reporting far simpler since you can skip copy-pasting between tables and spend more time on high-skill tasks that need your attention.
Use cases for marketers, agencies, freelancers, professional services etc.
There are a wide variety of business use cases for any team that relies on spreadsheets, including: marketing agencies, freelance entrepreneurs, consultants, professional service providers, sales teams and others.
This automation solution could be used to avoid sending vendors PDFs which quickly become obsolete; oversee budget or resource management; ensure billable hours and costs are on par with forecasts as a project progresses; sync records such as contact or client information to a single spreadsheet; etc.
Getting around with Google Sheets and Unito
You can find more information on the following topics in Unito’s knowledge base:
- Supported fields in Google Sheets and other features
- Setting rules in Unito to manage your spreadsheets
- Creating spreadsheets with Unito
- Adjusting the date + time format in a spreadsheet
- Finding spreadsheets by their URL