
How to Sync monday.com Tasks to Microsoft Excel with Automated Updates
Tracking task progress across apps with the help of an integration platform helps eliminate manual copy-pasting to and from your spreadsheet. When it comes to project reporting or marketing reporting, that’s where Unito shines the most, and that’s what we’ll be discussing in this article: how to report on monday.com tasks from Microsoft Excel.
In this context, we’ll be looking at a report tracking the progress of freelance contractors. How do we do that? By exporting monday.com tasks to Excel and keeping them in sync in both tools. You can apply the steps outlined below to any integration you want to put together between monday.com and Microsoft Excel without writing a single line of code.
Here’s a video demo showing how to sync monday.com to Google Sheets:
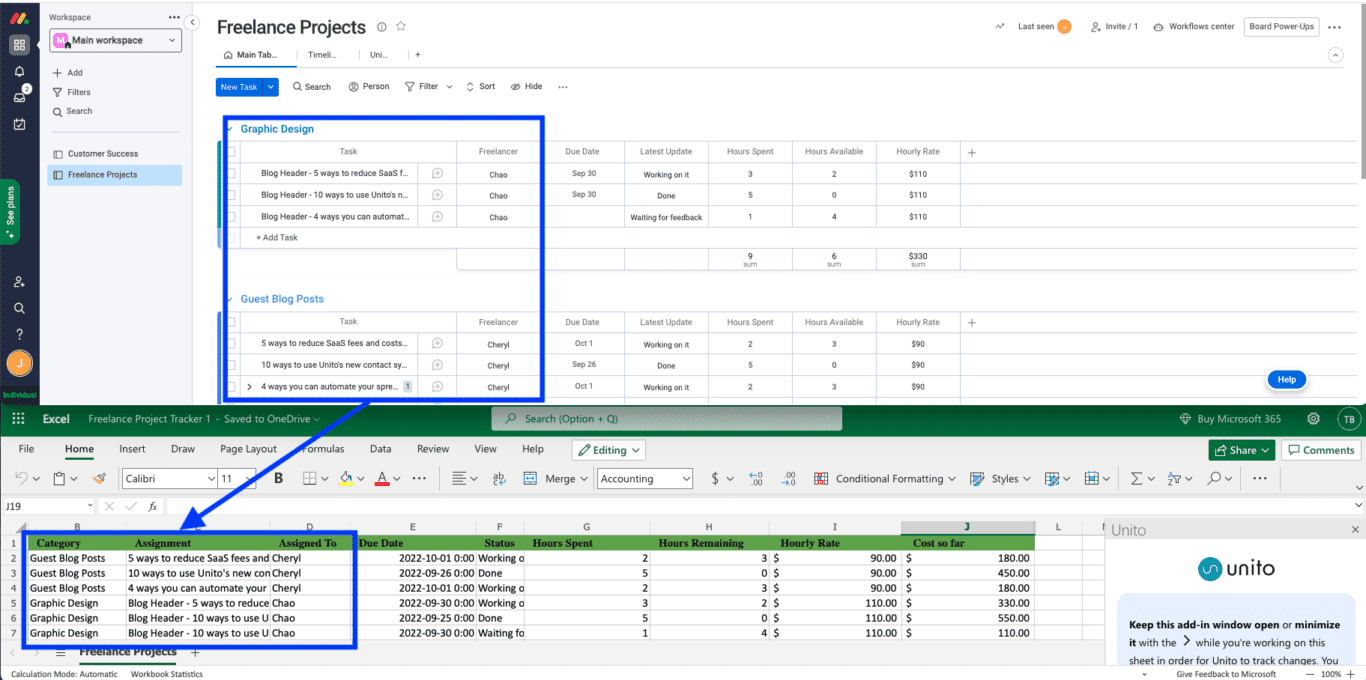
Here’s what our synced monday.com Excel integration looks like:
In this guide:
- Tools: monday.com and Microsoft Excel
- Use cases: Task management, project reporting, data migration
- Great for: Data analysts, project managers, stakeholders and executives
What does Unito do for monday.com and Excel users? Unito turns the details of your tasks into mappable fields that appear in your spreadsheet columns. The key is to use the first row as a table header and give each column an appropriate name that pairs well with the fields in monday.com.
Learn more about Unito’s monday.com Excel integration.
Before we build a report in Excel synced with monday.com:
- You’ll need to add the Unito app for monday.com before you can proceed. Here’s a guide on how to add Unito to your monday projects.
- Install the Unito add-in for Microsoft Excel. This walkthrough will show you how, or you can follow that link.
- Keep in mind that Unito can only sync text, dates, and number fields from monday.com to your spreadsheets.
Create a table header in Microsoft Excel
Go to www.office.com and open Excel Online, then find your spreadsheet. Make sure each column in the first row is clearly labelled with whatever titles you want to map with your monday.com board. If you don’t know where to begin, you can start with this Microsoft Excel template.
Microsoft Excel: Install the Unito add-in
Click here if you need detailed instructions to install the Unito add-in for Excel.
Go to www.office.com and open Excel Online.
- Then, from your spreadsheet click on File, then Get Add-ins.
- In the next screen click STORE and type Unito into the search box.
- Click Add and follow the on-screen instructions to install the Unito add-in.

Follow the on-screen instructions to add Unito to your Microsoft workspace.
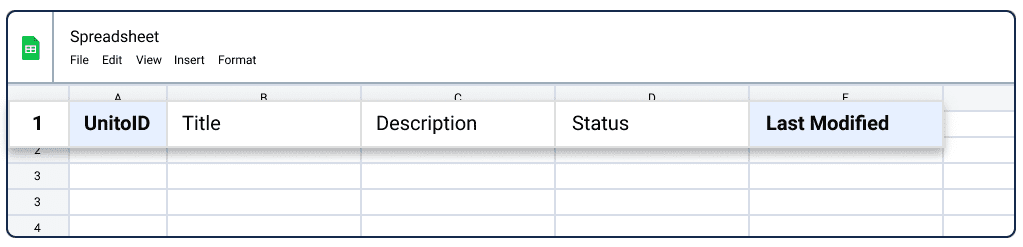
Once the add-in is installed, click Insert the two columns in this sheet.
You’ll see UnitoID and Last Modified. Only columns between those two will sync with Unito. Having them columns in your table header is essential for this integration to function as intended. You can hide them, but don’t delete or modify those columns.
Add Unito to your monday.com workspace
Click here if you need additional help adding Unito to your monday.com board from the monday.com marketplace.
- Login to your monday.com account
- Then, select Board Power-Ups > Apps Marketplace
- Type Unito in the search field
- Click on the Unito app, then Add to your account
- Now, hit Install, verify your workspace and board and Add Feature
- Authorize monday.com then Authorize again (the first button authorizes monday.com in Unito, while the second authorizes Unito in monday.com)
- Click Got it.
Step 1: Connect your monday.com board and Microsoft Excel spreadsheet to Unito
- Now you can either go to the Unito App and click +Create Flow or continue from your monday.com workspace once you’ve added the app.
- Click Start Here to connect your tools.
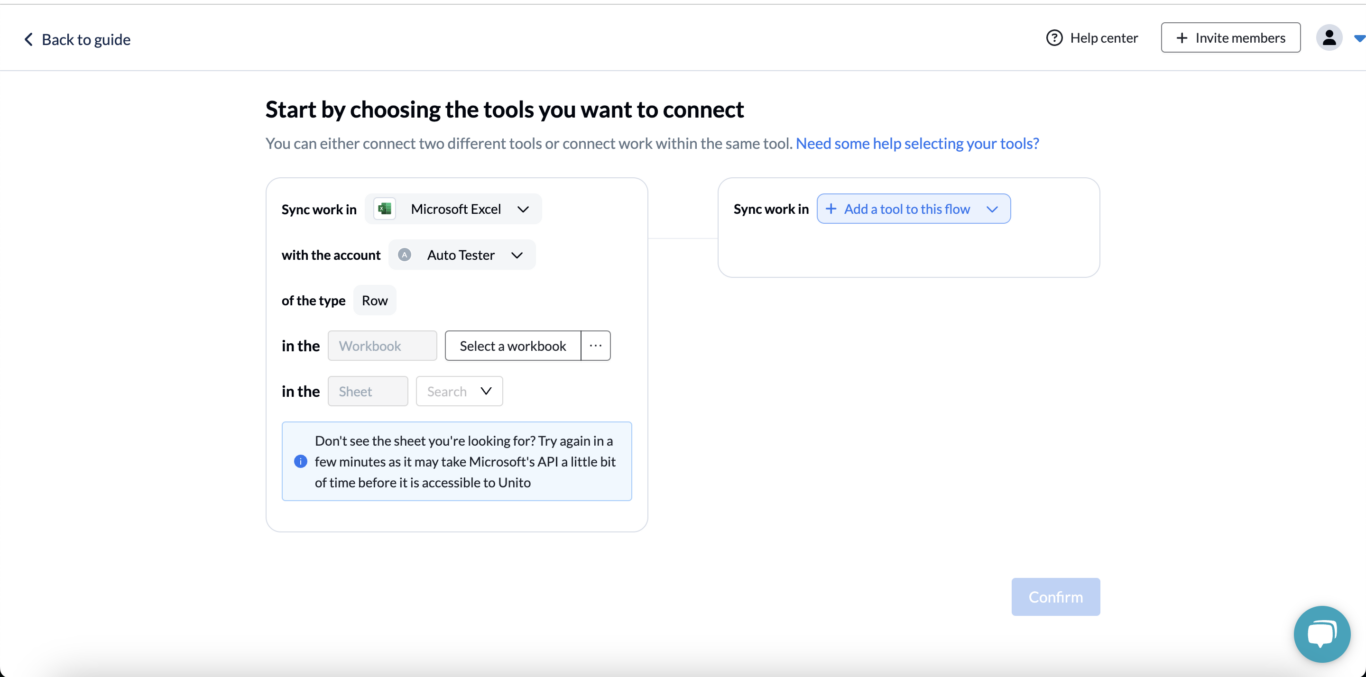
- Select +Add a tool to this flow and choose your apps. Then click +Choose account to specify the monday.com account you want to use.
- Pick a monday.com board and Excel spreadsheet.
- Click Confirm.
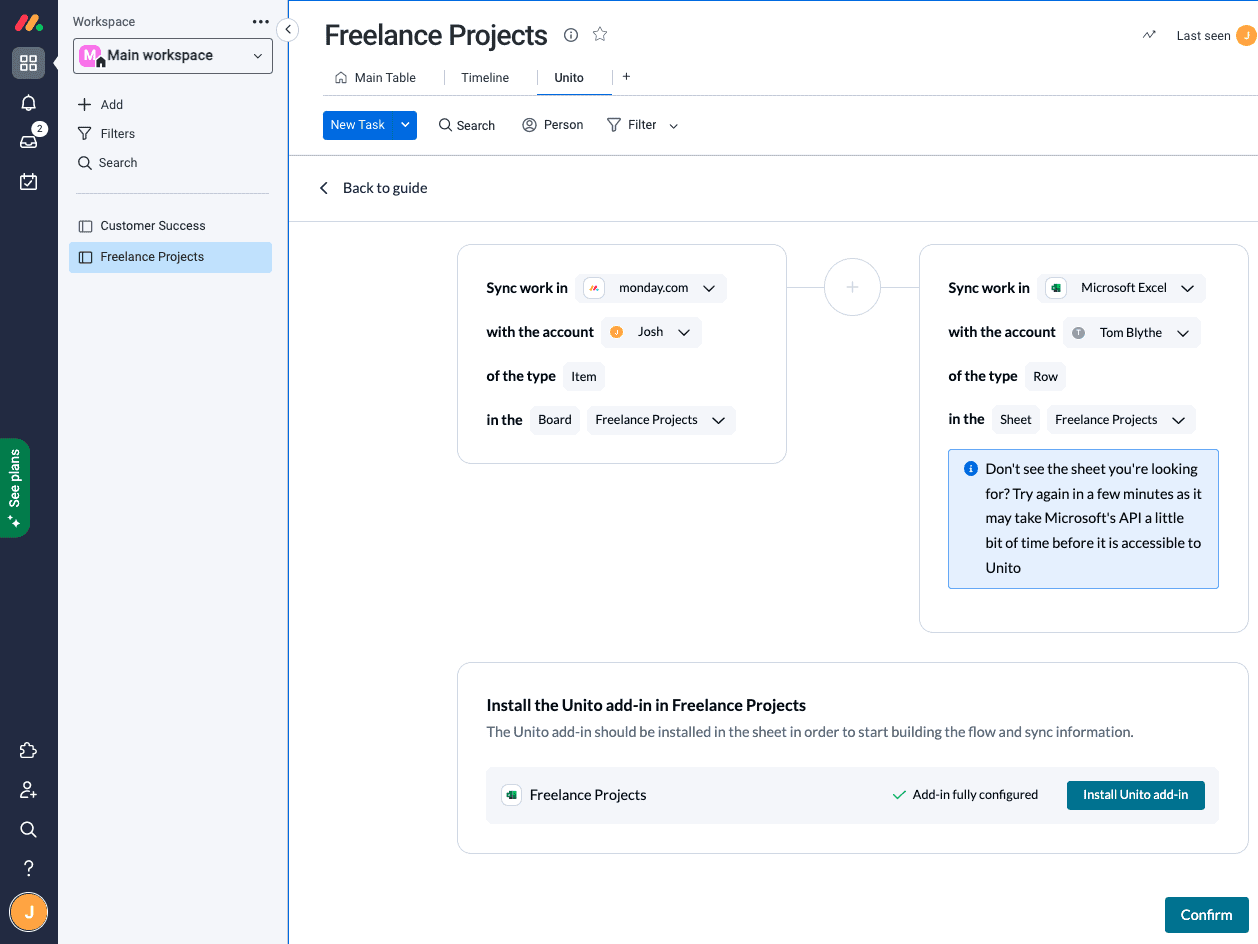
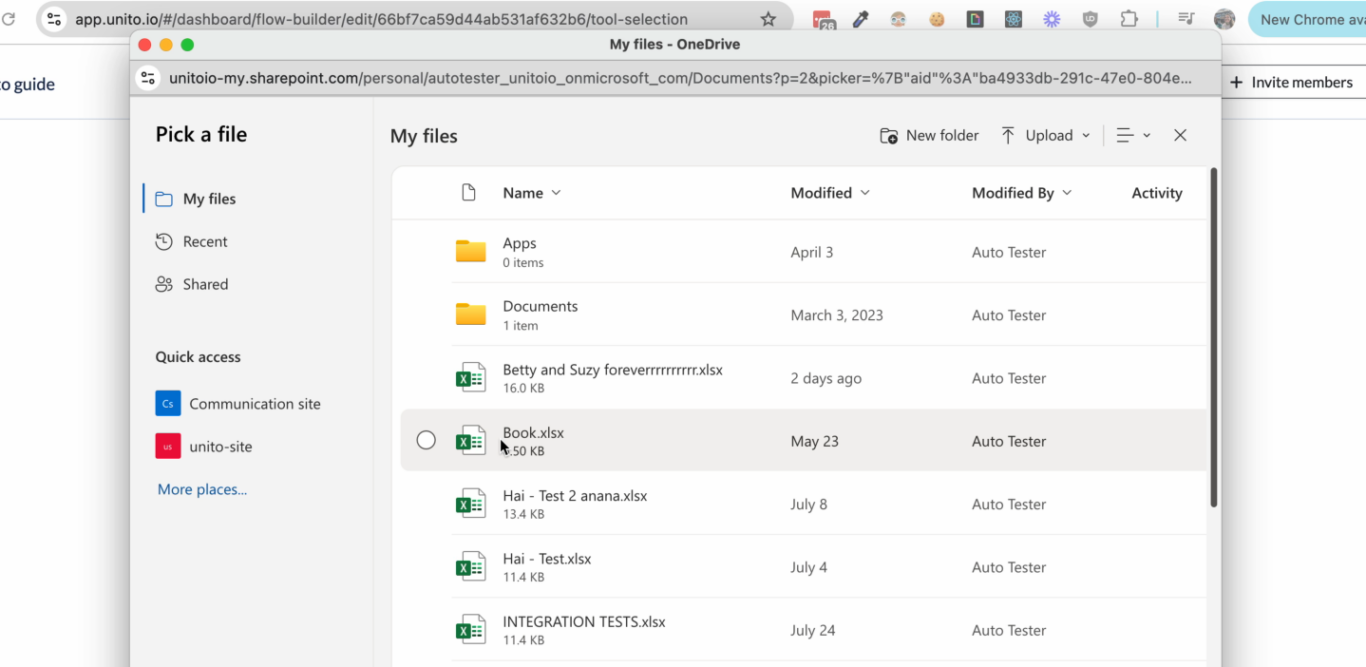
You can pull up your Excel spreadsheet by hitting Select workbook and picking the spreadsheet you want to sync.
Step 2: Tell Unito where to create and sync data
Flow direction determines how new tasks or rows are created by Unito. So with a two-way sync at this stage, adding new rows to Microsoft Excel will create a matching item in monday.com, and vice versa. Since we’re building a report in a spreadsheet, we’ll choose a one-way sync from monday to Excel.
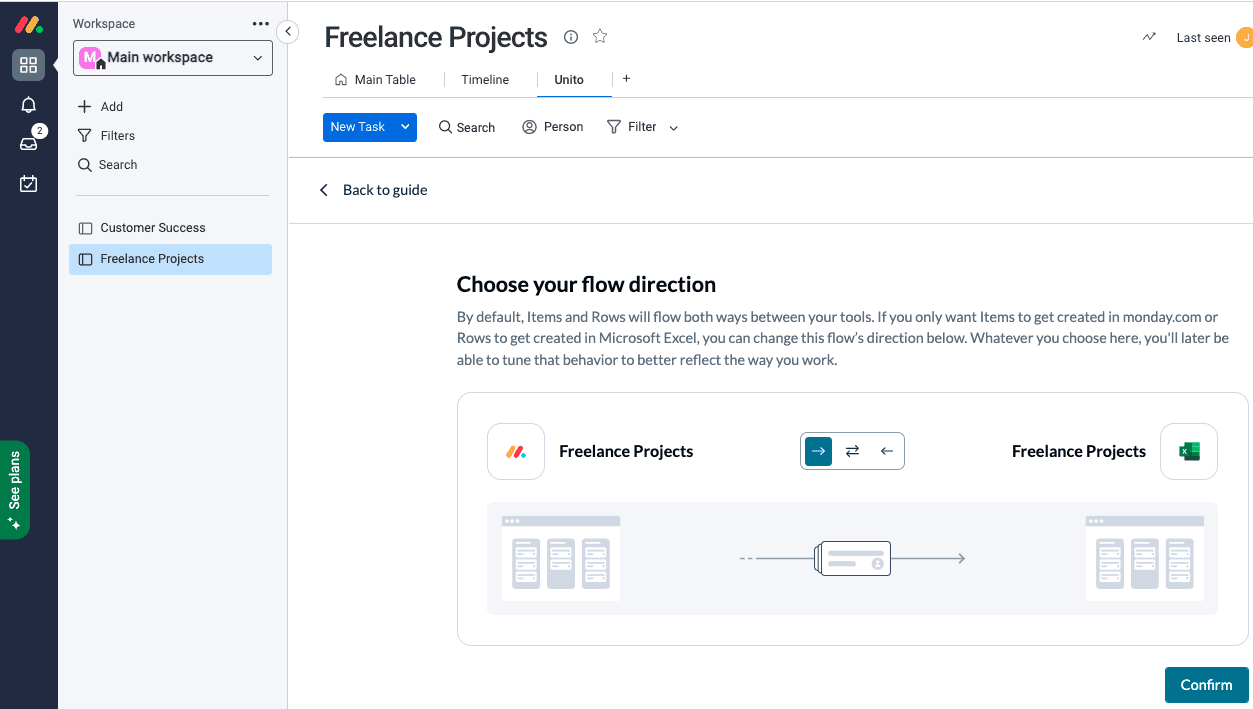
Note: Later, you’ll be able to add field mappings to determine which fields will be kept updated in both tools — regardless of the flow direction you set here.
Select Confirm when you’ve chosen a flow direction.
Step 3: Set rules to filter data between monday.com and Excel
This is where you can set up conditions to filter out monday items that you don’t want to appear in your spreadsheet. If you don’t set any rules, then all items in your chosen monday.com board will appear in Excel. If that’s what you want, simply hit confirm and proceed.
Otherwise, Add a new trigger to begin setting up your rules. There can be some variability here, depending on your particular setup.
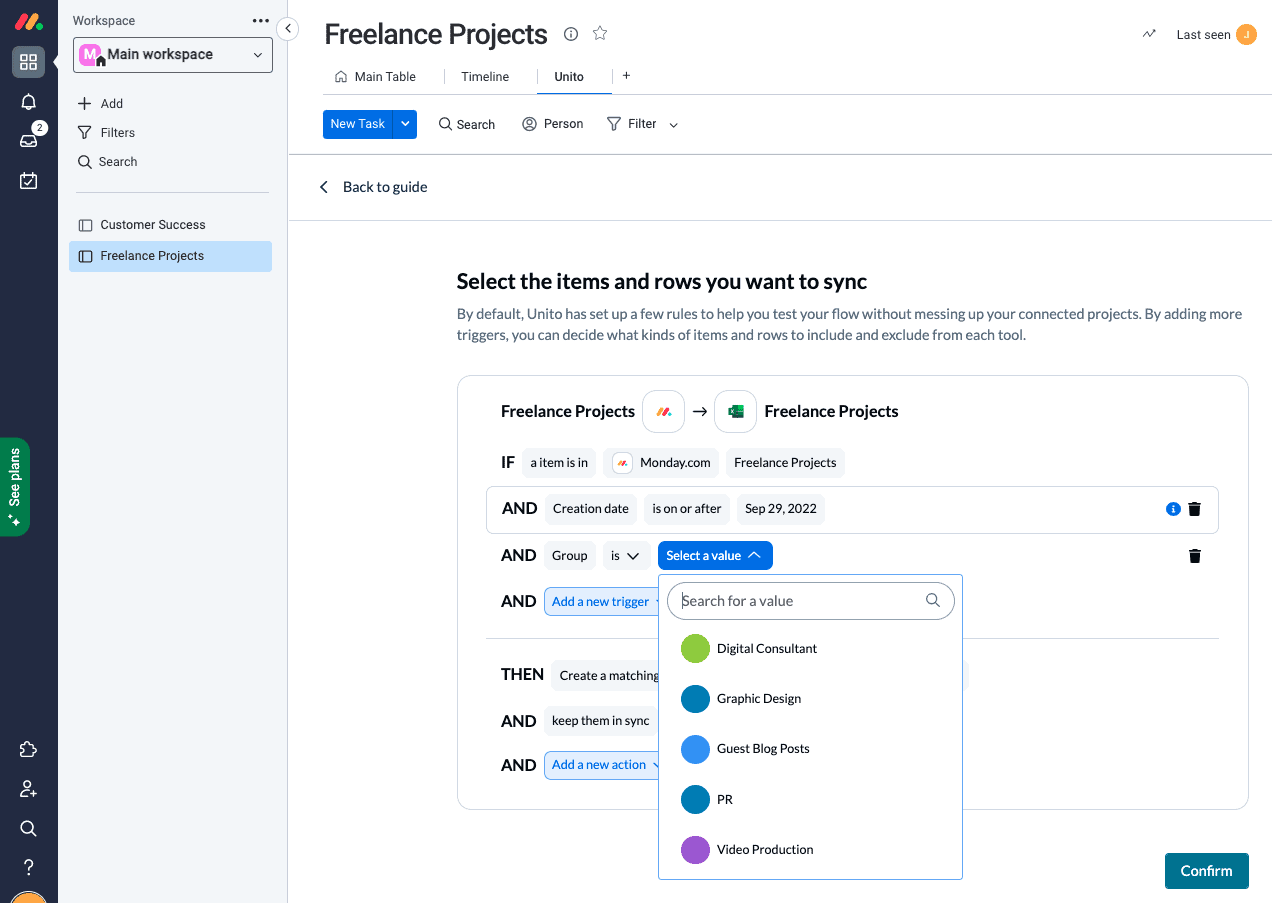
Rules can filter data using several fields in monday.com, though we recommend choosing status or priority.
You can learn more about setting up rules here.
Step 4: Pick monday.com fields to sync with Microsoft Excel rows
Fields represent the details of your spreadsheet rows and monday.com items. Since you’re sending field data to a spreadsheet, you’ll only be able to sync numbers or text fields.
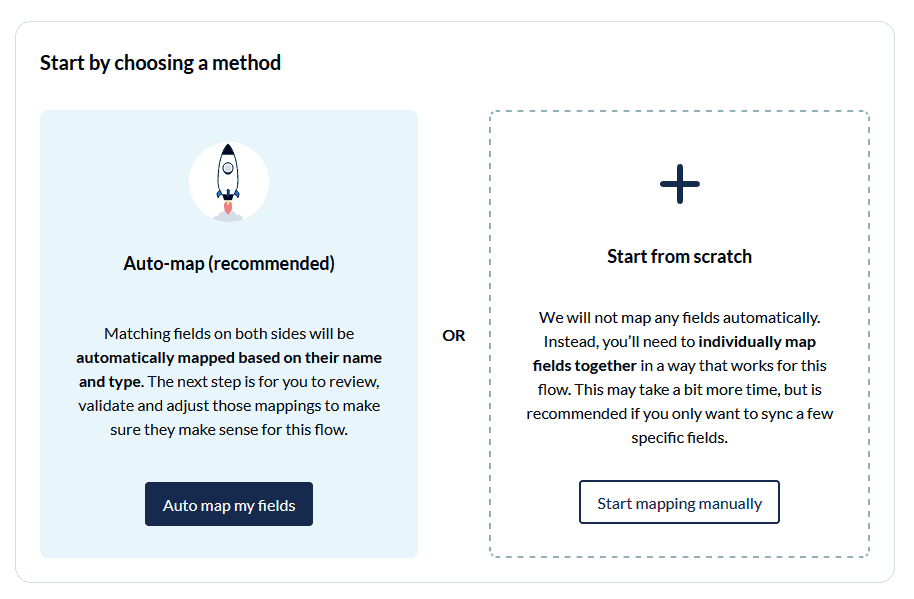
First, you’ll be asked whether you want to set up your field mappings from scratch or let Unito do this automatically. Since we have to name all of our fields in Excel you’ll need to choose the manual option.
Most fields will be automatically mapped for two-way updates, but you can modify each individually if you prefer one-way updates in some cases. For example, you may not want changes in Excel to affect your monday.com items, so you could set each mapped field to a one-way sync.
Select +Add mapping, then Select a field in both bases to pair the fields together. Here’s a simplified version of our monday.com to Microsoft Excel field mappings:

Note: If you change a column name in a synced spreadsheet, be sure to update your flow’s field mappings in Unito or else your data will stop syncing.
Click Confirm when you’re satisfied with your field mappings.
Step 5: Save, close, and launch your new monday.com Excel integration
And that’s it! You’ve just built a flow between monday.com and Microsoft Excel. Congratulations!
If you followed the steps above, your flow will now:
- Automatically create new Excel rows based on specific monday.com items
- Keep your spreadsheet and board updated in real-time.
If you have any questions, please don’t hesitate to reach out and let us know.

Exporting a monday board to Excel FAQ
What’s next after setting up your monday.com to Microsoft Excel integration?
If you want to know what else you can do with Unito, here’s some inspiration to help you power up your workflows:
- Check out our integration overviews of monday.com and Microsoft Excel to review their capabilities.
- Best Practices and Troubleshooting Tips for Syncing Microsoft Excel
- Learn to sync monday.com with Google Calendar
- Automatically create follow-up tasks in monday.com from a Notion CRM
- Sync Google Calendar events to your monday.com boards
- Delegate tasks from monday.com to Asana, Trello, Jira or HubSpot
- Export monday.com data to Google Sheets
- Sync Intercom conversations with monday.com tasks
Why sync monday.com to Microsoft Excel with Unito?
Because monday.com is one of the best project management tools on the market with a wide range of use cases to support collaboration. But if you’re building a report to share with executives or board members, they don’t often want to jump into your boards to see how things are going. That’s where spreadsheets come in handy: they’re flexible, functional, and everyone is used to working with them. So you have two choices: copy paste all the key details from your monday.com boards to a spreadsheet, however long that takes, or connect them to an automation platform with two-way sync, such as Unito.
A two-way integration with Unito lets you determine how new rows are created in Microsoft Excel, as well as how those rows update based on changes later on. That means in addition to automating row creation, you can also keep individual rows updated in real-time -or not- based on how you like to work.
Does monday.com integrate with Microsoft Office?
Absolutely! The monday.com marketplace has over 200 integrations, though there’s some variance in just how much data you can sync back and forth between tools—and some of them are offered by third parties. Built-in monday.com integrations for Microsoft Office built by the monday.com team include Microsoft Teams and Outlook, but not Excel.
Unito currently offers integrations for both Microsoft Excel and Outlook.
What does this look like in practice?
Here’s a demo of Unito’s Microsoft Excel integration with Asana. Although Asana’s interface differs from monday.com, the same steps and principles apply to syncing tasks to spreadsheets with Unito.