
How To Get Information Where It Needs To Go With Unito’s Field Mappings
Every commute has a difficult intersection. You know, the one where traffic seems to pile up every time you’re a little bit late. And when the lights stop working? It’s pandemonium. Until a traffic cop can get there and take control of the situation, drivers aren’t sure when it’s their turn to go, and the risk of an accident gets that much higher. Unito’s field mappings are like that traffic cop.
Read on for a breakdown of what field mappings are, how they work, and an example of how you can customize them to fit your specific use case.
What are field mappings?
Field mappings determine how Unito matches information across tools. By mapping fields, you ensure information in one tool goes exactly where it needs to go in the other. If the fields are similar enough, Unito automatically maps them for you. Due dates in Asana will be matched up with due dates in Trello, for instance. This is usually enough to cover most use cases. That said, you can also tailor your field mappings to specific use cases with just a few clicks.
How to customize your field mappings
When you’re creating a flow, you’ll be prompted to choose your blocks of work — our generic term for projects and boards. After doing this and setting up your rules, you’ll be prompted to customize your field mappings.
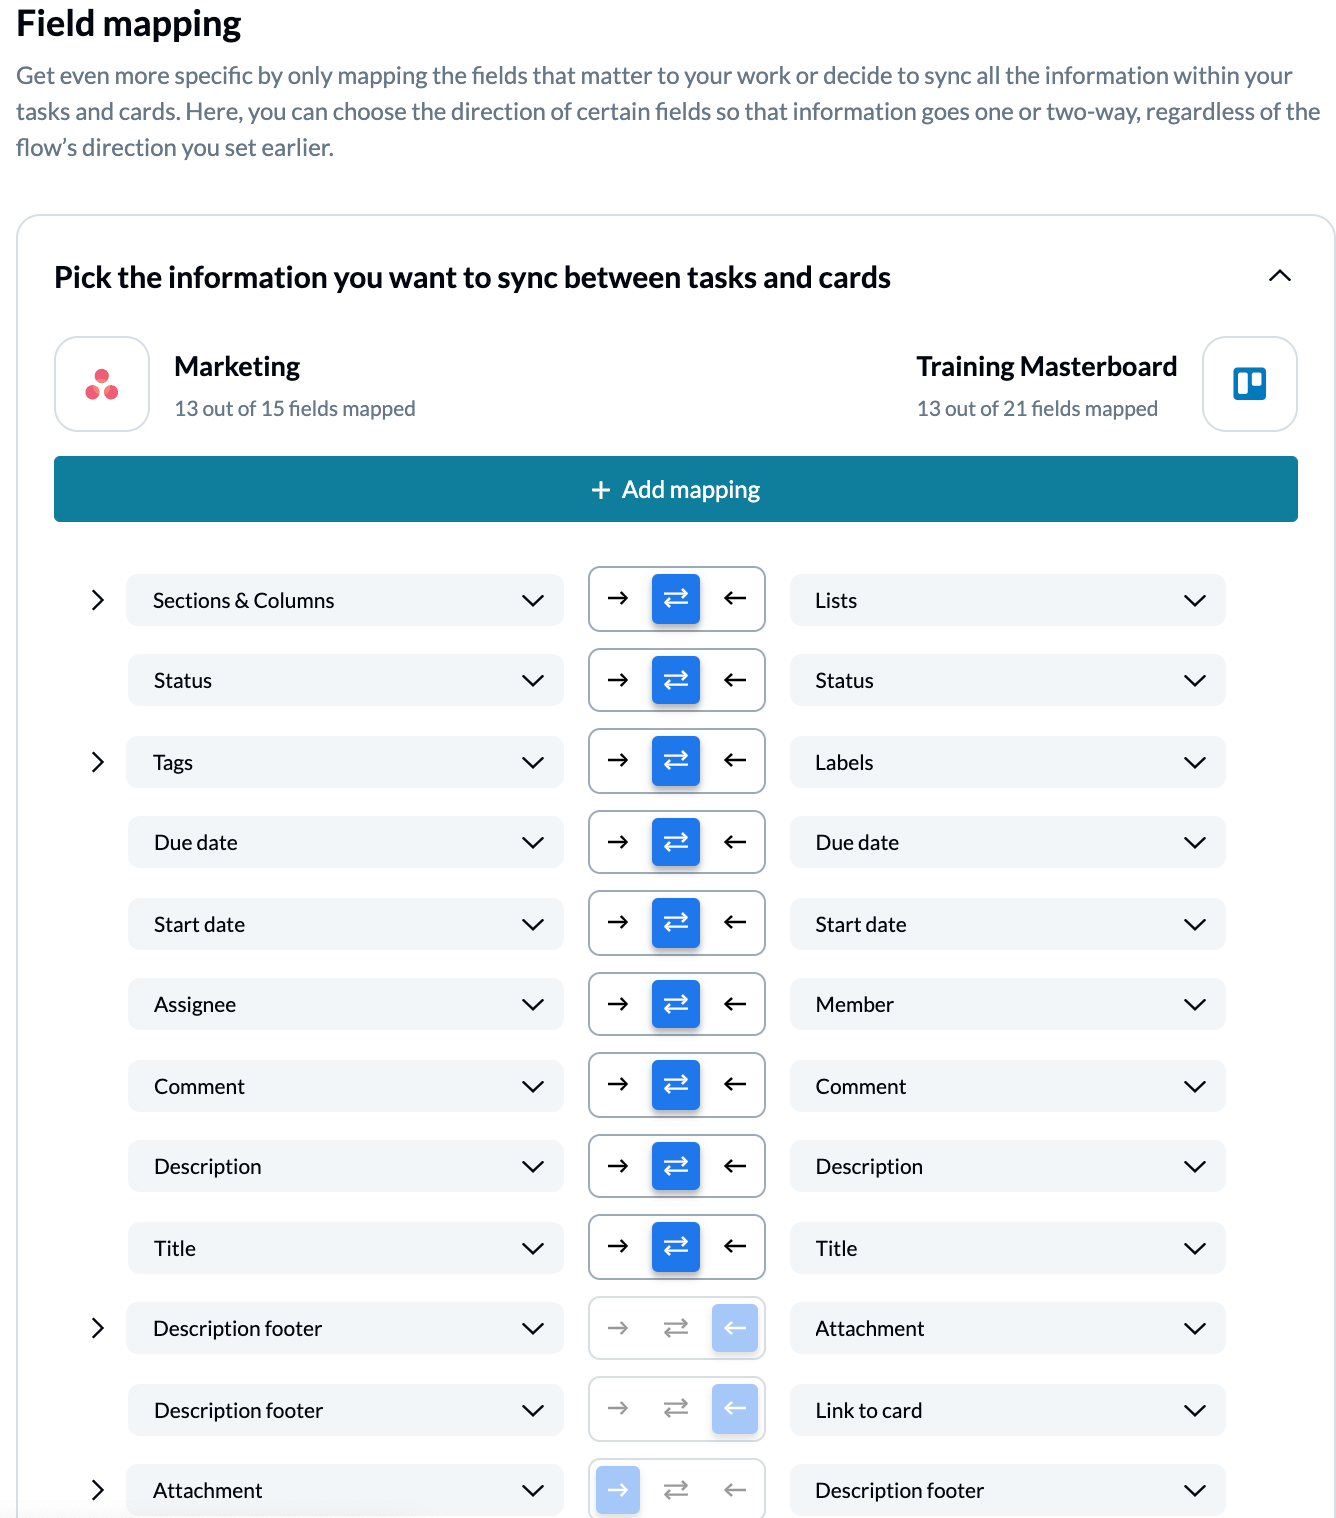
You can customize your field mappings in several different ways.
Deleting mappings
Maybe you don’t want some information to be shared between tools. To restrict certain fields, hover over the mapping you want to delete. You’ll see a gray garbage can symbol appear. Click on it to delete your mapping. When a mapping is deleted, the fields in that mapping won’t sync between tools. Deleting field mappings you don’t need reduces noise, keeping your projects from getting too cluttered.
Change flow direction
By default, most fields sync information back and forth between tools but some can only sync in one direction. That said, you can easily change flow direction by clicking on the arrows between the two dropdown menus. Click on the two arrows to sync information back and forth, and on either of the single arrows to make information flow one way.
Creating new mappings
At the bottom of the mapping list, you’ll find a blue link called Add a mapping. Click on it to create a new mapping. A dropdown menu on either side gives you the ability to choose the fields you want to map. Some fields — such as description footers — can be mapped multiple times while others can only be mapped once. If you want to create a different mapping for the latter, you’ll have to delete the original mapping.
Customizing mappings
When you hover over the list of field mappings, you’ll see that some have a blue gear. This means you can customize the way they work. This is often the case with fields that have multiple values, such as tags or labels. Hover over a specific value, and you’ll see how it’s mapped to the other tool. You can delete each value by clicking on the X, and add new values through the dropdown. Want to see how that works with a specific use case in mind?

An example of field mappings in practice
Imagine a marketing team that relies on designer support for their campaigns. Maybe the designers help create new landing pages, make website changes, or develop new product designs for launch campaigns.
To help identify different request types, the marketers use tags or labels like “website” or “feature.” On their side, the designers only want to know when requests come from the marketing team. The type of request isn’t important.
In this example, let’s start with a flow between the marketing team’s Asana project and the design team’s Trello board. If you were setting up the mapping for this use case, you’d start at the field mappings tab. Asana tags will already be mapped with Trello labels, so click on the chevron on the left to expand the mapping and customize it.
By default, Unito will find any tags and labels that match and map them automatically. If you want to add any labels, you just need to click on the blue plus sign on either side to add a new label.
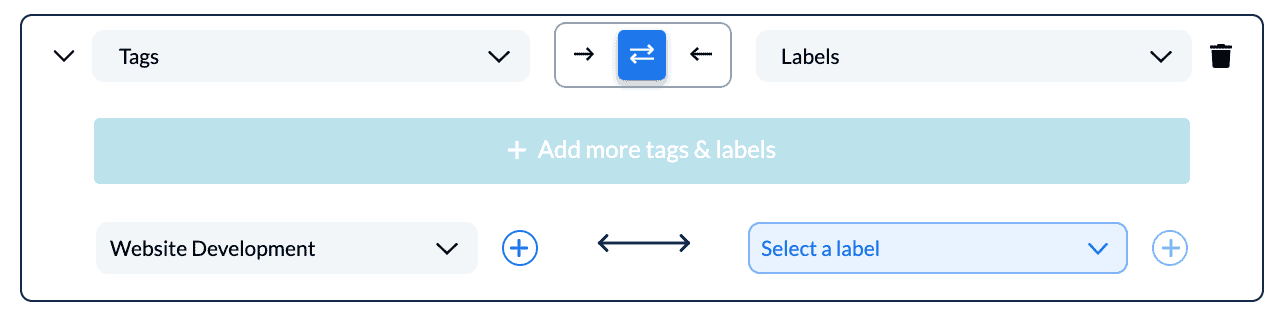
You’ll get a dropdown menu, where you can pick the Marketer Request label.

If you want multiple Asana tags to feed into a specific Trello label, you can click on the blue plus sign on the left and add them there.
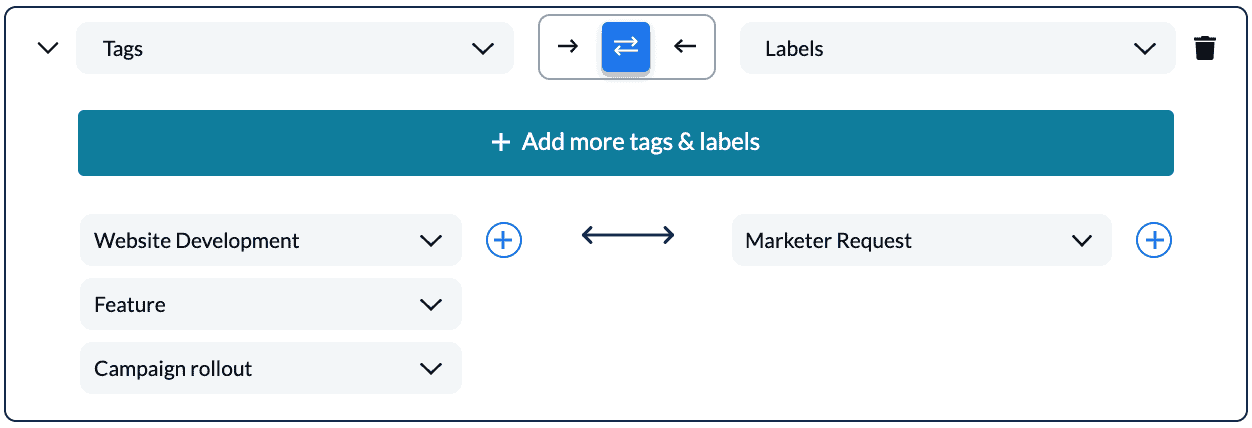
Because you’ve added all Asana tags in the same group, they’ll all automatically feed into the Marketer Request Trello label. So when an Asana task is marked with one of these tags, the corresponding Trello card will have the Marketer Request automatically added.
But let’s say the designers don’t want a single label. Maybe they want a separate label just for paid ad requests. Not a problem! All you need to do is click on + Add more tags & labels
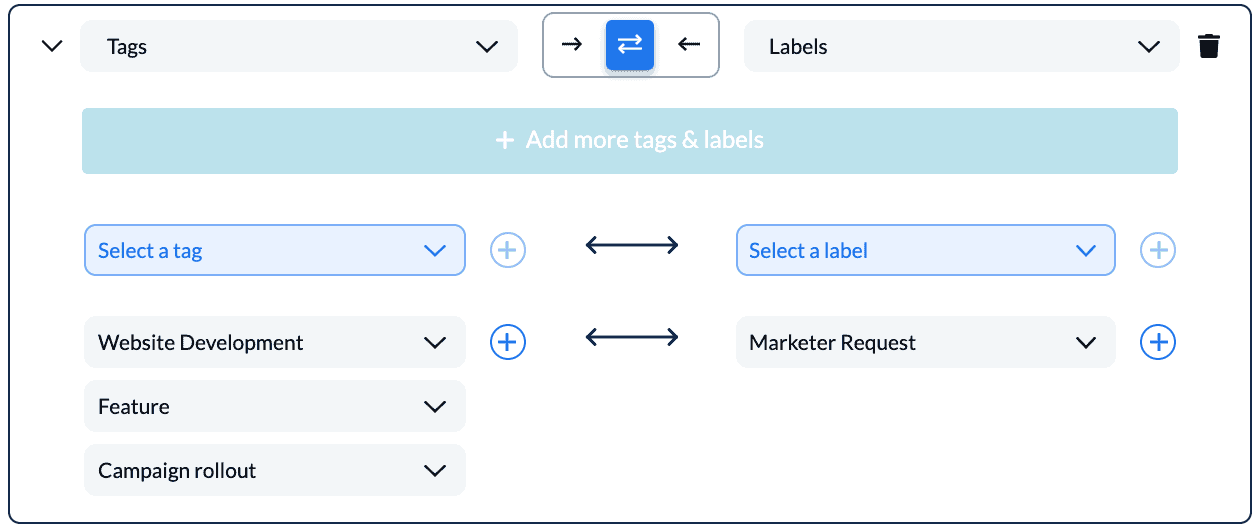
And then add both the Asana tag and Trello label that represent the paid ad requests.
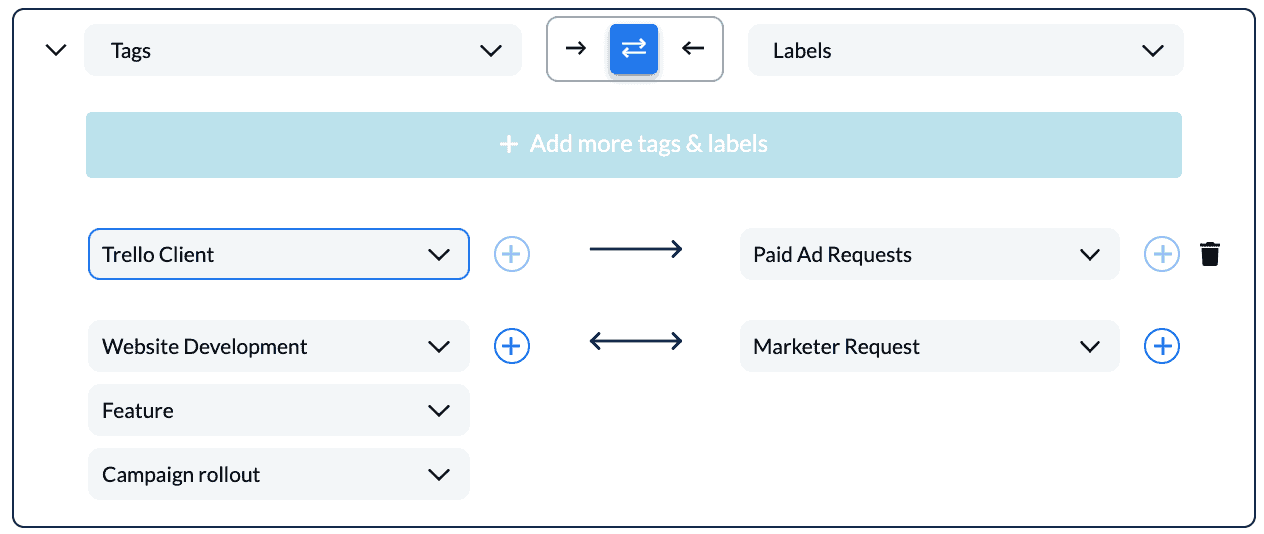
By having multiple groups, you can re-map labels to each other instead of making all Asana tags feed into a single Trello label.
And just like that, you’ve customized your first field mapping!
Follow the map
With Unito’s default settings, you can quickly build flows to match most use cases. But with just a bit more time, even the most technical use cases can be handled by Unito. With field mappings, you can customize Unito to your situation in just a few clicks. Ready to try Unito? Start your free 14-day trial here, no credit card required.
Want to know more?
Here's our breakdown of Unito features that are essential for your workflows.