
A Beginner’s Guide to Wrike
Juggling isn’t a skill most business professionals promote in their LinkedIn profile. While sometimes necessary, going back and forth with endless email chains, missing deadlines, and managing chaotic projects is a type of juggling that nobody wants any part of. Thankfully, there’s Wrike.
Wrike is a project management tool that enables businesses to plan, coordinate, and manage work. It helps cut down on unnecessary or unclear communications while streamlining and perfecting workflows. If you’ve ever felt like your team members are all on completely different pages — or planets — Wrike can help bring things back together.
By helping you sort through incoming requests, setting up custom workflows that fit your team’s specific process, and increasing transparency between team members, Wrike breaks down silos and boosts efficiency.
If you’re just starting out with the platform, this beginner’s guide to Wrike will get you on the right track. Continue reading to find out:
- 3 Great things about Wrike
- The key elements of your Wrike dashboard
- Wrike’s system for organizing work
- How to create and track a project in Wrike
- 3 Tips to get the most out of Wrike
Let’s dive in.
3 Great things about Wrike
1. Feature sets catered to your role
Are you on a creative team? A project management team? Maybe business operations? Wrike has specialized feature sets for different parts of the business, so you can really cater the tool to your workflow with ease.
Wrike for Marketers, for example, was built with marketing workflows in mind, and includes an Adobe Photoshop integration, intake forms, proofing and approving tools for videos, images, and other creative assets, and document versioning.
If you’re rolling out Wrike organization-wide, there are also plans to match the size and scale of your business. Wrike Enterprise includes advanced analytics tools, custom workflows and spreadsheets, and other features designed with large companies in mind.
2. Simple, clean design
Despite having a suite of awesome features, Wrike has a sparse, minimalist UI. If a cluttered interface packed with bells and whistles gives you a headache, you’ll appreciate Wrike’s clean and simple multi-pane aesthetic. And all Wrike features are categorized as either “project management” or “team collaboration,” so you won’t end up wasting time searching for the features you need to use.
If you’re ready to get down to business and start working on your project, Wrike won’t get in your way.
3. Easy to add and manage team members
Wrike makes it really, really easy to add users, share documents, adjust permissions, and send out invitations. Project managers who have large teams to wrangle will find a ton of value here, but even small teams will appreciate the simplicity. One of the biggest myths about Wrike is that it’s only for big teams, but there are plans for all team sizes, including a freemium version that allows for up to five users.
Getting started with Wrike
Before you get going with your Wrike dashboard, you have to decide which membership option is right for you and your business.
Wrike has five core plans: Free, Professional, Business, Marketers, and Enterprise. For the purposes of this guide, we’ll be exploring Wrike for Marketers. If you’re using any of the other plans however, most of this information will still be applicable. You can sign up for a free trial of all paid plans before you commit, so take your time and figure out which is best for your company’s needs.
Once you’ve signed up for your preferred plan and are in your Wrike dashboard, it’s time to explore.
The Navigation Panel
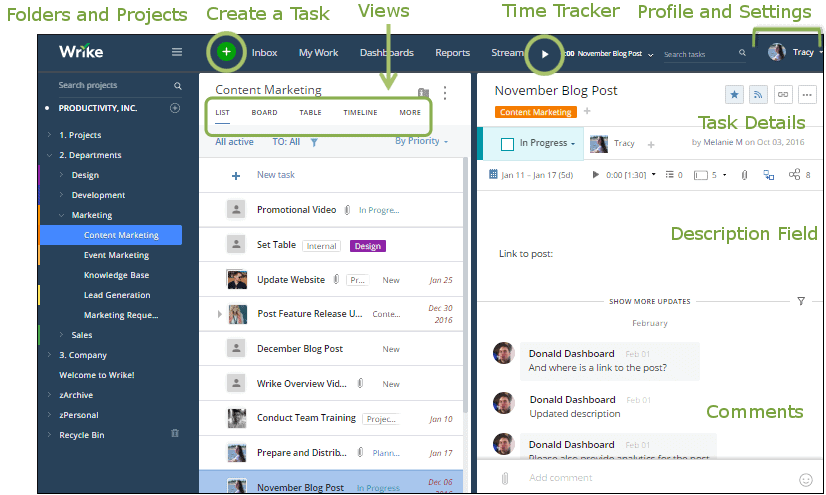
The Wrike Navigation Panel is something you’ll use on a daily basis. It includes:
- New component button: This green circle with a white plus-sign is where all new folders, projects, and tasks are born. You can click it to create a new task, project or folder, space, or request.
- Inbox: This is where you’ll receive notifications whenever you get @mentioned. For example, if your teammate is writing a report and it’s ready for your edits, your teammate might @mention you in the task. Doing so would trigger a notification in your Wrike Inbox (and potentially your email inbox, depending on the settings you’ve established).
- My Work: A list of the tasks assigned to you. You can easily drag and drop tasks here for your convenience.
- Dashboard: In your dashboard you can view filtered task lists and monitor the work you have on your plate. You can customize your Dashboard with widgets and filters to ensure you’re seeing the content that’s most important to you. Learn more about customizing Dashboard widgets in Wrike here.
- Stream: A live feed of all updates related to projects and work you’re involved in.
- Reports: (Enterprise only) allows you to generate reports on the work tracked in Wrike.
- Folders and projects: This is where all the work from all members of your company lives. If someone is working on something, you can find it here. To see all tasks stored in a folder or project use the Navigation Panel on the left-hand side.
- Calendars: Like most calendars, the Wrike calendar helps you track tasks that are due on a day-to-day basis. This is an extremely helpful way to manage your schedule, especially if you’re a visual learner.
The Wrike system
The Wrike system consists of four key areas: tasks, projects, folders, and spaces. These are essentially the ‘building blocks’ of Wrike that will help you keep track of work.
Tasks (and subtasks)
These are the main actionable units in Wrike. tasks represent all the work that you and your team need to complete.
Some teams will break down every single aspect of a project (from meetings to approvals) into tasks and subtasks, while others only create tasks for specific project management deliverables. Wrike’s custom features make it really easy to cater to these different approaches.
One of our favorite things about Wrike is that you can create a priority matrix to identify which tasks are urgent and critical. To do so, create folders for each priority level, and then drag tasks from one folder to another as your priorities change.
Projects
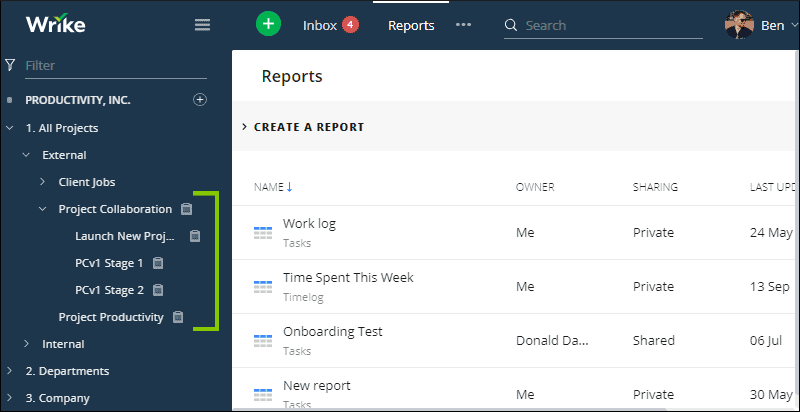
The projects section is a place to house multiple tasks that contribute to a single campaign or large project. Projects have attributes like project status, owner or stakeholder, and due date. Wondering if the graphic designer has started mocking up that infographic you need? A project makes it very easy to find out.
You can easily recognize projects in your sidebar navigation panel by the little clipboard icon that will appear next to the project name.
Folders
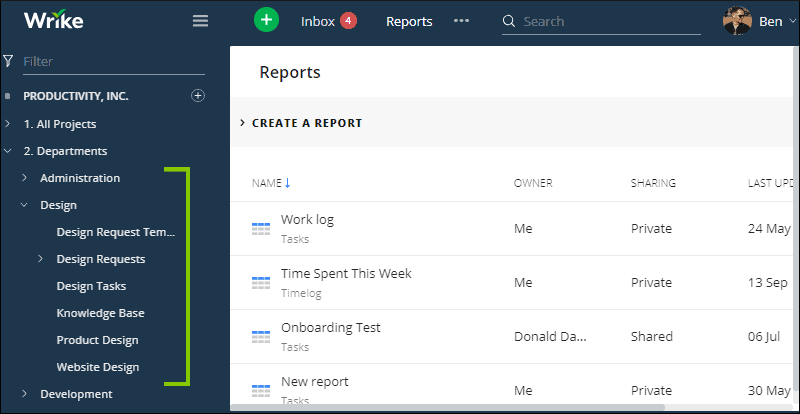
Folders are used to organize data. Just like you use file folders to keep your taxes and paper invoices tidy, Wrike’s folders make your projects and tasks easy to find. They’re color-coded for quick visibility so you don’t waste any additional time trying to find the info you need.
You can add tasks to folders to keep relevant information all in one place. For the most efficient workflow possible, we recommend grouping related tasks together. If you know that one stakeholder team loves to come in with the last-minute “emergency” requests, you can create a folder for these projects and tasks to keep them separate from other projects or department folders.
Spaces
Spaces are Wrike’s newest structural addition. They allow companies to define and manage each department. There are three different types of spaces available. They are:
- Personal Space: pre-created workspaces that let you manage your work just for you. Only you can see your Personal Space, so it’s a great place to store private notes, files, or work.
- Public Space: a place to manage and organize information that is available company-wide. This is helpful for internal communications, announcements, and other information that all employees and teams should be aware of.
- Private Space: where teams, departments, and groups can organize and view work. These are hidden from users not invited by a space administrator.
Learn more about spaces with Wrike’s handy guide here.
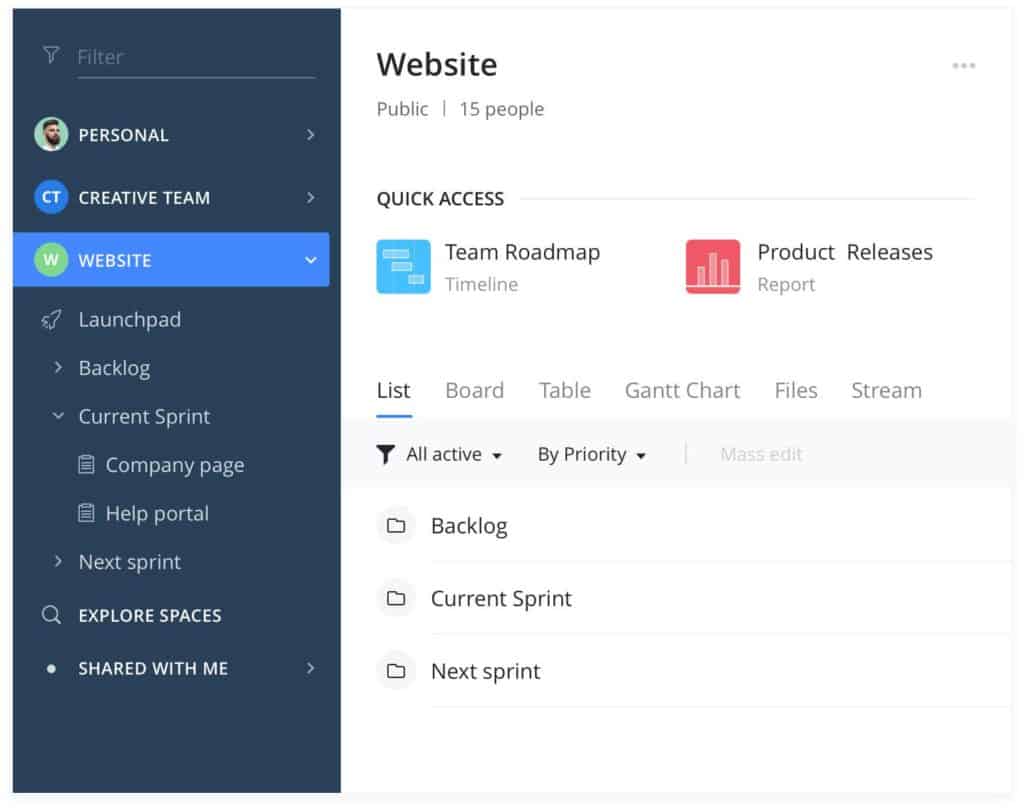
Viewing information in Wrike
The beauty of Wrike is in its customization. While other programs don’t always work the way you work, Wrike conforms to your team and personal workflows. With the different viewing options in Wrike, you can see the information that matters most to you in the most convenient format.
Once you select a folder or project, use any of these views to take a look at your workload and tasks.
- List: like a to-do list. This view shows you a list of tasks in a project or folder. The list view lets you sort tasks based on importance, priority, date, status, and title.
- Board: shows tasks organized into easy-to-read columns based on status. You can drag and drop tasks to different columns if needed. Find out more about Board View here.
- Stream: the best view for tracking work being completed in real-time. The Stream tab is filtered to show updates on all tasks, folders, and projects but you can customize this to better suit your needs. Learn more about the Stream View here.
- Timelog: Wrike has an integrated time tracking system. This view shows you time logs for selected folders so you can see how much time has been spent on tasks. Learn more about the Timelog View here.
- Gantt Chart: shows the workflow, time duration, and task dependencies in a selected folder. Gantt charts provide a bird’s eye view of projects and work scope. Learn more about Gantt Charts here.
- Table: like a spreadsheet, but way better. Here is where you can see key info in a grid format. Learn more about Wrike’s Table view here.
- Workload: are certain team members complaining about being overworked while others seem to be on permanent vacation mode? The Workload View will show you the balance of assignment distribution. It gives you one place to see the workload and availability of all team members. Find out how to get the most out of the Workload View here.
Putting it into practice: How to create a project in Wrike
Now that you’re familiar with the basic components of Wrike, it’s time to create your first project. Creating a project in Wrike is quite simple and intuitive. Once you’ve done it one time, you’ll basically be a pro.
1. Establish your team
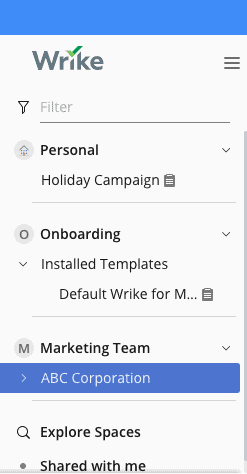
Go to the left-side Navigation Panel and click on the team name relevant to the project. For the sake of this example, let’s say we are assigning a project to the marketing team.
2. Create a folder
When you click on the team name, you’ll see a view with all of the projects and folders assigned to this team. You can either create a project right away or create a folder where this project will live. The folder is handy if you have multiple clients or campaigns and want to keep all projects organized under each one.
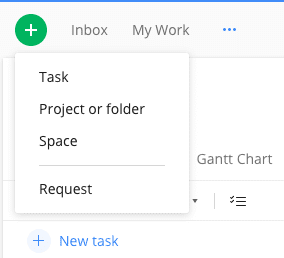
Create a new folder by clicking on the green circle button next to the Inbox tab. From the drop-down menu, select ‘project or folder.’ Click on the circle next to the folder option (below project) on the left side navigation.
3. Name your new folder
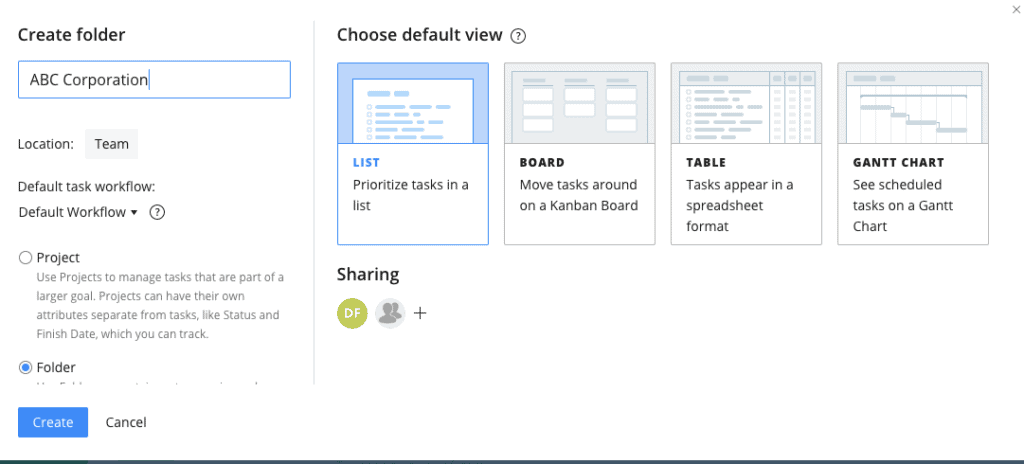
It will now appear in your left-hand Navigation Panel under your team. We’ve called the folder ‘ABC Corporation’ for the purposes of this example.
4. Start adding projects.
Now that you have your folder set up, you can start adding projects. Click on the green circle button with the white plus sign and select ‘Project or folder’ from the drop down menu. It will automatically have ‘Project’ selected on the left-hand side.
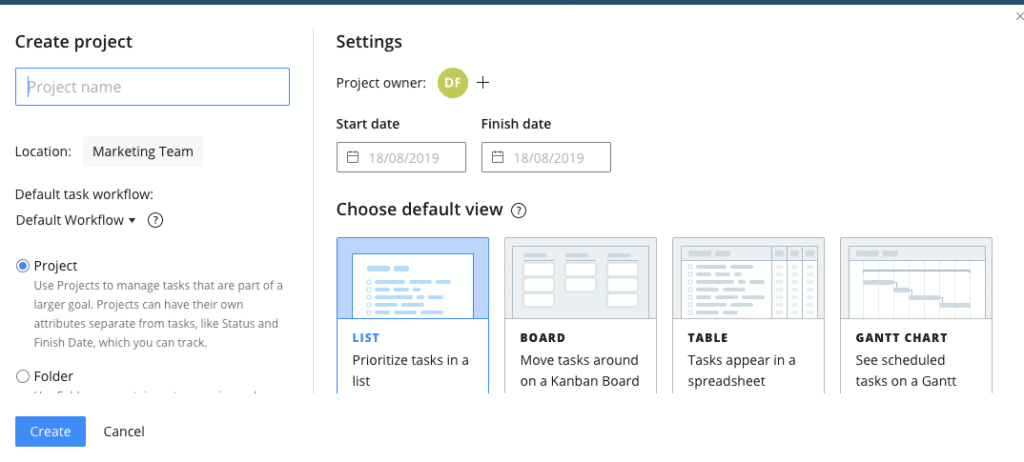
5. Determine project details
Name your project, set the start and finish date, and choose your preferred default view. We’ll call this project ‘Fall Campaign.’ You will now be able to see this on your left-side Navigation Panel.
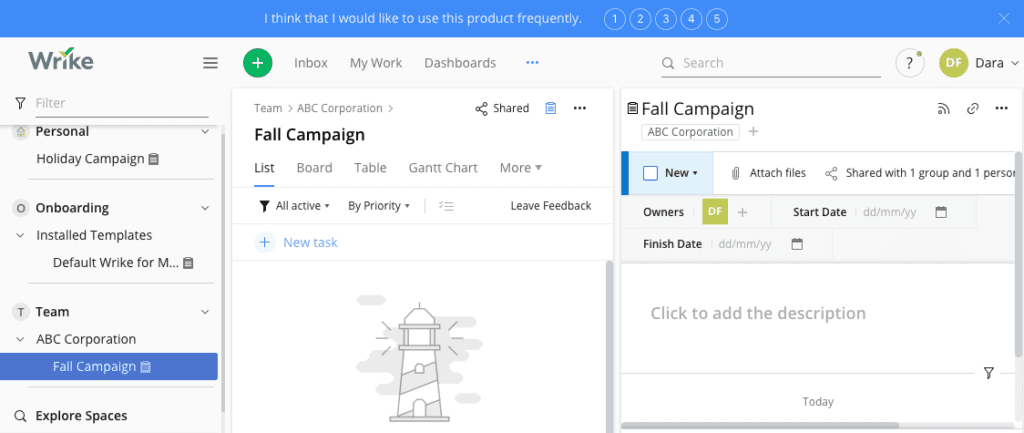
6. Add tasks and assignees
Now that you have your project all set up, you can start adding tasks and assignees. To add a task, click on the blue ‘New task’ button.
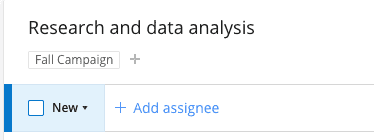
7. Name your task
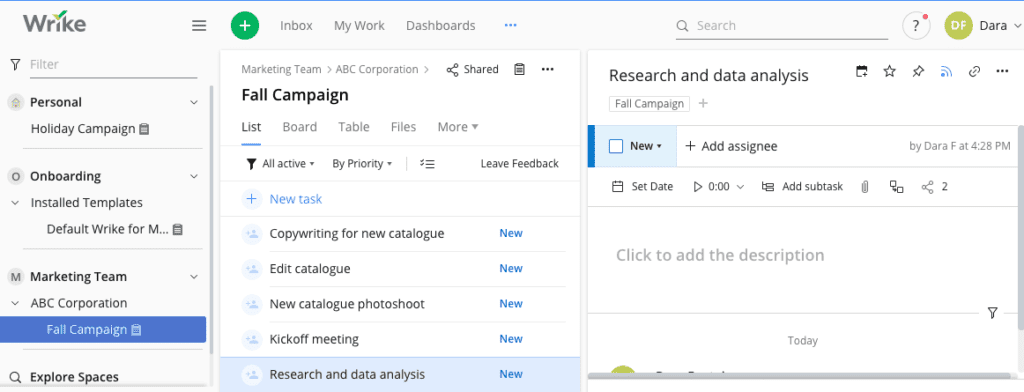
Type in your task name (for example, ‘Research and data analysis’) and hit enter. The new task will now show up in the list of tasks under the project, and you’ll be able to see details on the right-hand side.
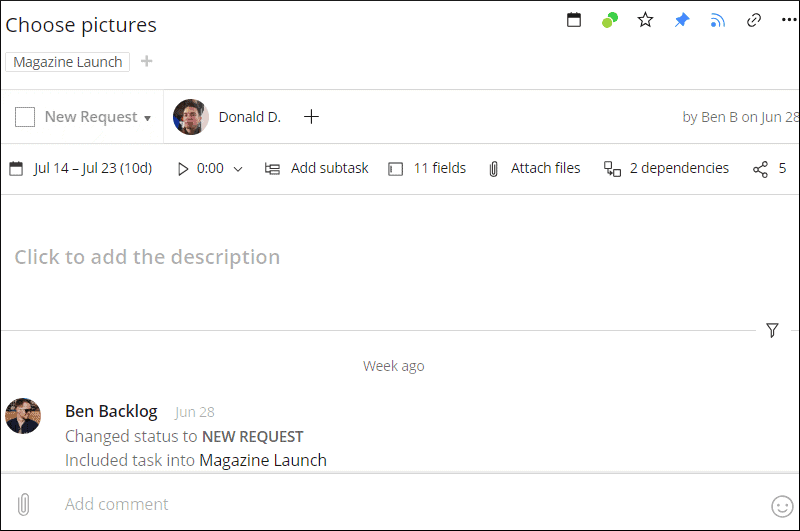
8. Add task details
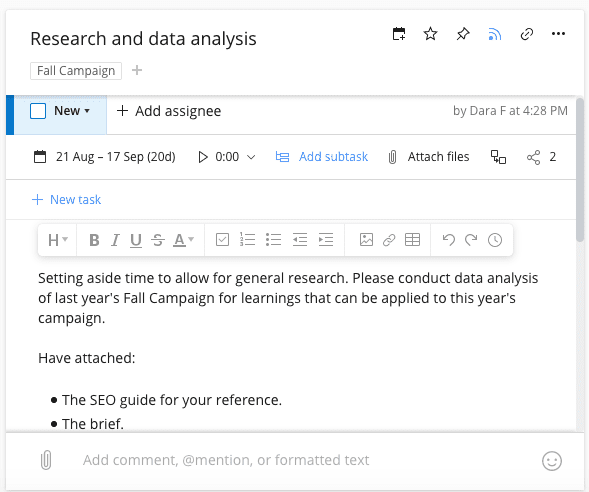
Now add the necessary details to your task, including subtasks, due dates, and other info. You can also assign the task to the appropriate team member and attach files. These details and attachments can be updated at any time, so don’t get too hung up on making sure everything’s perfect — although it’s good practice to have as many details as possible ready in the task before you assign someone to it.
9. Add task assignees
Who is going to be completing and/or overseeing the task? Add this team member by clicking the ‘Add assignee’ button.
10. Add subtasks
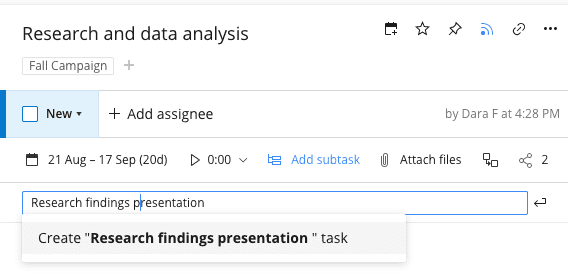
Once the task is created, you can also add a subtask. For example, the ‘Research and data analysis’ task might also include a presentation aspect so the assignee can share findings with the broader team.
11. Add subtask details
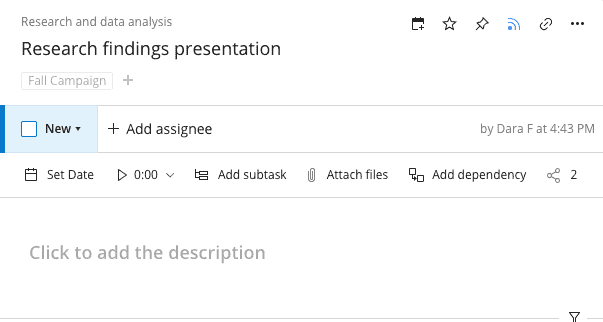
You can now do all the same things as you did with your main task for your subtask. Add an assignee, set due dates, and add any additional files and key information. Even if the assignee of the subtask is different than of the main task, they’ll be able to see any info and files included in the main task.
12. Set task priority level
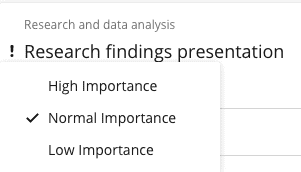
When you create a task and subtask, get into the habit of setting priority levels. This makes sorting tasks based on priority a breeze.
There you go. You’ve now created your first project in Wrike. Feels good, doesn’t it? And it only gets easier from here, since you won’t have to keep creating teams or folders.
Now that your team is one big step closer to complete organization and collaboration, you can concentrate on what really matters — the work.
3 Tips to help you get the most out of Wrike
Whether you’re already a Wrike user or still need a little convincing, here are some tips for using Wrike like a pro:
1. Use a custom dashboard as a priority matrix
A priority matrix can be a great way to organize tasks, as it helps you identify what tasks are both urgent and critical. You can build a matrix in Wrike by creating folders for each priority level, and then dragging tasks from one folder to another as your priorities change. Wrike’s custom dashboard setup options make it easy to arrange these folders in a way that aligns with your team’s workflow. You can even name and color-code the folders so it’s crystal clear where to drop immediate, critical tasks and where to store tasks on your backburner.
2. Keyboard shortcuts
Do you know how many working hours are spent each year moving your hand from the keyboard to the mouse and back? We don’t either, but it’s probably substantial. Instead of wasting time, speed up your project management and avoid carpal tunnel with the help of Wrike’s keyboard shortcuts. Here are a few particularly useful ones:
- “Send” = shift + Enter
- Create a new task = Alt + Shift + N
- Assign a new task to yourself = Alt + Shift + “.”
- Open the current task in a new browser tab = Alt + Shift + O
- Open the current task in fullscreen view = Alt + Shift + F
3. Track your time accurately
Whether you’re a freelancer who gets paid by the hour, or you just want to see what tasks occupy the majority of your work day, Wrike has impressively integrated time tracking into its dashboard. Within tasks there’s a “play” button which, when clicked, starts a timer. Let the timer run until you’re done with the task and click it again to stop the timer and log those hours. Alternatively, there’s a similar “play” button at the top of your main Wrike navigation bar with a handy dropdown menu of all your open tasks. This allows you to start or stop the timer on any task as you move through your day.
We recommend setting up a generic “daily activities” task. Then, when you’re called away from project tasks, switch the time tracker at the top to this “daily activities” task. You’ll end up with a better accounting of how your time gets spent.
How to integrate Wrike with other tools
Learning how to use Wrike is great, but what about slotting it in with your tool stack? Without the right integration, you can spend hours just copying and pasting information from tool to tool so everyone’s in the loop. Just because a tool is great for your needs doesn’t mean it works for another team. No one should be forced to use a tool that doesn’t fit their workflow.
Want to save time and effort? Try Unito. Unito has the deepest two-way integrations for some of the most popular tools on the market, including Wrike, Asana, Trello, Google Sheets, Zendesk, and more.
Sync data across tools seamlessly, use rules to filter out irrelevant information, and map fields so everything ends up exactly where it needs to go. All of that in just a few minutes.
Click here to see how easy it is to integrate Wrike with Jira.
Need to integrate Wrike with your tool stack?
Unito supports more fields, better customization, and true two-way syncing.