How To Set up Notion Database Automations (2 Methods)
Notion is an incredibly powerful tool. Teams use it as a knowledge base, a database, and even a fully-customizable project management platform. But with that power comes sprawl, and soon everyone uses a database for each project, for their own to-do list, and more. This makes it tough to ensure everyone has the information they need to get their work done. That’s where Notion’s database automations come in.
You can build these automations in one of two ways. The first uses built-in Notion features available on most plans, while the other relies on a Unito flow. Here’s how.
First method: using built-in Notion database automation
Notion’s built-in database automations let you automate some of the more tedious tasks involved in maintaining a database, assigning work, and many more of your team’s pursuits in Notion. Here’s how it works.
First, click on the ellipses (…) next to the New button near the top of your database.
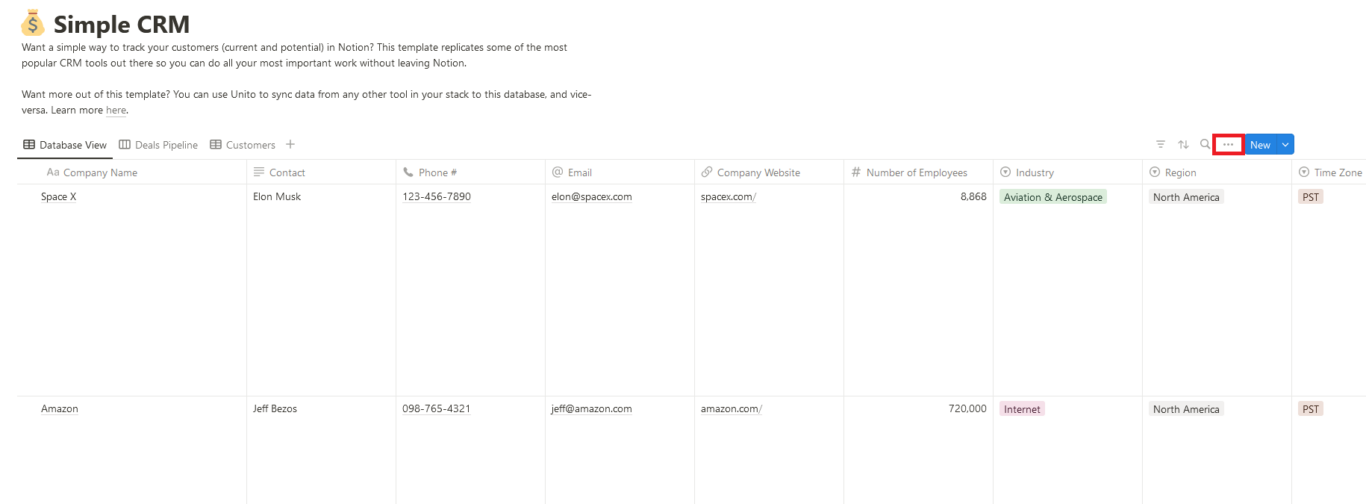
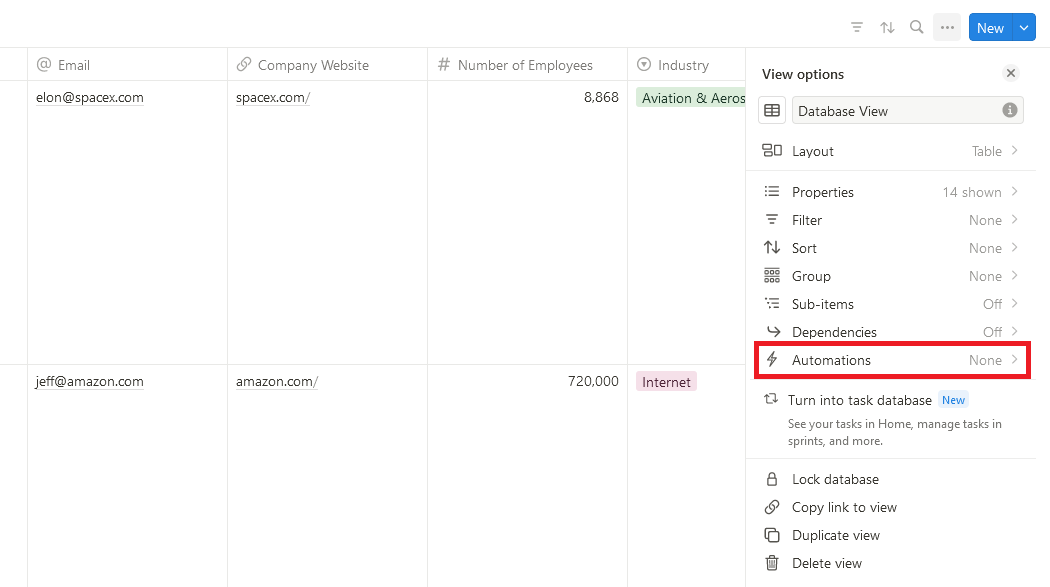
From there, you’ll want to click on Automations.
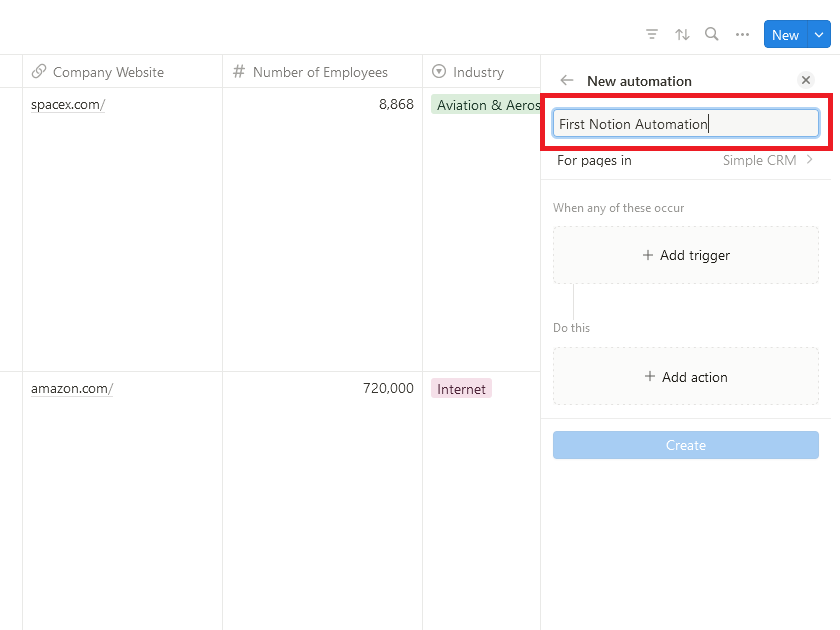
Next, give your automation a title.
Now that you’ve got your automation open, there are two things you need to set up:
A trigger, which is the signal your automation needs to start running.
You can set two types of triggers, either when a new page is added to your database or when a property is updated.
An action, which is what your automation will actually do.
Actions are a lot more varied, including editing properties, adding pages to any database in your Notion workspace, or even sending a Slack notification to a specific channel.
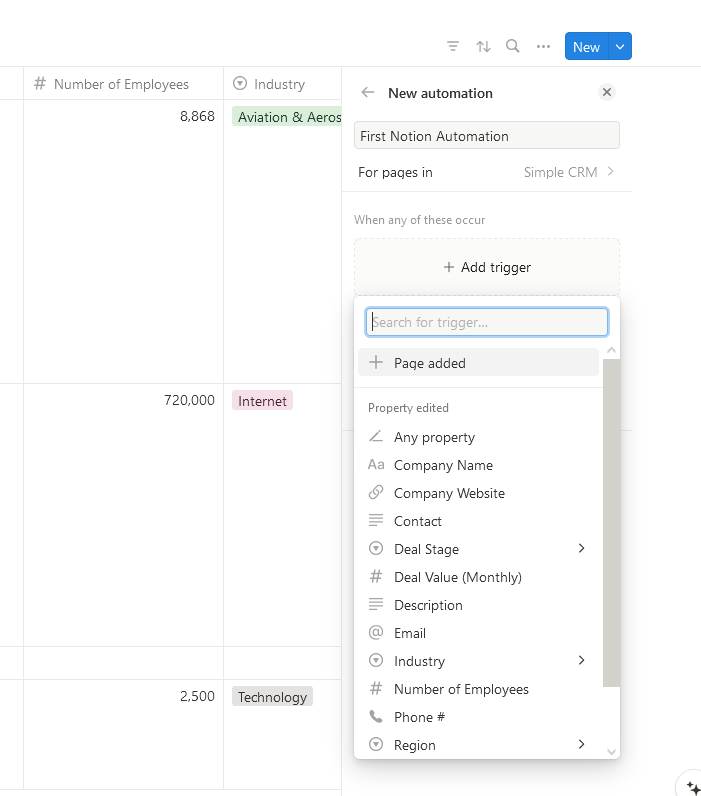
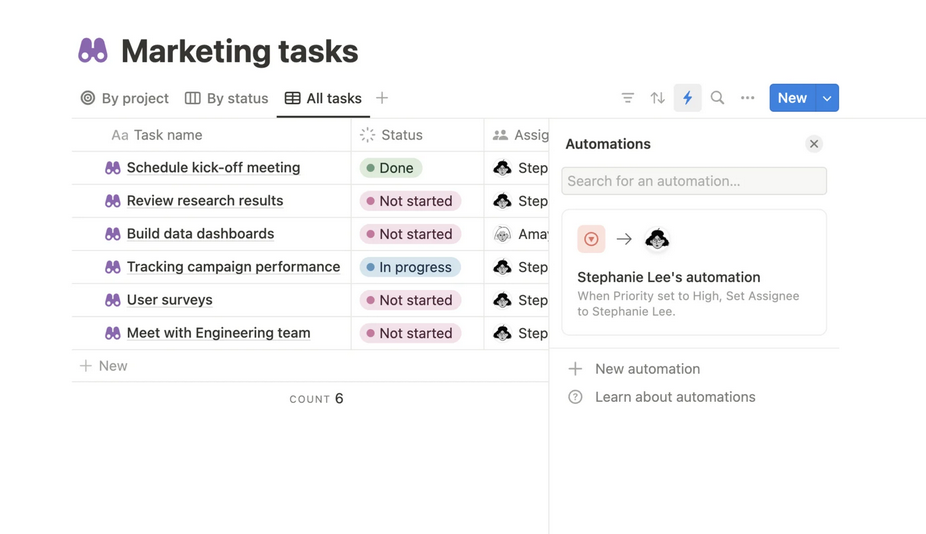
When you’ve picked both your trigger and your action, just hit Create and you’re done! You can check in on your automation in the same panel, edit it, and pause it as needed.
Limitations of this method
While Notion automations are simple to set up, they do come with some drawbacks you’ll need to think about before deploying them.
Not available for all plans: Database automations are only available with paid Notion plans. Free users can test them in Notion templates, but won’t be able to add them to their own custom databases.
They can only “push” data: Alright, “only” might sound artificially reductive, but this is an important distinction. When you set up a Notion database automation, it edits a property or creates a page somewhere else, and then that’s it. There’s no link between the database where your automation started and the page it created. That means any updates happening in that page don’t get carried over anywhere else.
They only work for Notion (and Slack): These automations are so easy to set up that they’ll make you wish you could use them in other tools, too. But you’ll only be able to use database automations in Notion or to send notifications in Slack. To export data from Notion, you’ll need to use a different method.
Any of these dealbreakers for you? Don’t worry, there’s another method you can use to set up automations in your Notion databases.
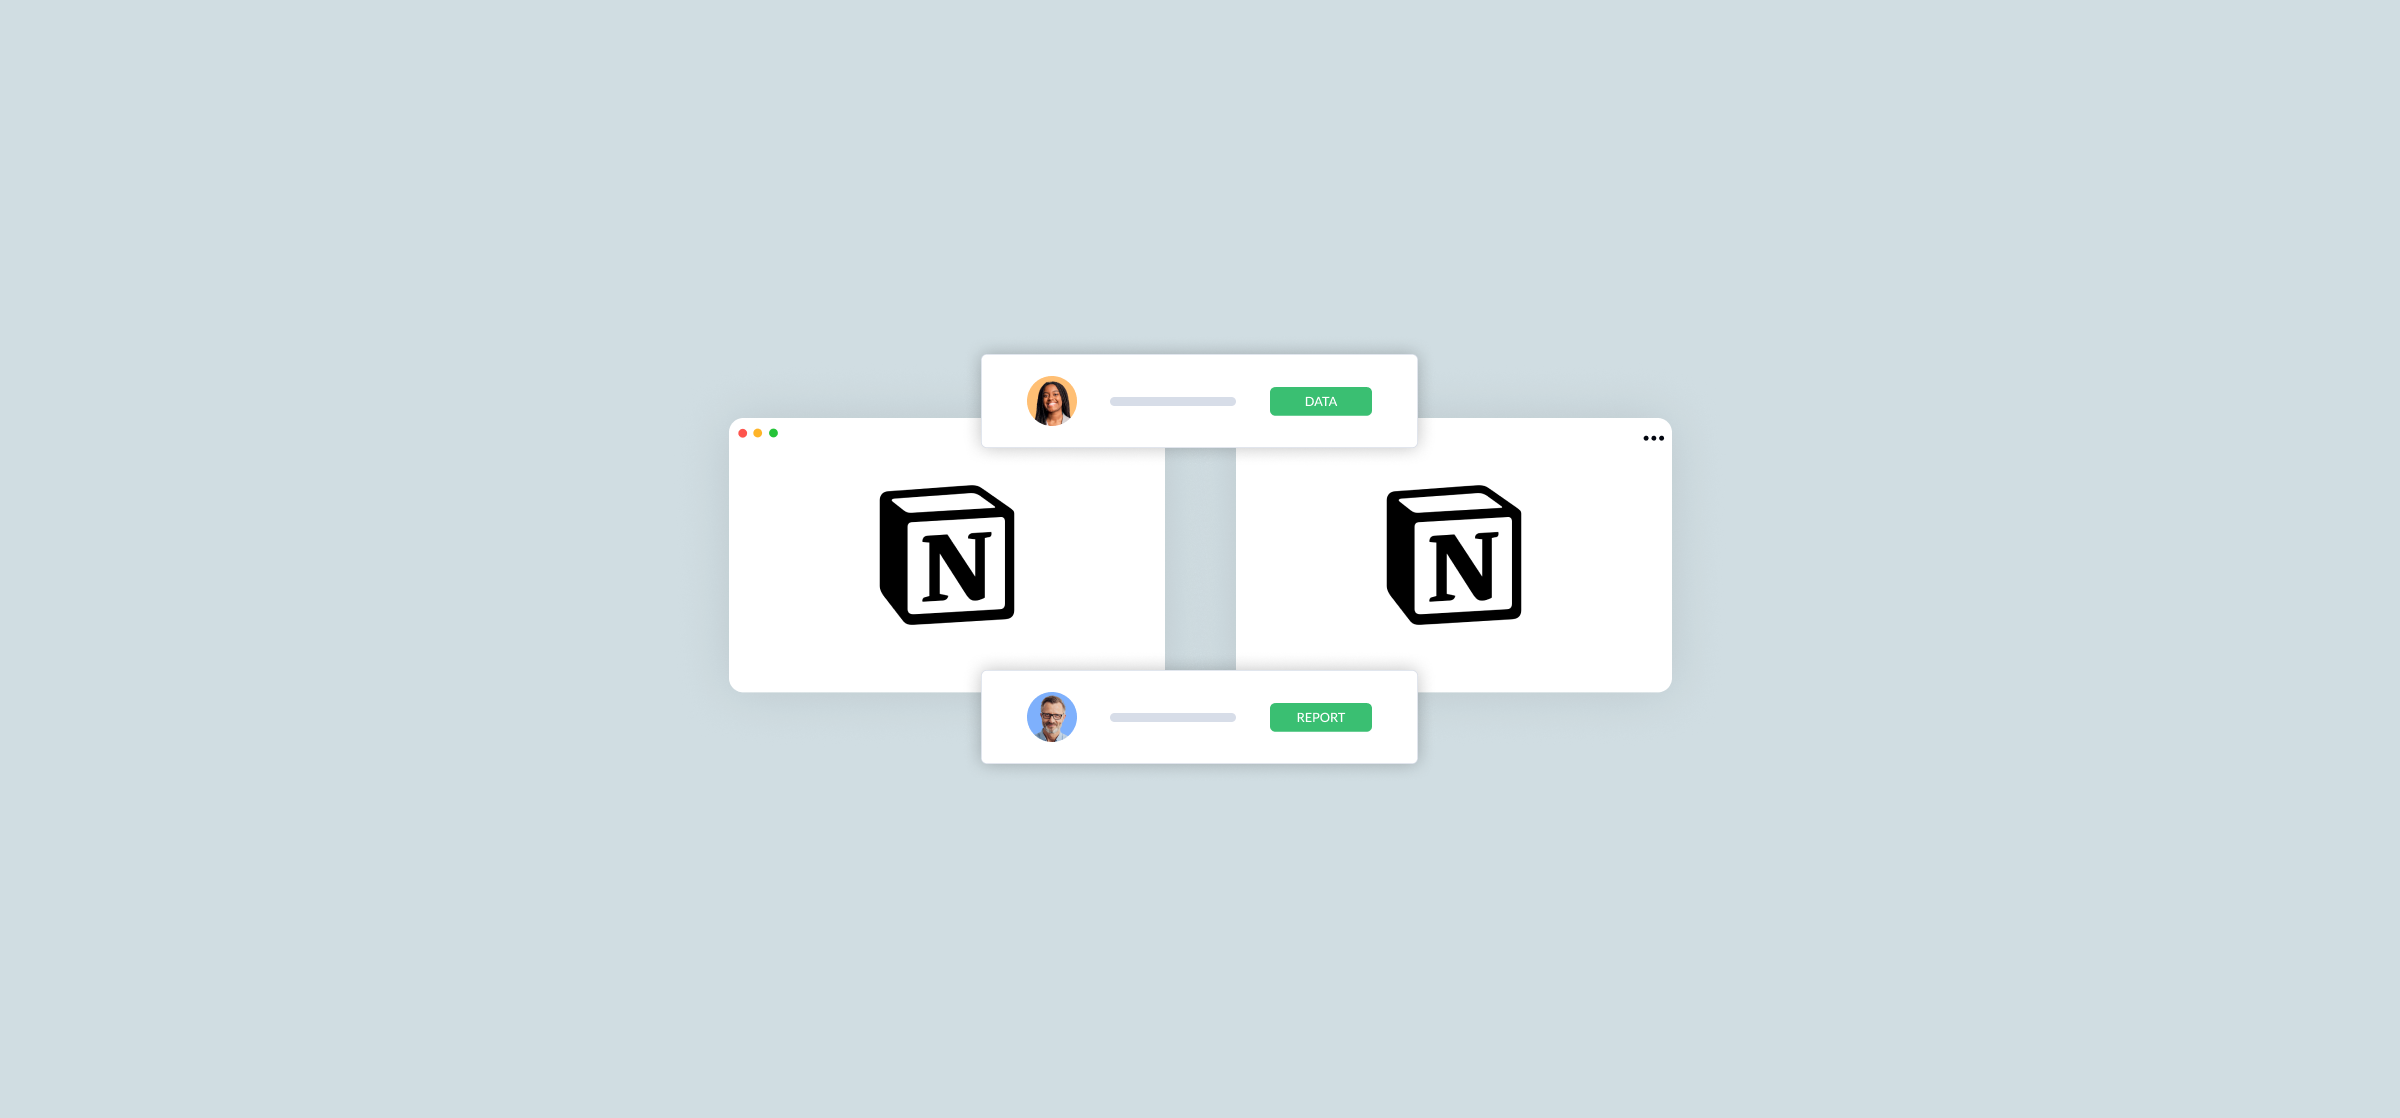
Second method: build two-way database automations with Unito
Unito is a no-code, two-way integration solution for some of the most popular software tools on the market, including Notion, Slack, Asana, Jira, and more. In just a few minutes, you can build a single Unito flow that can sync all data from a Notion database to another database — or over 40 other tools. Here’s why Unito might be the best solution for automating your Notion databases:
No need to pay for a Notion plan: While Unito is a paid third-party application, you can use it with your free Notion account. No need to double up on paid memberships.
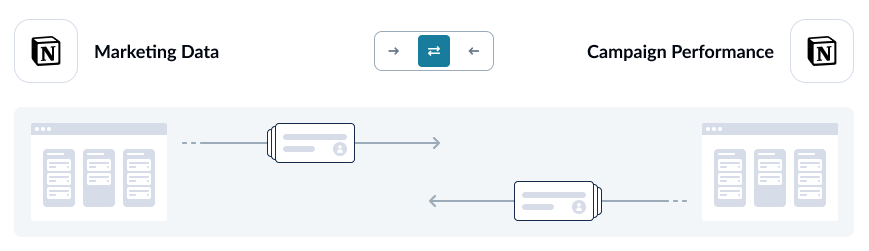
Push and pull: Unito syncs data in two directions by default. If you connect two Notion databases with a Unito flow, the pages in one will be automatically updated when work happens in the other, and vice-versa. You’d need multiple automations to replicate that with the first method.
Over 40 integrations: Unito offers integrations for project management tools, spreadsheets, contact management tools, and a whole lot more. That can make it your one-stop shop for integrating just about any tool in your stock.
So how does it work? Let’s dive in.
If you’re more of a visual learner, check out this video guide from Unito’s product experts.
Step 1: Connect Notion
First, you’ll need to connect Notion to Unito, picking the account you’ll want to sync pages from.
Step 2: Pick flow direction
This will determine if new Notion pages are automatically created in just one tool or both. It’s where Unito stands out from built-in database automations because you can choose between a one-way or two-way integration.
Step 3: Build rules
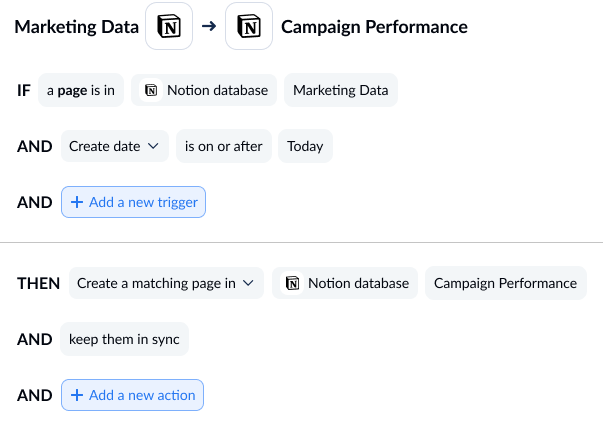
If you don’t want every Notion page syncing between your databases, you can use Unito rules to filter out the ones you don’t want synced. You can build rules based on these fields:
Date
Single-select
Multi-select
Person
Text
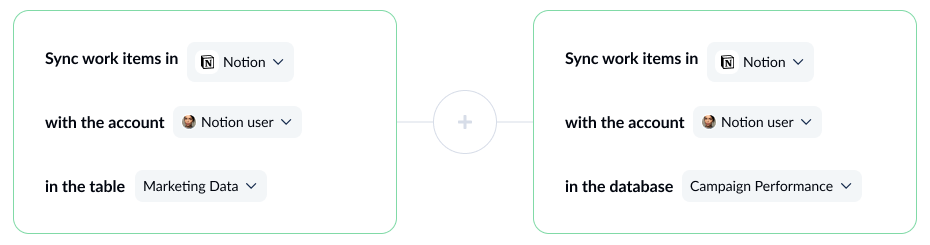
Step 4: Map your fields
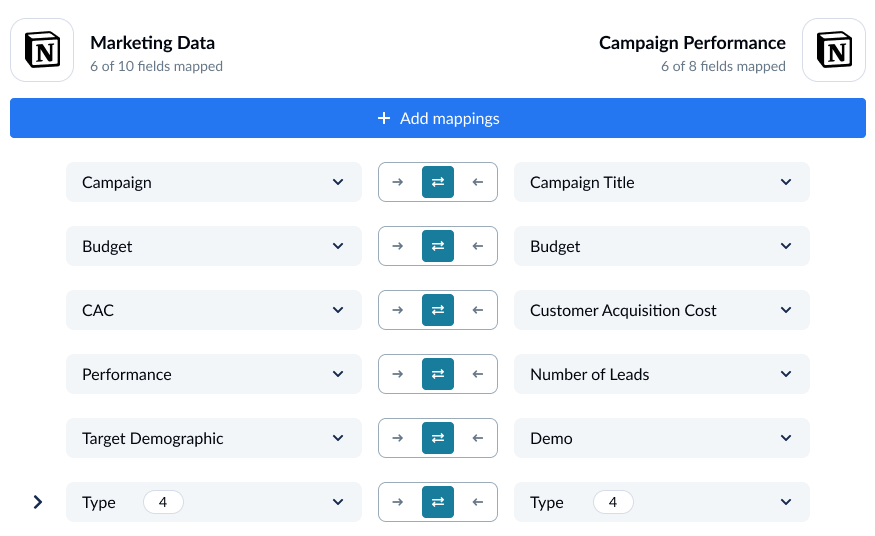
Unito supports most fields in Notion, so you’ll be able to sync any of the data you need between databases and even to other tools. You can let Unito map your fields automatically or map them yourself.
And that’s it! You’re ready to launch your flow. You can keep your Notion databases in sync no matter how much work happens in each one.
Want a more in-depth guide?
Get our detailed walkthrough to syncing Notion databases with Unito.