How to Sync and Merge Multiple Notion Pages with Automated 2-Way Updates
If your organization uses multiple Notion workspaces, databases and pages, there’s a good change you’ve had to find a way to export data from one to another. For a one-time Notion export, there are plenty of options out there, but if you want an on-going, continual transfer of information that keeps both synced pages up-to-date in real-time? There aren’t as many solutions available on the market as you might think.
Luckily, Unito’s 2-way integration for Notion allows you to connect pages between databases and workspaces quickly and easily with real-time updates end-to-end.
In this guide:
- Tool: Notion
- Use cases: Task management, project reporting, marketing reporting
- Great for: Project managers, consultants, marketers
Before you connect multiple Notion pages and databases to Unito
- Add Notion to your Unito workspace
- Add Unito as a connection in Notion
Unito syncs pages from Notion as long as those pages are part of a Notion database.
Add Unito as a connection in Notion
Click here for instructions on how to set up each Notion page to sync with Unito
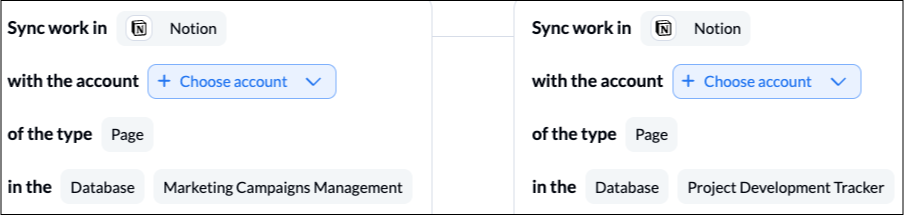
You can sync pages from any Notion database in your account as long as you have “edit permission” in that database. Here’s an example of how databases appear in Unito:

Add Unito 2-way Sync as a connection for each page you want to include in your flows. Otherwise, Unito won’t be able to detect your databases in Notion. Here’s more from Notion’s knowledge base on adding connections.
Troubleshooting your Notion integration
If you need help setting up your Notion integration, you can browse this guide on adding Notion to Unito or you can find a more general overview of this Notion integration here.
Note: Only one Notion user per workspace can connect to Unito. So make sure you create a Notion user specifically for Unito and give it access to all pages and databases in your workspace.
The first time you connect Notion to Unito, you can choose which pages to include (click to expand)
Select Notion pages to sync
As you connect Notion to Unito, you’ll see this screen, where you’ll be asked to give Unito permission to access your Notion workspace.
Click on Select pages.

Next, you can choose exactly which pages to give Unito access to:

Make sure the ones you want to sync are checked. Feel free to uncheck any pages you don’t want to sync.
Step 1. Connect each Notion database to Unito
Now, you can navigate to the Unito App and select +Create Flow. On the next screen, select Start Here to connect each Notion database and page.
When you’re ready, click Confirm.
If you aren’t able to connect a page, make sure that page has provided edit permissions to Unito (click to expand)
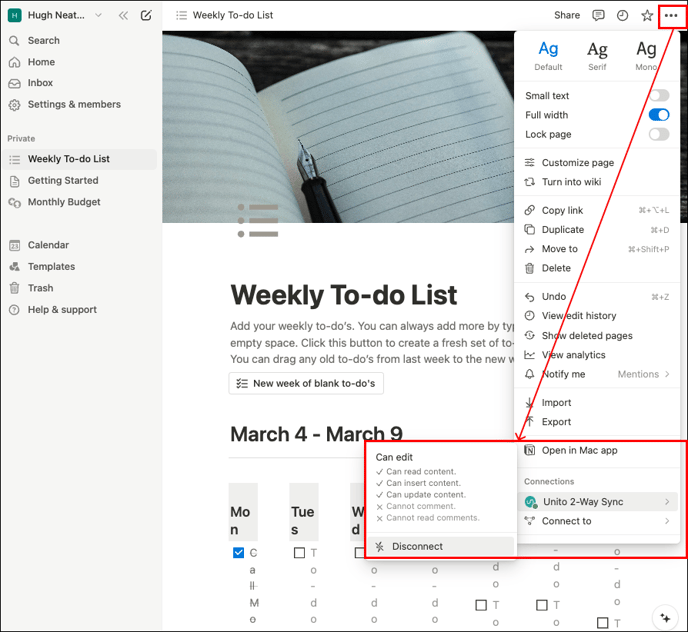
You can verify whether or not Unito has access to a page you want to sync by going to the page and clicking on the ellipsis (…) in the top-right corner. you should see Unito 2-way Sync in your list of connections.
If you later add a new page to your Notion workspace, you don’t need to re-authorize Unito. Just go to the Share menu, and invite Unito, making sure to include Can edit permissions.
Step 2. Choose a flow direction for creating new data in Notion
Your data can sync either from one Notion page to the other, or bidirectionally. This determines how manual activity in one page will automatically create and update information in another.
Click Confirm when you’ve chosen a flow direction.
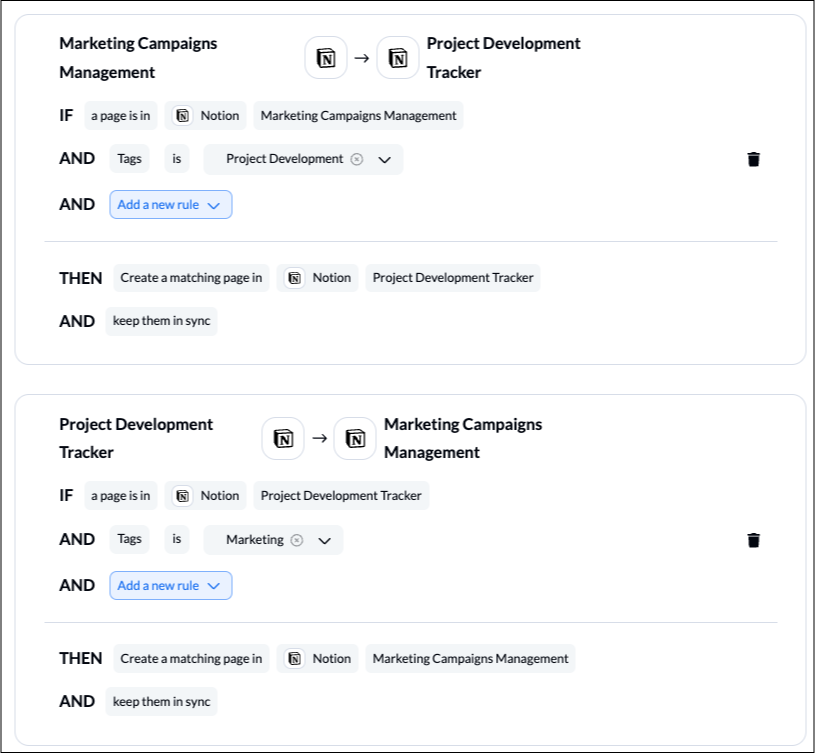
Step 3. Filter out unrelated Notion pages from syncing
This is where you can set up conditions to filter out Notion data that you don’t want to sync with the other page. If you don’t set any rules, then all Notion data will sync over. A great way to filter information is through the use of labels or drop down fields.
Select Add a new trigger to get started.

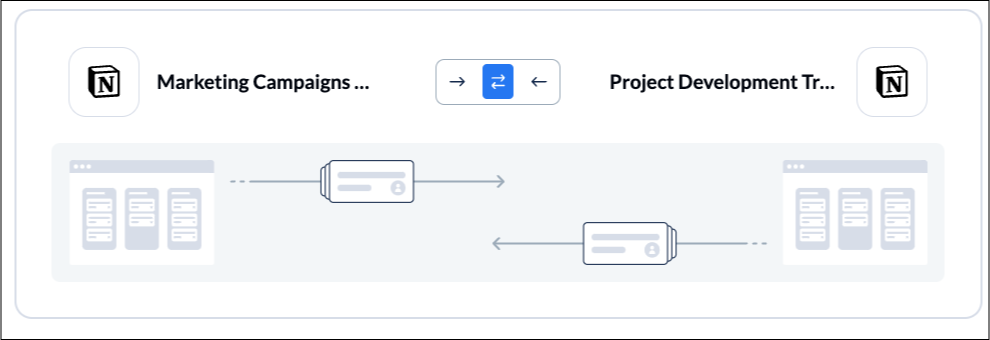
In the above example, we chose to sync Notion pages with the tag: “Project Development” only. Here is what our completed demo’s table of rules looks like:
Find out more about setting rules.
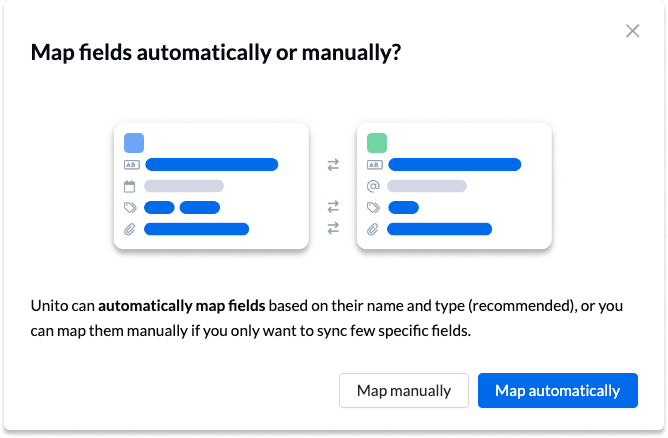
Step 4. Link fields between Notion pages and databases
While rules are intended to set triggers for when and how data should be synced, choosing fields determines what information is synced. You’ll effectively tell Unito how fields in each Notion page relate to each other, even if they’re named differently.
First, you have to choose between auto-mapping your field table or starting from scratch. With auto-mapping, Unito will essentially attempt to set up a template for you to start from.
Learn more about Field Mappings
Click + Add mapping to create a new pair of fields, then Select a field for each tool and find the fields you wish to link between Notion pages.
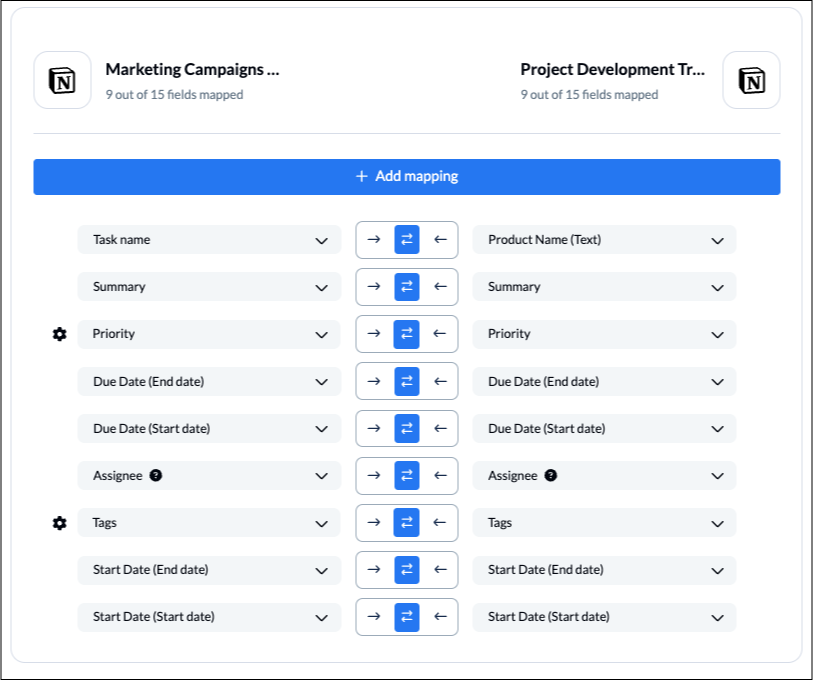
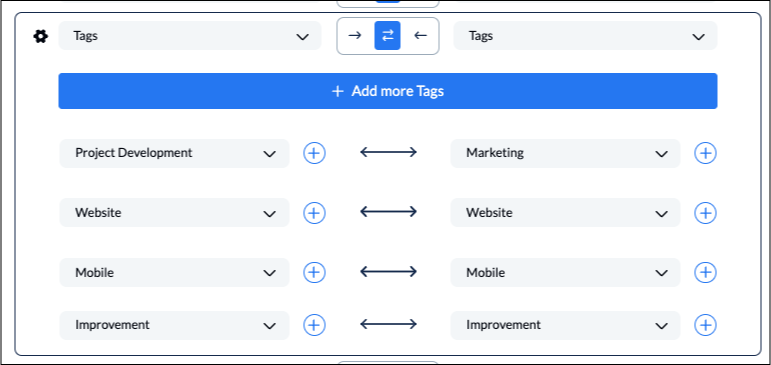
If you see a gear (or cog) icon, click on it to adjust values for any drop-down field with multiple options:
Click Confirm when you’re satisfied with your field mappings.
Find out more about setting field mappings.
Step 5. Launch your Notion to Notion integration
And that’s it! You’ve just completed a 2-way integration between multiple Notion pages and databases!
If you have any questions, don’t hesitate to reach out and let us know. Our live support team is ready to jump in and lend a hand to make sure your flows always functions as intended.
What’s next after syncing, merging or mirroring Notion Pages together?
Who should sync Notion pages to Unito?
Any team that uses multiple Notion pages, databases or workspaces can adapt their use cases with an integrated 2-way workflow. This article will present a single use case to show you what Unito can do. After you’re finished, we encourage you to experiment and personalize your Notion flow to make it your own.
This can save a significant amount of time by cutting out copy-pasting between Notion pages entirely. Instead, automated data syncing becomes a breeze, supporting you through various tasks including business reporting, project management, customer or contact tracking, and more. Learn more about Notion and Unito here.
Troubleshooting your Notion integration
Unito’s Notion integration allows you to quickly populate tables with real-time information from your other apps or tools automatically.
If you need help setting up your Notion integration, you can browse this guide on adding Notion to Unito or you can find a more general overview of this Notion integration here.
Unito is SOC 2 Type 2 compliant and adheres to major global data privacy regulations. Your information is fully encrypted while in transit. If you need more details, you can read about our Unito’s security policy here.