
How to Use Excel: A Guide for Beginners
Nearly every resume I read while hiring lists Microsoft Excel under skills and expertise, but how many people know how to utilize it properly? Yes, calculating basic sums may seem straightforward, but there are so many formulas and functions in Excel that it can quickly become overwhelming.
If you’re already confused, you’re in the right place. This article will explain the basics of Excel and provide helpful tips, so you’ll be an expert in no time!
What exactly is Excel?
Excel is part of Microsoft Office’s suite of product offerings – along with Teams, OneDrive, Word, PowerPoint, Outlook, and more – and is used by people across various companies to organize and manipulate large amounts of data.
It’s perfect for completing simple math – adding, subtracting, finding averages, and more – but you can also sort and organize data, create charts and tables, and import data from other Excel worksheets or online sources.
There are endless options when it comes to using Excel, which can make it overwhelming for beginners. It’s like Google Sheets but requires a paid subscription to use and has more functionality.
Let’s dive in!
Excel terminology
Before you start using Excel it’s important to understand certain terms and what they refer to.
Worksheet
Everything we’re about to discuss exists within a worksheet. This is the spreadsheet you’re working within. Along the very bottom of Excel, you can see the worksheet tab. In this screenshot we have two worksheets created, which have been renamed “2022” and “2023”.
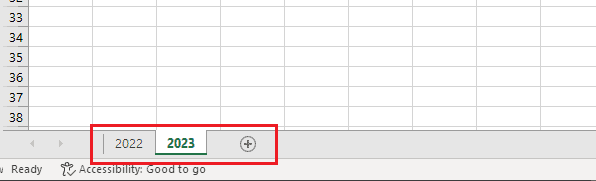
The button with a + inside a circle allows you to create new worksheets, which you can rename as needed. Excel will allow you to add 255 worksheets to a single workbook, so you can easily store a lot of data in one place.
Cell
A cell is where a row and column intersect within the worksheet. You can input data into cells while organizing information. In this screenshot, we have cell A1 selected with the word “Date” written in it.
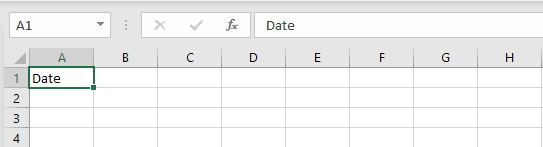
“A1” also refers to the cell reference. In this case, A1 is also an active cell, as it’s selected and outlined with a green box.
Row
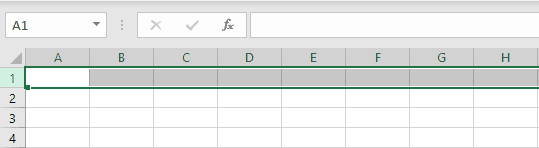
A row refers to a horizontal group of cells; they are organized by numbers and go up to 1,048,576 in a single worksheet. In this screenshot, we have row 1 selected.
Column
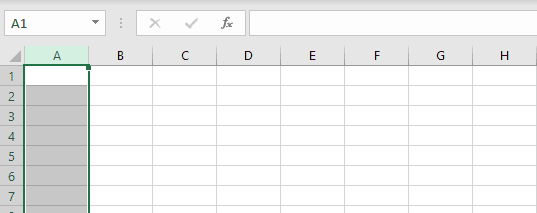
A column refers to a vertical group of cells; they are organized by letters you can have up to 16,384 in a single worksheet. In this screenshot, we have row A selected.
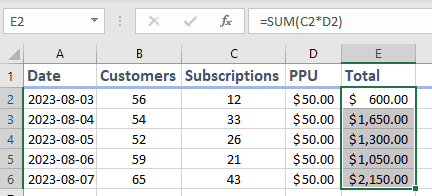
Range
A range refers to a selection of cells, and can be highlighted within a worksheet for selection, or used when inputting formulas. They are written by referencing rows and columns. For example, in this screenshot the range selected is E2:E6.
Formula
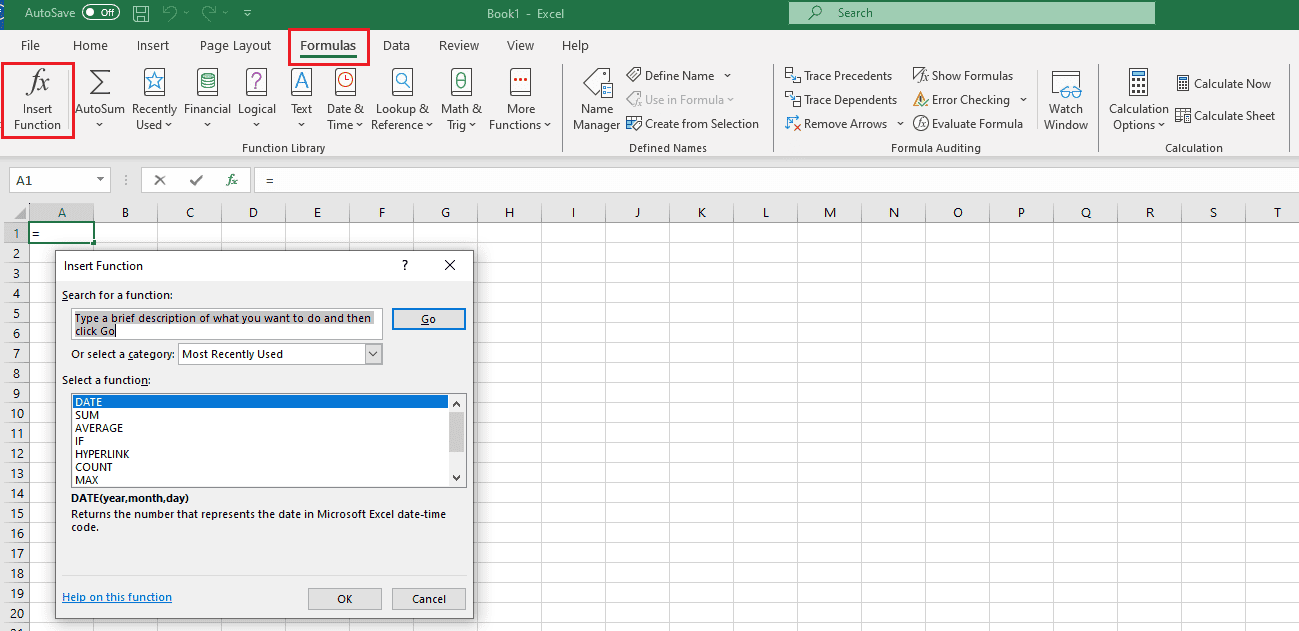
Formulas are used to do math in Excel. They combine equations and cell references to calculate values based on data you’ve inserted in your worksheet. Every formula must start with an equal sign (=) to be valid and work properly.
There is a Formulas tab across the top of your Excel worksheet where you can explore different options. If you click “Insert Function” you will see the most common functions (premade formulas) that are used and can be inserted directly into active cells.
We’ll talk more about functions later.
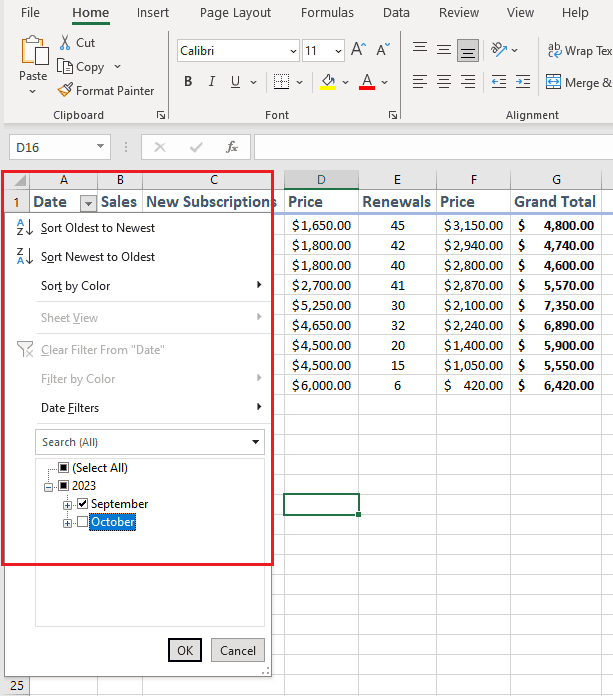
Filter
Filters are rules you can implement on rows and columns to help manipulate data. If you want to display information alphabetically or by highest to lowest sums, you’ll want to add some filters to your worksheet.
You can select filters under the “Home” screen by clicking on “Sort & Filter” on the far right-hand side.
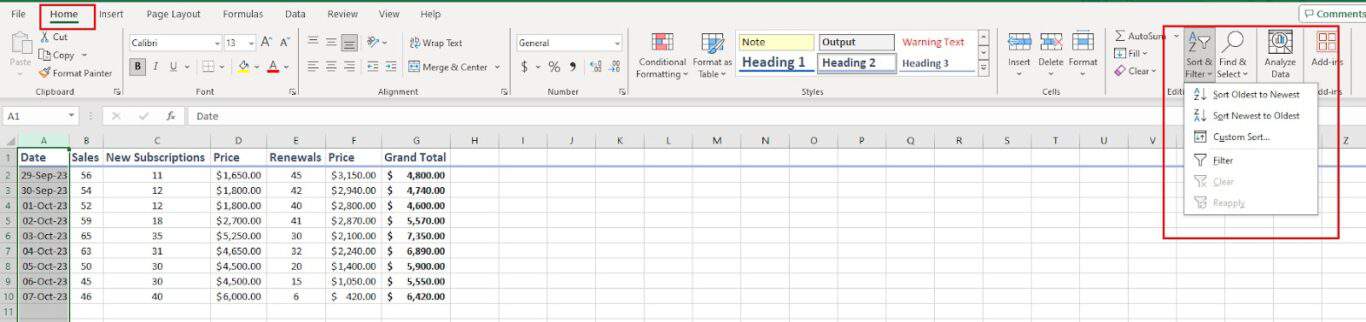
There are options to set up custom filters for advanced organization, or you add a filter to a single column to quickly sift through information. In the screenshot below, a filter was added to the “Date” column, which would allow the user to select only certain months to display, for example.
Easy Excel tips
There are a lot of things you can do to make navigating Excel easier and more effective. Knowing how to format cells, make quick updates, and complete basic functions will speed up your work and make everything easier.
Keep these tips in mind:
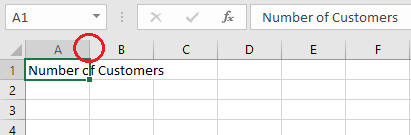
Adjust cell width
You can easily adjust the with of cells to fit text by double clicking the line that separates two cells.
For example, in the screenshot below, we can make “Number of Customers” fit within cell A without overlap by clicking on the line between cells A and B.
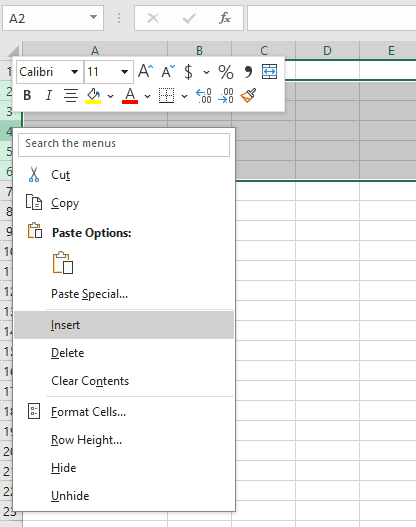
Add multiple rows or columns
Don’t waste time adding single rows and columns one by one. You can add these in bulk by highlighting the number you want to add, right-clicking on the row or column label, and then clicking “Insert.” This will add new blank rows and columns you can then use.
You can see in this screenshot we’ve highlighted five rows, and then click “Insert” to add five all at once instead of individually.
Remove duplicate information
Want to ensure there’s no duplicates in your worksheet? Simply click the “Data” tab across the top of your worksheet, click the “Remove Duplicates” button, and then select the column you want to remove duplicates from.
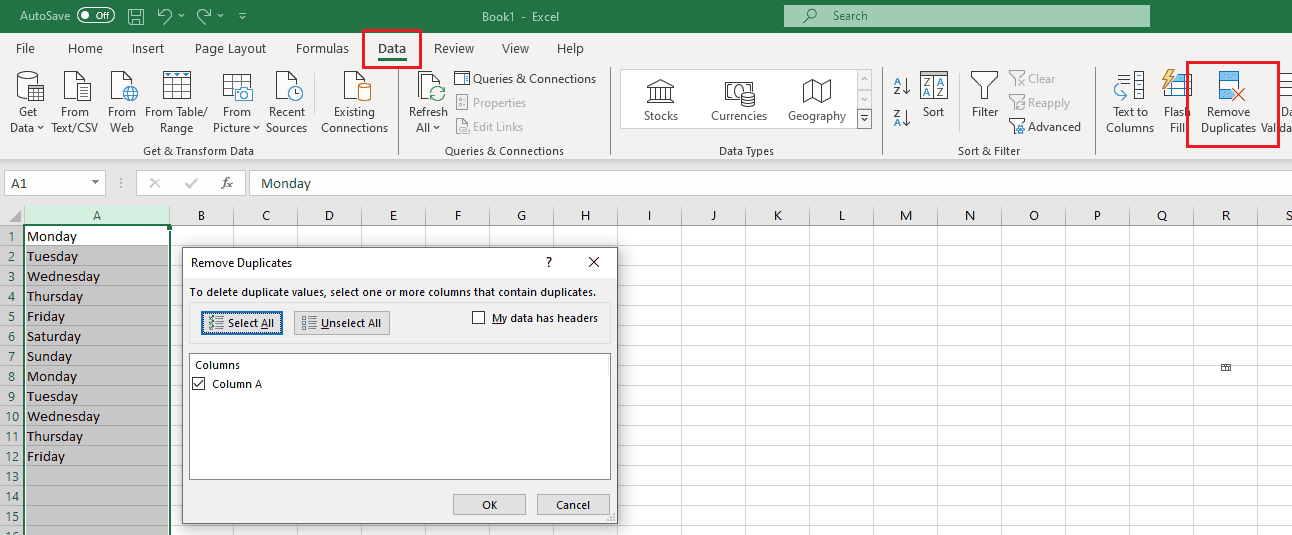
Once it’s complete, a box will appear telling you how many duplicate values were found and removed, and how many unique values remain in the column.
Separate text into multiple cells
If you have a column of text that was copied and pasted, it may need to be formatted further. This happens a lot with names and dates, where all the text is in one cell, but you want it separated out.
This is easy to do with the “Text to Columns” button under the “Data” tab.
Highlight the column you want to split up, then click on “Data” and select “Text to Columns.” You’ll be prompted with two options.
- Delimited will look at characters such as commas to indicate where the text will split
- Fixed width will allow you to select the exact location where the text will be split
Follow the prompts in the tool and look at the examples shown on how the text will be split. Then, click “Finish” and your text will be split between multiple cells!
Find and replace text
If you’re importing a lot of website URLs or email addresses, you may want to edit the text to simplify what you’re looking at.
Let’s say you have 100 URLs from your corporate website, but you want to isolate the page paths and ignore the root domain. Under the “Home” tab click the “Find & Select” button and click “Replace.” Then, fill out what you want to find, and what you want it replaced with.

Then, click “Replace All” and your URL text will be simplified. This makes organizing text for marketing and social media campaigns extremely easy.
You can also use the “Find & Select” button to quickly search for specific text strings, like the CTRL + F search function in Microsoft Word.
Basic Excel formulas
Many people use Excel simply for basic formulas. It saves time having to manually calculate information and reduces potential human error (unless you unput data into the wrong cell, so pay attention!).
Every formula must begin with an = sign in the active cell, otherwise you’ll get served with an error.
Here’s how to format the following formulas:
- Addition: To add the value of two cells, use a + sign. For example, =A1+A2.
- Subtraction: To subtract the value of two cells, use a – sign. For example, =A5-A4.
- Multiply: To multiply the value of two cells, use a * sign. For example, =B3*B4.
- Divide: To divide the value of two cells, use a / sign. For example, =B5/B6.
You can also combine these formulas for more advanced calculations. If you do, add parentheses around ranges to denote total sums you want used in your formula. For example, =(A1+A2)*(B3-B4).
Beginner Excel functions
Functions are premade formulas that can be used in Excel to find both simple and complex calculations. As we mentioned before, you can find the most common ones under the “Formulas” tab.
- SUM: The SUM function will add up values for you, typically in a specific range. It’s a quick way to add up data without manually adding each cell in a formula.
- AVERAGE: Have trouble calculating averages in your head? This function will do the work for you.
- COUNTIF: This function will count the number of cells in a given range that meet a specific criteria; for example, the number of times an employee’s name appears in a list.
- HYPERLINK: Need to include a link or shortcut to an outside source? This function allows you to do that.
- LEN: This function counts the number of characters in a specific cell or text string.
- PROPER: Need something formatted so every word starts in uppercase? No need to rewrite your text, just use this function.
Excel has over 450 different functions, with many being more advanced than others. It’s unlikely you’ll ever use them all, but it’s good to know that there are robust options to help you sift through data effectively.
Need to get data from other tools into Excel?
Most tools you use, from project management apps to CRMs give you some way to export your data as a CSV file and turn it into a spreadsheet. But what if you want to keep that data up to date when changes happen in your other tool? That’s where Unito comes in. Find out how a two-way sync is the best way to get data in and out of Excel with these guides:
- Export Asana tasks to Excel
- Convert Excel spreadsheets to Google Sheets
- Export Jira projects to Excel
- Export Smartsheet tasks to Excel
- Export Trello cards to Excel
Here’s a demo video showing how quickly you can set up your own Excel Jira integration
Dig through your data like a pro
Now that you know the basics of Excel you can start exploring all the options to organize and manipulate your data. Once you grasp the basics, you’ll become more comfortable utilizing more advanced functions like VLOOKUP and combining data from multiple sheets.
Remember, the opportunities are endless in Excel, and Google is your friend if you get confused or need more step-by-step guides on how to do something.