How To Use Discord: A Guide for Beginners
Need to get up to speed on Discord before you join a new team? Or maybe you have to get a chat app for your department and you’re evaluating your options? No matter the reason, here’s your full guide on how to use Discord, from the interface, to how Discord works and creating your first Discord server.
Let’s dive into it.
How Discord works
Discord is one of the most common chat apps out there, often used by online communities to talk about the topics that matter to them most. That said, it’s also a powerful option for businesses looking to help their teams stay in touch without relying on email. Here are the essential terms you need to know before learning how to use Discord:
- Servers: A Discord server encompasses messages, channels, files, and more. Discord users can switch between multiple servers, each dedicated to a particular group, topic, or use case. If you’re using Discord within a business setting, you might create a server for each department or even each team.
- Channels: Housed within servers, channels allow for a more narrow focus. You can create multiple text channels to cover specific topics within a team, like individual projects, team outings, and more.
- Direct messages: While most of your messaging will probably happen in a server, you can also send direct messages to your contacts (called “friends” in Discord).
This should already give you a rough understanding of how Discord works. Now let’s dive into how you can use Discord’s interface.
How to use Discord’s interface
Discord’s interface can be broadly divided into three general sections, which you’ll run into in different places of the tool. They’re the home screen, private messages, and your servers. Let’s go through each one in turn.
The home screen
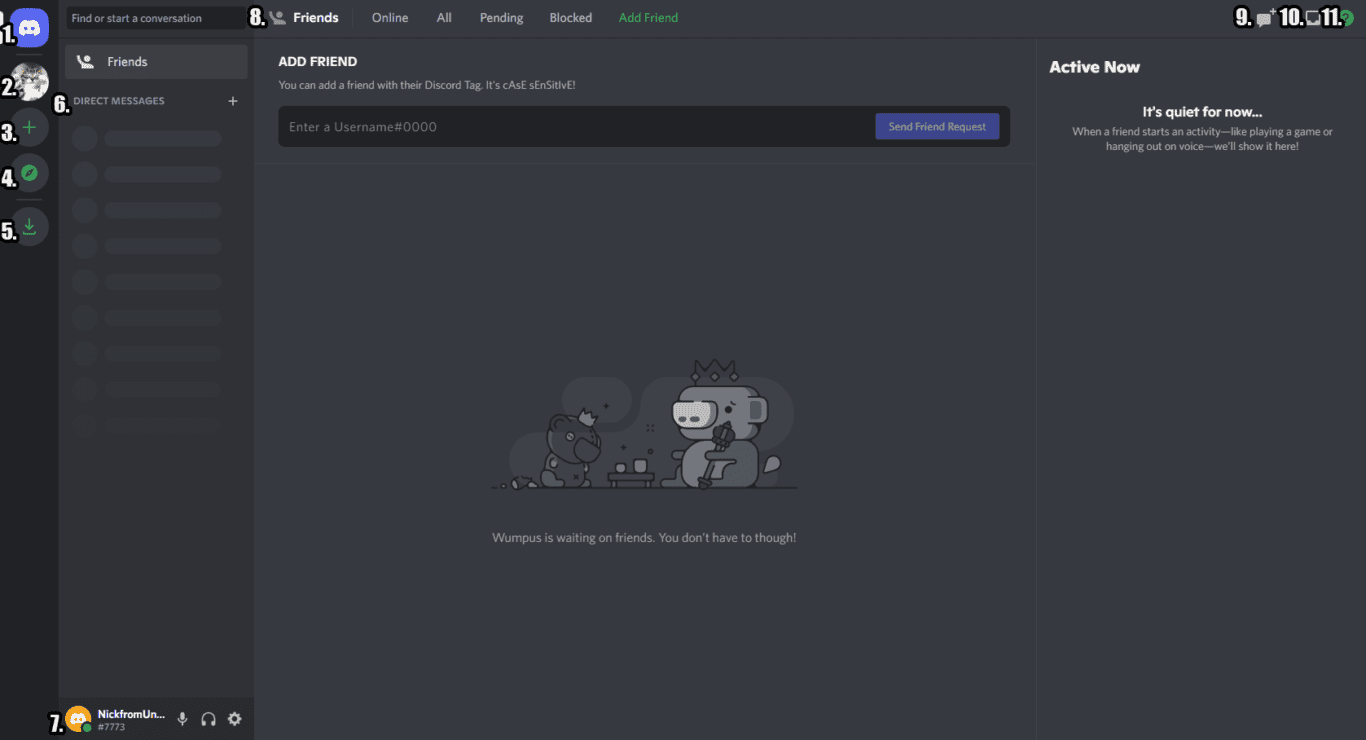
This is the first screen you’ll see when you first open Discord. Here’s what you’ll find:
- Home button: Takes you back to this screen.
- Server list: When you’re a member of multiple servers, they’ll be listed here. Click on one to open it.
- Add server: You’ll generally join servers by clicking here.
- Explore public servers: Want to join servers from around the world? This is where it’s done.
- Download apps: You’ll only see this if you’re using Discord in a browser. That’ll give you links to download the desktop or mobile versions of Discord.
- Direct messages: When you start sending direct messages, they’ll be collected here.
- Profile: By clicking on your profile picture here, you’ll get access to profile settings. You’ll also be able to turn on your mic in this bar.
- Friends: When you have friends — what Discord calls contacts — you’ll be able to filter through them here.
- Group DM: By clicking here, you can start a new group conversation with multiple Discord friends.
- Inbox: Any time you’re mentioned in a server or get replies, all those notifications will be listed here.
- Help: If you need help, this is where you’ll click.
Private messages
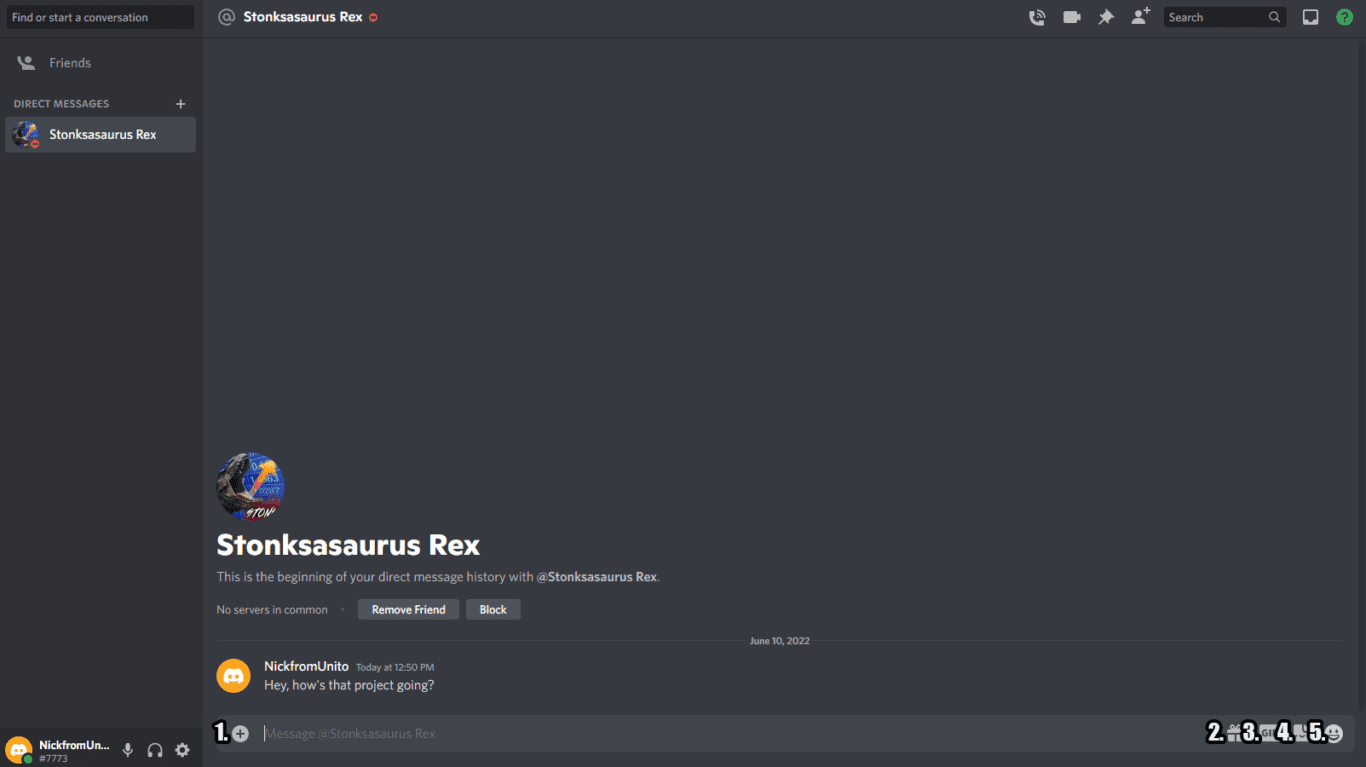
When you send private messages to your Discord friends, you’ll get this screen. Here’s what you need to know about it:
- File upload: Click here, and you’ll be able to add a file to your message.
- Upgrade: If you want to get your friends a paid membership to Discord, you can do that here.
- GIF: Who doesn’t like sending a good GIF?
- Stickers: Halfway between GIFs and emojis.
- Emojis: Punctuate your messages with emojis here.
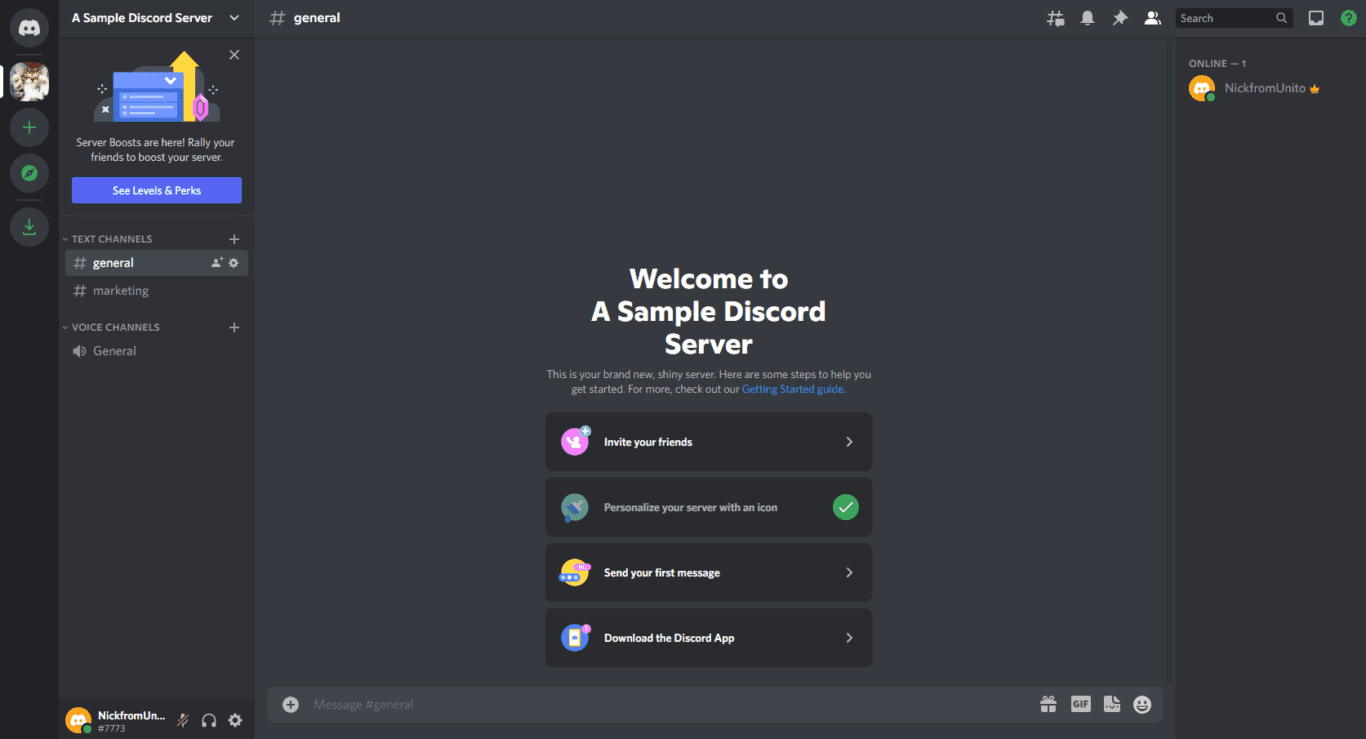
Discord servers
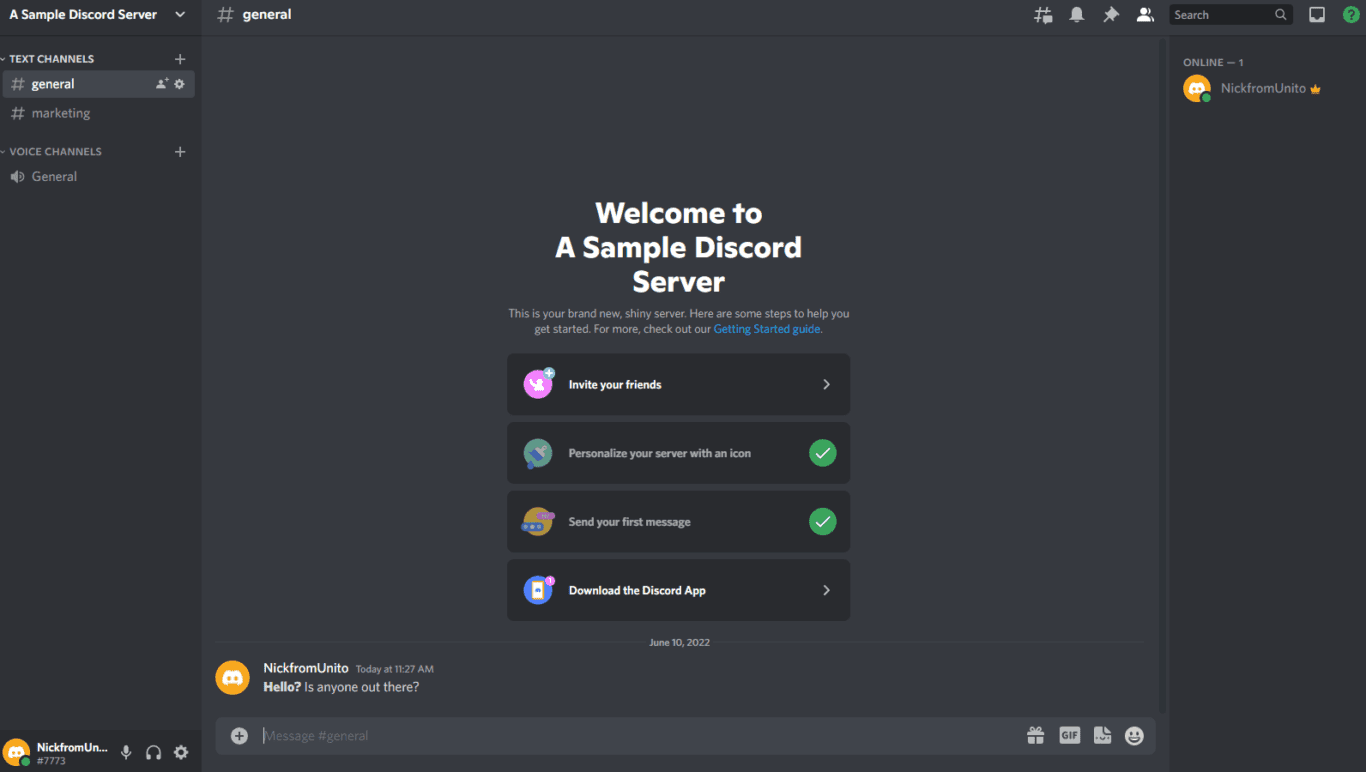
Finally, this is what you’ll see when you’re in a Discord server. You’ve already seen most of the elements of this screen already. The main difference is the channel bar on the left side of the screen, which lets you switch between all channels in a specific server. These are split up between text and voice channels. We’ll cover these in detail later.
Creating your first Discord server
One of the first things you’ll need to do before you can start using Discord is creating your first server. Thankfully, Discord will walk you through the process as soon as you sign up.
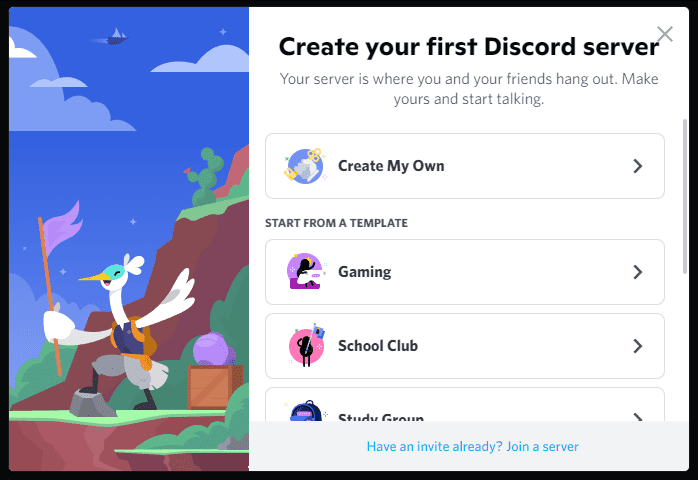
If you’ve already received an invitation to an existing Discord server — say because you started working at a new job that uses Discord — you can just click on the blue Have an invite already? link at the bottom of this pop-up. Otherwise, you can choose to start from a template or create your own server.
For this guide, we’ll be creating our own server.
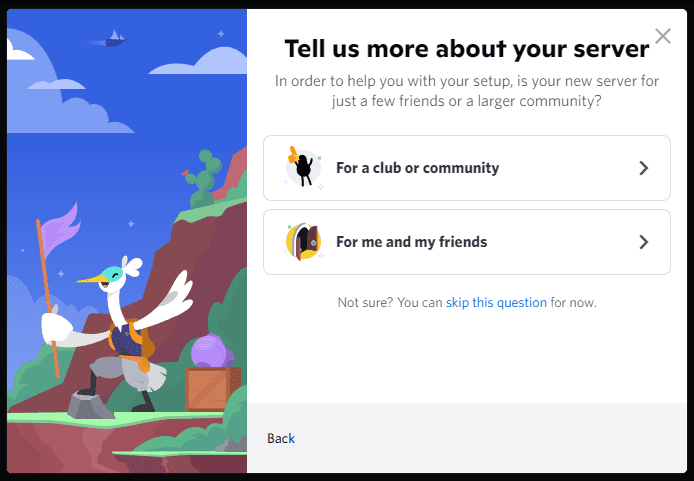
Discord will walk you through this process, asking you questions to make sure the server you create matches your need. If you’re creating a server for work, it’s probably a good idea to skip this first question.
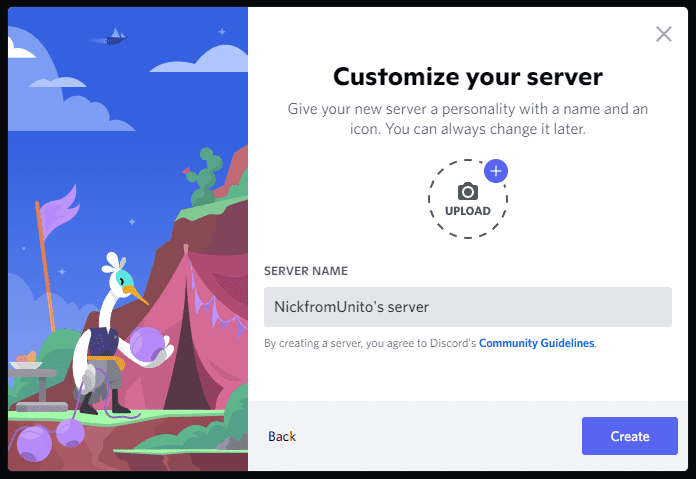
Next, you’ll be asked to give your server an icon and a name. Pick whatever makes the most sense to you, then hit Create.
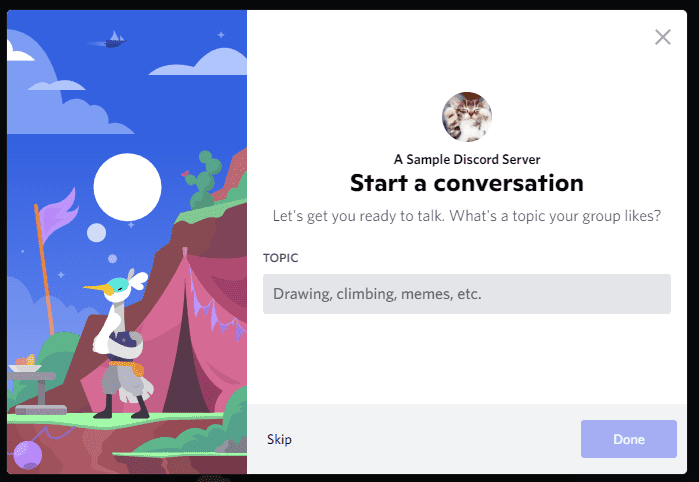
After that, you’ll be asked to pick a topic. This will create a channel, which can host conversations around a specific topic. For this sample server, I’ll pick “marketing.”
And just like that, you’ve created your first discord server! Now it’s time to dive into channels.
Discord channels
If you’ve followed the steps above, you’ll already have three channels. You’ll find them on the left side of the screen.
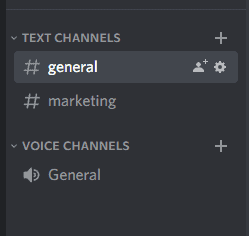
You can create two kinds of channels in Discord:
- Text channels are essentially a message board, where anyone in your server can post messages, create threads, and send files. These channels will probably cover the bulk of your conversations.
- Voice channels are like a group call. Click on a voice channel and you’ll be automatically connected with anyone else who’s clicked on it. You can turn on your microphone to talk to others and even have video calls.
Channels are usually organized around specific topics or purposes. If you’re a company using Discord as your chat app, you’ll probably have channels for each team, and maybe even for specific projects.
Sending your first message
Alright, so you have a server and a few channels. Now all that’s left to do is actually start chatting. Start by picking a text channel, then click on the message box at the bottom of your screen.

Type out your message.

If you want to format your message — think bold or italics — select the part you want to format.
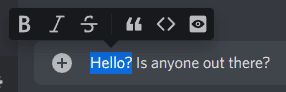
You’ll get the above menu, which lets you format your text. From left to right, these buttons are:
- Bold
- Italic
- Strikethrough
- Block quotes
- Code blocks
- Spoiler tags
Once you’ve formatted your message, hit enter to send it.

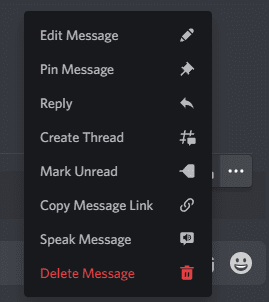
Just like that, you’ve sent your first message. Note that, by hovering over the message, you can edit it, start a new thread, and much more.
And that covers it for your guide on how to use Discord. Now you’re familiar with the interface, know how to create servers and channels, as well as sending messages. So sign up for a free Discord account, create your servers, and start chatting with your team.
Is Discord the right tool for businesses?
Discord is an easy app to deploy and use, but is it the right fit for your business? We have a full guide to whether Discord is best for business (and when you should consider an alternative) here.