How to Build a Jira to Salesforce Integration With Unito
In most organizations, collaboration between teams in Salesforce and developers in Jira is only possible through a ton of emails and copying and pasting data back and forth. When a deal depends on development work to go forward, any delays in that collaboration can lose you customers and jeopardize your sales goals.
But with an integration solution like Unito, your teams can work together seamlessly, with all the data they need right at their fingertips in the tool of their choice. In this guide, you’ll learn how to build the Unito flow you need to make this happen.
Here’s how to set up a 2-way flow in Unito:
In this guide:
- Tools: Jira and Salesforce
- Use cases: Ticket escalation, product management, software development
- Great for: Sales, customer success, software developers, product managers, RevOps
Use case overview
Salesforce is the operations center for your sales efforts, post-sales support, and whatever work needs to happen to get and keep customers. But if you’re selling products and services that require technical work from software developers and other specialists, your sales team will need to tag them in. In most organizations, that happens through a mess of emails, Slack messages, and offline requests. That makes it tough to keep track of what’s happening unless someone manually copies data between Salesforce and Jira.
With a Unito integration, you can automatically pair Salesforce cases with Jira issues, streamlining collaboration between these two teams.

Setup in Jira
If you’re connecting Jira to Unito via OAuth2, then simply follow the on-screen instructions when adding your account for the first time:
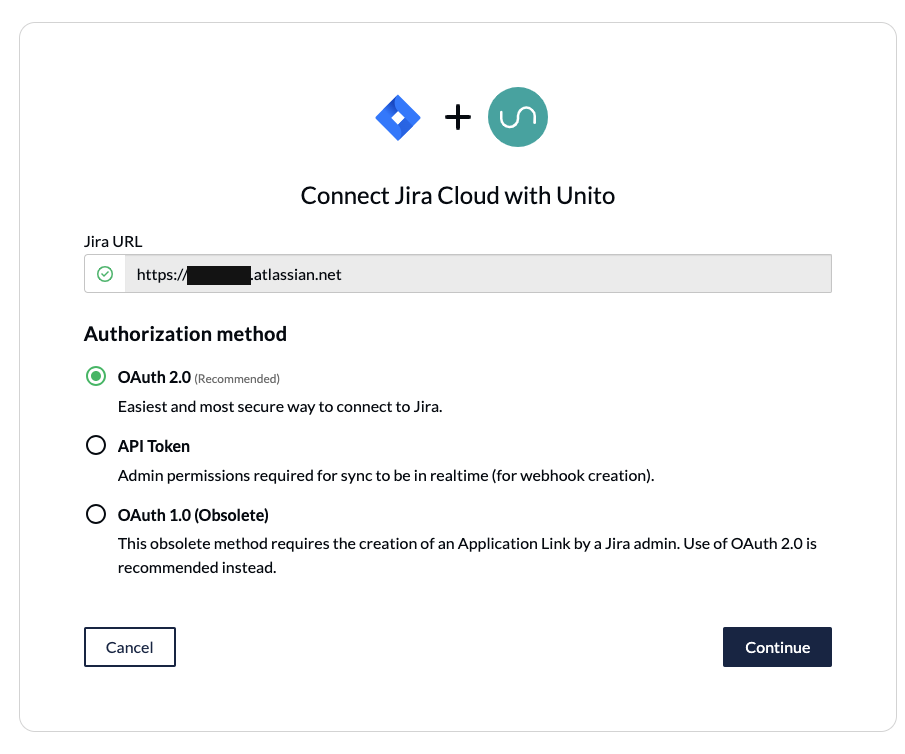
Not using OAuth2 to connect your Jira Cloud workspace? You’ll have to set your Jira contact email visibility to anyone in your Jira profile page. Then, you’ll have to set up an application link in Jira to sync your issues to Salesforce.
If you’re connecting an on-premise Jira Server instance to Unito, you’ll need to follow this guide. You can also use ngrok to connect Jira Server to Unito.
Step 1. Connect Salesforce and Jira to Unito
- Go to the Unito App and click +Create Flow.
- Click Start Here to start connecting Jira and Salesforce.
- Choose the accounts you want to connect.
- When you connect a tool for the first time, you’ll need to authorize it in Unito so your work items sync over properly.
Here’s what the tool connection screen in Unito looks like once you’ve connected Jira and Salesforce.

If you ever need to connect more Jira projects to Salesforce, you can just duplicate this flow once it’s done, modifying it as needed.
Step 2. Set a flow direction between Jira and Salesforce
In Unito, flow direction controls where new work items are created. In this case, that means Jira issues and Salesforce cases. When setting flow direction, you have three options:
- 2-way, which creates new Salesforce cases and Jira issues to match work items created in either tools.
- 1-way from Salesforce to Jira, which creates new Jira issues to match Salesforce cases you create manually. Creating Jira issues manually won’t create new Salesforce cases.
- 1-way from Jira to Salesforce, which creates new Salesforce cases to match Jira issues that are created manually. Creating Salesforce cases manually won’t automatically create new Jira issues.
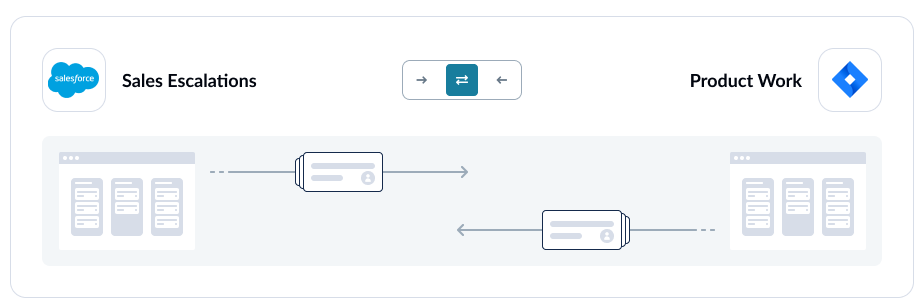
Note that this only affects the creation of work items, not the direction of updates for individual fields (e.g. due dates, assignees, comments). Even if you create a 1-way flow, you can tailor the flow direction of individual fields in the last few steps of this guide.
Step 3. Set rules to sync specific Jira issues and Salesforce cases
Think of rules like filters. They allow you to tailor your flows so only some work items get synced between Salesforce and Jira. For example, you could decide to filter out any Jira issues with a certain status (like Completed) or a specific label (like Level 1 for a support ticket).
To start creating a rule, click Add a new rule. From there, you can choose what will trigger that rule and what will happen when it is triggered.
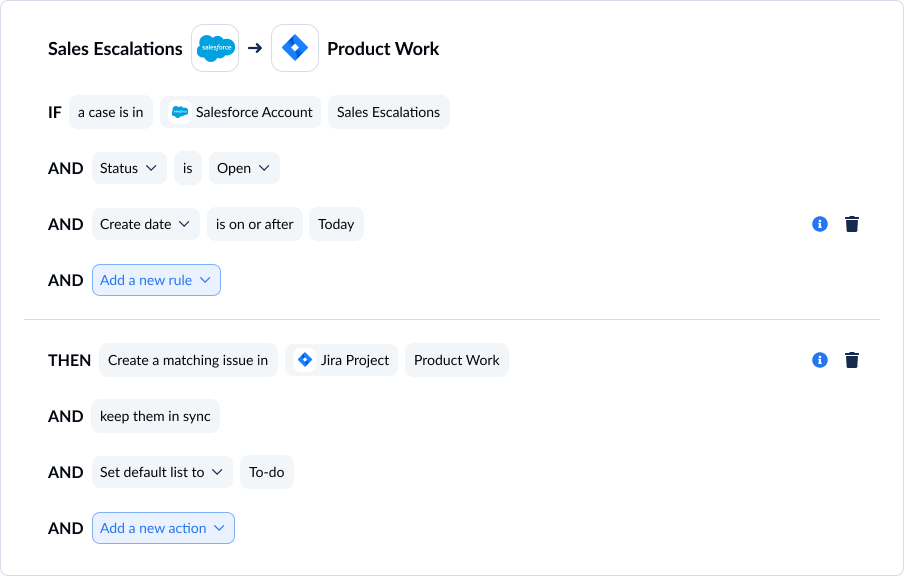
You can learn more about setting rules here.
Step 4. Map fields between Salesforce and Jira
When it’s time to map your fields, you have two options. Click Map automatically to let Unito do all the work for you — which works for most use cases. If you want more precise control over your mappings, you can click Map manually to start mapping fields from scratch. Note that even if you let Unito map your fields automatically, you can customize them after.
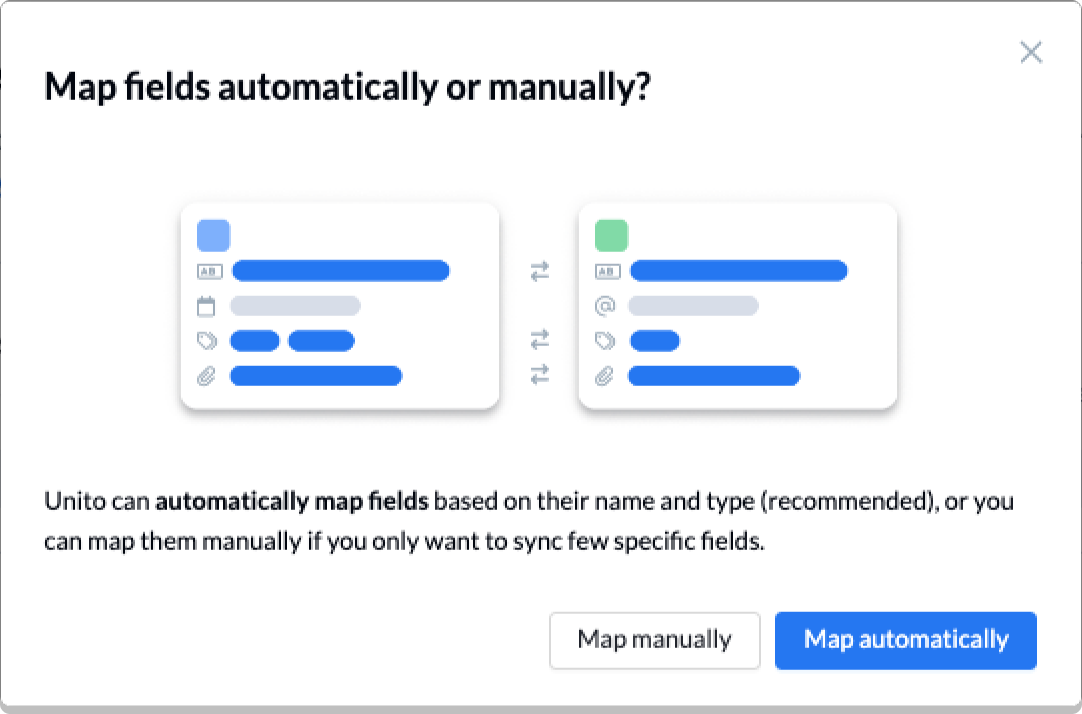
If you map your fields automatically, you’ll see something like this.
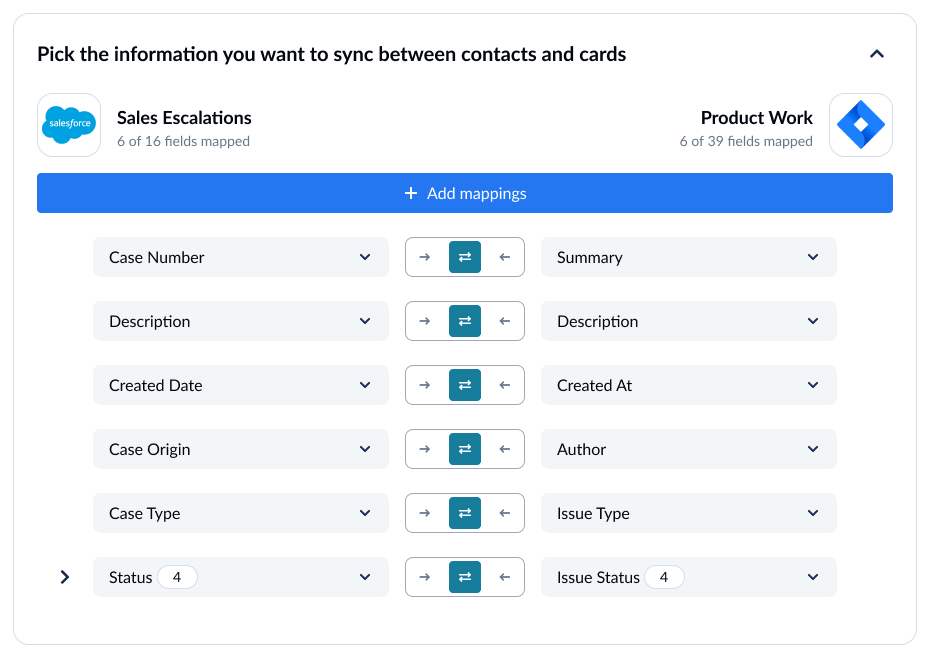
You can click +Add mapping, then Select a field to sync additional fields. Unito will automatically suggest compatible matches for any field you add through a drop-down menu.
Fields with cog icons can be customized further (e.g. linking specific labels between apps).
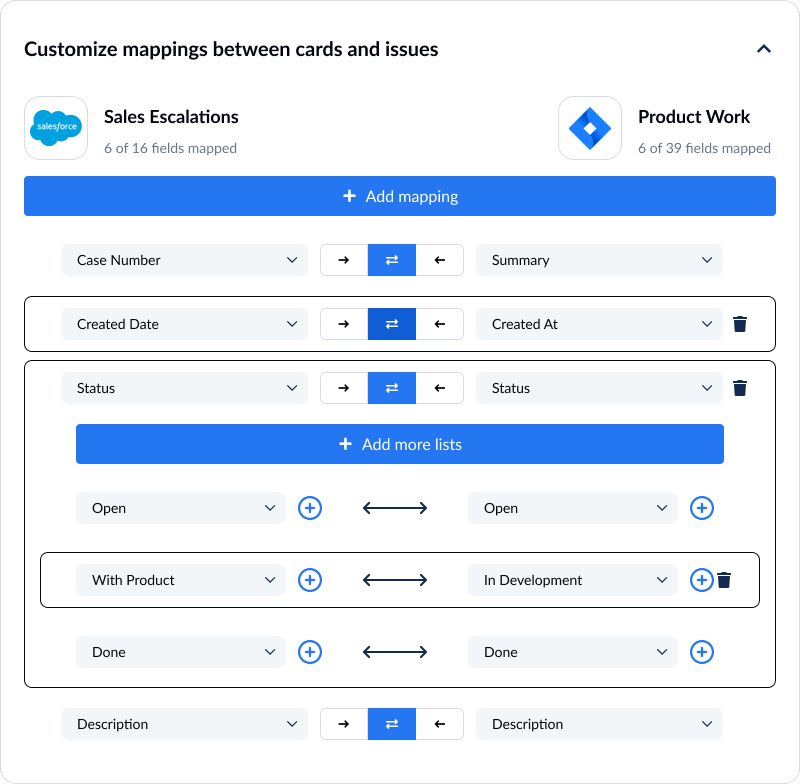
Step 5. Launch your Jira to Salesforce integration
That’s it! You’ve built your first flow and you’re ready to launch. Once you do, Unito will automatically sync Jira issues with Salesforce cases, keeping all fields updated automatically. Any questions? Don’t hesitate to reach out to our team by clicking the chat bubble in the lower-right corner of your screen!
Ready to optimize your software projects?
Meet with our team to see what Unito can do for your workflows.

