How To Integrate Asana and BitBucket
If you’re trying to connect Asana and BitBucket, you’ve come to the right place. Putting these two powerful tools together can give your internal processes a boost by taking you a step closer to automating BitBucket operations. One way to do that is to create a 2-way sync with Unito that enables you to keep an eye on your Asana task list by creating, updating and organizing them automatically. Unito is SOC 2 Type 2 certified with strict security measures in place, so you know you’re in good hands.
You can use the same steps and principles in this guide to sync BitBucket with other project management tools, including Trello, Wrike, Jira, monday.com, ClickUp and more.
Here’s an overview of everything you can sync between Asana and BitBucket with Unito.
Watch a demo of Unito syncing Asana and Jira
Although Jira and Bitbucket are different tools, the way Unito syncs data between them and a project management tool such as Asana is very much the same.

Before we connect Asana and BitBucket
- Ensure you have an account with the right permissions in both BitBucket and Asana. You don’t need to be the account owner, but you do need access to the project and repo you’ll be connecting to Unito.
In this guide:
- Tools: Asana and BitBucket
- Use cases: Software development, product management, task management
- Great for: Developers, engineers, project managers, product managers
Step 1. Connect Asana and BitBucket to Unito
Navigate to the Unito App and select +Create Flow. On the next screen, select Start Here to connect Asana and BitBucket. Choose the accounts you wish to connect to Unito. Then, specify a specific Asana project and BitBucket repository.
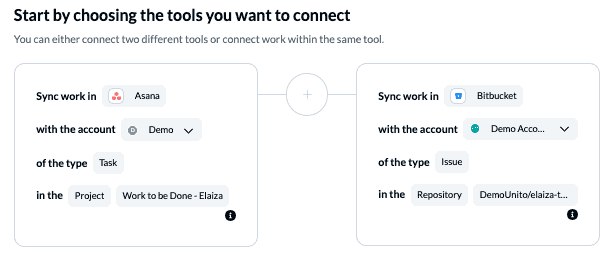
When you’re ready, select Confirm.
Step 2. Choose a flow direction for creating tasks and/or issues
Choosing a flow direction tells Unito if we want new Asana tasks to create BitBucket issues, vice versa, or both.
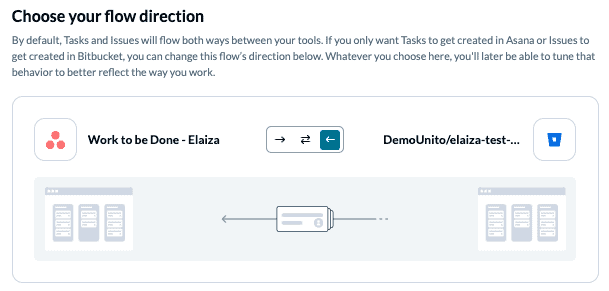
Learn more about flow directions.
Select Confirm when you’ve chosen a flow direction.
Step 3. Set rules to filter out unrelated Asana tasks or Bitbucket issues
When you Add a new trigger you can tell Unito which specific actions in Asana or BitBucket will create new tasks or issues in your other tool.
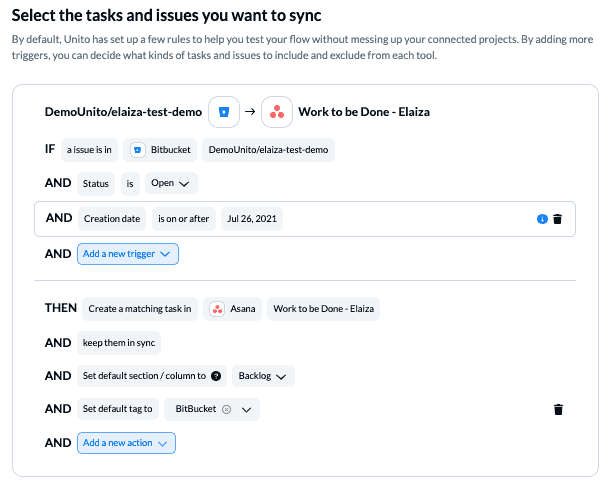
Rules provide flexibility to decide how Unito can best help you eliminate manual tasks, such as updating teams about project status, assigning work to specific people, requesting support or adding useful tasks to a backlog for future projects.
Find out more about setting rules.
Step 4. Link fields between Asana and Bitbucket
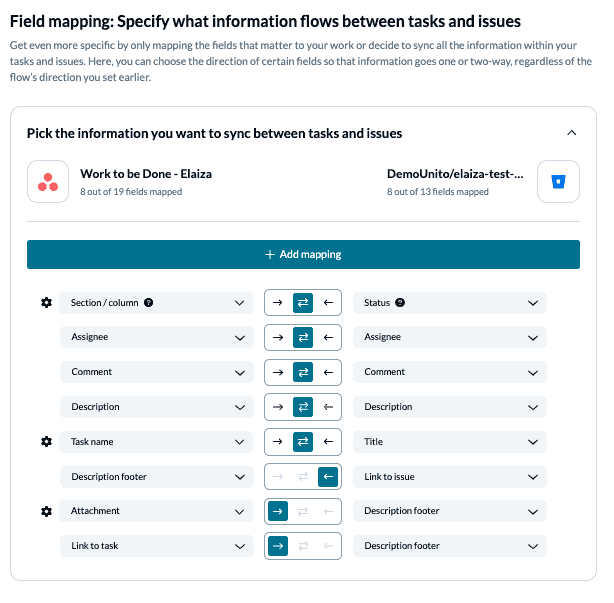
Unito considers most details of your Asana tasks or BitBucket issues to be fields that can be linked together. So in this step, you’ll determine the relationship between fields in each tool.
In other words, should an Asana tag link to your Bitbucket status, priority, or a custom field? You have full control over how your fields will link together and update changes in both Asana and Bitbucket.
You can review the full list of fields and more in this overview of Unito’s Asana – BitBucket integration. First, you need to decide whether to auto-map a set of fields, or start from scratch. If you select auto-map, you can still change any field pairings you want or add custom fields.
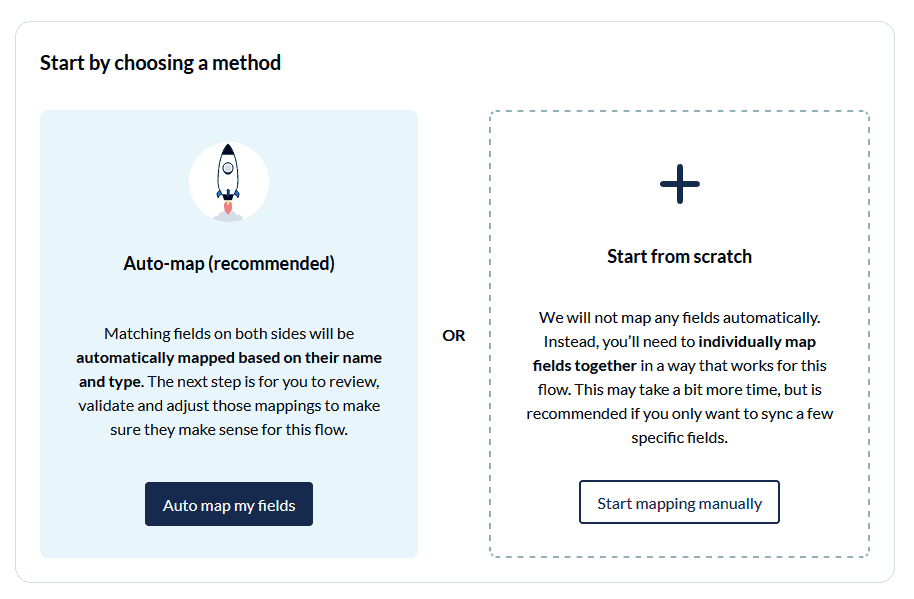
Select + Add mapping, then Select a field in both Asana and BitBucket to pair two fields together.
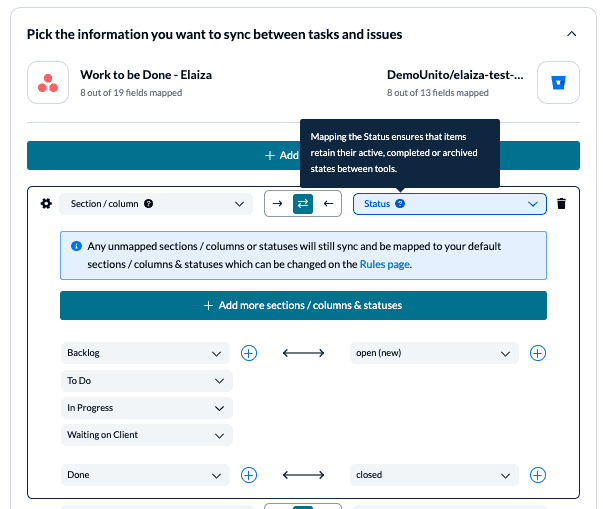
Each field can be synced one-way in either direction or bidirectionally.
Learn more about Field Mappings
Click Confirm when you’re satisfied with your field mappings to proceed.
Step 5. Launch your Bitbucket Asana integration
And that’s it! You’ve just completed a flow to connect Asana and BitBucket. Congratulations!
If you’ve followed the steps above, your flow will now:
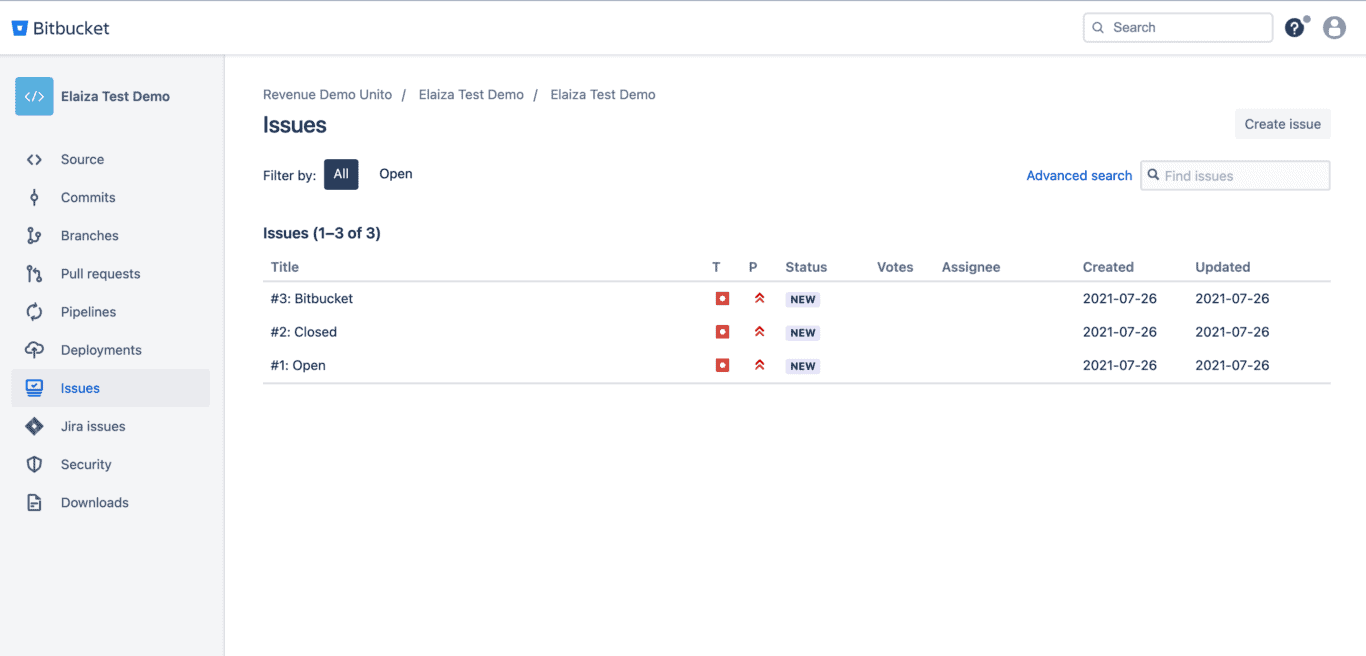
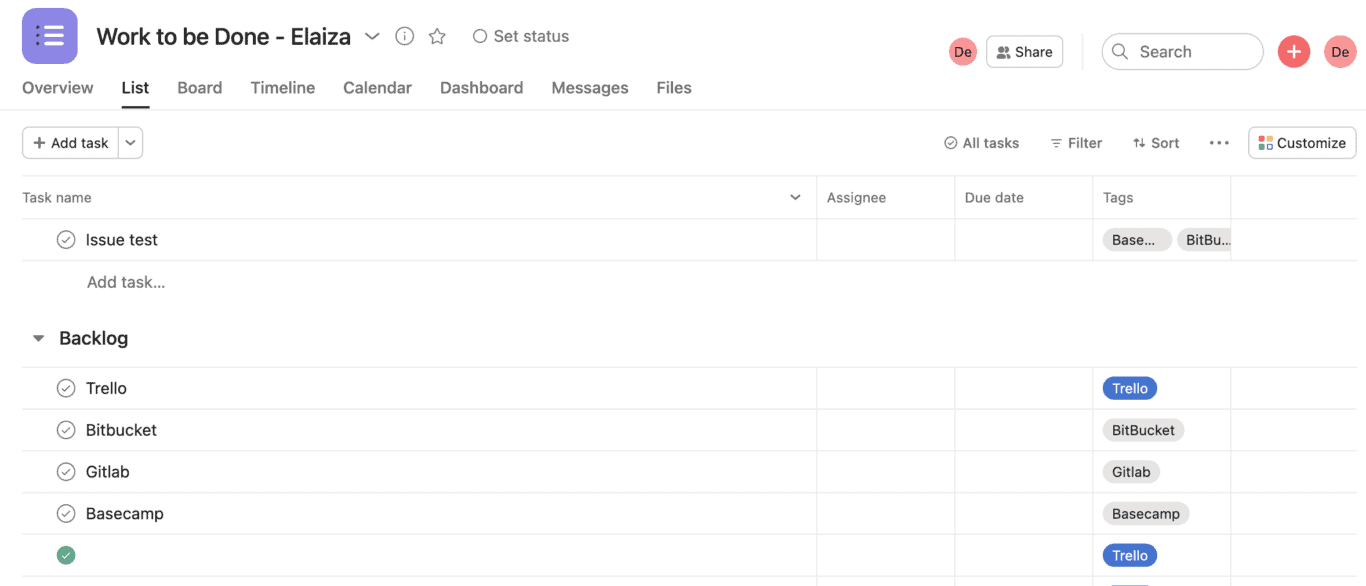
- Create Asana tasks from our BitBucket repo and assign them to our Backlog with the “BitBucket” tag.
- Allow those tasks to stay in sync if they are moved between the sections: Backlog, To Do, In Progress, Waiting on Client, Done.
If you have any questions, don’t hesitate to reach out and let us know.
Ready to streamline development work?
Meet with our team to see what Unito can do for your workflows.
What’s next after connecting Asana with BitBucket?
If you’re interested in seeing what else you can do with Unito, here are some articles to help you power up your workflows:
- You can duplicate this flow to sync other types of BitBucket issues to any tool in your stack (including other Asana projects).
- Read Version Control 101
- Follow similar guides to sync:
Why connect Asana and BitBucket?
Connecting BitBucket to Asana is a smart next step for anyone familiar with the basics of workflow automation, since integrating these powerful tools enables you to:
- Create a new task in Asana whenever you create a BitBucket issue with a specific assignee or issue type; then automatically set that task its own tag, assignee and section in Asana.
- Create a BitBucket issue based on new (or historical) Asana tasks with specific tags, assignees, or from a specified section / column.
Taking time to build this automated workflow means saving hours down the line by automating a basic manual function that you no longer need to worry about. All it takes is a set of rules and field mappings in Unito to establish a 2-way integration connecting Asana and BitBucket.
Who should connect Asana and BitBucket with Unito?
Anyone who works in a Git repository in 2022 can benefit from this workflow. That includes software developers, project managers, team leads and other professionals. It’s a great tool integration for sharing live visualizations of your team’s work and keeping everyone organized. This specific workflow can help anyone collaborating with teams internally or externally that use both a repository and a project management tool.
This guide will demonstrate how to connect Asana and BitBucket with Unito in one of many possible use cases. It is far from the only one, but hopefully it will show you a thing or two so that you can tailor it to your own needs.

