How to Add Columns in Google Sheets
Spreadsheet tools like Google Sheets are great for building simple reports — if you know your way around them. Adding columns is one of the first things you need to learn to become proficient with spreadsheets.
Here are a few ways to do that.
How to add a column in Google Sheets
Usually, you’ll want to add a column between two columns that already have data in them, so make sure you’ve selected one of those columns.
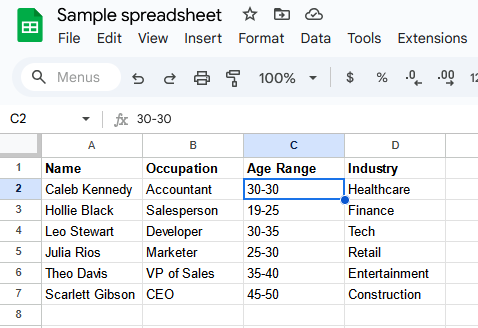
Click on Insert.
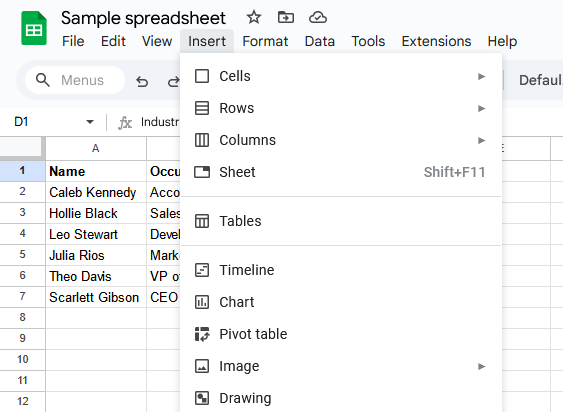
Then, hover over Columns and click on Insert 1 column left or Insert 1 column right depending on where you want to add your new column.
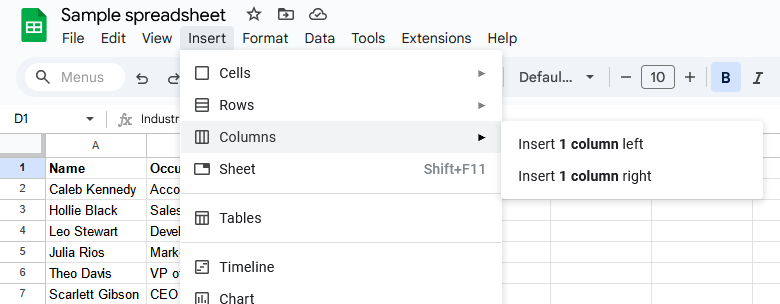
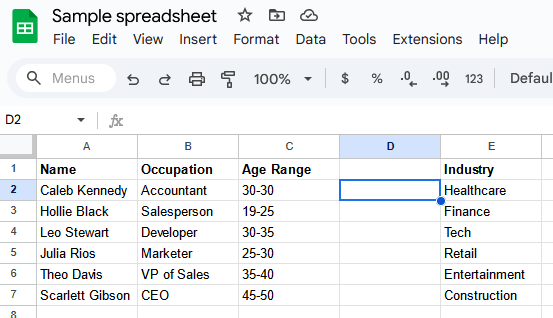
And that’s it! You’ve now got an entire column to put your new data in.
How to add columns in Google Sheets with right-click
Right-click on any cell and click on Insert 1 column left.
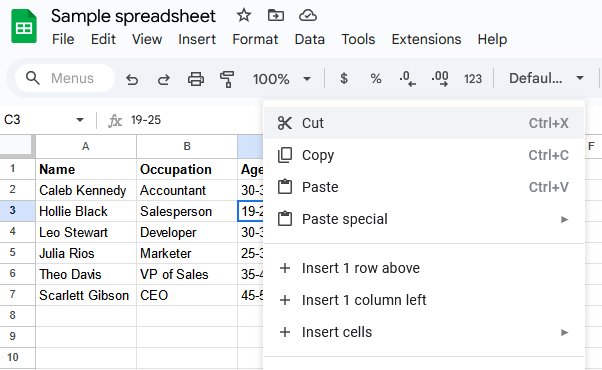
If you instead want to add a column to the right of your selected column, just make sure to right-click on that column’s header — the letter at the very top.
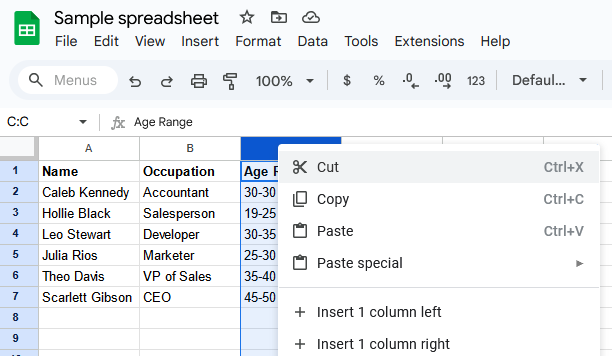
From there, you can either insert a column to the left or right of the column you’ve selected.
How to add multiple columns in Google Sheets
Did you know you can add multiple columns to Google Sheets in just a few clicks? First, click on a cell and drag horizontally until you’ve selected a number of cells equal to the number of columns you want to add.
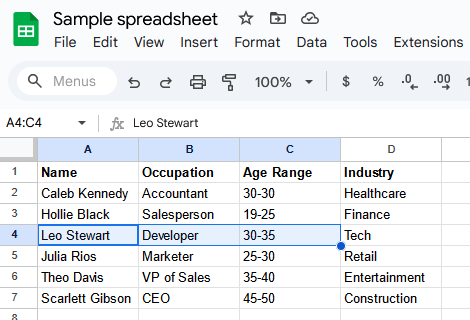
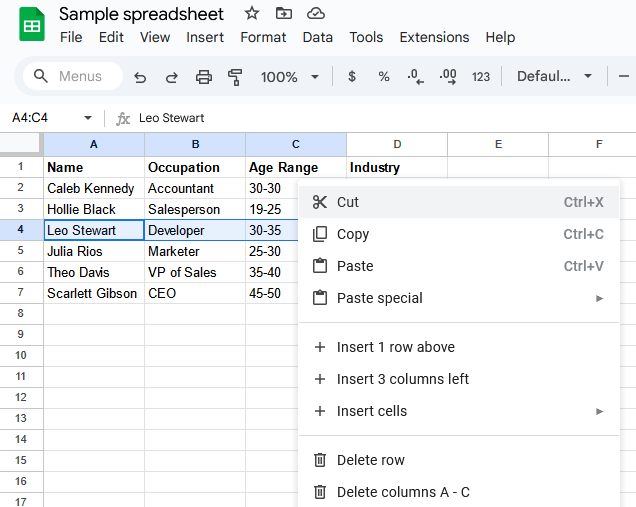
Right-click on any of the selected cells then click on Insert X columns left (X will be the number of cells you’ve selected).
How to delete columns
You can delete columns from your spreadsheet in one of two ways. The first is through the Edit menu.
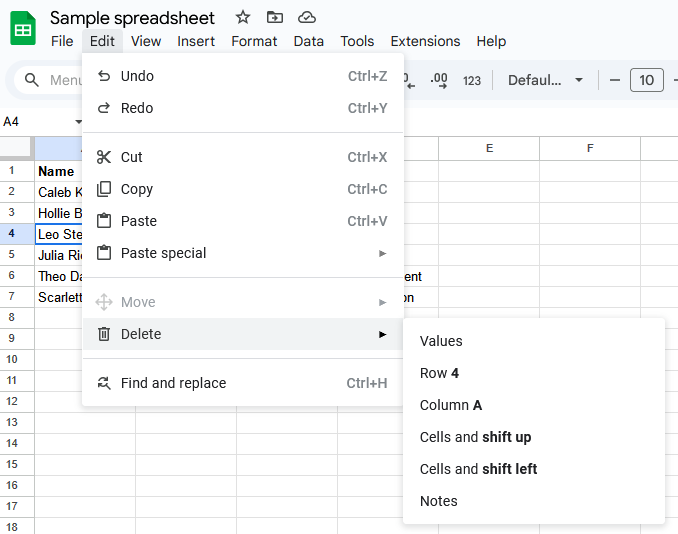
First, select a cell in the column you want to delete and click on Edit.
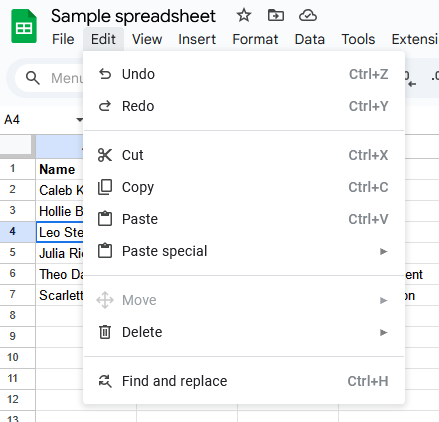
Hover over Delete then click on Column X — X will be replaced by the header letter of the column you’ve selected.
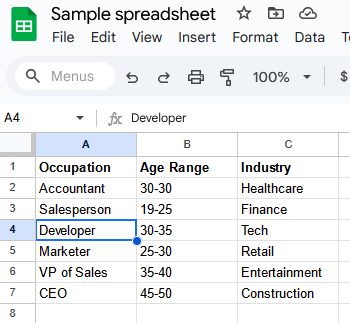
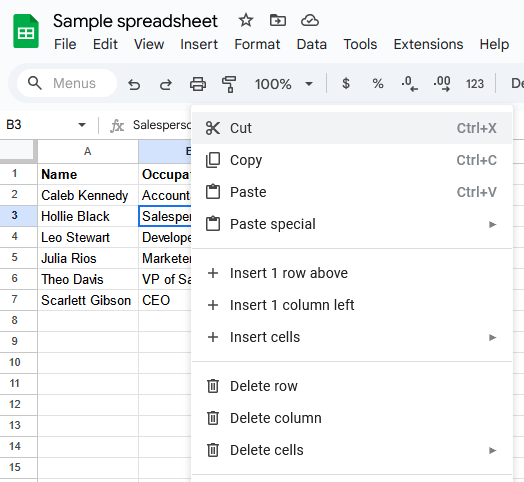
You can also delete columns by right-clicking on a cell in the column you want to delete and clicking Delete column.
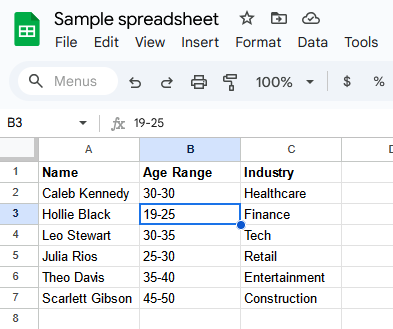
How to add rows in Google Sheets
You can add new rows in Google Sheets as easily as adding new columns. Just select a row next to where you want your new row to be.
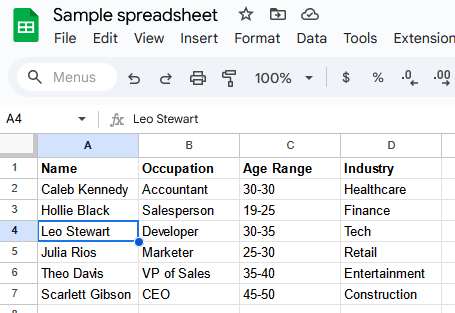
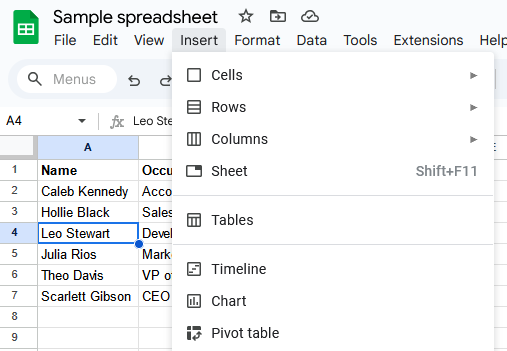
Click on Insert.
After that, hover over Rows, and click on Insert 1 row above or Insert 1 row below based on where you want your row to be.
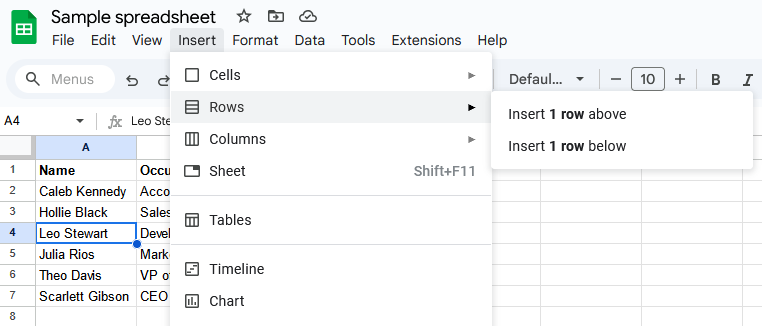
That’s it! You’ve just added a new row for your data.
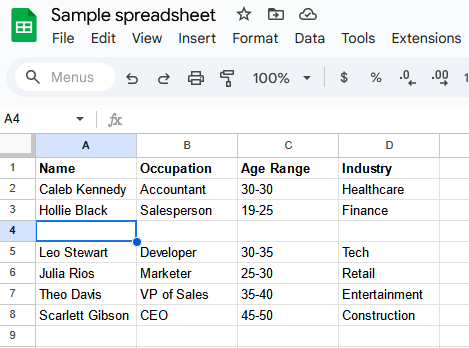
How to add rows in Google Sheets with right-click
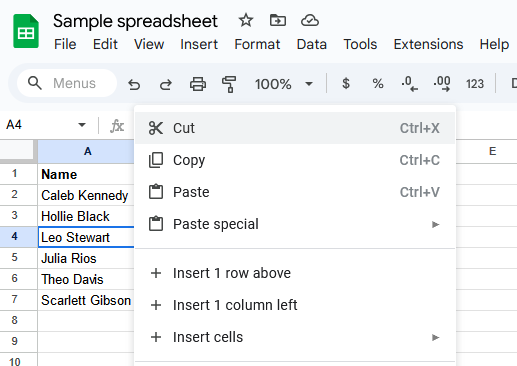
Right-click on any cell and click on Insert 1 row above.
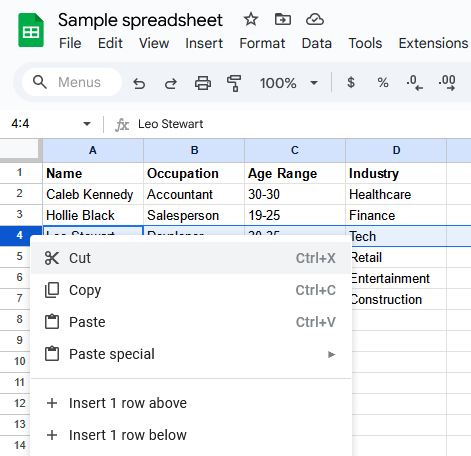
Want to add a row below instead? Just right-click on the row’s number — four, in this case.
How to add multiple rows in Google Sheets
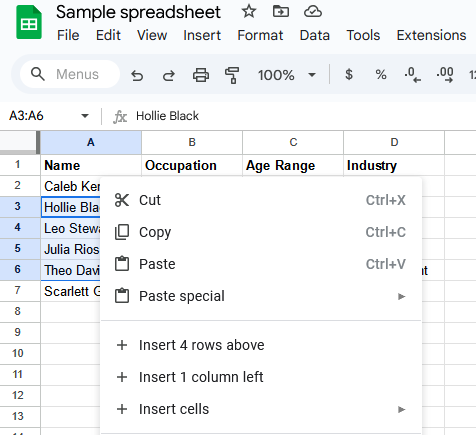
You can add multiple rows to Google Sheets in the same way you had multiple columns. Click on a cell and drag vertically until you’ve a number of cells that matches the number of rows you want to create.
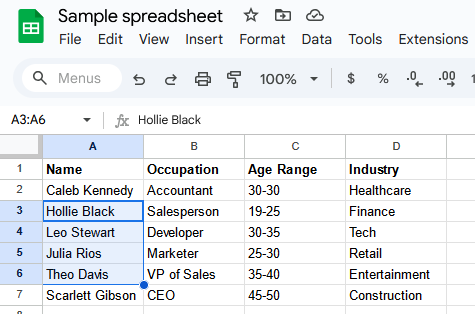
Right-click on the cells you’ve selected and click on Insert X rows above, with X being the number of cells you’ve selected.
How to delete rows in Google Sheets
There are two ways to delete rows from your spreadsheet.
For the first method, start by selecting a cell in the row you want to delete and click on Edit.
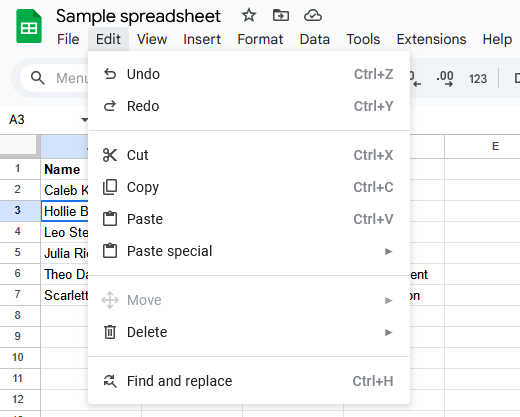
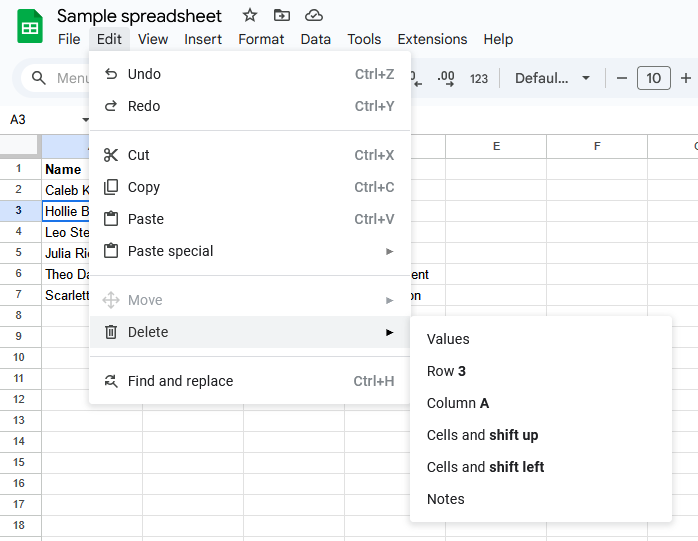
Hover over Delete and click on Row X —X being the number of the row of the cell you’ve selected.
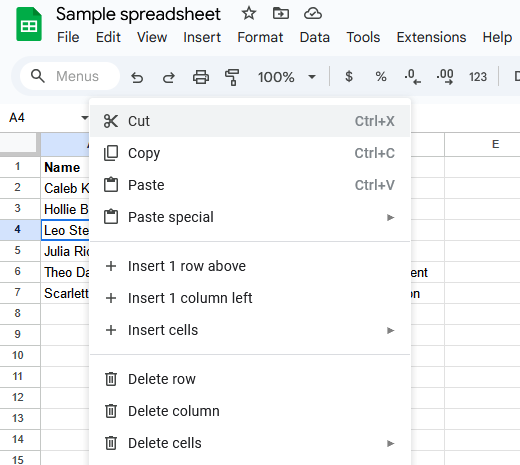
You can also delete a row by right-clicking a cell in the row you want to delete and clicking Delete row.
How to automatically add new rows to Google Sheets
All these options allow you to quickly add new data to your spreadsheets, but they have to be done manually. That’s not an issue when you’re building simple reports with limited data, but as soon as you’re consolidating data from other reports — or even multiple tools — things can quickly get out of hand. If you’re regularly building these reports, you need a way to add new data to Google Sheets, especially when it comes from other tools.
That’s where Unito comes in.
Unito is an integration platform with some of the deepest two-way integrations for tools like Google Sheets, Excel, Jira, Asana, Smartsheet, and more. With a Unito integration, you can pair a Google Sheets spreadsheet with another spreadsheet or another tool. This integration will automatically create new rows in Google Sheets to match data in these other tools and keep them up to date.
Curious to see this in practice? Check out this demo of Unito in action.

