How To Set Up a Quick Miro-Jira Integration With 2-Way Sync
Miro is one of the best tools for brainstorming out there. Many product teams kickstart a new sprint by meeting up, either in person or virtually, to sort through their backlog, prioritize existing tasks, and think of new initiatives to work on. But once the brainstorming is done and the work needs to begin, a project manager has to manually copy over every Miro card into Jira. Depending on how productive your brainstorming sessions are, that can take hours, if not days.
With Unito’s integration for Miro and Jira, you can automatically sync Miro cards to Jira, creating issues for your next sprint without any manual work from your PMs. In this guide, you’ll learn how to build a Unito flow to do this.
More of a visual learner? Here’s a video guide to setting up a 2-way flow in Unito:
In this article:
- Tools: Miro and Jira
- Use cases: Software development, product management, task management
- Great for: Developers, engineers, project managers, product managers, stakeholders and executives
Use case overview
For many teams, Miro is the homebase for creativity and brainstorming, but it’s rarely where the work actually happens. No matter what you’re planning in Miro, there’s going to be some work involved in making sure all that context ends up in Jira. Copying and pasting data from Miro to Jira is the default option, but the right integration can make all the difference.
In this walkthrough, it’s all about syncing Miro cards to Jira, automatically creating issues to match the Miro cards representing initiatives, feature requests, and other ideas.

Setup in Jira
If you’re connecting Jira to Unito via OAuth2, just follow the on-screen instructions when adding your account for the first time:
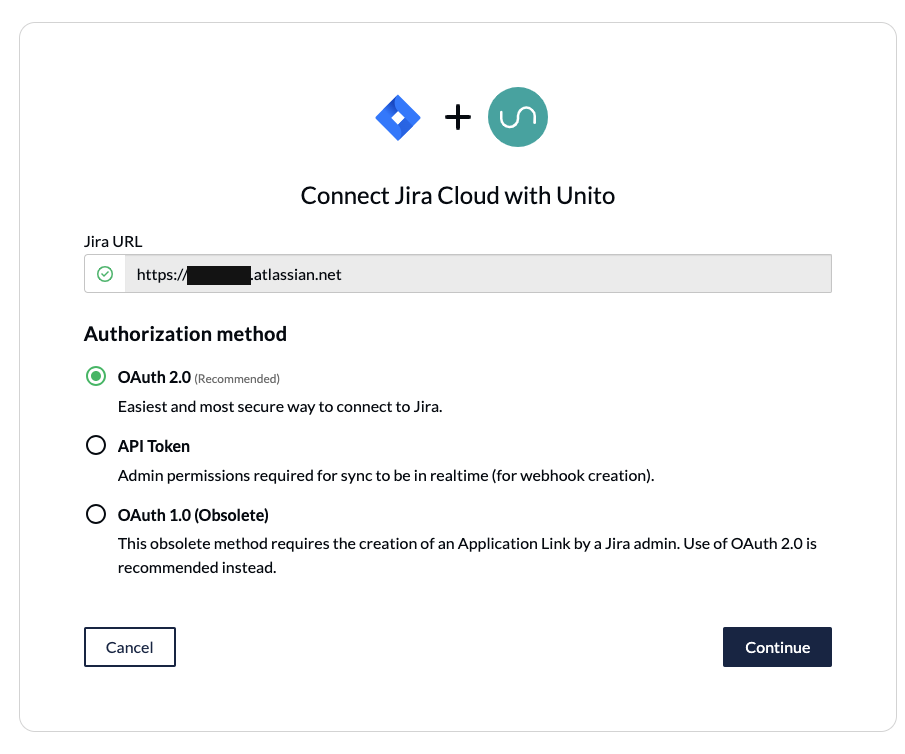
Not using OAuth2 to connect your Jira Cloud workspace? You’ll have to set your Jira contact email visibility to anyone in your Jira profile page. Then, you’ll need to set up an application link in Jira to sync issues with Miro cards.
If you’re connecting an on-premise Jira Service instance to Unito, you’ll need to follow this guide. You can also use ngrok to connect Jira Server to Unito.
Step 1. Connect Miro and Jira to Unito
- Go to the Unito App and click +Create Flow.
- Click Start Here to start connecting Miro and Jira.
- Choose +Add a tool to this flow in either column and connect Miro.
- When you connect a tool for the first time, you’ll need to authorize it in Unito so your work items sync over properly.
- Click +Choose account to specify the account you want to use.
- Pick your board and follow the on-screen instructions.
- Repeat steps 3-5 to connect your Jira project to Unito.
- Click Confirm.
Here’s what the tool connection screen in Unito looks like once you’ve connected Miro and Jira.

If you ever need to connect more Miro boards to your Jira projects, you can just duplicate this flow once it’s done, modifying it as needed.
Step 2. Set a flow direction between Miro and Jira
In Unito, flow direction controls where new work items are created. In this case, that means Miro cards and Jira issues. When setting flow direction for most integrations, you have three options:
- 2-way, which creates work items to match items created in the other tool.
- 1-way from Tool A to Tool B, which creates new work items in Tool B to match the items you create manually in Tool A. Creating work items in Tool B manually won’t create new work items in Tool A.
- 1-way from Tool B to Tool A which creates new Tool A items to match Tool B items that are created manually. Creating work items in Tool A manually won’t automatically create new items in Tool B.
Unito’s Miro-Jira integration currently only supports a one-way flow from Miro to Jira.

Note that this only affects the creation of work items, not the direction of updates for individual fields (e.g. card names, assignees, card colors). Even if you create a 1-way flow, you can tailor the syncing direction of individual fields in the last few steps of this guide.
Step 3. Set rules to sync Miro cards and Jira issues
Rules are essentially filters, allowing you to customize your flows so that only some work items get synced between Miro and Jira. For example, you could decide to filter out any Miro cards from specific frames (like your initial brainstorm) or of a specific color.
To start creating a rule, click Add a new rule. After that, you can choose what will trigger that rule and what happens when it’s triggered.
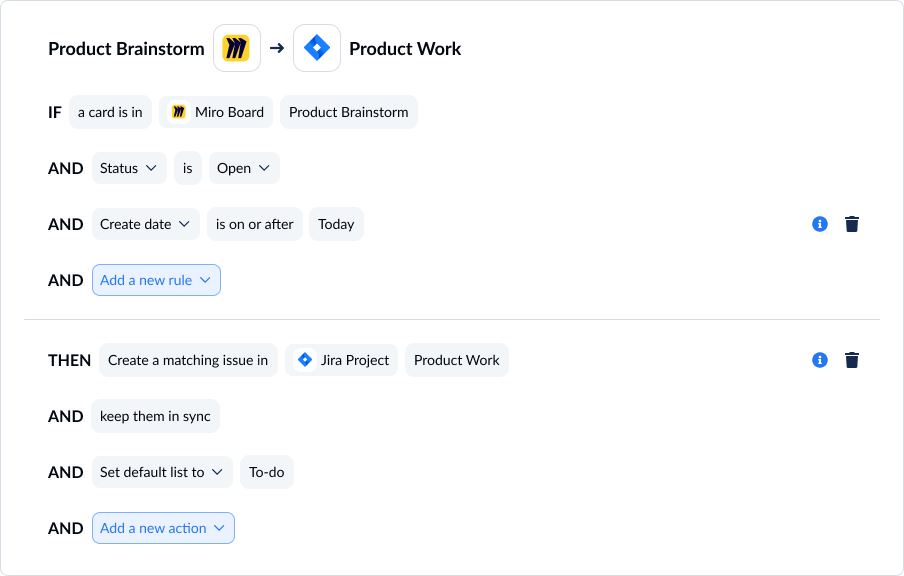
You can learn more about setting rules here.
Step 4. Map fields between Miro and Jira
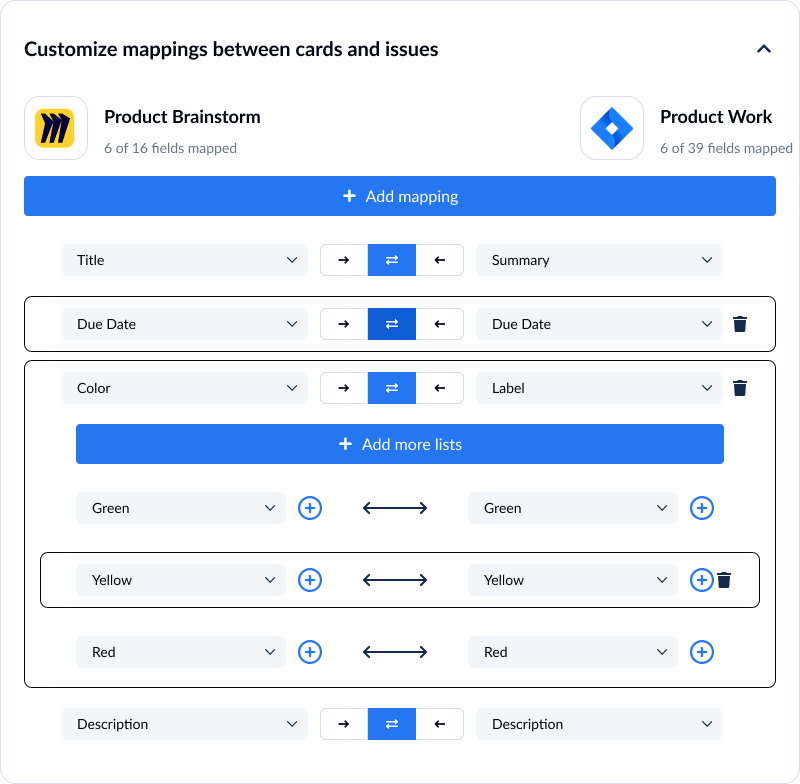
Mapping fields allows you to match up data in Miro with data in Jira, ensuring everything goes to the right place. You can, for example, match Miro card titles to Jira issue summaries, or Miro due dates to due dates in Jira.
You have two options when mapping fields. Click Map automatically to let Unito do all the work for you — which is all you need in most situations. Even if Unito maps your fields automatically, you can customize them after. If you want to start from scratch, click Map manually.
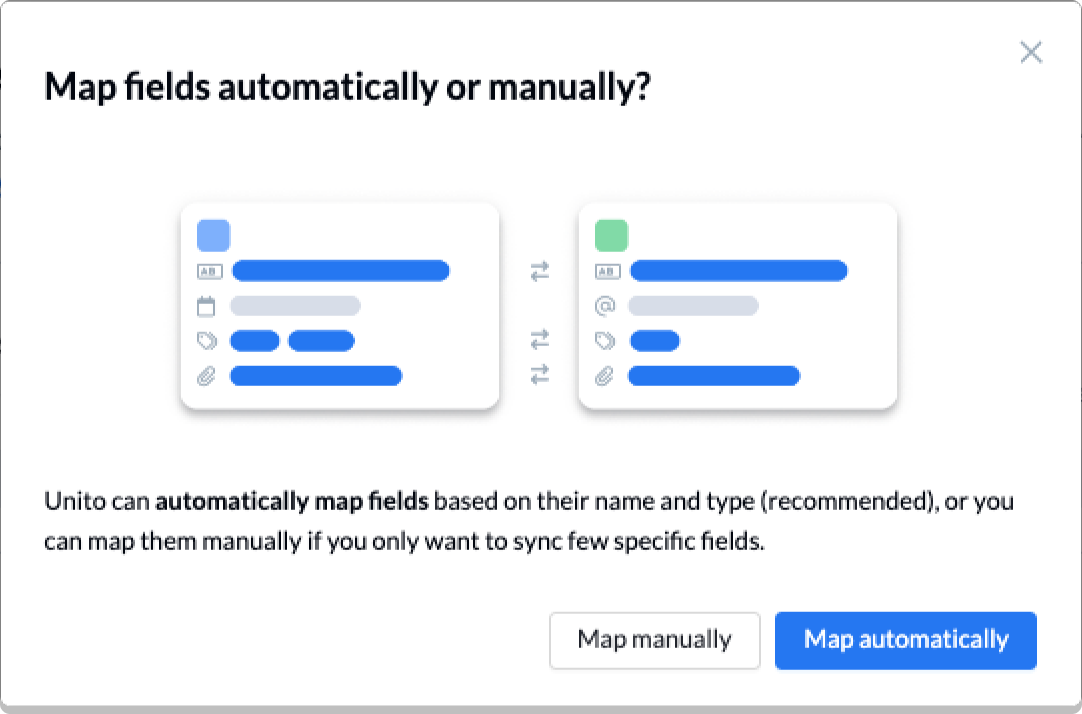
If you map your fields automatically, you’ll see something like this.
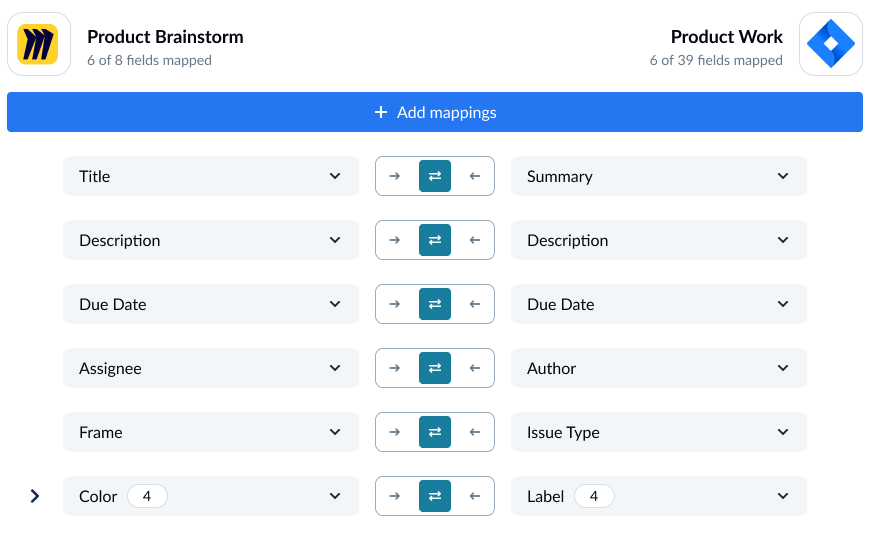
To add a new field mapping, click +Add mapping, then Select a field. Unito will automatically suggest compatible matches for this field through a drop-down menu.
Fields with cog icons can be customized further (e.g. linking specific Miro card colors to specific labels in Jira).
Step 5. Launch your Miro-Jira integration
That’s it! You’ve built your first flow and you’re ready to launch it. Unito will automatically sync Miro cards with Jira issues, keeping all fields updated automatically. Any questions? Reach out to us by clicking the chat bubble in the lower-right corner of your screen.
Ready to optimize your software projects?
Meet with our team to see what Unito can do for your workflows.

