How To Integrate Asana and Zendesk With Two-Way Updates
In this guide, you’ll find everything you need to know to set up an integration that will sync Asana tasks with Zendesk tickets using an automated 2-way flow from Unito. Since Unito is a customizable platform with a no-code interface, you can set up this integration without any support from your technical teams. No need to troubleshoot complex automations or rely on expensive consultants, either.
More of a visual learner? Check out this video tutorial for a similar integration.
By the end of this guide your Asana-Zendesk integration will:
- Create new Asana tasks based on Zendesk tickets.
- Create new Zendesk tickets synced with Asana tasks.
- Update fields in real-time with a two-way sync when you work in either tool.
In this guide:
- Tools: Asana and Zendesk
- Use cases: Ticket escalation, product management, task management, marketing reporting, account management
- Great for: Marketers, sales, customer success, RevOps
Step 1. Connect Asana and Zendesk to Unito
- Sign up for Unito if you haven’t already!
- Navigate to the Unito app and click +Create Flow.
- Click Start Here to connect Asana and Zendesk.
- Click +Choose account for each tool and complete the authorization process.
- Click Confirm.
Connecting tools to Unito for the first time? Here’s an in-depth guide.
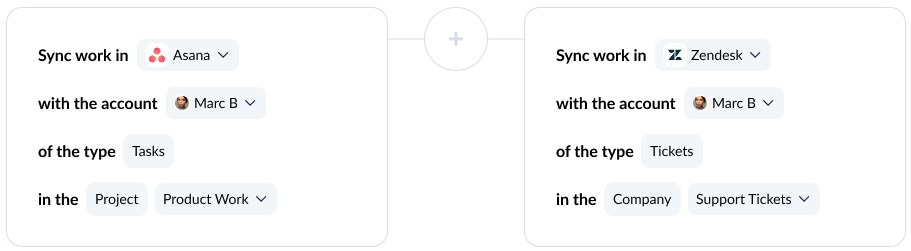
Step 2. Choose flow direction for tasks and tickets
With flow direction, you choose where Unito automatically creates work items to match those you create manually. You have three options:
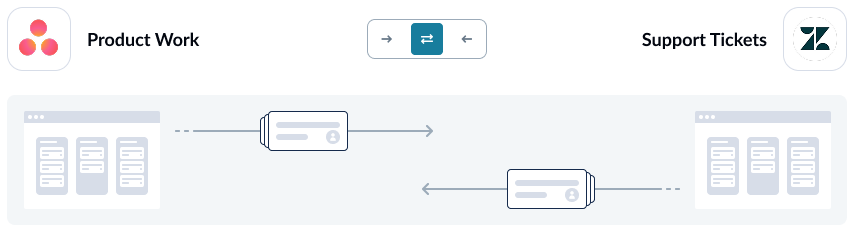
- 2-way: Both Asana tasks and Zendesk tickets are automatically created by your Unito flow to match items you create manually in each tool.
- 1-way from Asana to Zendesk: Zendesk tickets will be automatically created by Unito to match Asana tasks you create manually. Unito won’t create new Asana tasks.
- 1-way from Zendesk to Asana: Asana tasks will be automatically created by Unito to match Zendesk tickets you create manually. Unito won’t create new Zendesk tickets.
Here’s a more detailed guide to how flow direction works.
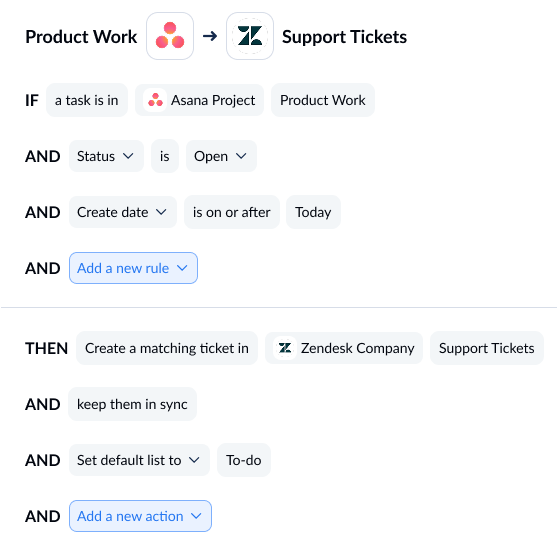
Step 3. Build rules to sync specific work items
Unito rules can do two things:
- Filter out work items you don’t want to sync. For example, you could create a rule that only syncs Zendesk tickets opened after a certain date.
- Automate certain actions. For example, you could create a rule that automatically assigns a new Asana task to a certain person on your team.
To start building your rule, click Add a new rule, then choose a trigger and action.
You can learn more about setting rules here.
Step 4. Map fields between Asana and Zendesk
When you map fields, you pair fields in Asana with fields in Zendesk so data always goes right where it needs to be. Unito can usually map most fields automatically whether they’re exactly the same (Assignee→Assignee) or compatible (URL→Text). You can also choose to map fields manually to fully customize your flow.
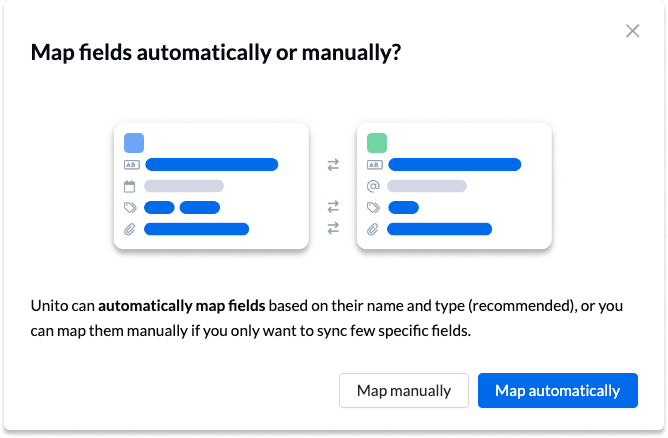
Here’s what you’ll see when Unito maps your fields automatically.
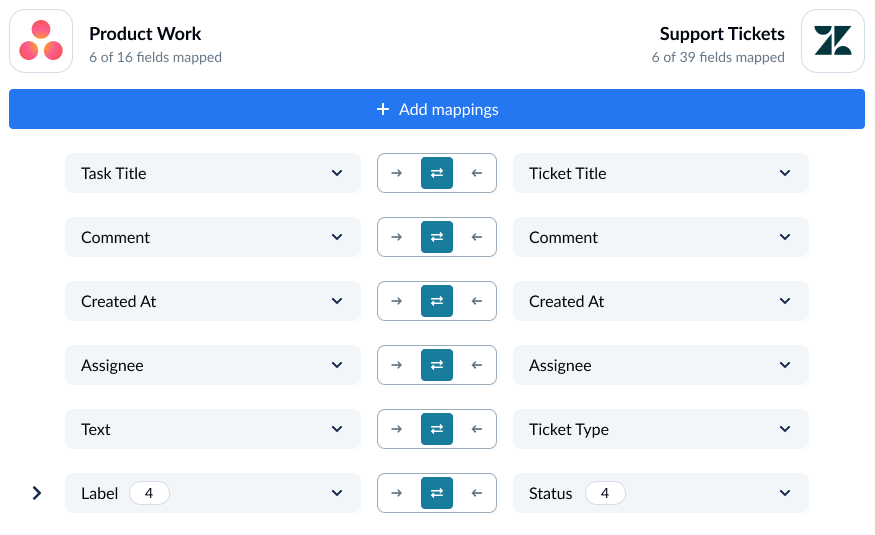
You can add a field mapping by clicking +Add mapping then Select a field. When you choose the field you want to map in one tool, Unito will automatically recommend compatible fields in a dropdown under the other tool.
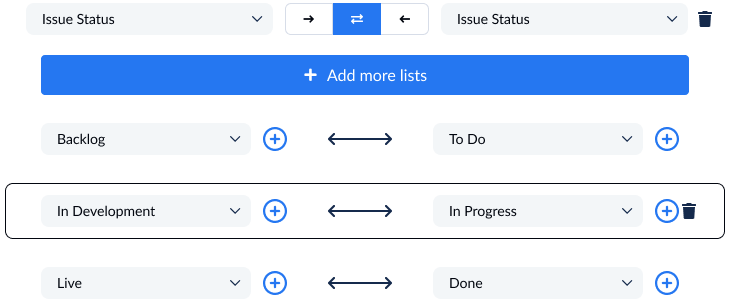
Some fields have a cog icon, meaning they can be customized further once they’re mapped. For example, a Status field can be customized so its options match those in another field.
Step 5. Launch your Asana-Zendesk integration
That’s it! You’re ready to launch your flow. Unito will automatically keep Asana tasks and Zendesk tickets in sync. This will allow your teams to collaborate more effectively without copying and pasting data or jumping back and forth between tools.
Ready to optimize your support workflow?
Meet with our team to see what Unito can do for your workflows.
What’s next?
Need to integrate Asana or Zendesk with other tools in your stack? check out our other guides: