
How To Use Airtable Automations To Get More Out of Your Bases (2 Methods)
Manually updating databases can take hours out of your day. But someone’s got to do it, right? Sure, but after days of clicking the same dropdown field across a hundred records, you might start looking for ways to cut corners. Then, maybe, while looking into shortcuts, you happen on Airtable automations. Could they be the solution to your copy-paste problems?
There are two main methods you can use to set up Airtable automations. One is within Airtable, and the other relies on a little help from Unito.
First method: using Airtable’s automations
Did you know that you can automate simple actions without leaving Airtable? Airtable uses a simple trigger and action automation process to automate, even from Airtable to other tools.
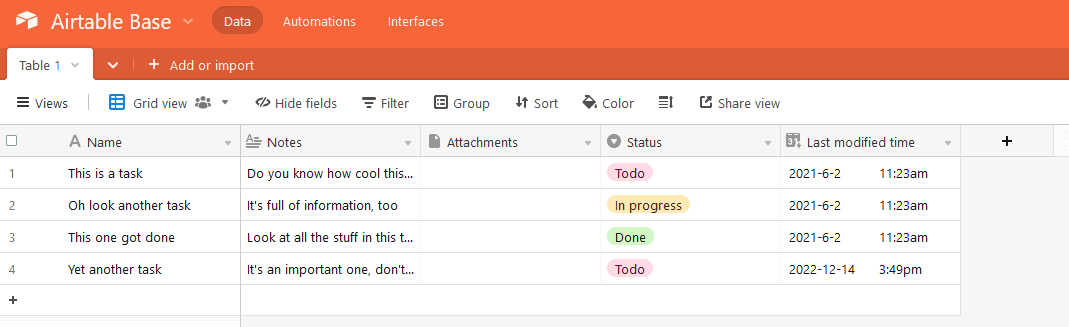
Here’s how you can use Airtable automations.
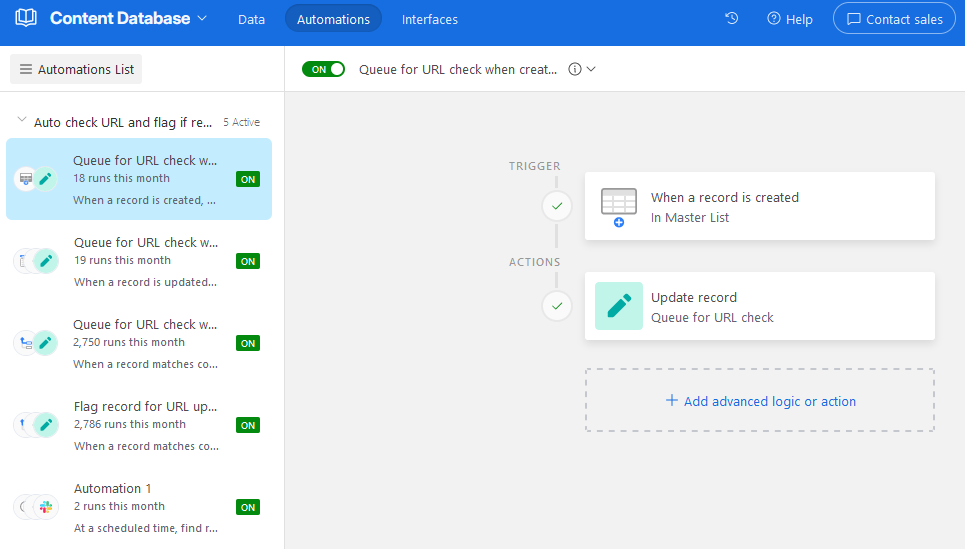
First, you’ll want to click Automations at the top of your base.
When you do, you’ll see this screen.
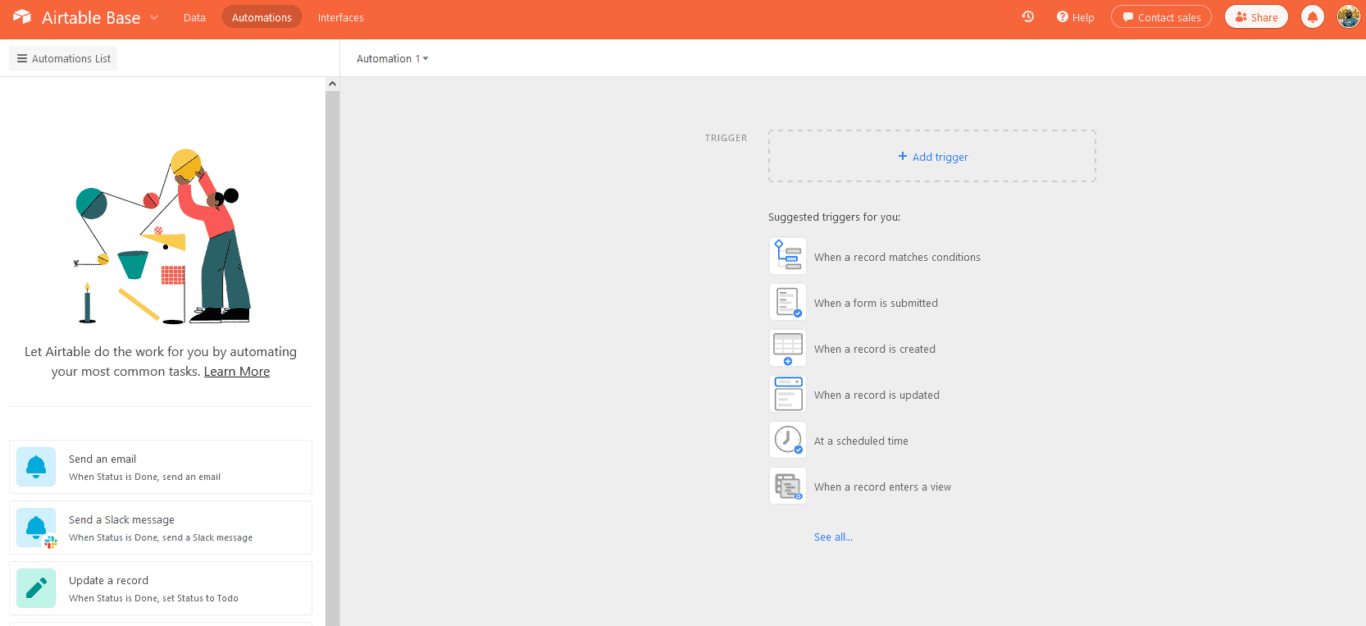
While this might seem overwhelming at first, there are two places where you can start. Look at the menu on the left. You can pick common, pre-built Airtable automations, like “When Status is Done, send an email” or “At 9:00am Monday, email records where Status is Done.”
Alternatively, you can build your own by clicking +Add trigger.
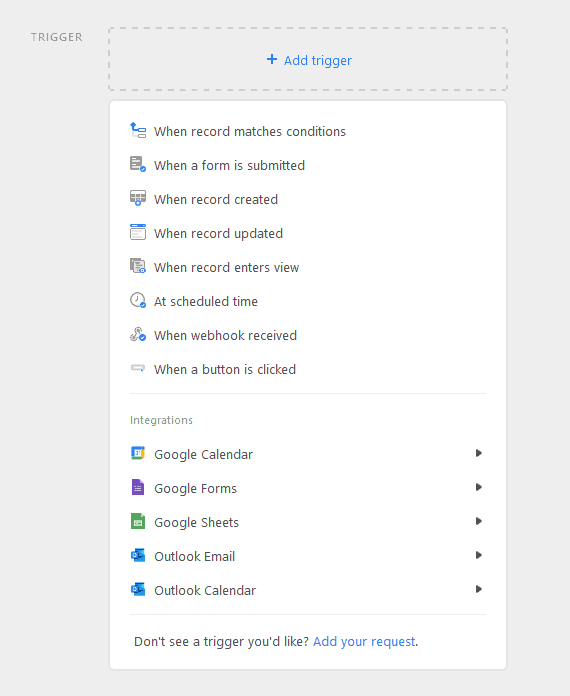
These triggers are the events that’ll kickstart your automation. If, for example, you pick When a record is created, this automation will run every time a new record is added to your Airtable base. Let’s pick that trigger.
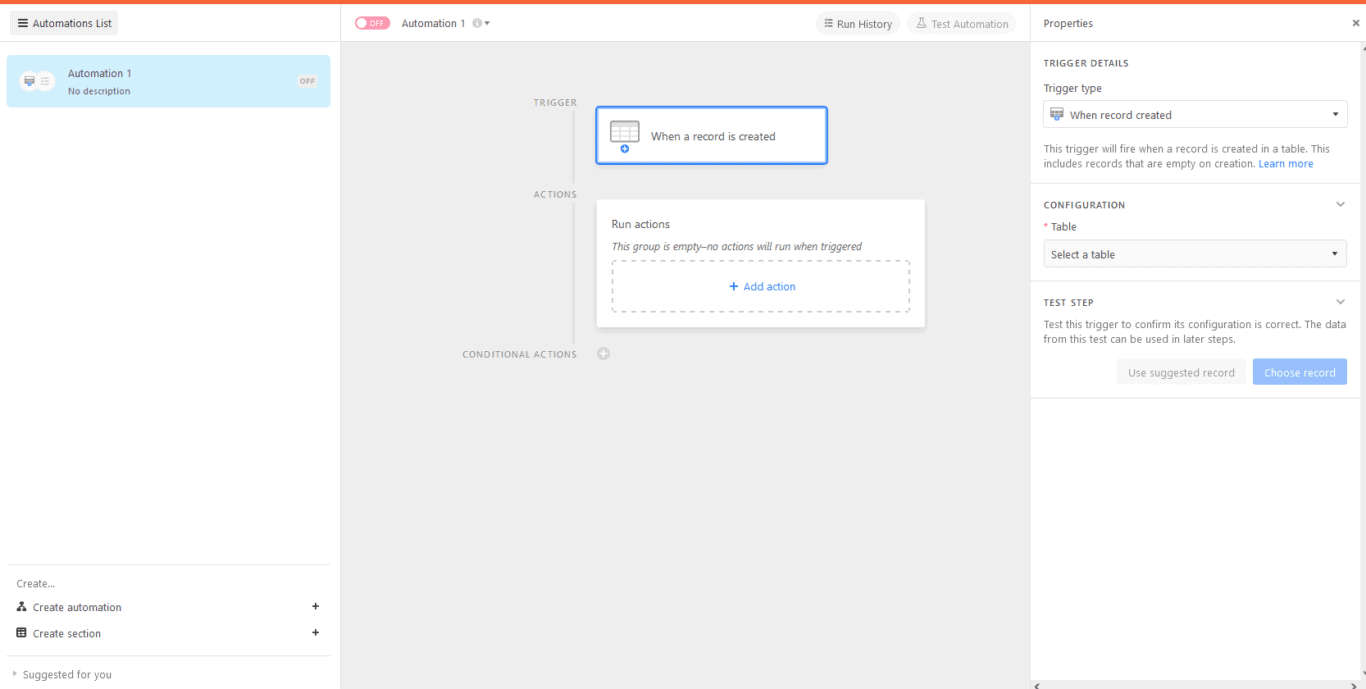
Alright, we’ve run into a screen that’s a bit more complex here. On the left, you’ll now find a list of all your automations. So far, you’ll only have Automation 1, and you’ll notice that it’s off.
In the center, you’ll see a tree representing your automation. Right now, there’s only a trigger, since we haven’t added any actions yet.
On the right, you’ll see the trigger’s properties. The only thing you need to do here is to make sure that the Table dropdown (under the Configuration header) shows the table where your automation should run. In this case, that’s Table 1.

Now, it’s time to add an action, the thing the automation will actually do. Click on +Add action.
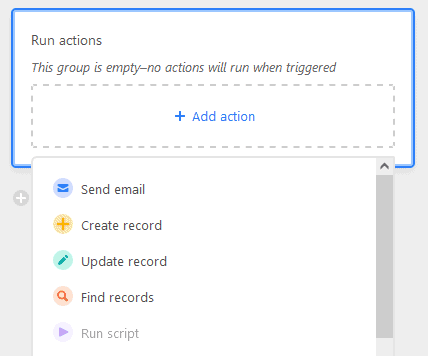
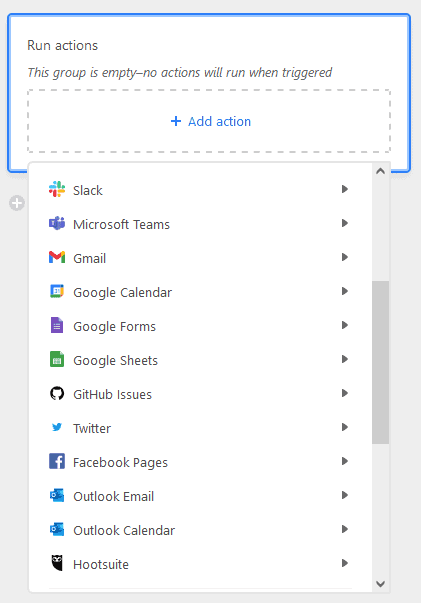
Here, you’ll find a ton of actions for your rule, from sending an automatic email to updating records. If you scroll down, you’ll also find a ton of integrations you can use for this automation, including Slack, Gmail, Google Sheets, and more.
For this first automation, let’s keep things simple. Let’s pick Update record.
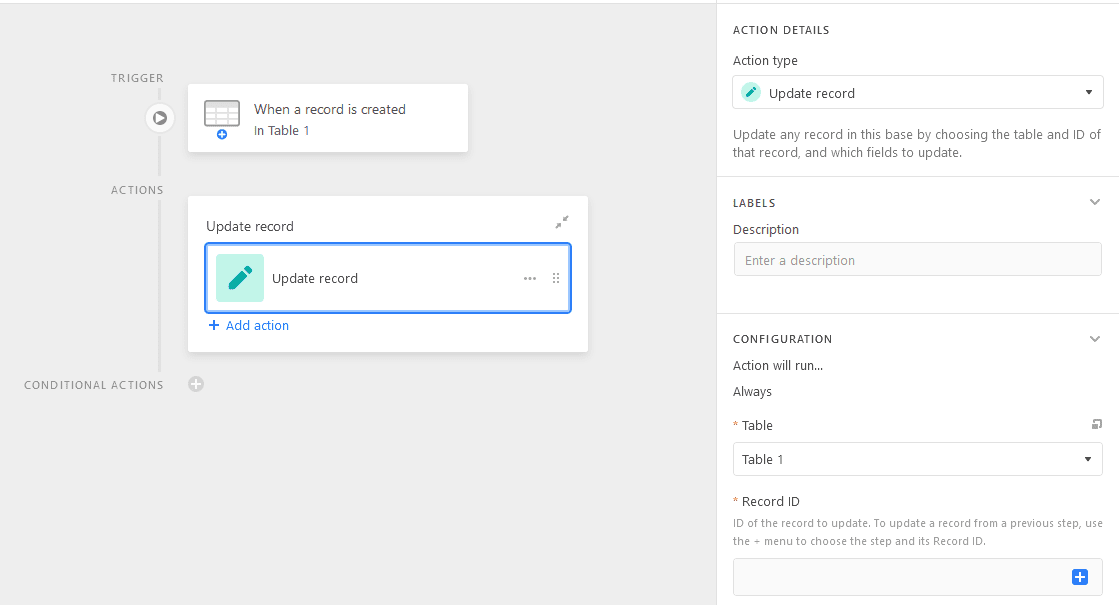
You’ll get a Properties panel just like before, which you can use to customize your action. Here, we’ve created an action that automatically sets the Status field to Todo when a record is added to our table.
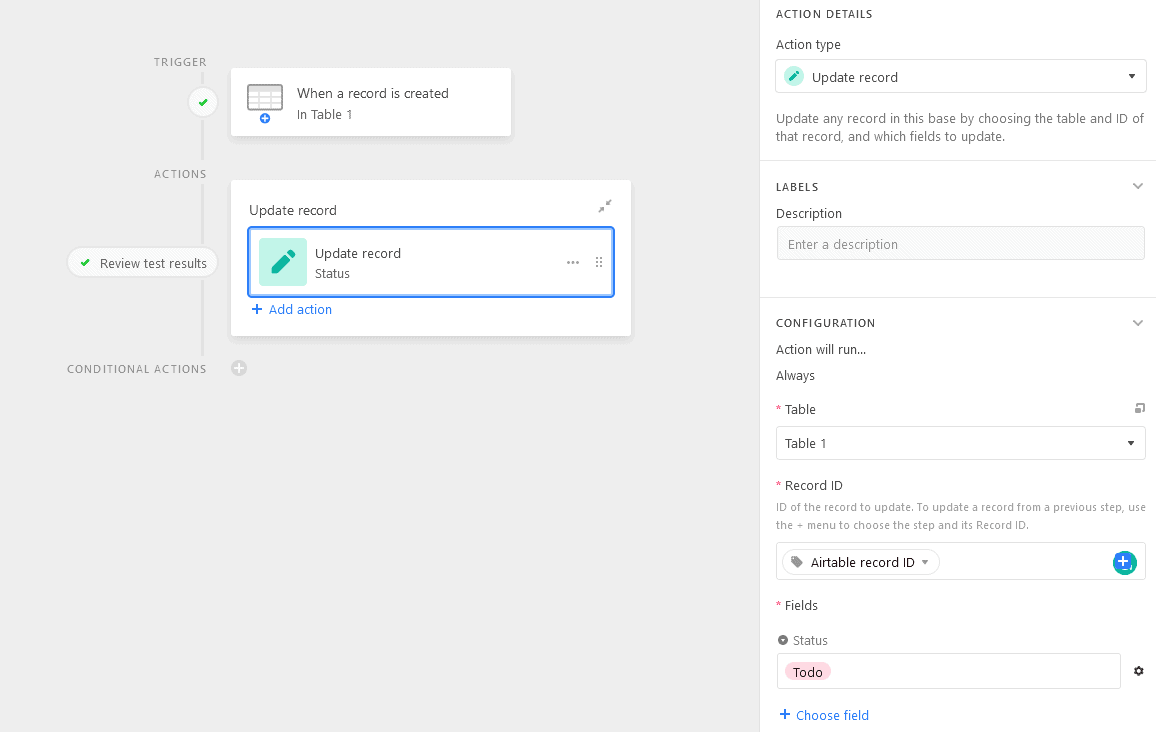
Now, let’s turn this automation on and try it out. We’ll go back to our table…
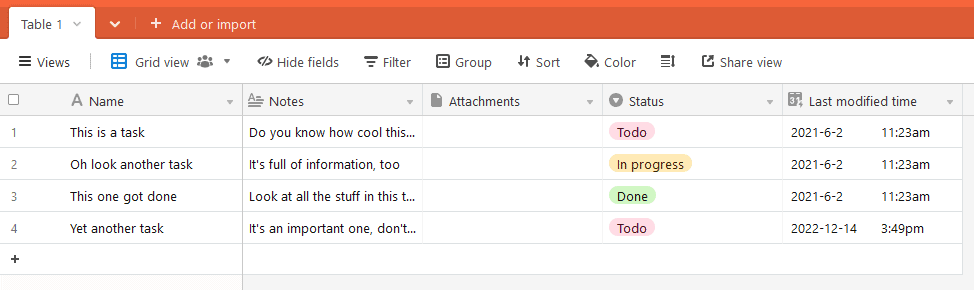
Add a new record…
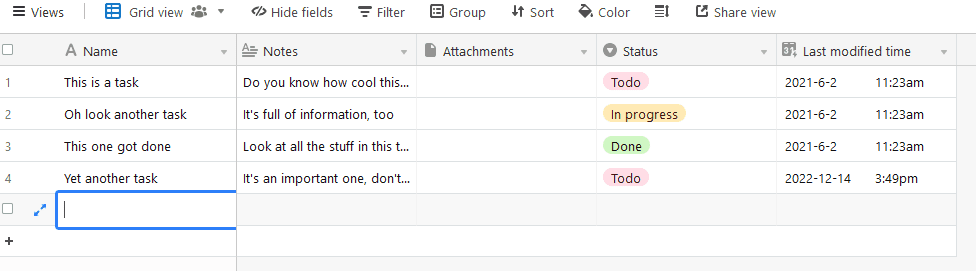
And just like that, its status is automatically updated to Todo!

Congratulations, you’ve just built your first Airtable automation! Note that this is as simple as it gets, and there’s a lot more you can do with this feature. You could add multiple actions to this automation, like sending a Slack message whenever a record is created and sending data to a Google Sheet.
Limitations of this method
Airtable automations have two advantages; they come with Airtable and they’re super easy to build. But are they the best solution for your workflow? Not necessarily. Here are potential dealbreakers for you:
- It’s one-way: Trigger-action automations are easy to build, but they have one big problem. They only work in one direction. That’s great if you’re looking to automate simple, repetitive work, but you won’t be able to keep anything in sync after that.
- Limited integrations: Airtable’s automations can integrate with 17 tools, like Google Sheets, email clients, social media platforms, and more. But if your tool of choice isn’t on that list, you’re out of luck.
- It (can be) pay-to-play: If you’re using Airtable’s free plan, their automations might be disappointing. For one, you’ll only get 100 runs a month across all your automations. Not only that, you won’t have access to what Airtable calls “premium” integrations, like Jira, Salesforce, and Google Docs.
Airtable automations are a great place to start if you want to eliminate the manual work that comes with database tools.
With a custom automation built in Airtable, you can streamline processes like:
- Automatically enter tasks in tools like GitHub and Jira when new records are created in Airtable.
- Automate request management for contact forms or customer support from Google Forms and create records in Airtable.
- Automatically check if a task meets approval standards in Airtable before being pushed to project management tools.
But for processes that involve a ton of data or multiple tools, there’s another method you should know about.
Second method: create your own Airtable automations with Unito
Unito is a no-code workflow management solution with the deepest two-way integrations for some of the most popular tools on the market, like Airtable, Asana, Trello, and more. With a Unito flow, you can create your own Airtable automations and keep everything in sync across all your bases (or even other tools, such as Azure DevOps).
Here’s why Unito is the best way to create Airtable automations:
- It’s two-way by default: Do you need to sync data back and forth between your Airtable bases? You can’t do that with Airtable automations, but it’s a built-in feature for Unito.
- It works with more tools: With Unito’s 30+ integrations, you’re sure to find something that works for your workflow, whether you’re using Asana, Jira, Azure DevOps, or Airtable and HubSpot.
- You get more bang for your buck: Yes, Unito is a paid service. But where Airtable might force you to bump up your plan just to get more runs from your automations, when you get a Unito plan, you get a lot more.
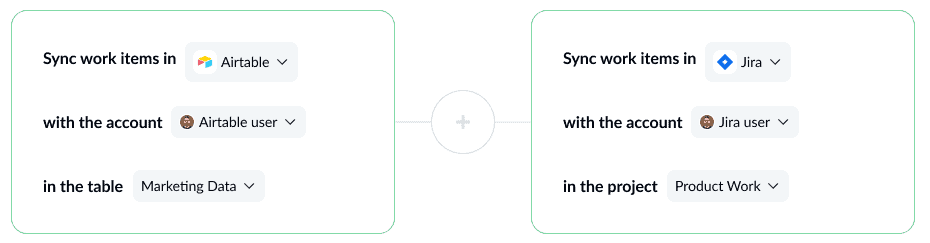
Want to see this in action? Here’s a quick demo of this integration.
Here’s how easy it is to set up Airtable automations with a Unito flow.
- Start by connecting your tools and picking the Airtable table you want your automation to start from. Then, pick the tool you want that automation to end up in.
- After that, you can set up rules to filter out records you don’t want to automate. For example, you might decide that any records with a specific option in a single-select field should be excluded.
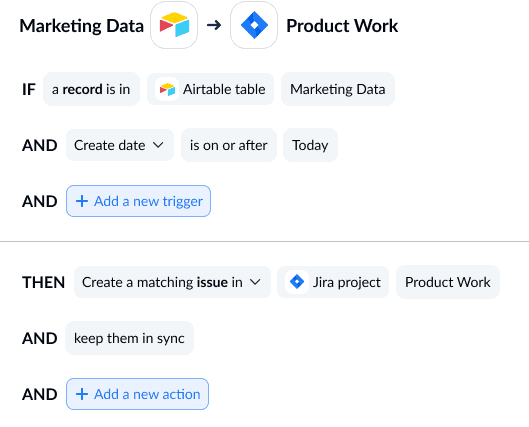
- The last step before launching your flow is mapping fields across your tools. This lets Unito know where information should be going, even if those fields are completely different in each tool. Note that Unito can map similar fields for you automatically, but you might have to customize the ones that don’t already match up.
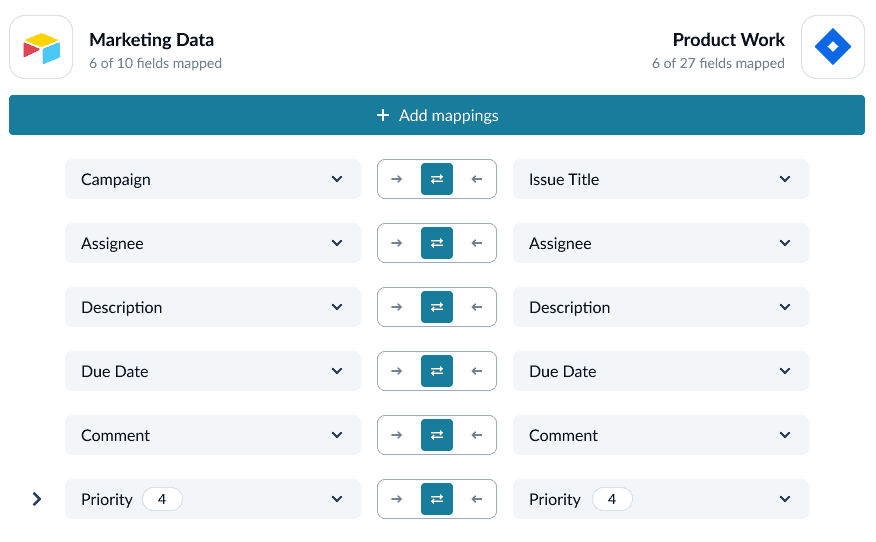
And that’s it! Once you’ve mapped your fields, you can launch your Unito flow and watch your automation go.
Airtable automations FAQ
What can you automate with Airtable?
The built-in Airtable automations feature lets you push and change data in Airtable and other tools through a number of integrations. These automations work by choosing a trigger (like creating a new record) and an action (like updating a different record).
Here are five examples of automated processes made possible by Airtable:
- When a record is created, send an email to a specific email address.
- When a specific field is updated in a record, create new records in another base.
- When a Google Forms submission is received, run a script.
- When a record enters a specific view, generate documents automatically in Google Docs.
- When an event is created in Google Calendar, find records in Airtable.
Airtable automations are incredibly flexible, especially when you combine them with Airtable’s built-in integrations.
What are the limitations of Airtable automations?
While Airtable automations are easy to set up, they do come with some limitations.
- One-way: Airtable automations can only push data in one direction. That means if you’re looking for a way to keep your bases up to date in both directions, you’ll have to use an integration solution like Unito.
- Limited integrations: While these automations are great for getting data into Airtable from other tools (and back out again), you won’t have as many integrations to work with. Airtable offers 30+ integrations, while solutions like Zapier have thousands.
- It’s only mostly free: A free Airtable plan will give you some access to automations. You’ll only get 100 runs of your automations each month, and you can only review two weeks of automation history when something breaks.
Are these limitations too much for you? Then see what Unito can do for your Airtable bases in this full walkthrough.
How can you open existing automations in Airtable?
If your Airtable bases already have automations, checking on them is pretty easy. Just hit Automations in the top bar of your Airtable base.

You’ll see the automations added to this base on the left.
To dig into triggers and actions, just click on one of these automations.