Inspect Element: How To Change Writing and More on Any Site
Ever wanted to make a temporary change to a website or see how a page would look on a mobile browser? There’s a way to do that in almost any browser: inspect element. With this feature, you can see all the code that goes into building a web page. This lets you pinpoint different elements within the code, as well as make some temporary changes to a web page that only you can see.
Read on for a guide to using the inspect element feature, as well as examples of what you can do with it.
Who should use inspect element
You might be thinking that inspect element sounds like a feature only a developer can use. After all, if you’ve used a browser for long enough, you’ve probably stumbled across it without realizing what it was, saw a bunch of code, and closed it. But even though the inspect element panel might seem a bit intimidating at first, it can actually be incredibly useful for a variety of roles.
- Marketer: Need to do some research on your competitors? With inspect element, you can check keywords in their site headers. You can also know how your site is performing with Google’s Lighthouse reports.
- Writer: If you write blog posts in the tech space, you’re probably often taking screenshots of your company’s product. Maybe you’re used to blurring out your name and email address, or you’re constantly having to create and re-create dummy use cases. With inspect element, you can do that much faster by just swapping out text.
- Designer: With the inspect element panel, you can temporarily replace images on any webpage, or even try new colors without having to re-create everything in your design tools.
- Customer support agent: Customer support agents are often receiving feature requests and suggestions from customers. If they’re in charge of triaging these requests for software teams, sometimes it can help to have a screenshot that shows the potential change. With inspect element, that can be simulated by just about anyone.
How to inspect element
Finding the inspect element feature is very simple. Many of us have accidentally triggered it while browsing without realizing it. Here’s how to inspect element on purpose.
Open your desired web page.
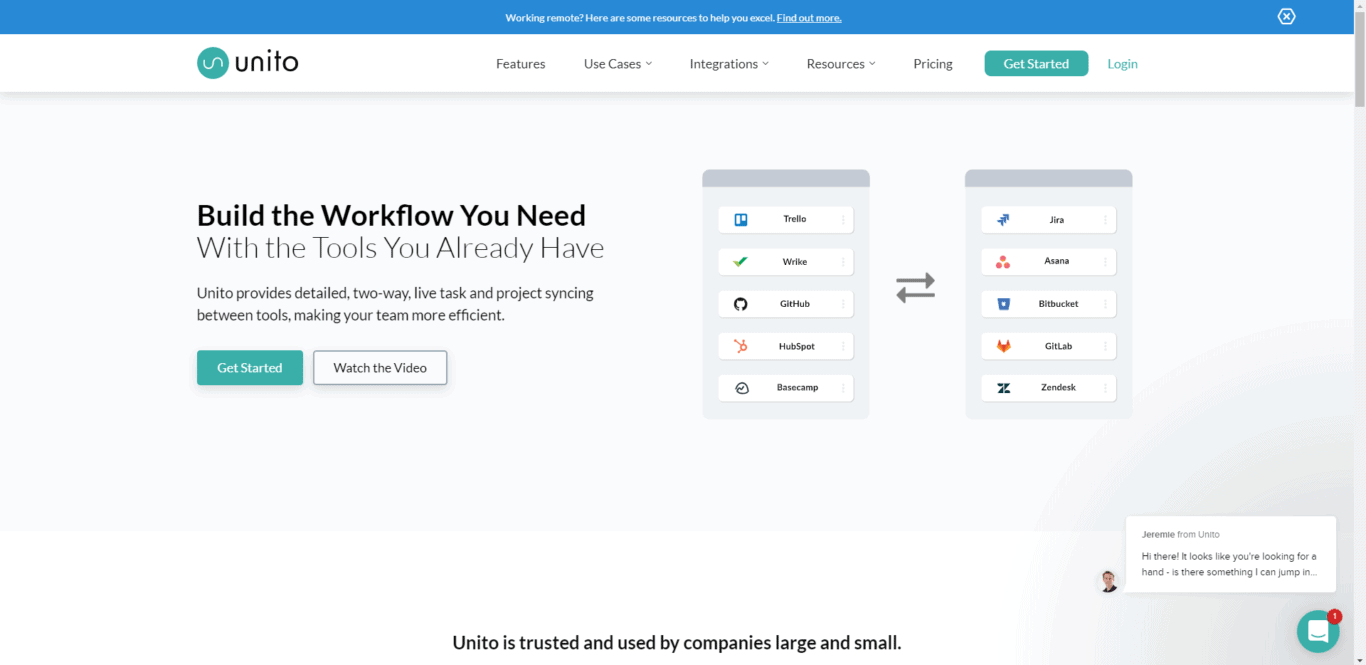
Hover over the page element you want to inspect (ex: an image, a widget, a text blog) and right-click it.
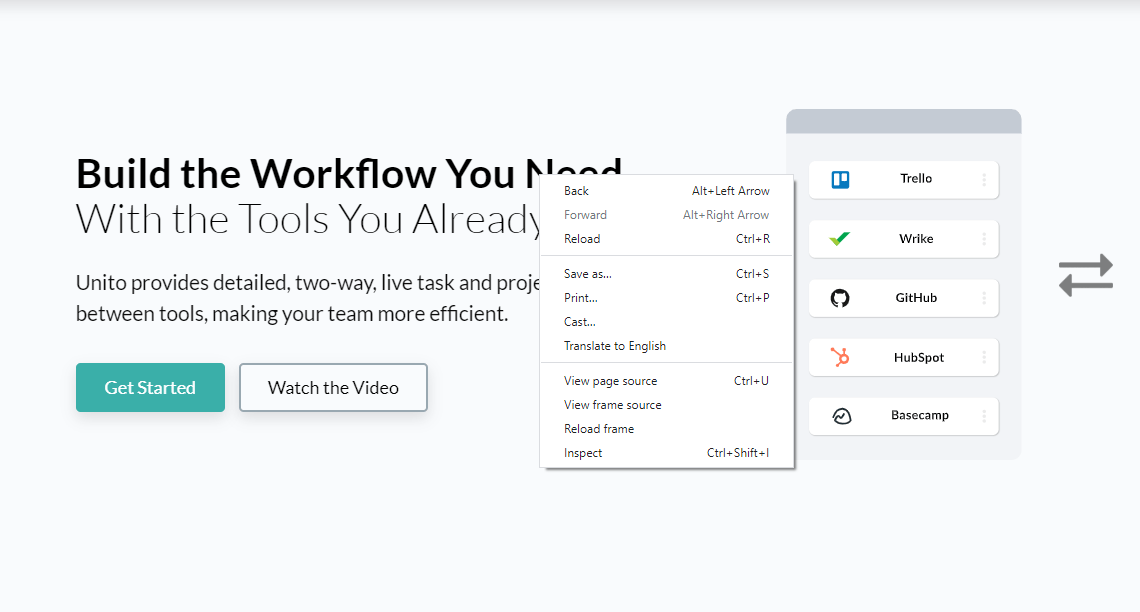
Click on “Inspect” to open the Elements panel.
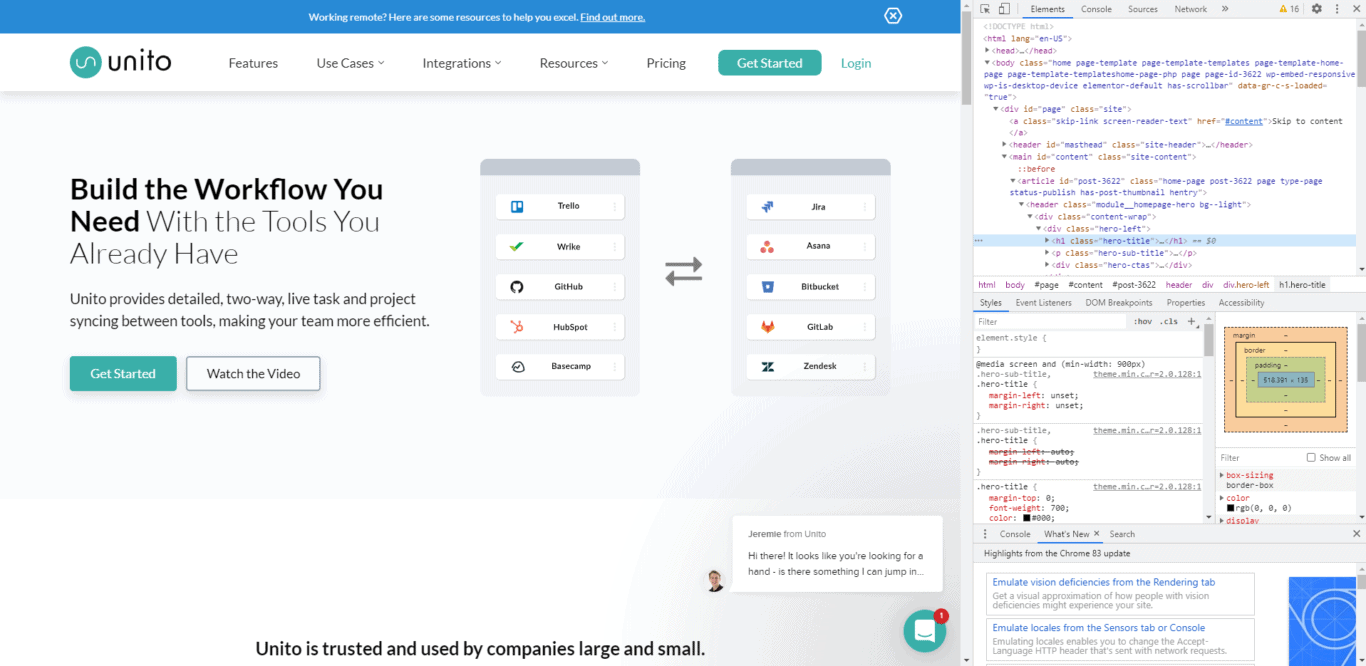
Ok. There’s a lot here. For the purpose of this guide, focus your attention on the frame at the top of this window. See how some of the code is highlighted in blue? That bit of code represents the element you’re inspecting. Now, if you hover over any other bit of code, you’ll see the corresponding element be highlighted on the website.
Notice that your element is part of a sequence of drop-down menus. That’s because most websites use CSS to keep everything organized. For example, you’ll see that our homepage has this line of code that represents the header.
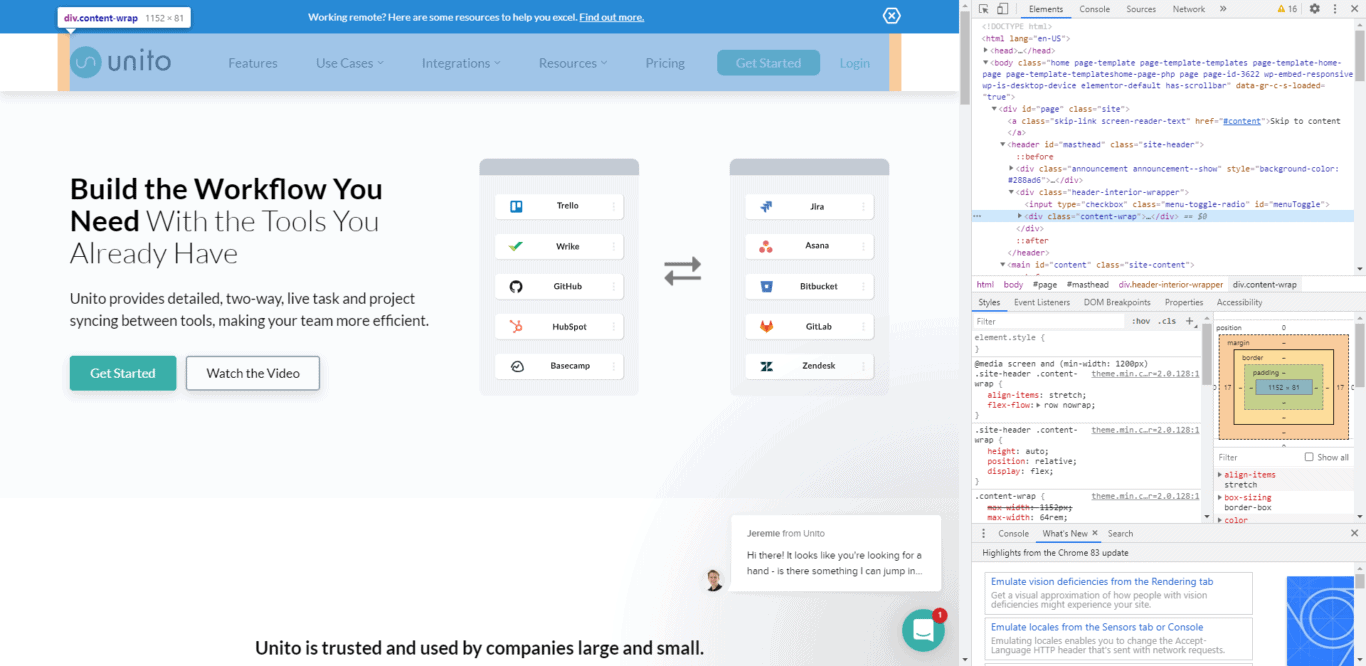
If I click the arrow, it expands to show all the elements contained within that container, including our logo and our navigation.
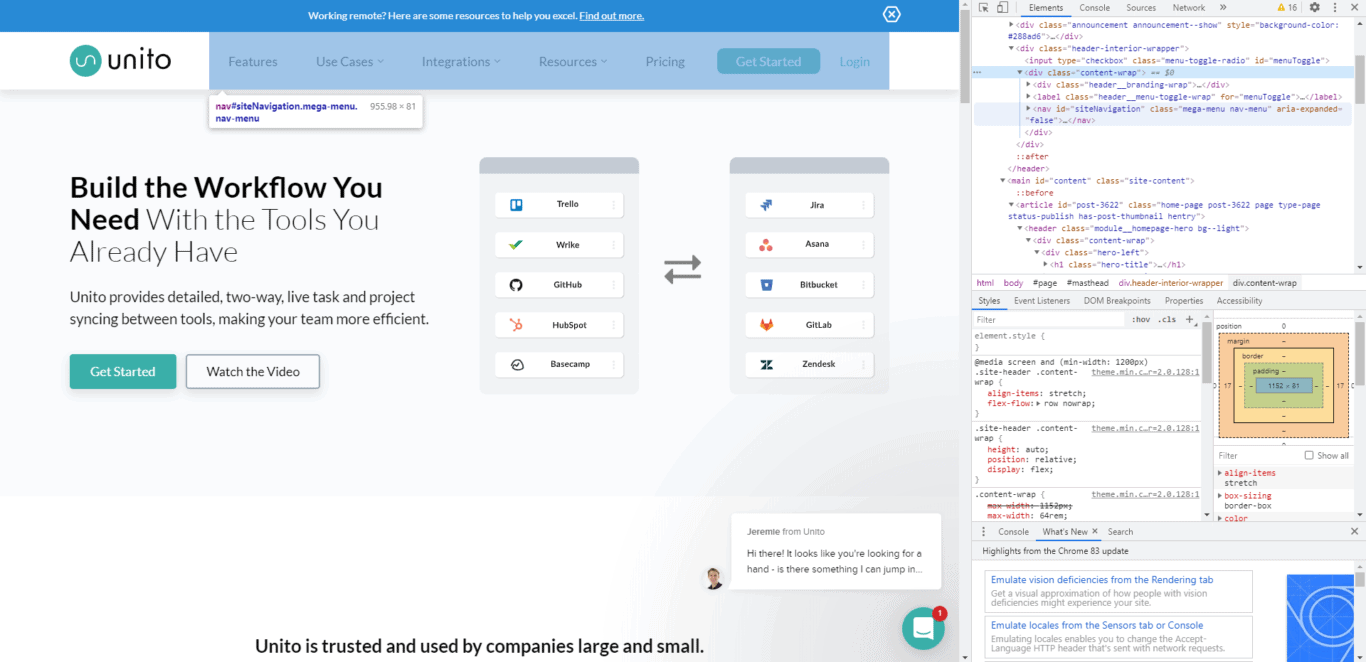
By doing this, you can easily find any element on a web page. If you want a quicker way to access the inspect element panel, just remember Google Chrome’s shortcut: F12. Hitting that key will instantly bring up the side panel.

Inspect element in other browsers
Google Chrome isn’t the only browser that can give you a peek at the code behind a website. Other popular browsers have similar features, although they might have a slightly different name, and the steps to access them might not be exactly the same. Here you’ll also find the inspect element shortcut for each browser.
Firefox
Accessing this feature in Firefox is pretty similar to how it’s done in Google Chrome. In Firefox, you can also hit F12 to bring up the inspect element panel.
- Right-click anywhere on a web page and click on Inspect (or right-click then hit “Q”).
- When the code panel pops up at the bottom of your screen, make sure the Inspector tab is selected.
Microsoft Edge
Microsoft’s newest browser can also give you a peek at the code behind a website. Microsoft Edge has two inspect element shortcuts. You can either hit F12 or Ctrl+Shift+I.
- Right-click anywhere on the web page and click on Inspect.
- Make sure the Elements tab is selected. If you’re curious about Edge’s other dev tools — of which inspect element is one — you can click on Welcome. There, you’ll get a helpful guide to different features like inspect element.
Safari
In Safari, you’ll have to do a bit of legwork before you can use inspect element. You’ll first have to go to Safari’s settings menu. Click on Preferences in the top left corner of your screen, then check the Show develop menu in menu bar option. After this, you can use inspect element like any other browser.
- Right-click on any point of the web page and click on Inspect.
- Once the panel pops up, click on Develop, then click Show Web Inspector.
Now that you know how to access the inspect element panel, here are a few things you can do with it. Note that all these instructions will be using Google Chrome.
A few use cases for the inspect element feature
Testing new copy
Need to write copy for a website and you want to see how it would look on the page? When you inspect an element, you can change it temporarily. No one else is going to see the change, and you just need to refresh the page to get it back to normal. Here’s an example of how to do this with the copy on our homepage:
Right-click on the element you want to change.
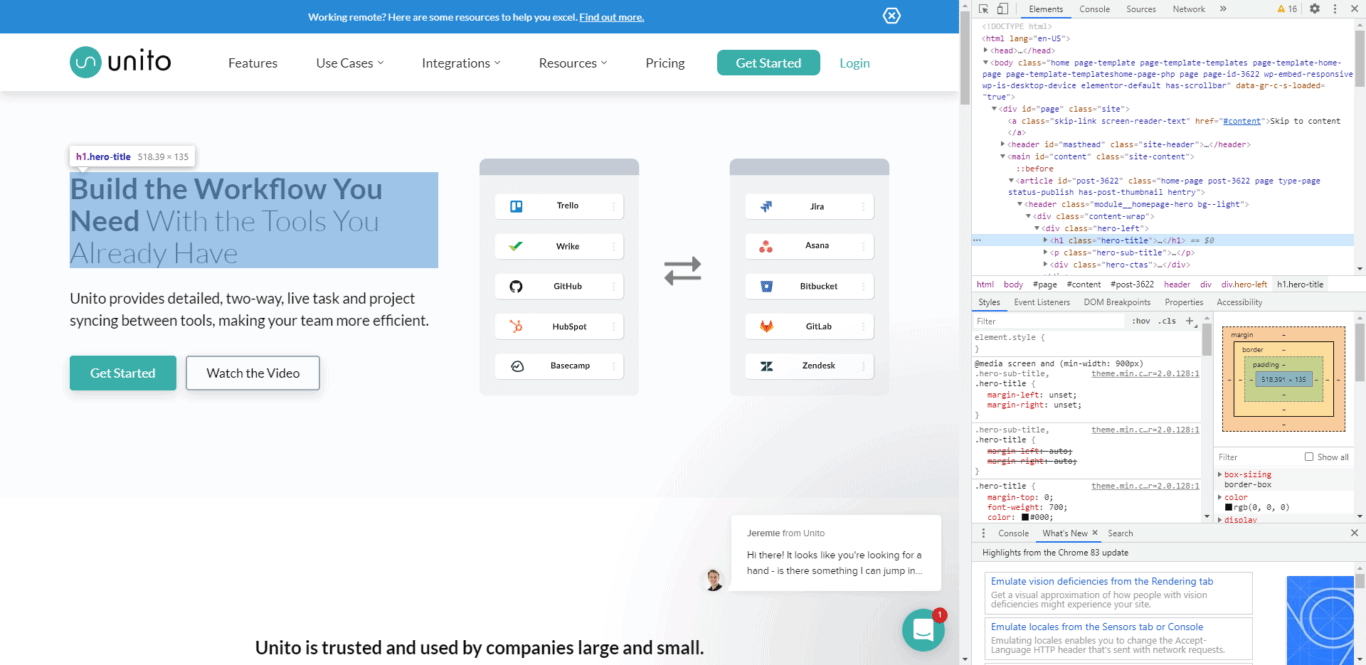
Open the drop-down menu in the “Elements” window until you find the copy you’re looking for.
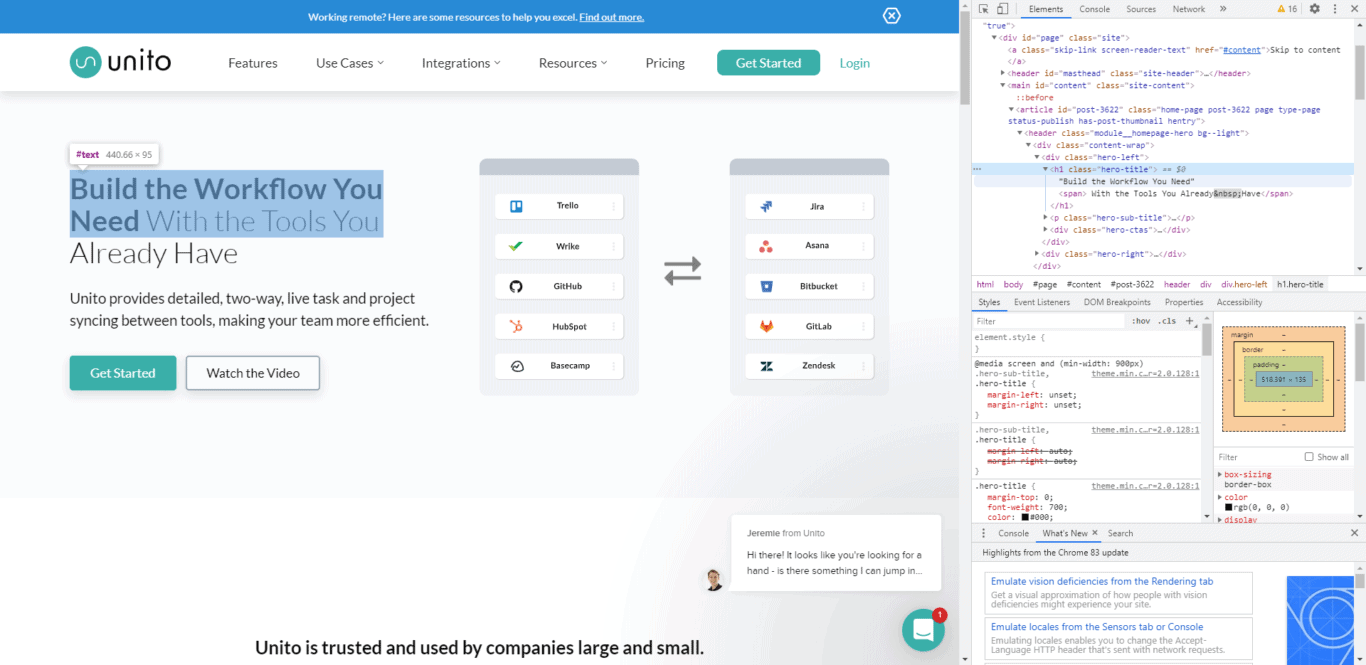
Double-click on the copy you want to change.
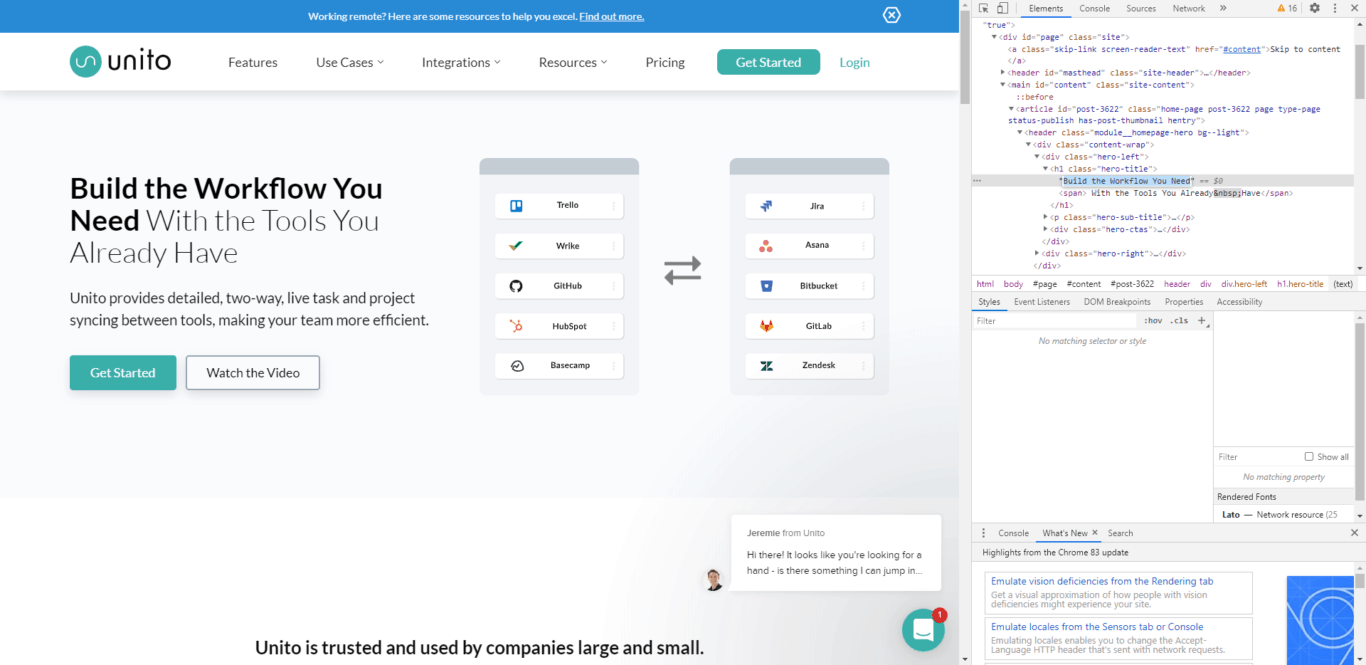
Type in your new copy and hit Enter.
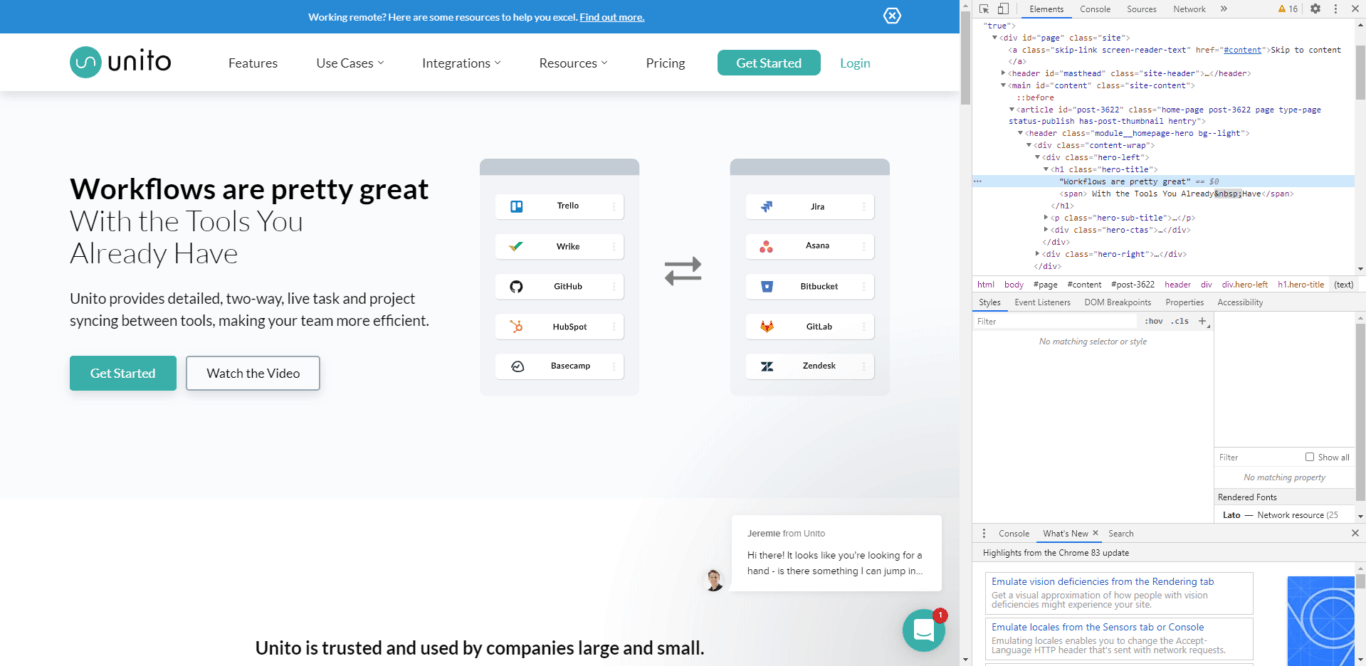
Note that changing the copy won’t necessarily change the formatting of the website itself, so you might get some strange results if your new copy has a different number of characters than what you’re replacing. Still, you can get a sense of what your update would look like before submitting it to your designer.
Previewing different visuals with inspect element
Text isn’t the only thing you can replace on a webpage. You can do the same with visual elements like images, graphics, and more. Again, this can be useful for testing new design options without having to bother designers or developers. Here’s how it’s done:
Right-click on the element you want to change and left-click on “Inspect.”
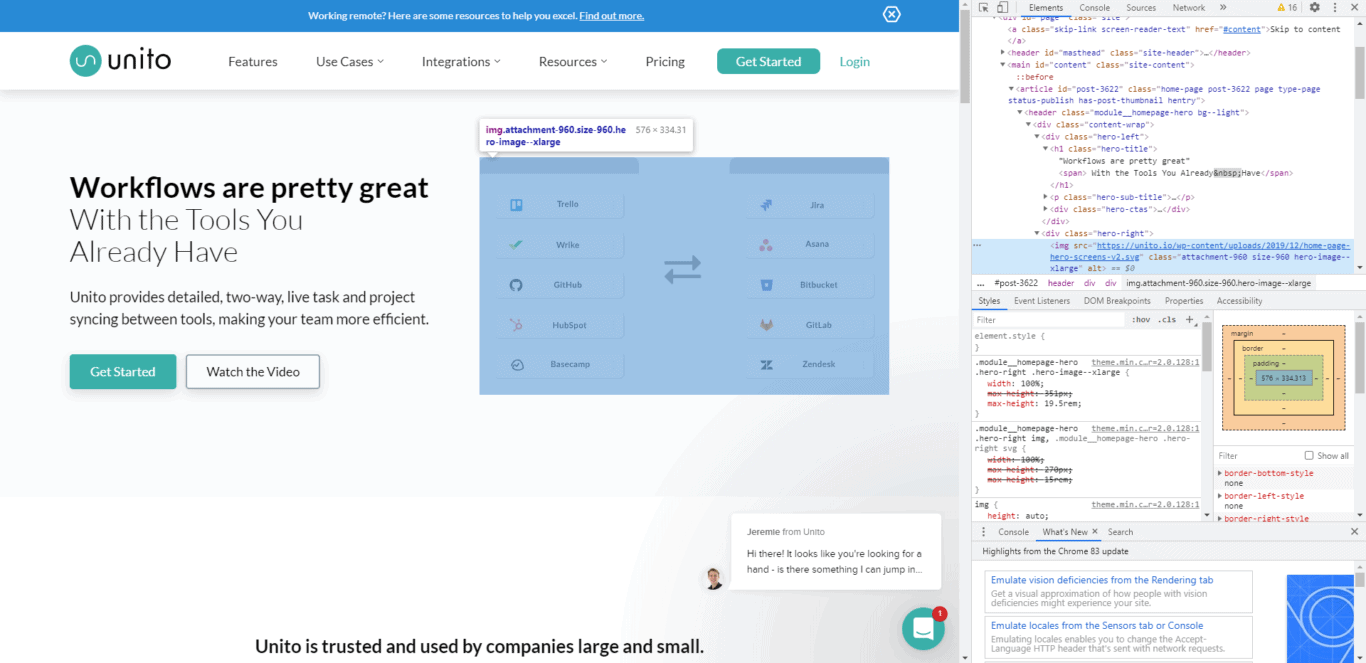
Double-click on the hyperlink in the piece of highlighted code. The hyperlink should end with an image file extension — like jpeg or svg.
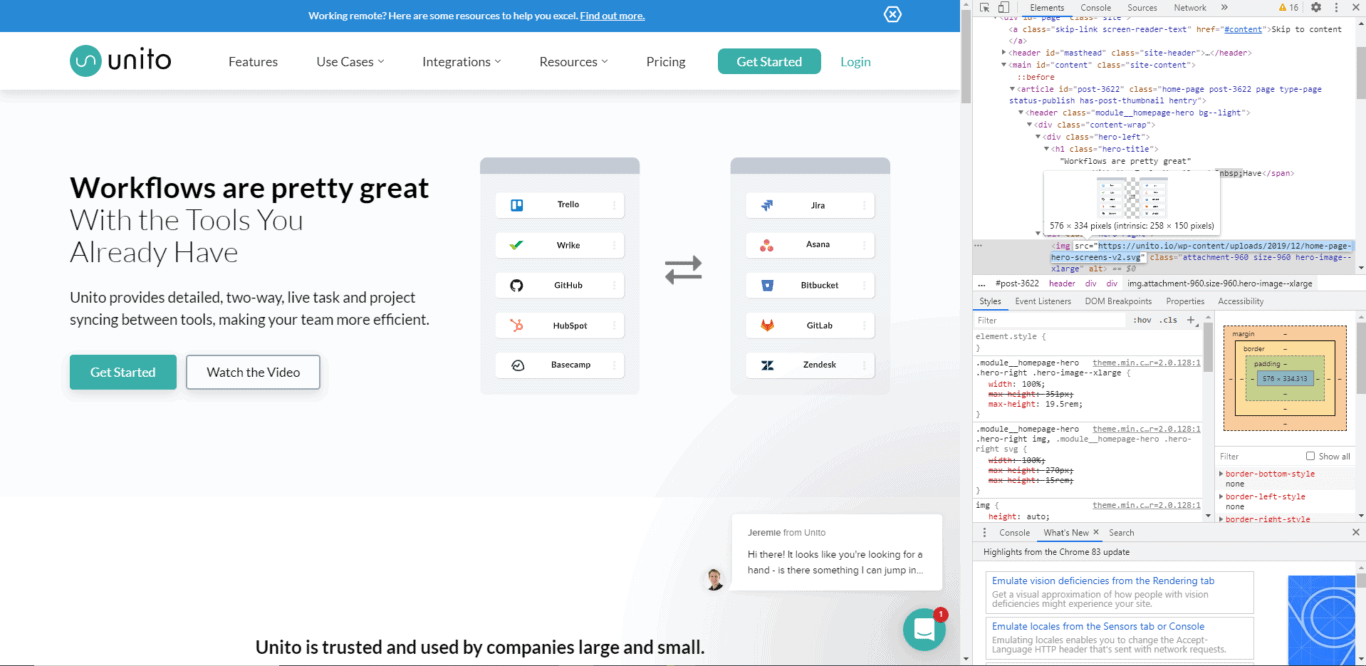
Replace the hyperlink with a link to your new image and hit Enter.
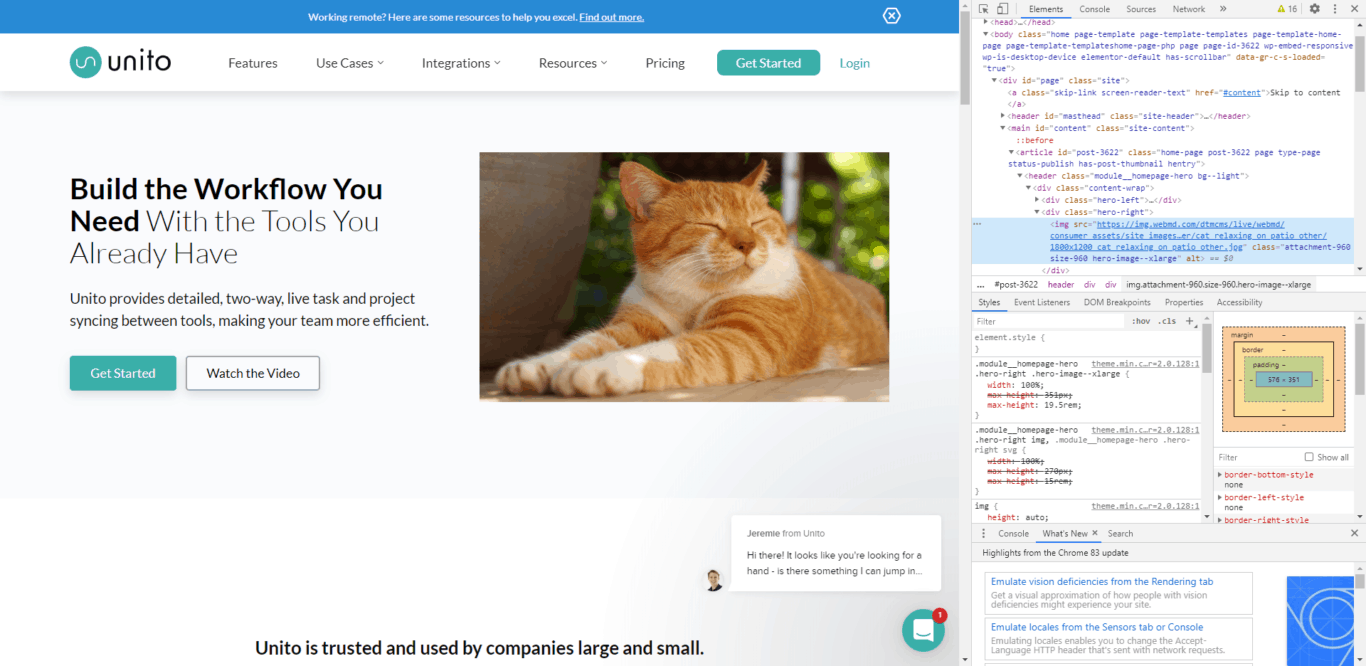
The image you add will have to fit within the frame that already exists on the page. So if your new image is taller than the image it’s replacing, for example, it will be distorted to fit.
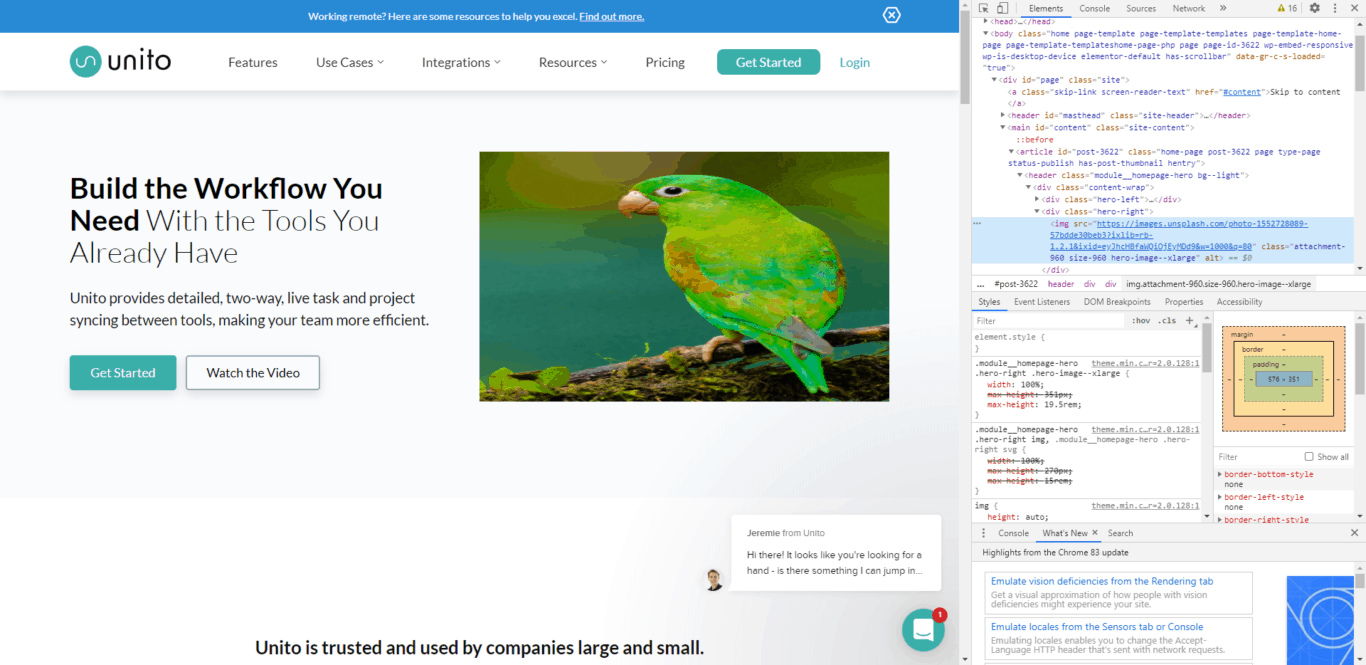
If you want your graphic to fit, you can hover over the element you intend to replace in the code. You’ll get a pop-up telling you its size, and you can resize the replacement graphic accordingly.
Use inspect element to preview the mobile version of a website
So you’ve placed in some new text, or an image, and you want to see how it would look on a mobile device? You can do that with inspect element too! Here’s how:
Right-click anywhere on the page and click “Inspect” (or hit F12).
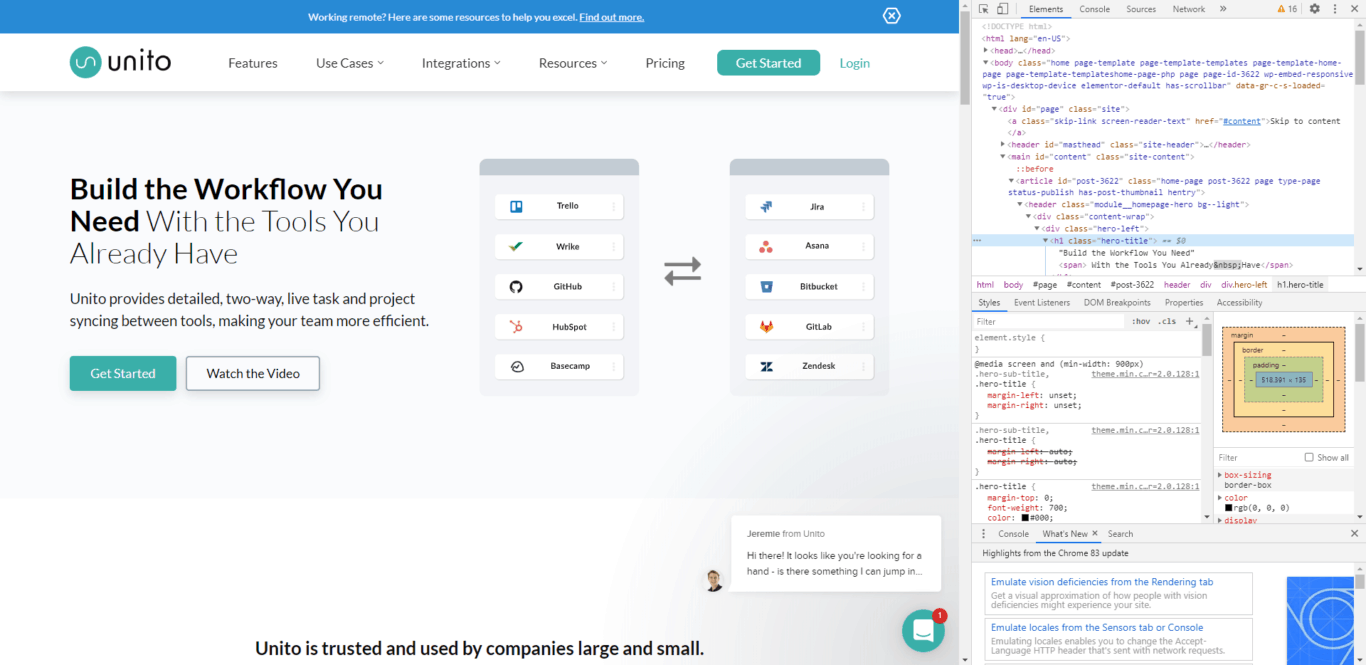
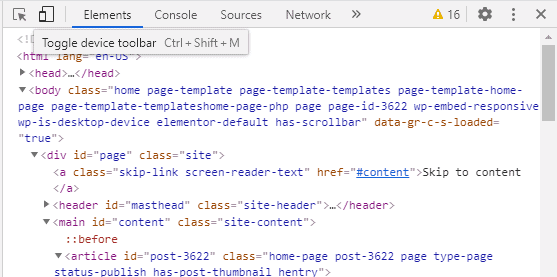
Click the “Toggle Device Toolbar” option.
Refresh the page and you’re done!
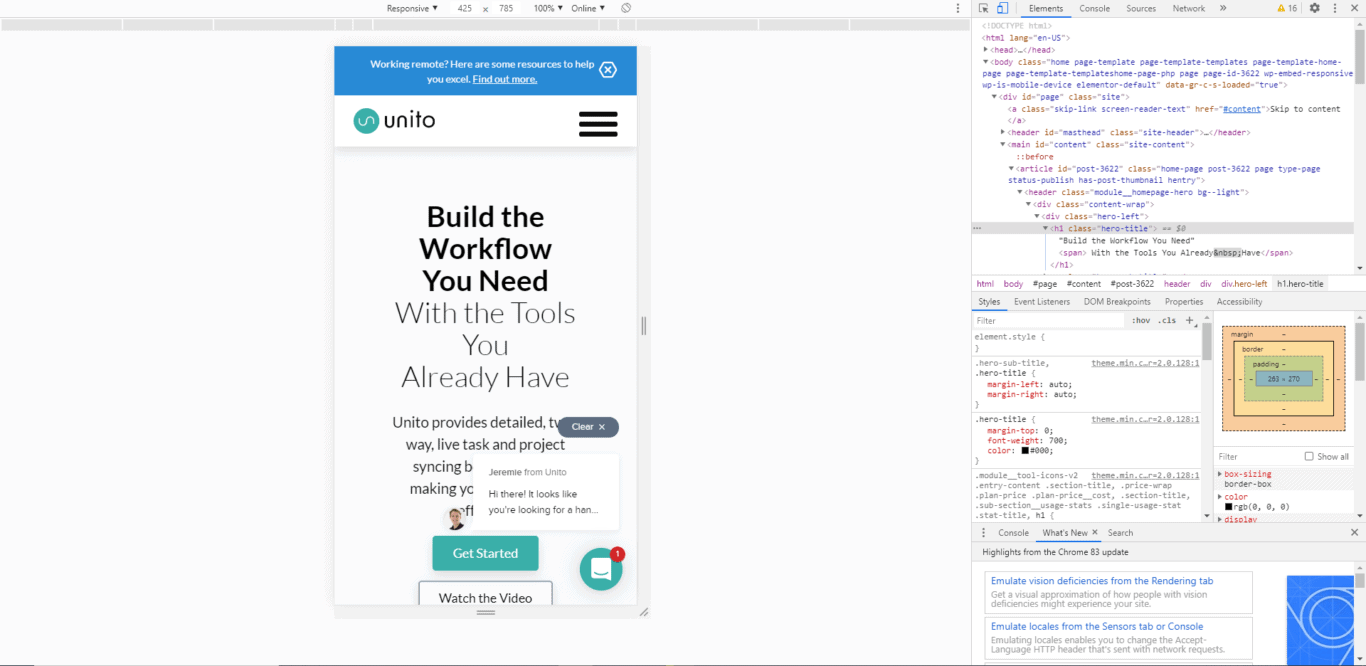
Notice that a few things have happened. First, the website has been resized to the dimensions of a mobile screen. Second, if the website you’re working on has a mobile version — like ours does — you’ll now see that one. Third, your usual mouse cursor has been replaced with a grey circle. This circle replicates the touch-functionality, so if you click, hold, and move your mouse, you’ll scroll through the website like you would on a mobile device.
You’ll also notice this bar at the top of your screen.
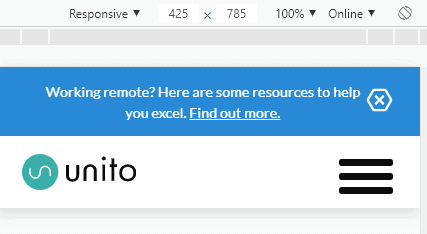
Here’s what each button does, from left to right:
- Device selection: When you click on this drop-down, you’ll be able to select from a range of mobile devices, which changes the size of the display. If you need a device not listed in the menu, you can click on “Edit…” to get a longer list to choose from.
- Resolution: Have a custom size you want to test out? Input it here, width first, followed by height.
- Zoom: Zoom in and out of the website.
- Connection: Want to see how quickly the page loads on different networks? Choose a network option from the dropdown, then start navigating the website. You’ll see how quickly — or not — specific assets load.
- Orientation: Some people like to browse the web sideways. Click on this to find out how you can indulge them.
Using this feature isn’t just for previewing a website on mobile. In fact, for some websites, using the inspect element feature can give you access to commands and features you’d usually only see on mobile. For example, you can’t upload an image to Instagram from a desktop computer — which can be frustrating if you’re a social media manager. However, if you use the mobile emulation feature, you’ll be able to use Instagram as if you were on mobile, and you can upload images from your desktop.
Up for inspection
Inspect element is one of those little browser secrets that feel like a superpower once you learn about them. Now that you know how to use it, try inspecting some of your favorite websites to see how things work behind the scenes.
Before you go
Struggling to get work done across tools? Tool stacks are growing at an unprecedented rate, as are the headaches associated with them. You probably have a favorite tool where you get most of your work done, but it’s not always what your colleagues want to use. Instead of wasting time copy-pasting data and switching tools, why not try Unito?
Unito has the deepest two-way integrations for the market’s most popular work tools. In just a few minutes, you can build your first flow, start syncing work items, and save time.


