
How to Export Google Contacts to a Spreadsheet Automatically with 2-Way Updates
This guide will show you how to export your Google Contacts to a spreadsheet – either in Microsoft Excel or Google Sheets. The steps outlined below can also be followed generally to export contacts from Microsoft Outlook, since the same steps and principles will apply. If you have any questions about this integration, don’t hesitate to get in touch with our live support staff.
In this guide:
- Tools: Google Contacts and Google Sheets
- Use cases: Account management, marketing reporting
- Great for: Marketers, data analysts, project managers
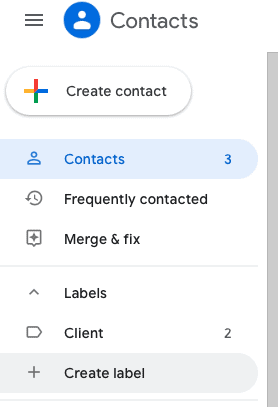
Step 1. Choose a label for your contacts
Head over to contacts.google.com and create a label for your contacts if you haven’t already. The name of your label should apply to your use case – the reason you’re syncing contacts to a spreadsheet.
You could categorize them by region, business relationship, or another criteria of your choice. Next, apply that label to each contact you’d like to import into a Google Sheet.
Step 2. Install Unito Spreadsheet Sync
In order to sync contacts to Google Sheets rows, you’ll first need to add the Google Sheets extension: Unito Spreadsheet Sync from the Google Workspace Marketplace.
When the extension is installed, you just need to insert two columns to help Unito sync your contact data.
Step 3. Add a header row to your spreadsheet
Once the add-on is installed, make sure your table includes a header row with the names of each field you plan on syncing. Unito will use the text in your header row to match fields from your other app or tool sync fields into the columns below.
You can either do this automatically with Unito, or manually.
Here’s how to auto-populate your header row:
After you insert two columns into a blank sheet, click Create Flow from within Unito Spreadsheet Sync and Import data from the tool of your choice. When you create a flow this way, you’ll be given an option to auto-populate your row header.


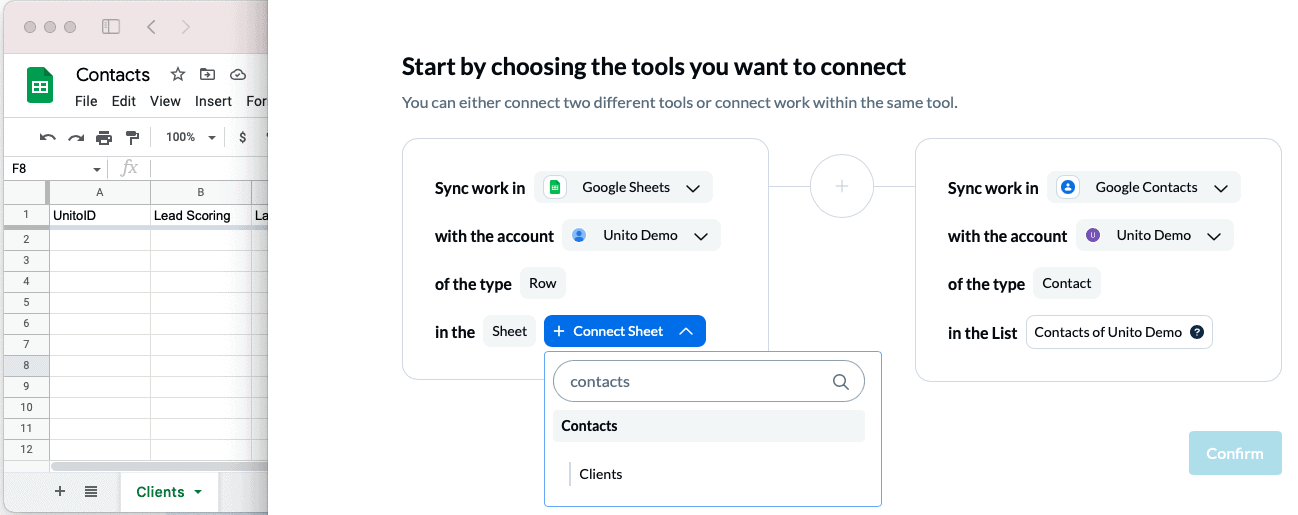
Step 4. Connect your spreadsheet and Google Contacts to Unito
- Open the Unito App if you haven’t already done so, and click +Create Flow.
- Select Start Here to connect each app in any order.
- Select an account for each.
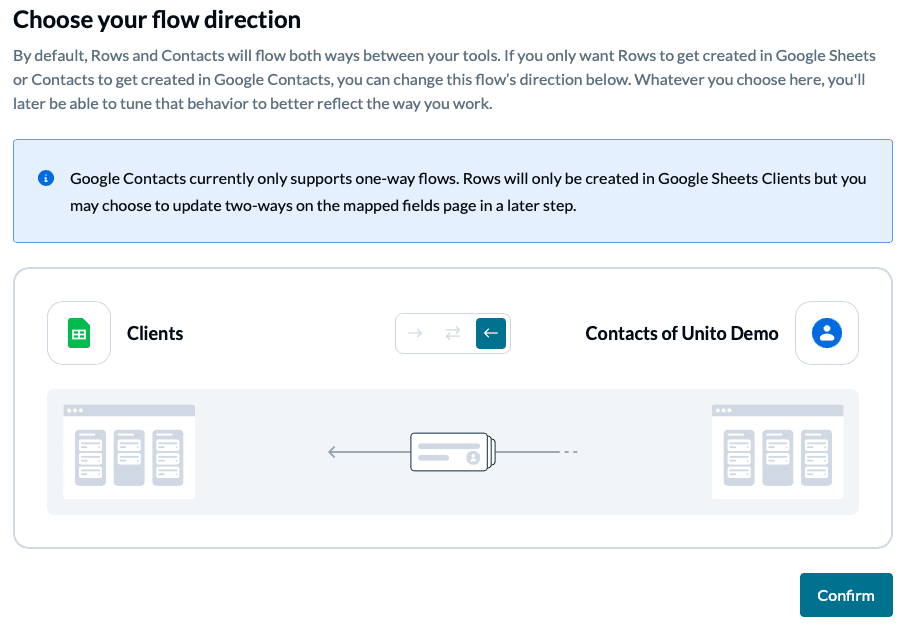
Step 5. Confirm a flow direction from Google Contacts
This part is simple: for this integration, we can only choose a one-way flow from Google Contacts to your Spreadsheet.
This means new contacts you add to Google Contacts will create identical rows in your Google Sheet with matching information, but not the other way around.
Since that’s all we need right now, we’ll select confirm.
Step 6. Set rules to export contacts to your spreadsheet
Rules will help us decide which contacts we want to export from Google Contacts into our spreadsheet. They can also help us filter out unwanted or unrelated contacts from syncing accidentally. This is where our labels come into play.
In Unito, select Add a new trigger, then Label, and pick all the labels you created earlier.
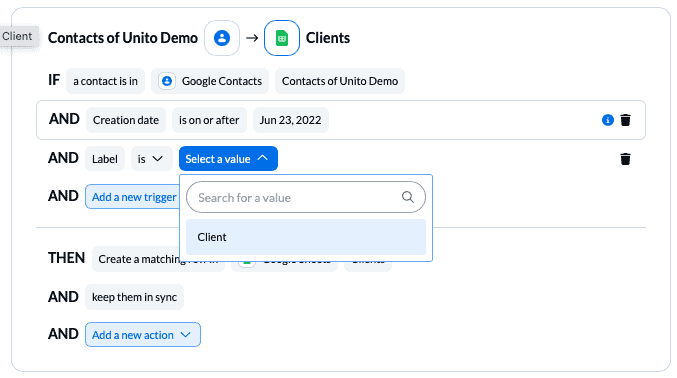
Now, only those contacts with labels from these rules will appear in your Google Sheet.
Step 7. Select field mappings based on header rows
Here, Unito will pair up the fields from your header row in Google Sheets with the details of your Google Contacts. So if you’re following our guide, at this stage you’ll be prompted to auto-populate your spreadsheet with Unito. Otherwise, you’ll have to do so manually before you can map fields.
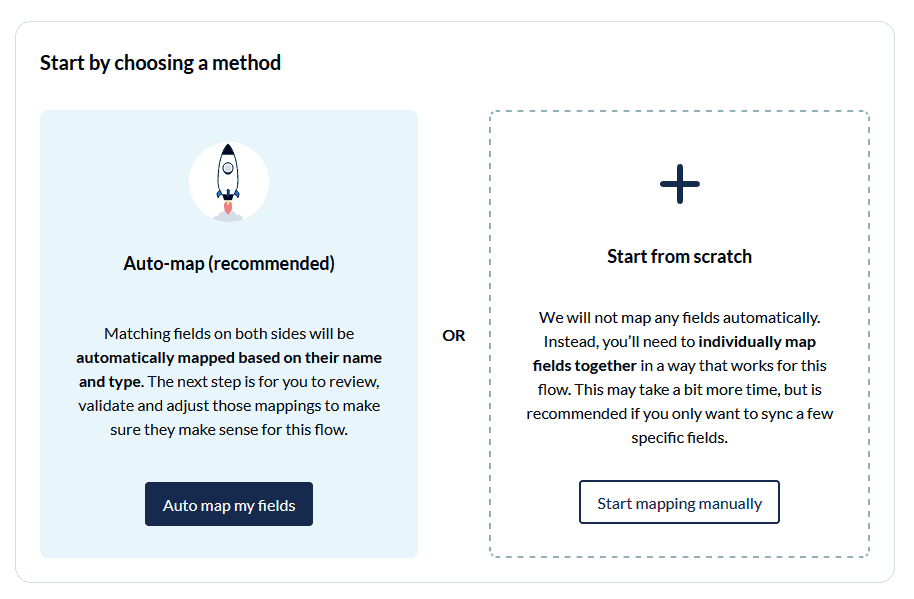
If you don’t auto-populate, you’ll see this screen below which can auto-map a list of fields in Unito but not in Google Sheets.
Next, you’ll see the relationship between fields in each tool. This table tells you how changes to your spreadsheet affect contacts or vice versa.
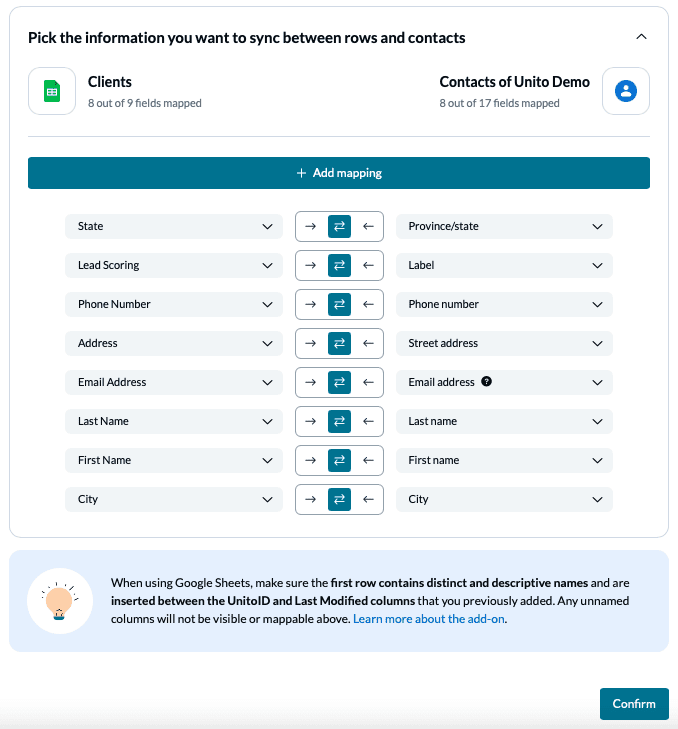
If you choose a one-way flow for any field, then only changes in the source field will cause similar changes to appear in the destination field. e.g., if Google Sheets is your source or you choose a 2-way sync, then any changes made to your spreadsheet will cause those changes to appear in Google Contacts.
Note: If you change a column name in a synced spreadsheet, be sure to update your flow’s field mappings in Unito or else your data will stop syncing.
Click Confirm when you’re satisfied with your field mappings to proceed.
Find out more about setting field mappings.
Step 8. Save and close to launch your flow between Google Sheets and Google Contacts
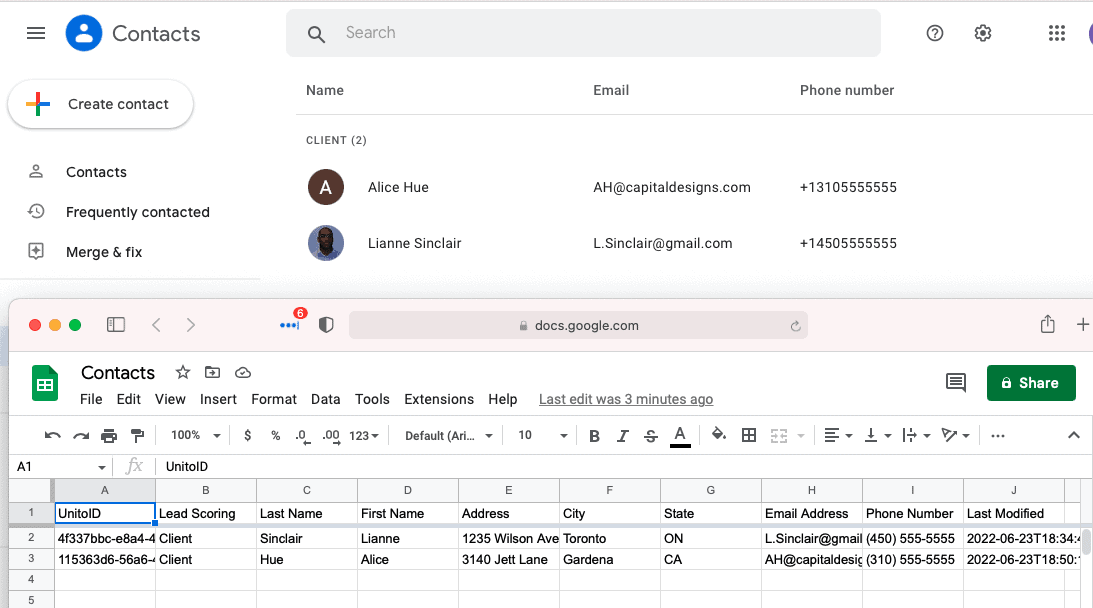
If you’ve followed the steps above, your flow will now add rows in either Google Sheets and/or Microsoft Excel based on rows added in the other. Here is an example of our fully-synced contacts and spreadsheets:
If you have any questions, don’t hesitate to reach out and let us know.
What’s next after importing Google Contacts into a spreadsheet?
- Learn how to duplicate this flow to suit other use cases you may have in mind.
- Read our Google Contacts primer and Google Sheets primer to better understand each integration’s capabilities and limitations.
- Connect Google Sheets to HubSpot to streamline sales reporting.
- Try syncing Google Calendar to Trello, Asana, or Notion.
Best practices and troubleshooting for Unito’s Google Sheets integration
Common error messages
If you see either of the error messages below, it likely indicates that one or both of the columns: “UnitoID” and “Last Modified” have been deleted or modified from your sheet. You’ll need to re-insert them (either manually or with the add-on) before your data will sync again.
“We’ve detected that mandatory columns have been removed from your Google Sheet. Let’s get you back up and running.”
“The container configuration does not allow us to sync.”
Why export Google Contacts to a spreadsheet with Unito?
There are a number of reasons why you might want to import contacts into a Google Sheet. Sales reps can use it for reporting, agencies with multiple clients might like to have a dedicated list that can be easily shared, or maybe you just prefer the layout of a spreadsheet tool. Syncing Google Contacts or Microsoft Outlook to a spreadsheet with Unito can help you dive deeper into your data from the familiarity and flexibility of a table.
In any case, automating the transfer of contacts from one app to another is simple and shouldn’t involve manually copy pasting details over and over again. The best part about an automated solution is that if details become out of date, you can simply change it in one space and watch the other update instantly.
Getting around with Google Sheets and Unito
You can find more information on the following topics in Unito’s knowledge base: