How To Create a Timeline in Google Sheets (2 Methods)
Spreadsheets make the world go round. They might be the single most-used software tool out there, and you’d be shocked by how widespread they are. But even though they’re so universal, they have a few problems. For one, they’re designed to crunch numbers and handle data. So if you’re using one for project management, you might run into some problems. Like, for instance, how you’re supposed to represent time-sensitive tasks. Project management tools do this natively, but can Google Sheets be used to create timelines?
It turns out it can. Not only that, but there are two main methods you can use to create a project timeline in Google Sheets.
Why use a timeline view in Google Sheets?
If you’re used to using your spreadsheets in a specific way, you might not have experimented with the timeline view in Google Sheets yet. Here are a few ways these timelines can be incredibly useful for you and your teams:
- Project management: If you’re not using a dedicated tool for managing project tasks, your project managers might be using spreadsheets to track key milestones. With a timeline view, you can get a better overview of which tasks need to get done when, and how they overlap time-wise.
- Marketing campaigns: A marketing campaign is often best represented with a timeline visualization since each piece of the campaign is dependent on the others. By having your campaign in a timeline sheet, you’ll be able to share it with just about anyone in your organization.
- Employee onboarding: Onboarding new employees is definitely time-based, with the first three months of a new employee’s tenure often being the most important. A timeline in a spreadsheet is a great way to track all the tasks involved with onboarding.
- Tracking dependencies: Any other initiatives that have dependencies between tasks (meaning that some tasks need other tasks to be completed before they can start) can benefit from a timeline.
First method: using built-in timelines
With this feature, you can build a basic timeline right in a Google spreadsheet, without any extra tools. Here’s how it’s done.
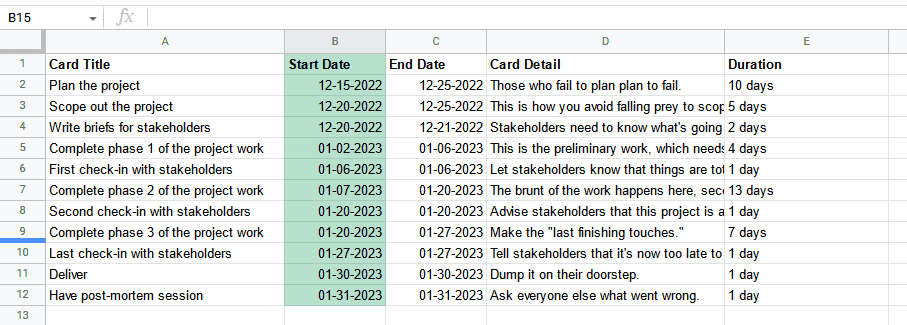
To create a proper timeline, the folks at Google suggest that your sheet have the following columns:
- Card title: This will give each task a name.
- Start date: Use a date format to represent when the task starts.
- End date: Use a date format to represent when the task ends.
- Card detail: Add a summary, notes, or comments for each task.
- Duration: Cover the amount of time each task will take.
Once that’s done, your sheet should look like this.
To create your Google Sheets timeline, first select the cells you want represented in your timeline.
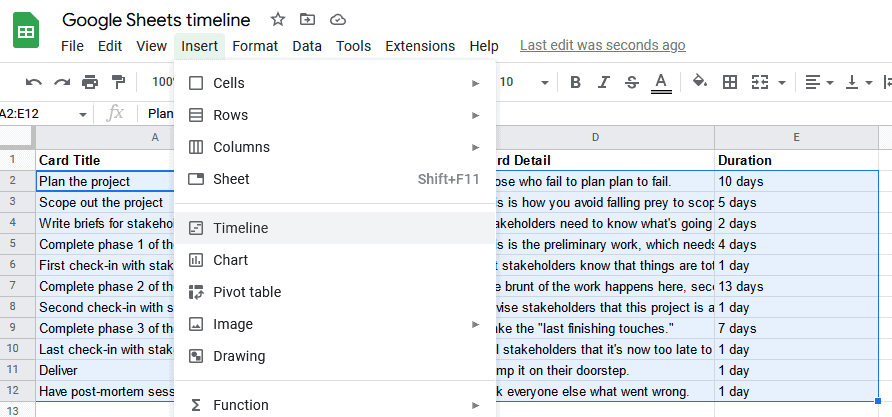
Then open the Insert menu and click Timeline.
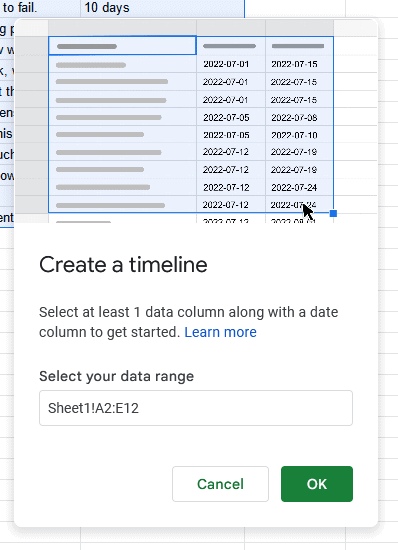
You’ll get this screen, where you can confirm the data you want included in your timeline. Make sure to check that the Select your data range field represents all the data you want to include then hit OK.
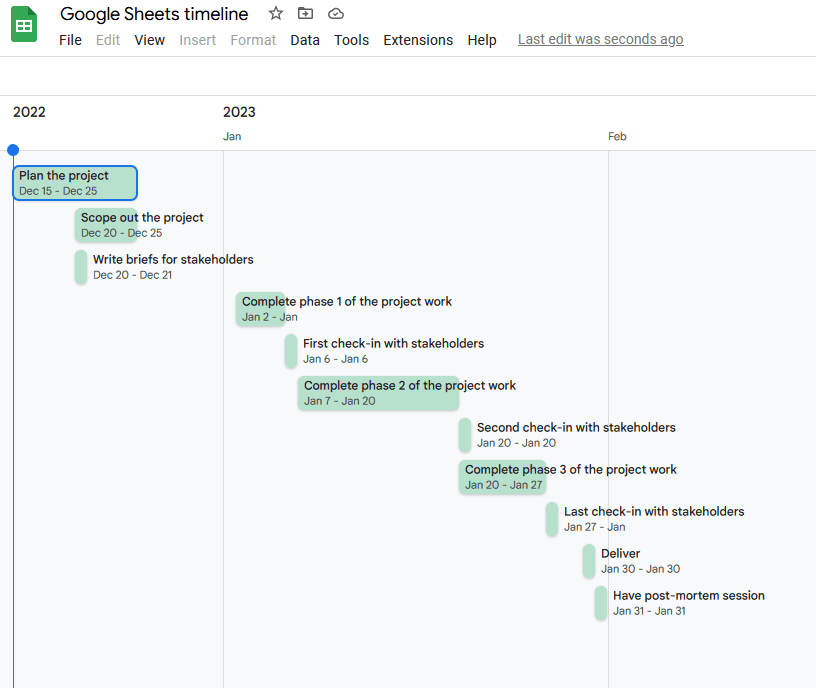
And just like that, you’ve got yourself a Google Sheets timeline! All the tasks you outlined in your sheet are now represented in this view.
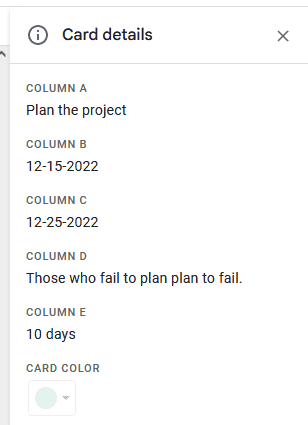
Click on a task, and you’ll see its name, date range, description, and any other data you have in your sheet.
Limitations of this method
It’s hard to beat this method, as far as simplicity goes. But does that mean it’s the best for timeline creation? Here are some reasons why that might not be the case:
- Your data is trapped in Google Sheets: This is a great way to represent tasks in a timeline if your entire workflow begins and ends in Google Sheets. But if you’re dealing with project management tools or other database tools, then you’re out of luck.
- There’s no filtering: When creating your timeline, you need to select a range of rows. If you need to exclude a few rows, you can do that manually. But how realistic is this when you need to filter out hundreds of rows?
- You’re missing out on dedicated PM features: Sure, this timeline is a great step up if you use Google Sheets for project management. But what about tracking dependencies? Subtasks? Or even time tracking?
If only there was a way to combine what you love about Google Sheets with the project management features you need?
Second method: create better timelines with Unito and your favorite tool
Unito is a no-code workflow management solution with the deepest two-way integrations for some of the most popular tools on the market. Tools like Google Sheets, Asana, Trello, Jira, and more.
With the right Unito integration, you can keep your data in Google Sheets and sync it to a dynamic timeline in your project management tool of choice. The best part? Everything’s updated automatically in both tools.
Here’s why Unito is the best way to create Google Sheets timelines:
- Your data is free to travel: Sync your Google Sheets data to a project management tool, another database, a software development tool, or any of Unito’s 30+ integrations.
- Filtering data is built-in: You don’t have to sync your entire Google Sheets spreadsheet to your project management tool. Use Unito’s rules to filter out the rows you don’t want synced.
- It’s the best of both worlds: In most project management tools, creating a timeline view only takes a click or two. By syncing Google Sheets data to your tool of choice, you can get a timeline view whenever you want.
Want to see just how easy it is to use Unito to sync Google Sheets data? Here’s a quick video guide.
Now let’s look at how easy it is to build your first Unito flow and get better timelines from Google Sheets. In this example, we’ll be syncing Google Sheets with Asana.
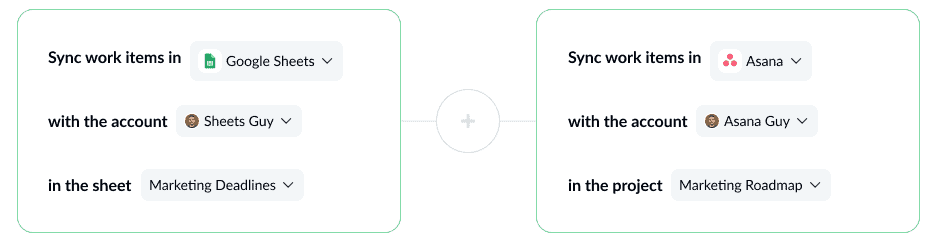
- Start by connecting your tools and picking the Google Sheets spreadsheet you need to sync data from. Then, pick the tool where you want your timeline to end up.
- After that, you can set up rules to filter out rows you don’t want in your timeline.
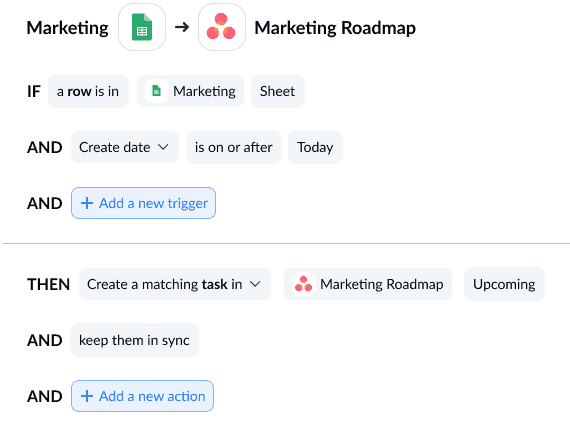
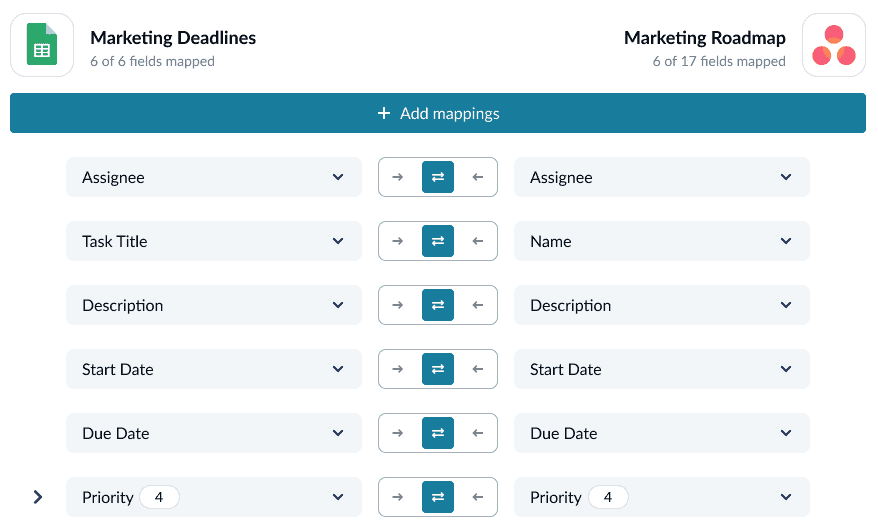
- The last step before launching your flow is mapping fields across tools. This lets Unito know where your data should go, even if those fields are different in each tool. Note that Unito can map similar fields for you automatically, but you might have to customize the ones that don’t already match up.
And that’s it! Once you’ve mapped your fields, you can launch your Unito flow and watch it generate a dynamic Google Sheets timeline.
FAQ: Making a timeline in Google Sheets
How do you make a timeline in Google Sheets?
To make a timeline in Google Sheets, you first need to lay out your rows in a specific way. Create these columns in your sheet:
- Card title
- Start date
- End date
- Card detail
- Duration
Once your data is laid out the right way, just highlight it all, then hit Insert in your top bar then hit Timeline. Google Sheets will have your timeline created in moments.
Does Google Sheets have a project timeline template?
While Google Sheets doesn’t necessarily have a built-in project timeline template, you can find quite a few of these templates online with just a quick Google search. Here are a few project timeline templates:
Can you add data from other tools to a Google Sheets timeline?
Absolutely! With a two-way sync solution like Unito, you can connect your Google Sheets timeline to project management tools like Asana and Jira, software development tools like GitHub and GitLab, reporting tools like Google Analytics and Facebook Ads Manager, and more. These integrations will even edit data in Google Sheets automatically to match data in other tools.