How to Sync NetSuite and Jira With Two-Way Updates
In this guide, you’ll find everything you need to know how to set up an integration that syncs NetSuite records with Jira issues through an automated two-way flow from Unito. Since Unito is a completely customizable platform with a no-code interface, you can set up this integration without any support from your technical teams. No need to troubleshoot complex automations or rely on expensive consultants, either.
Overview
- Tools: NetSuite and Jira
- Use cases: Task management, project reporting, account management, product management, software development
- Great for: Project managers, software developers, product managers, consultants, stakeholders and executives
Unito’s two-way sync integration for NetSuite and Jira allows users of any technical background, from product managers to software developers and team leads, to sync NetSuite records with Jira issues. This integration syncs updates back and forth between both tools, creates new work items, and can even automate repetitive actions. This in-depth guide shows you how that’s done.
By the end of this guide, your NetSuite-Jira integration will:
- Create new NetSuite records based on Jira issues.
- Create new Jira issues synced with NetSuite records.
- Update fields in real-time with a two-way sync when you work in either tool.
Before you start
Connecting NetSuite to Unito for the first time
You’ll need a NetSuite admin account and the following information:
- NetSuite Application ID
- OAuth Client ID
- OAuth Client Secret
You’ll find a full guide to getting this information here.
Setting up Jira
If you’re connecting Jira to Unito via OAuth 2.0, then simply follow the on-screen instructions when adding your account for the first time:
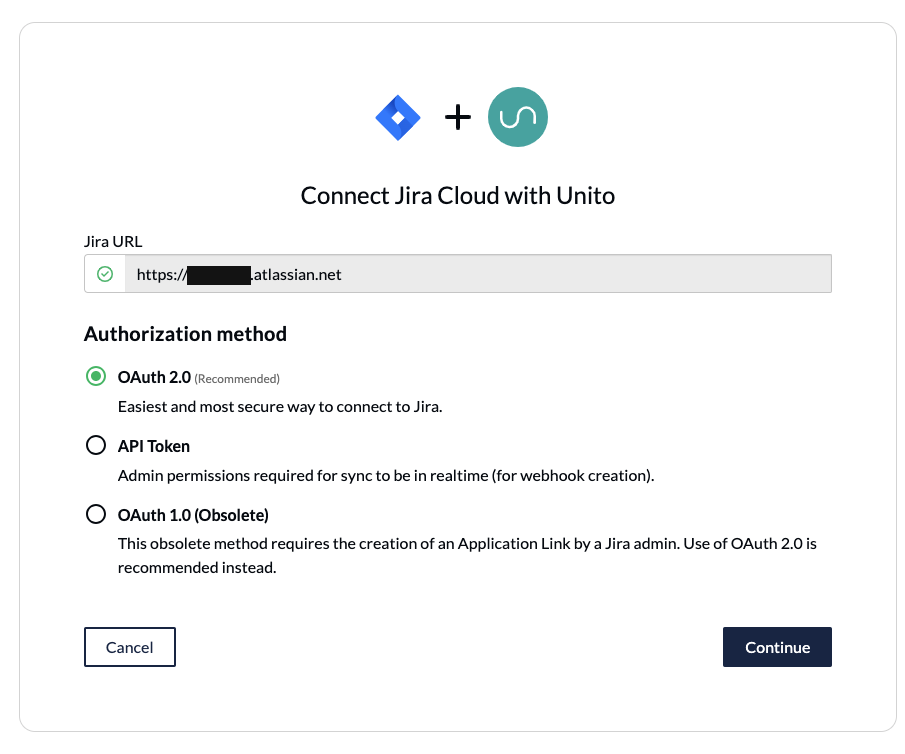
If you’re not using OAuth 2.0 to connect your Jira Cloud workspace to Unito, you’ll need to do the following:
- Set your Jira contact email visibility to anyone in your Jira profile page.
- Set up an application link in Jira to sync your issues to NetSuite.
If you’re connecting an on-premise Jira Server instance to Unito, you’ll need to follow this guide. You can also use ngrok to connect Jira Server to Unito.
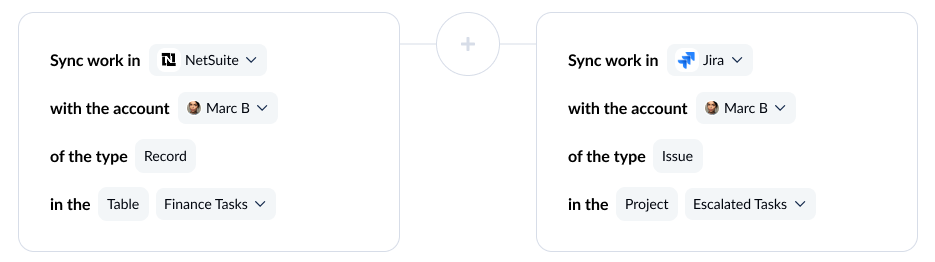
Step 1: Connect NetSuite and Jira to Unito
- Sign up for Unito.
- Click +Create Flow in the Unito app.
- Click Start Here to connect NetSuite and Jira.
- Click +Choose account for each tool and complete the authorization process.
- Click Confirm.
Connecting tools to Unito for the first time? Here’s an in-depth guide.
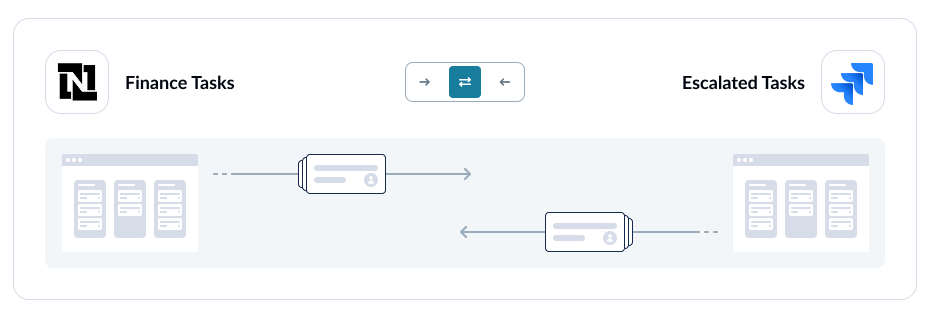
Step 2: Choose flow direction for records and issues
With flow direction, you decide where Unito automatically creates work items to match those you create manually. You have three options:
- 2-way: Both NetSuite records and Jira issues are automatically created by your Unito flow to match items you create manually in each tool.
- 1-way from NetSuite to Jira: Jira issues will be automatically created by Unito to match NetSuite records you create manually. Unito won’t create new NetSuite records.
- 1-way from Jira to NetSuite: NetSuite records will be automatically created by Unito to match Jira issues you create manually. Unito won’t create new Jira issues.
Want to know more about flow direction? Check out this guide.
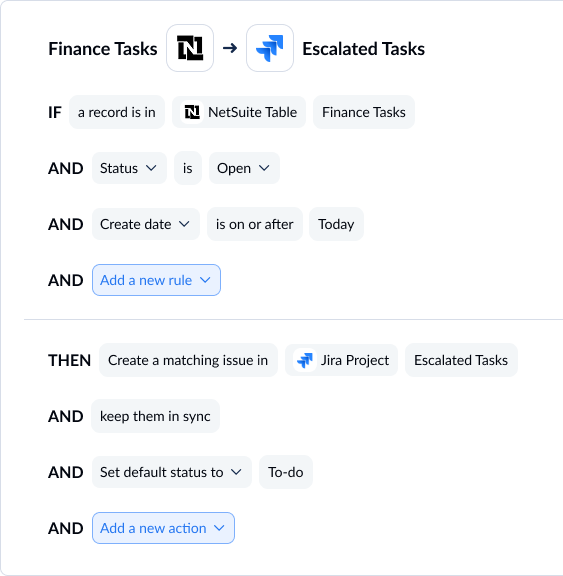
Step 3: Build rules to sync specific work items
Unito rules can do two things:
- Filter out work items you don’t want synced. For example, you could create a rule that only syncs NetSuite records opened after a certain date.
- Automate certain actions. For example, you could create a rule that automatically assigns new Jira issues to a certain person on your team.
To start building your rule, click Add new rule, then choose a trigger and action.
Want to learn more about rules? Check out this guide.
Step 4: Map fields between NetSuite and Jira
When you map fields, you pair fields in NetSuite with fields in Jira so data goes exactly where it needs to. Unito can usually map most fields automatically, whether they’re exactly the same (Owner→Owner) or just compatible (URL→Text). You can also choose to map fields manually to fully customize your flow.
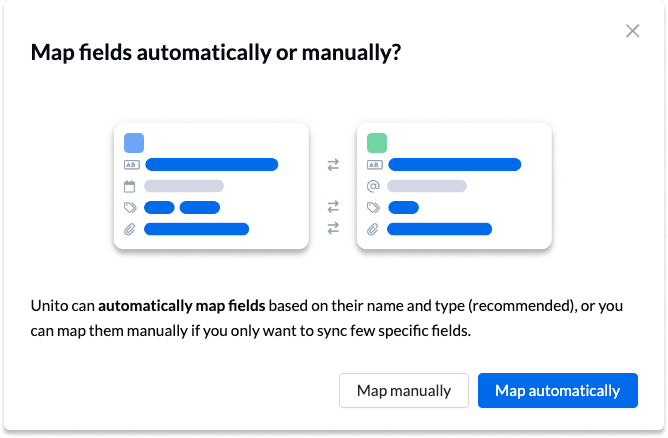
Here’s what you’ll see when Unito maps your fields automatically.
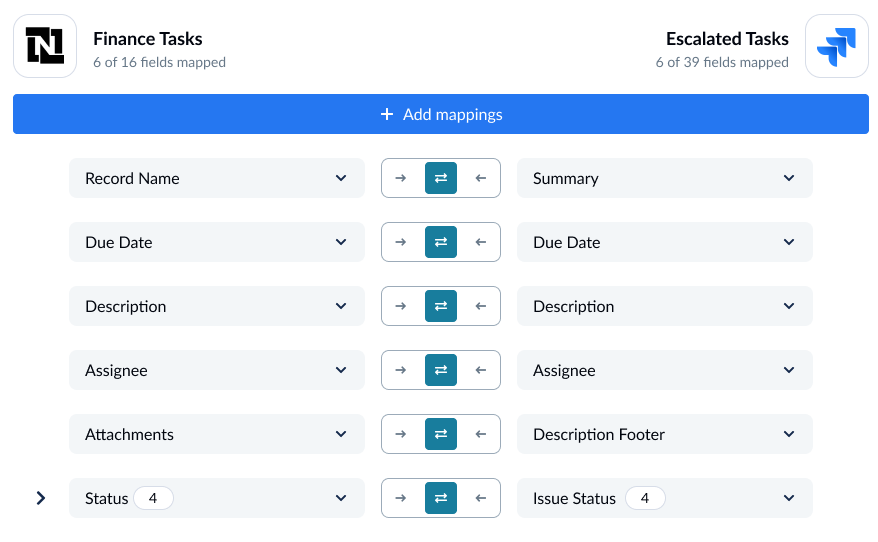
You can add a field mapping by clicking +Add mapping, then Select a field. When you choose the field you want to map in one tool, Unito will automatically recommend compatible fields in a dropdown under the other tool.
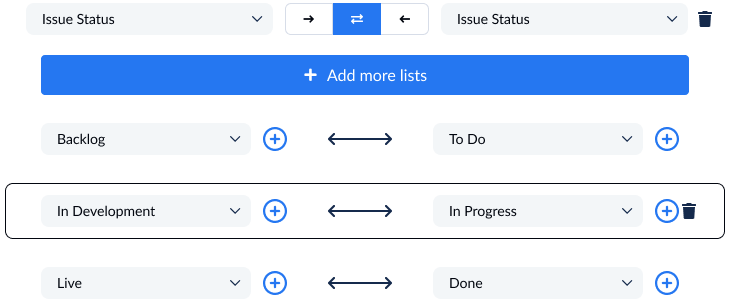
Some fields have a cog icon. They can be customized further once they’re mapped. For example, a Status field can be customized so its options match those in another field.
Step 5: Launch your NetSuite-Jira integration
That’s it! You’re ready to launch your flow. Unito will automatically keep NetSuite records and Jira issues in sync. This will allow your teams to collaborate more effectively without copying and pasting data or constantly switching tools.
Ready to optimize your workflow?
Meet with our team to see what Unito can do for your workflows.
FAQ: NetSuite-Jira integration
Why should I integrate NetSuite with Jira?
Syncing Jira issues with NetSuite records allows your teams to work more effectively together without constantly switching back and forth between tools. This allows:
- Development teams who plan sprints and projects in Jira to share essential updates with teams in NetSuite so they always have full context.
- Teams working in NetSuite can sync updates to Jira so stakeholders have up-to-date reports in the platform they use regularly.
- Improving collaboration between oversight teams in NetSuite and other teams in Jira.
How do I add a Jira issue to NetSuite?
While you can manually transfer data from Jira issues to NetSuite records, the best way to do this is with Unito’s integration. With a single flow, you can turn issues from a single Jira project into NetSuite records automatically and sync any updates between both tools.
Why should I use Unito’s Jira-NetSuite integration?
Unito has the deepest two-way integrations on the market, but they only take a few clicks to set up.
When you connect your Jira issues with NetSuite, NetSuite records can become Jira issues and vice versa. That means everything from comments to due dates and assignees can get synced across with no extra work. No morecopying and pasting, no more data entry, and no more missed updates. You get the feeling of everyone working in a single tool without having to designate a middleman or force anyone into a tool they don’t use.
What’s next after integrating NetSuite with Jira?
Need to integrate NetSuite or Jira with other tools in your stack? Check out our other guides: