How To Move Data Between Multiple Bases With Airtable Sync (2 Methods)
While Airtable is one of the most powerful database tools out there, it comes with an inherent problem. Because building a base is so easy, you’ll probably end up with a workplace full of one-shot bases, all with little bits of data that could probably be more useful elsewhere. So how do you make sure that you have the right information in the right place, at the right time? You build an Airtable Sync.
There are two main methods for doing that. One is using Airtable’s own Airtable Sync feature, and the other is building your own with Unito.
First method: use the Airtable Sync feature
Airtable has a built-in way to sync data between bases which they call, appropriately, Airtable Sync. In just a few clicks, it’s possible to pick a source table, create a destination table, and get your data flowing automatically. It’s pretty reliable too; your Airtable Sync will check for changes every five minutes or so. Here’s how you can build your own.
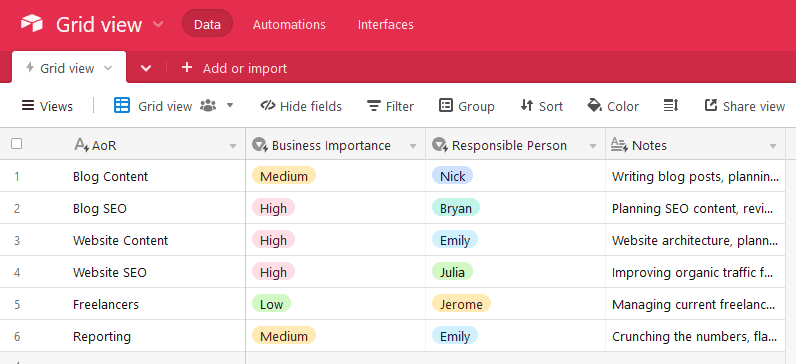
Start by picking the Airtable base you want to sync data from. Here’s one I built with just enough information to serve as an example.

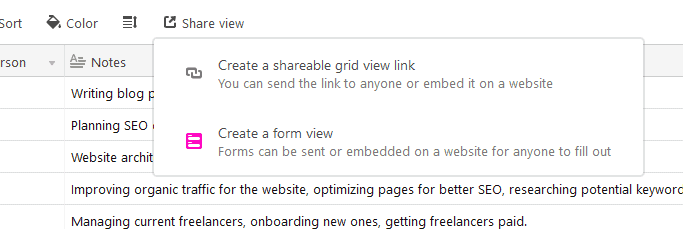
Once you’ve picked your base, you want to hit Share view and pick Create a shareable grid view link.
You’ll then get a window showing you the view’s shareable link. But if you look closely, you’ll see an option labeled Allow data in this view to be synced to other bases. Check that option.
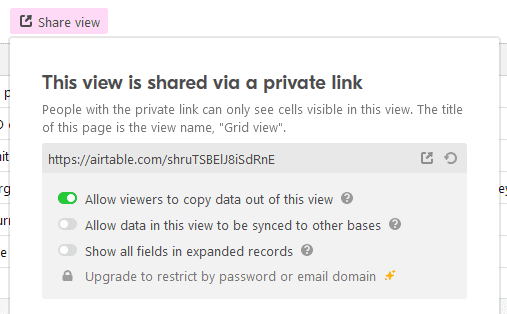
When you do that, you’ll see a new option pop up: Sync this view to another base.

Click on it to set up your Airtable Sync. Here’s what you’ll see.
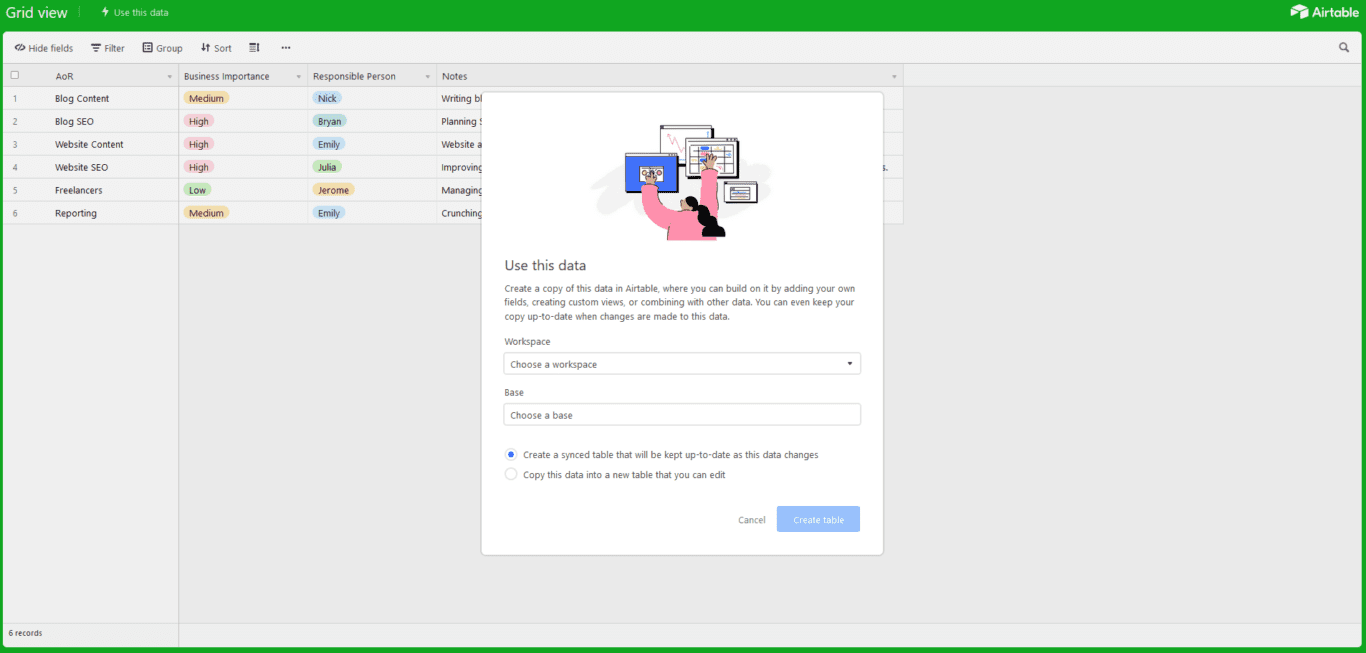
You have a few options here. First, you can choose the workspace where you want this data to end up. Maybe it’s the same workspace, maybe a different one.
After choosing your workspace, the next dropdown will give you a list of bases in that workspace. You can then choose an existing base to sync your data to, or create a brand new one.
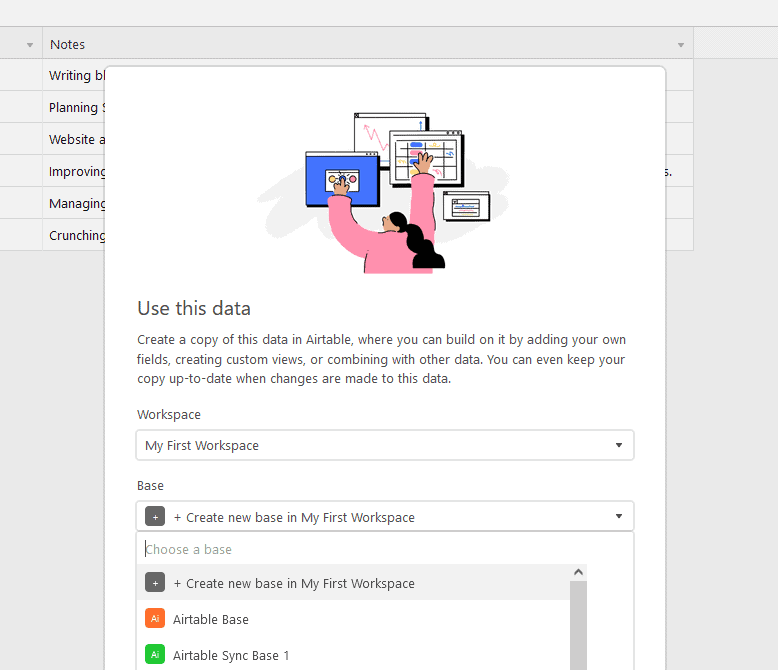
Once you’ve selected the right base, you have two options. You can either create a synced table within this base or copy the data into a new, editable table. The main difference between these two options? With the first, you won’t be able to edit the data you sync in the destination base, but it will be kept up-to-date as changes happen in the original base.
With the second option, you won’t actually sync data over. You’re essentially just exporting the data to work with it elsewhere. It won’t be kept up to date.
So let’s pick the first option and hit Create table.
And just like that, we have a new base, complete with the data from our source base. The little lightning bolt next to Grid view is how you know the data is synced with another base.
Limitations of this method
You can set up an Airtable Sync pretty quickly, but there are some situations where “quick” doesn’t mean “best.” Here’s why:
- You (might) have to pay for it: If you’re using a free Airtable plan, you’ll only get one Airtable Sync for your entire workspace. Worse, it won’t automatically sync data unless you’re on a paid plan. You’ll have to manually trigger the sync each time you want an update.
- It’s one-way: Airtable Sync only sends information from one base to another, not back. That means you can’t add or delete records in the destination base or edit information in synced fields.
- It only works in Airtable: Airtable is probably not the only tool in your stack that could benefit from a way to sync data back and forth.
Airtable Sync is super simple to use, and that’s a strength all on its own. But some workflows can benefit from a different method. Something more robust.
Second method: build your own Airtable sync with Unito
Unito is a no-code workflow management solution with the deepest two-way integrations for some of the most popular tools on the market, like Airtable, Asana, Trello, and more. With a Unito flow, you can automatically sync Airtable records between bases and keep everything updated without any extra work.
Here’s why Unito is the best method for building your own version of an Airtable sync:
- You get more bang for your buck: Yes, Unito is a paid service. But where Airtable might force you to bump up your plan just to sync data between bases, when you get a Unito plan, you get a lot more.
- It’s two-way by default: Do you need to sync data back and forth between your Airtable bases? With Airtable Sync, that’ll be forever out of your reach. Not so with Unito.
- It works with the rest of your stack: Want to sync Airtable records to Jira? What about Asana tasks? Maybe you want to build a database of specific Slack messages in Google Sheets? With Unito, you can do it all.
Want to see what this looks like in practice? Check out this quick video demo.
Here’s how easy it is to set up your first Airtable two way sync with Unito.
Building a flow that syncs Airtable bases
Anyone can build an Airtable sync with Unito in just a few clicks.
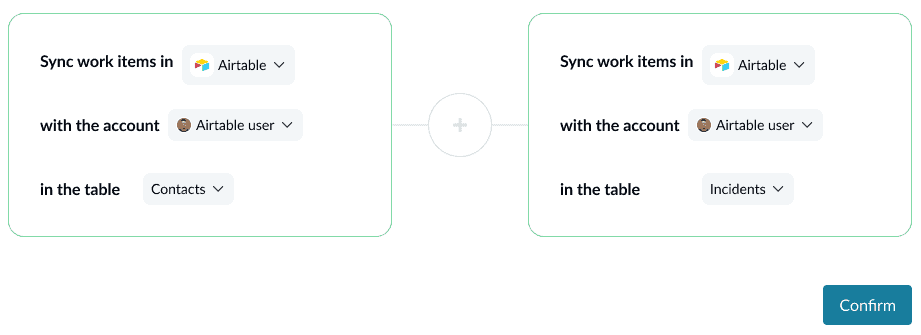
- Start by connecting your tools and picking the Airtable tables you want to connect.
- After that, you can set up rules to filter out records you don’t want synced over. For example, you might decide that any records with a specific option in a single-select field shouldn’t sync over.
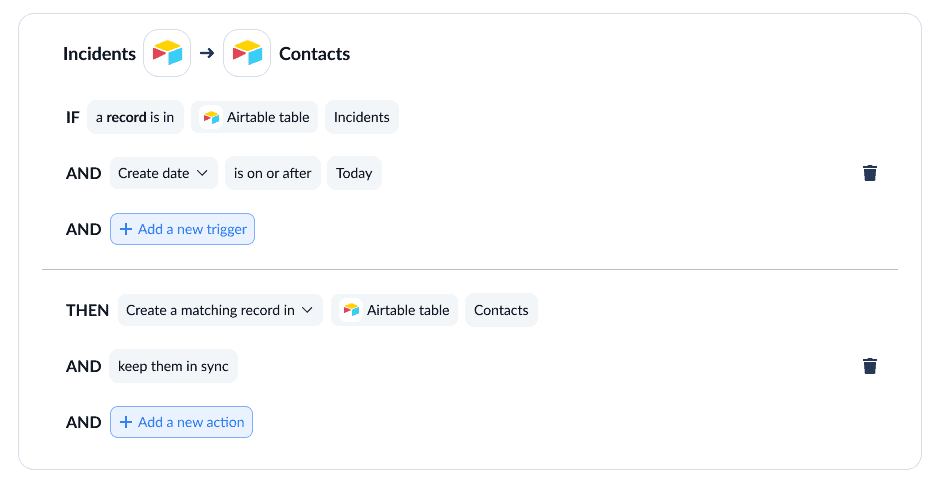
- The last step before launching your flow is mapping fields across your Airtable tables. This lets Unito know where information should be going, even if each table has completely different fields. Note that Unito will automatically map similar fields, but you may have to customize the ones that don’t already match up.

And that’s it! Once you’ve mapped your fields, you can launch your Unito flow and watch as your Airtable bases sync automatically.
Want to know more about this integration?
Find out what this integration can do for your workflows
FAQ: Setting up a two-way sync in Airtable
What is Airtable sync?
Airtable sync is a built-in Airtable feature that allows users to sync data from one Airtable base to another (or multiple others). What you can do with Airtable sync depends on the Airtable plan you have. Some plans only allow for a one-way sync, meaning data gets pushed from one base to the other but no updates go the other way. Other plans allow for a two-way sync, meaning data goes back and forth between bases.
How do you sync one Airtable base to another?
With Airtable sync, you can do this in just a few steps:
- Go to the table you want your data to sync from.
- Click Share and sync. This will open a menu, where you can click Sync data to another base.
- Toggle Allow data in this view to be synced to other bases.
- Click on Sync this view and choose the Airtable base you want to sync to.
Note that this process assumes your destination base is already set up for the data you want to sync. If that’s not the case, you might want to go into that destination base and set it up before going through the above steps.
How often does Airtable sync bases?
When you set up an Airtable sync, you can choose to make it a manual or automatic sync. If it’s a manual sync, you’ll need to go in and trigger syncs. If it’s automatic, your Airtable sync will check your bases for changes as often as every five minutes.
What is a two-way sync?
A two-way sync is an integration that updates data in two tools or two locations within the same tool. If you’re integrating two Airtable bases with a two-way sync, any time you change records in one base, records in the other base will be updated automatically. The same is true the other way, too, with changes in that second base being synced back to the first.